Our beloved 2014 CX-5 has served us mighty well for many years. She's got 314k miles on her now and she's got her first major trouble. I'd appreciate some help on what troubleshooting to do next.
On my wife's way home she got a check engine light. I pulled the code and it is a P0304. Cylinder 4 missfire.
Here's what I did... Replaced Spark Plug, Coil and fuel injector. Same code. Checked with a spark tester and confirmed spark.
Engine runs slightly rough at idle, but seems to run fine above idle all the way up to highway speeds. No seeming loss of power or sputtering.
When I pull the wire harness going to each coil while the engine is running, most make a dramatic change to the engine, except #4, it changes a little, but doesn't really fall on its face.
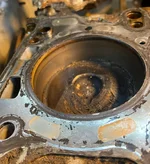
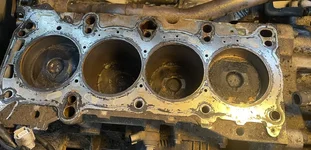
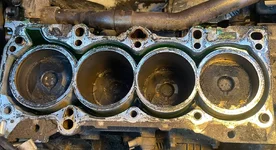
The other symptom is that the car has been "using" more and more oil and coolant over the past year. Yet I never see any drips under the engine, and I don't see coolant coming out of the exhaust. But when I wipe the inside of the exhaust tip, my finger does come out very black. When my wife pulled in the other night with the check engine light, there was no oil on the dipstick.
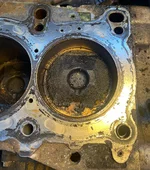
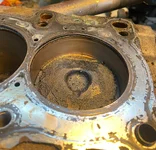
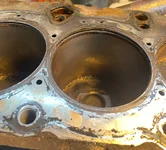
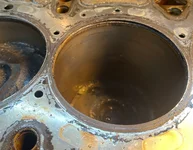
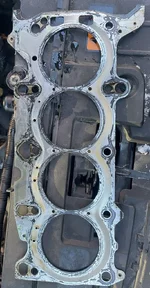
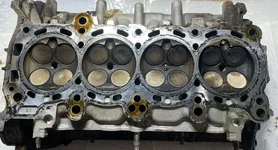
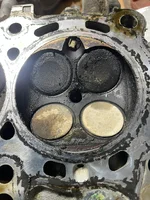
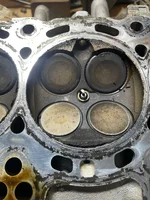
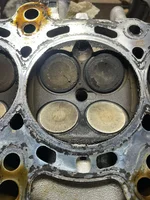
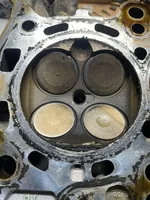
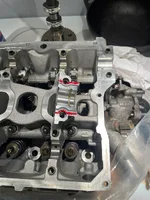
So, my working theory at this point is that the Missfires is caused by low compression in the cylinder 4. The low compression is (hopefully) caused by a blown head gasket. Which would also explain the loss of coolant. As for where the oil is going, I'm not positive. I'm guessing it's going out with the coolant.
Oh yeah, the engine does not overheat.
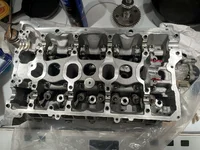
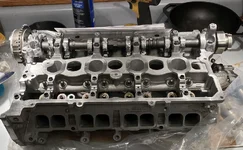
My next move is to order a compression tester off of Amazon and get compression reading for each cylinder. If that confirms low compression I guess I'll pull the head and look for signs of a blown gasket.
Does this seem reasonable? Any other suggestions?
On my wife's way home she got a check engine light. I pulled the code and it is a P0304. Cylinder 4 missfire.
Here's what I did... Replaced Spark Plug, Coil and fuel injector. Same code. Checked with a spark tester and confirmed spark.
Engine runs slightly rough at idle, but seems to run fine above idle all the way up to highway speeds. No seeming loss of power or sputtering.
When I pull the wire harness going to each coil while the engine is running, most make a dramatic change to the engine, except #4, it changes a little, but doesn't really fall on its face.
The other symptom is that the car has been "using" more and more oil and coolant over the past year. Yet I never see any drips under the engine, and I don't see coolant coming out of the exhaust. But when I wipe the inside of the exhaust tip, my finger does come out very black. When my wife pulled in the other night with the check engine light, there was no oil on the dipstick.
So, my working theory at this point is that the Missfires is caused by low compression in the cylinder 4. The low compression is (hopefully) caused by a blown head gasket. Which would also explain the loss of coolant. As for where the oil is going, I'm not positive. I'm guessing it's going out with the coolant.
Oh yeah, the engine does not overheat.
My next move is to order a compression tester off of Amazon and get compression reading for each cylinder. If that confirms low compression I guess I'll pull the head and look for signs of a blown gasket.
Does this seem reasonable? Any other suggestions?