NB MX-5 Hey, it's Minnie!

Nice little updates Mike. Good to see you are staying busy while on-shore. haha

I used X-pel on the fogs of my P5. No issues with bubbles but I was also working with a flat surface. I did use Lamin-X for the bumper markers on the NC and it held up well. Trying to get it to wrap around and stick without creasing in the corners was some fun though, I can only imagine doing a headlight. I have to give it to the people who do wraps for a living, it is a craft and an art form! I did get a heat gun for Christmas though so what should I wrap first? lol

Going to guess you opted for clear? I have been considering the lighter smoked color for my head lights and tail lights. I'd pay a local shop to do it though to save me the frustration.
Yes, I went with clear. While I don't drive all that much at night, I won't do anything that will reduce any of my visibility.

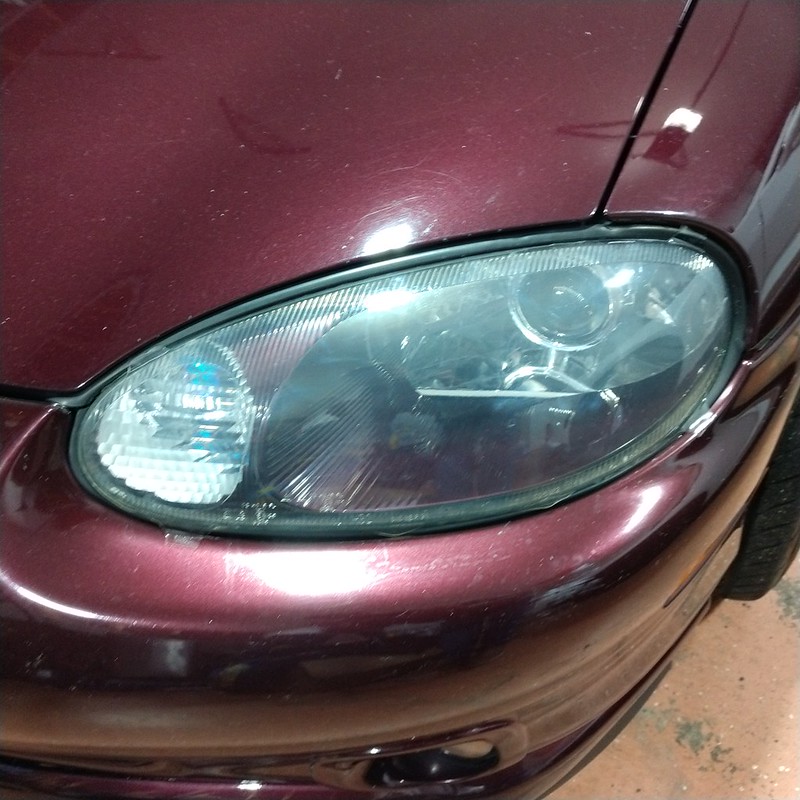
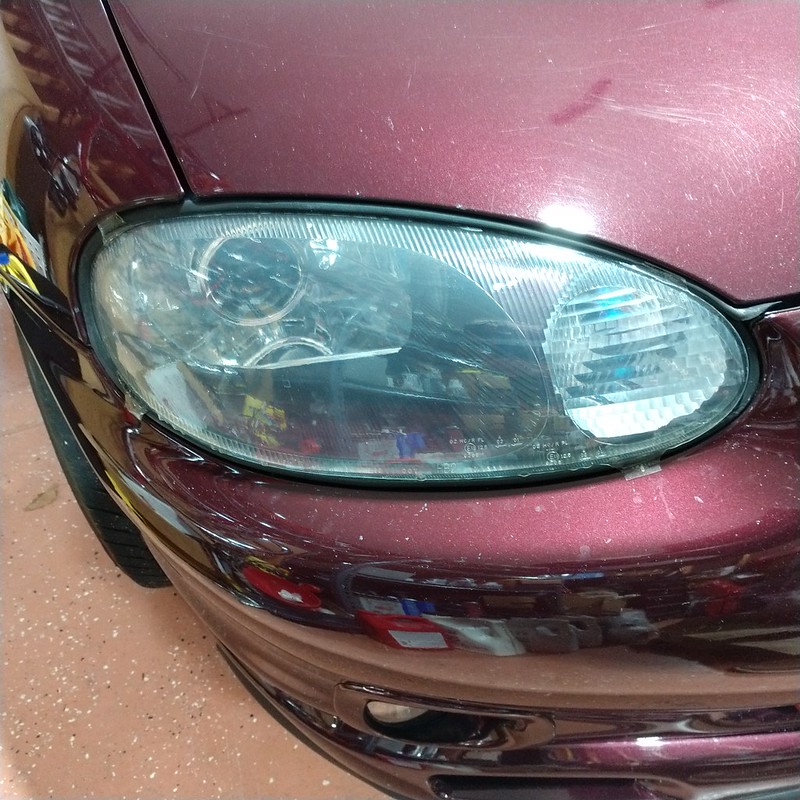
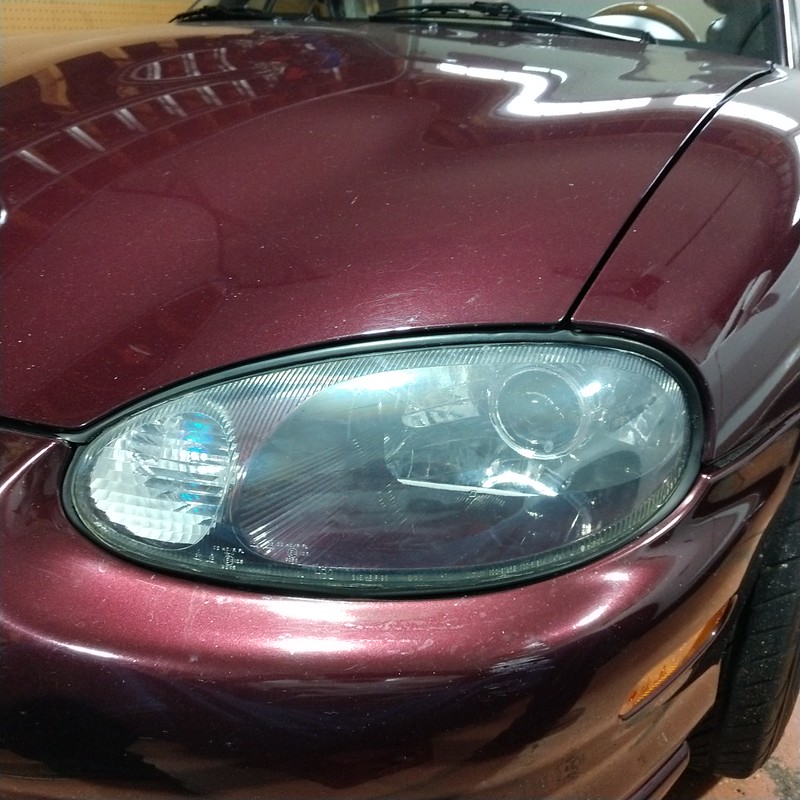
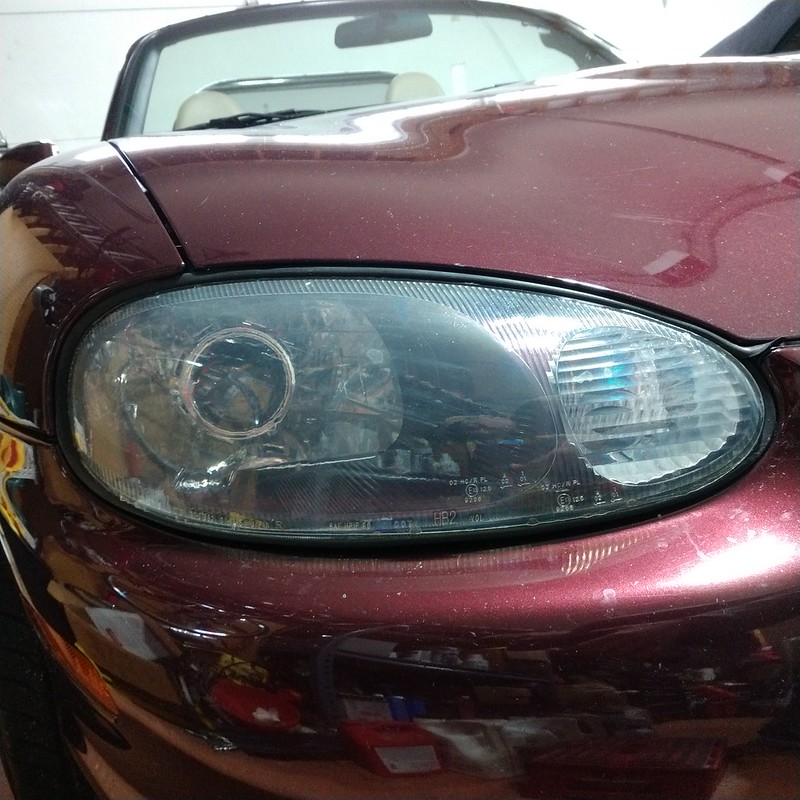
Couple of pictures of the completed film application. First two are how they looked after being put on, if you look closely you can see the four tabs that Laminex puts on to make it easier to handle.

Driver’s:
52611722364_3938a25991_c.jpg


Passenger’s:
52610955712_dd3ea19d51_c.jpg


Using the supplied razor knife I trimmed the edges of the film. This thing is sharp and cut right through the film with no problem (likely helped by the film being thinner than what X-pel used). Here is the final result:

Driver’s:
52611460866_60cbd864d3_c.jpg


Passenger’s:
52611948938_123ab99bd7_c.jpg
[/url]

There are still a couple of small spots where all the moisture hasn’t evaporated yet, after another couple of days if they are still there I will use a needle to pop the hole. I’m happier with this result so far, no big lifts like my last set. The slight bit of haze you might see is from the inner painted reflectors gassing off. This has happened before, I remove the headlights and swish some alcohol around inside to get rid of it.

Still waiting on my exhaust hangers to arrive, Rock Auto use DHL Commerce for some reason and they are being slow. Hoping I might get them tomorrow.
 
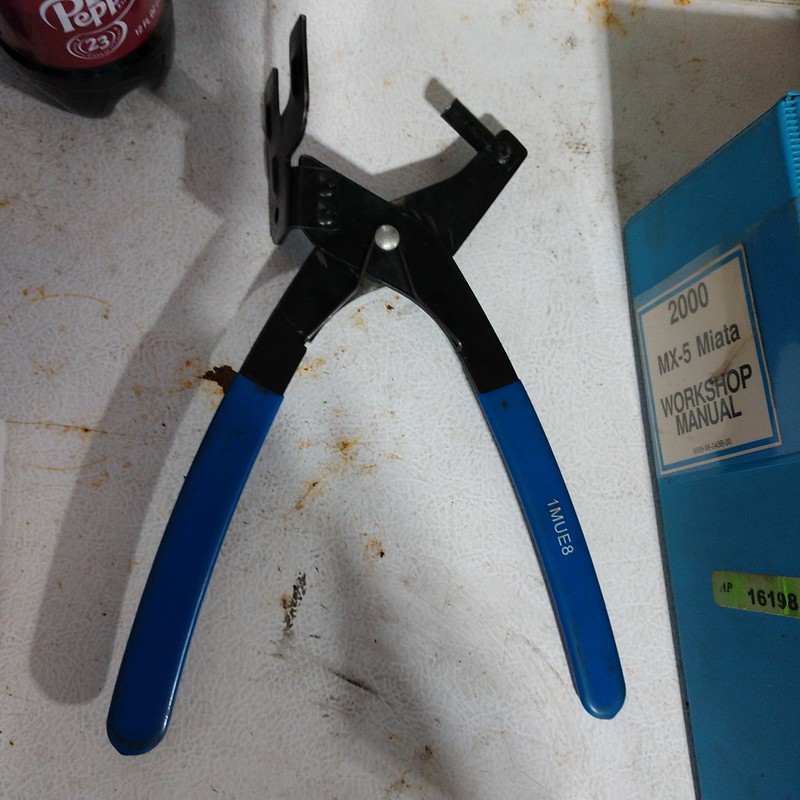
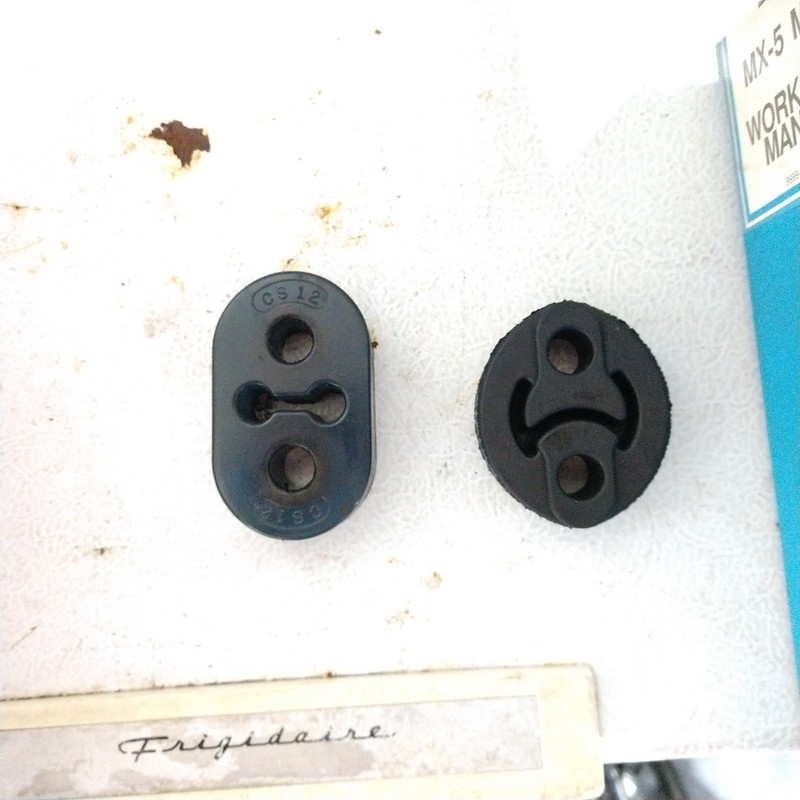
Weather wasn’t too cold here today and the exhaust hangers arrived so dove into that job. Once I had her up in the air and had a look, I figured I’d be able to replace them all without removing my lower diffuser. As it turned out, of the five hangers total (four on the muffler, one on the midpipe) three were urethane and two were rubber. One thing that can make this job easier is an exhaust hanger removal tool like this one:

52613313154_abfe45d4e4_c.jpg


I was able to use this for most of the hangers, it makes a possibly frustrating job better. I also use WD-40 as lubricant both for removing the old hangers and installing the new ones.

Started on the passenger side of the muffler and got both of those off without too much difficulty. Here is a picture comparing the urethane hanger with a new rubber one:

52613313189_36ca0bbca7_c.jpg


Next moved to the driver’s side. The rear muffler hanger was rubber but was hard to get off due to a very small clearance between the end of the chassis hanger and the body. A little finagling got that out. The forward muffler hanger on that side was urethane, after some struggling I decided to just cut it off so did that. The hanger on the midpipe was a little bit of a struggle as there is not much clearance for the removal tool so I ended up doing the old-fashioned way with a large flat blade screwdriver (it was rubber so not too bad).

One thing to note, if one of the metal hangers has a bend in it, put the flexible hanger on that side first. You will save yourself some headaches.

Took me about an hour all in, long enough to listen to most of the latest Candy Dulfer album and for my toes to get slightly numb.
 
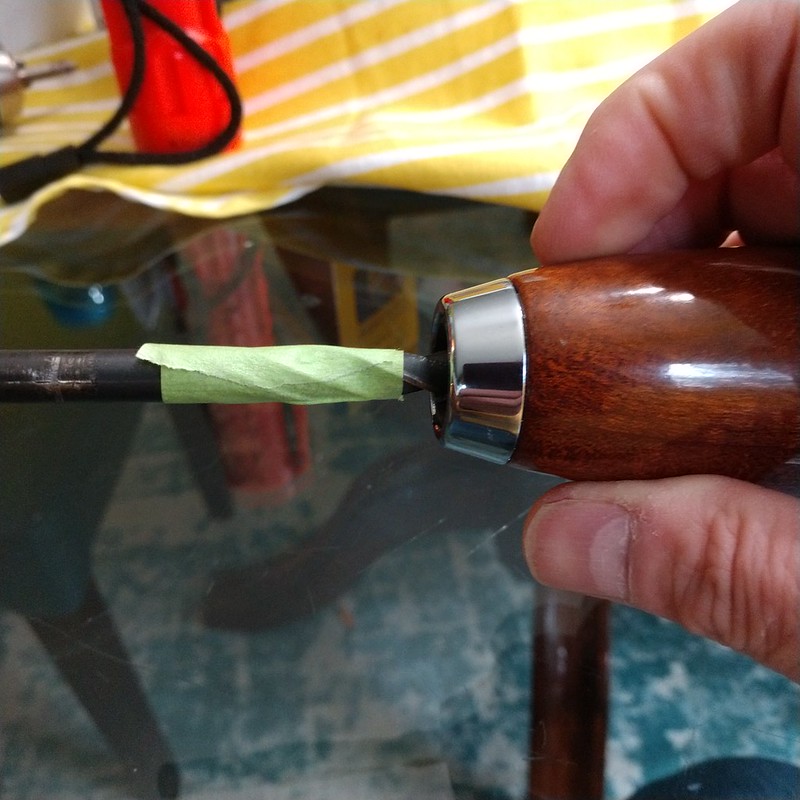
I figured out the ringing noise I was hearing was from the new shift knob. I was able to slightly move the wood overlay over the insert. I tried a couple of ways to remove it entirely without success. Looking down inside the bottom opening it looked like there was a space where I could get something in to seal it up. Mixed up some two-part epoxy and put it down in there using a 3 ½” nail. That worked well except that I put too much in which kept the knob from going onto the shift lever as far as it should. I checked different drill bits until I had one that would fit inside the hole without touching. I put that inside the old knob to get the needed depth and put a piece of tape on the bit to let me know when I got the that point. Easy does it with drilling, didn’t want to punch through the top of an expensive knob. Here is how the bit looked in the new knob showing how far I needed to drill:

52625622664_59bb214277_c.jpg


That’s all done, knob screwed on just fine (it’s nice and tight too). No apparent movement of the wood relative to the insert so should be good to go.
 
So, after all was said and done with the new shift knob installation, there was about a ¼” gap between the bottom of the knob and the boot. I couldn’t recall how much there was with the original knob, but I got to thinking about how one of the stock shift boots from one of my Mazdas had a plastic cup-shaped piece on the bottom of the boot that sort of took up a gap and kept the top of the boot in shape. That piece came off one time when I was moving stuff around and I never got around to replacing it. Since my brain was working I decided to get some nylon washers from Ace and use them as a spacer/shape holder for the boot. I measured the shift lever and top of the boot and came up with 13mm and 29mm diameters. Went up to Ace today and picked up the washers. Ones I ended up with were 25.4mm OD (1”) and 11.4mm ID (0.45”)/14.3mm ID (0.56”). All were around 1/8” thick. Here they are side by side:

52629381611_ca25163ee0_c.jpg


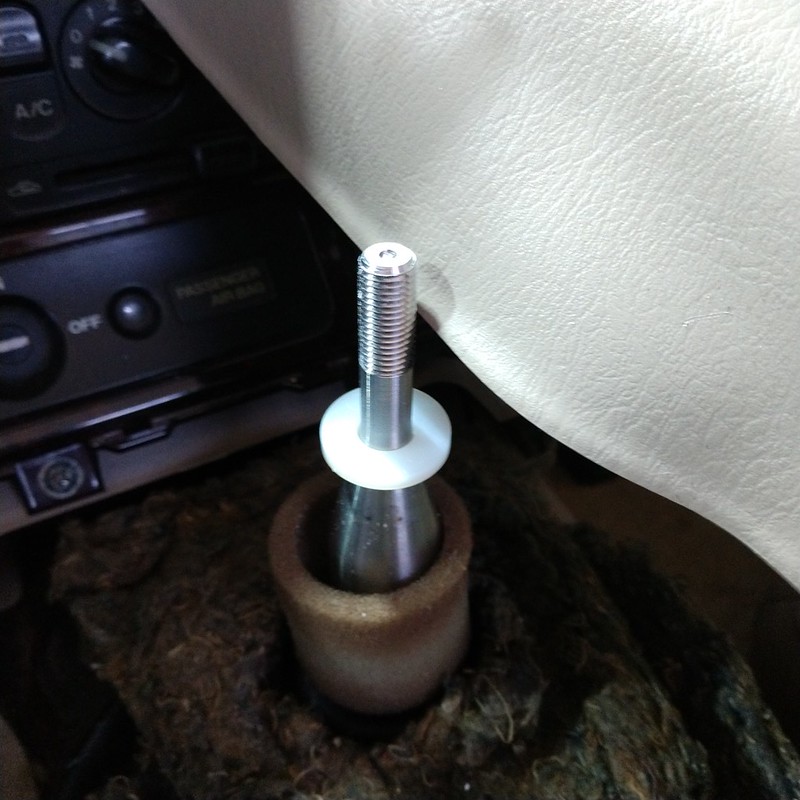
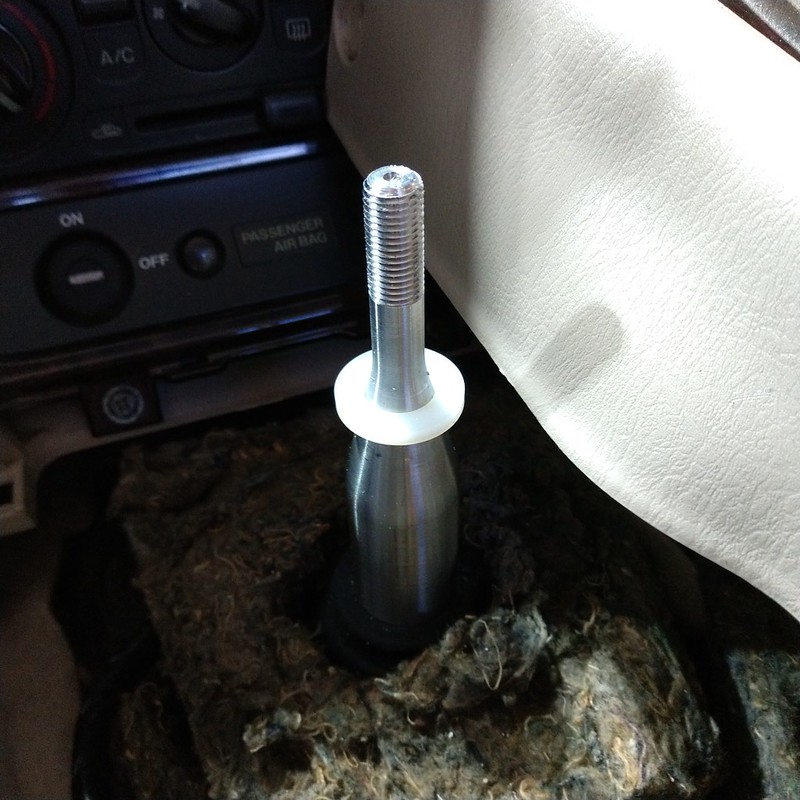
Put them on smallest one first and put things back together. The smaller one didn’t allow a lot of engagement of the knob on the shift lever so I tried the bigger one. Here is how they sat on the shift lever:

52628861277_6944391a51_c.jpg


52629816765_f5bacd47c7_c.jpg


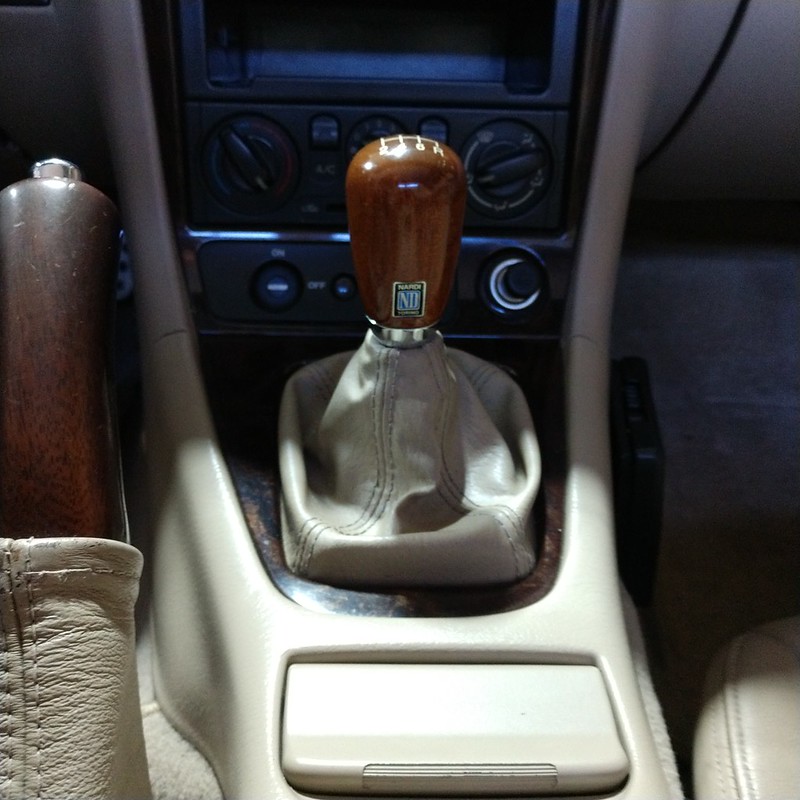
The bigger one did the trick. Here is the final result:

52629628209_9a723cf2fa_c.jpg
 
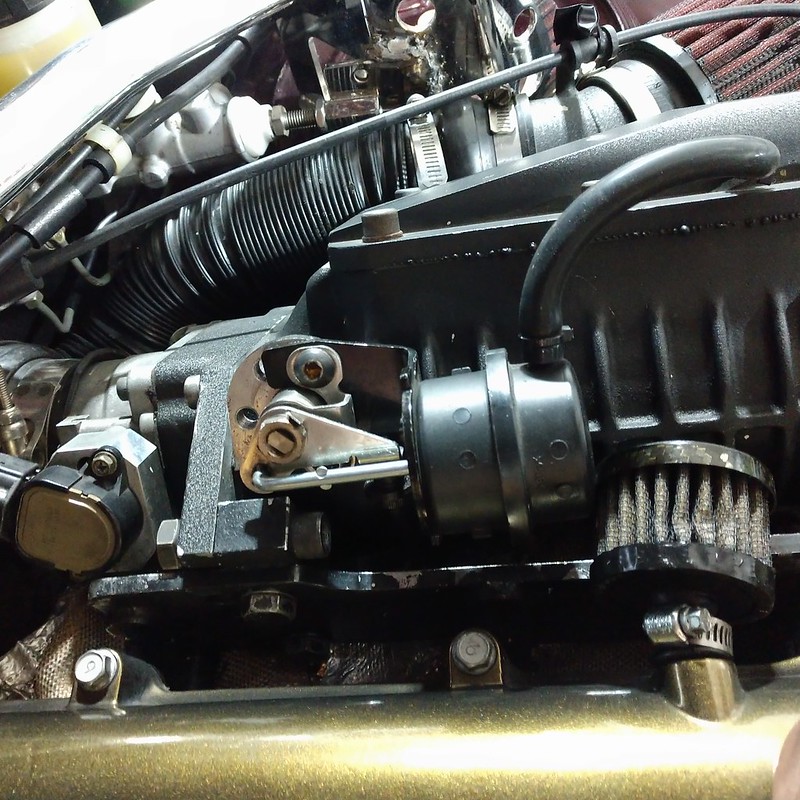
Been seeing some jerking on light-throttle tip-in, when that happens (usually in the cold months) it means the supercharger bypass actuator needs adjusting. Easy enough to do, loosen two Allen-head screws (bottom one is located out of sight in the picture) and move the actuator around until the flapper sits on the stop screw completely in the closed position.

52634999337_da6a2f7ec5_c.jpg


Before anyone asks, the screws are always nice and tight so the actuator isn’t walking due to vibration. Not too sure what’s going on, I pretty much had to do it every winter with the M45 but have only done it a couple of times with the MP62. Test drive afterwards showed smooth throttle operation.
 
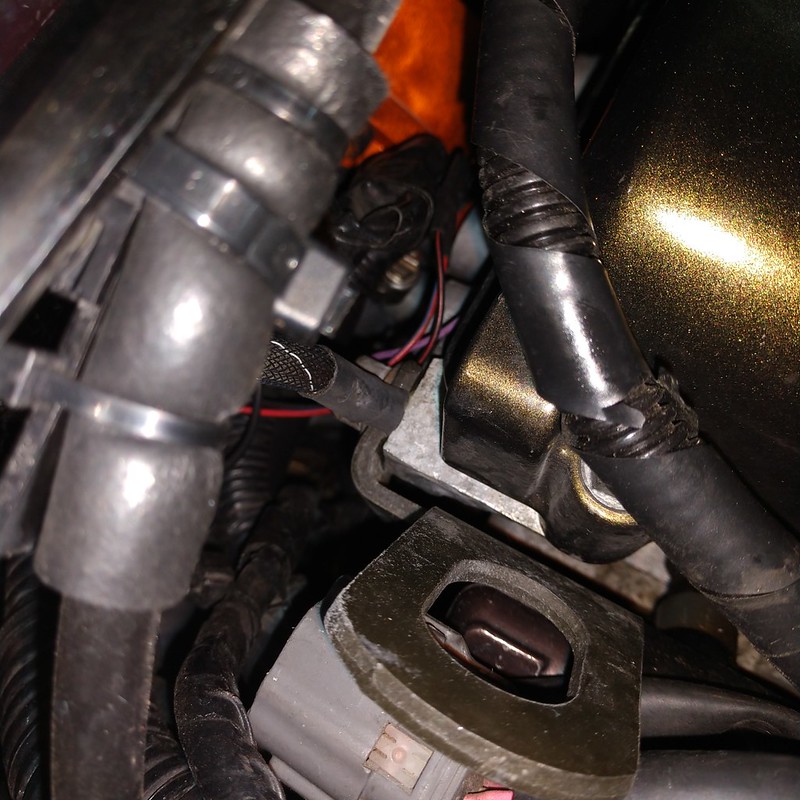
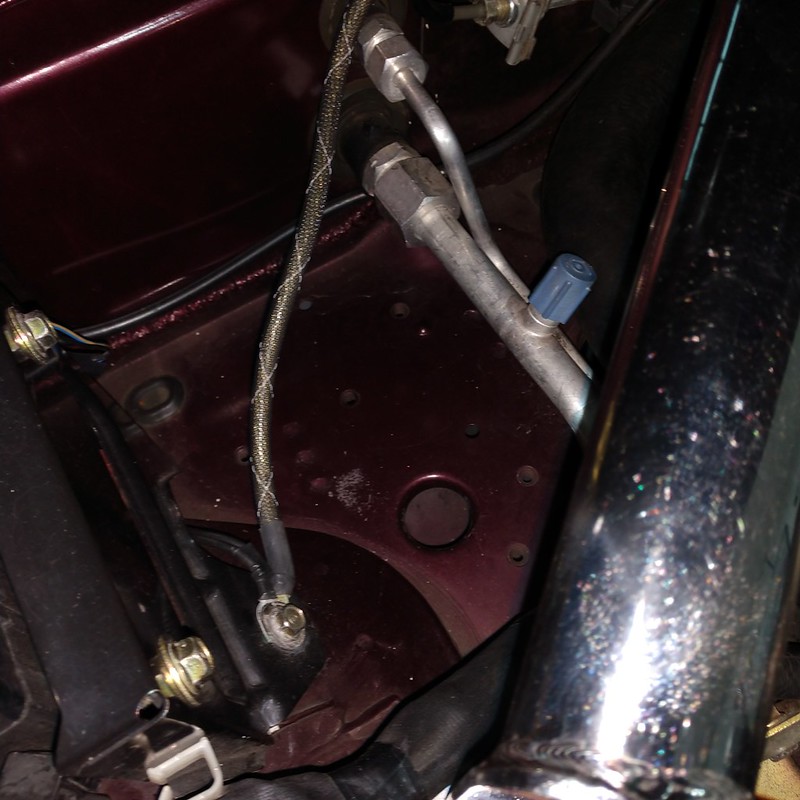
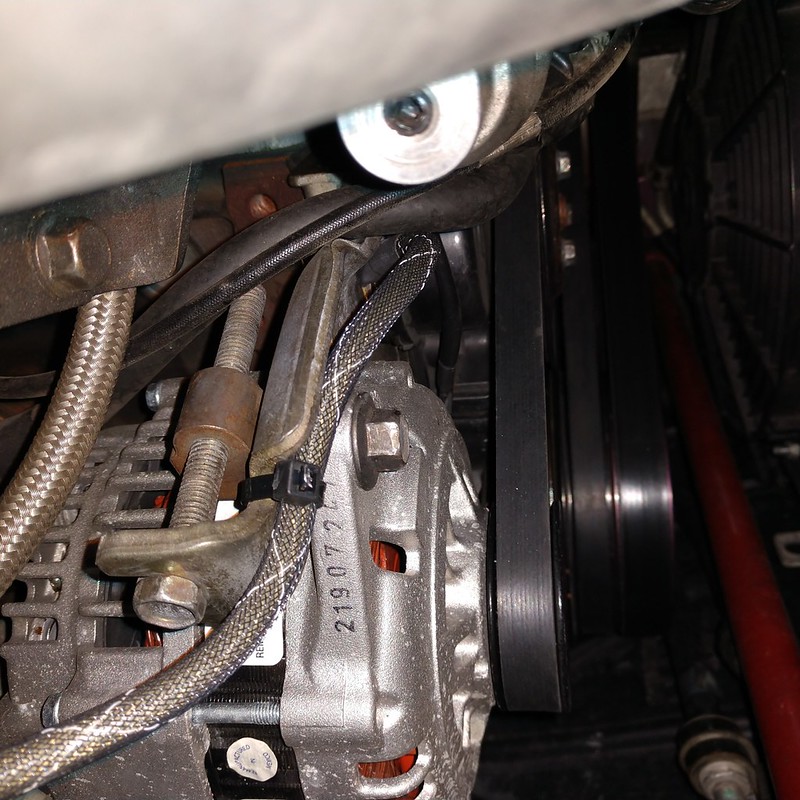
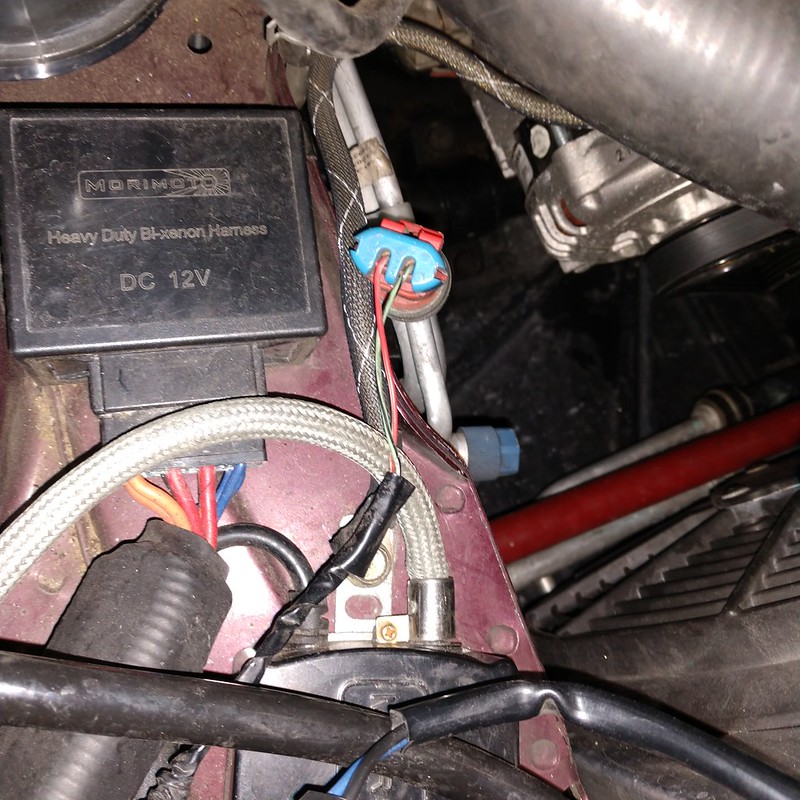
Recently there was a thread on the turbo Miata site about issues with the NB alternator with its internal voltage regulator and how it has caused problems with aftermarket ECUs. Since I have a Megasquirt and would prefer not to fry an $800 part I figured it would be a good preventive measure to ground things. Initially I was looking on Amazon for some ground straps but then remembered I had a grounding wire kit on my Mazdaspeed6 that I removed before selling. Went and picked that up yesterday, then after some measuring determined which two wires I could best use. I connected the alternator at its mounting bolt closest to the block (two birds with one stone kind of thing) and ran that to a chassis ground. For the head, I ran the wire from the rear lifting point to a chassis ground. I did have to hog out the holes on the connectors I attached to the engine/head side bolts as they were a bit too small. Dremel tool to the rescue! Here are pictures of what I’m talking about, the ground wires have black insulation with thin white stripes:
52652295922_1b0b054ef7_c.jpg


52652786516_d842d7b931_c.jpg


52652786481_1e7c22c2c2_c.jpg


52652786436_828218a16e_c.jpg


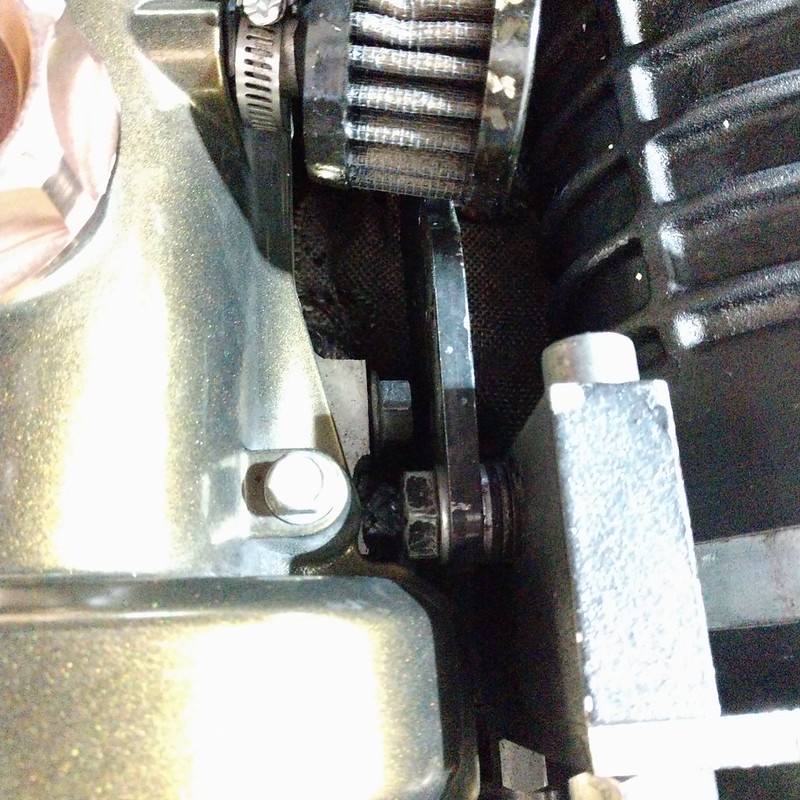
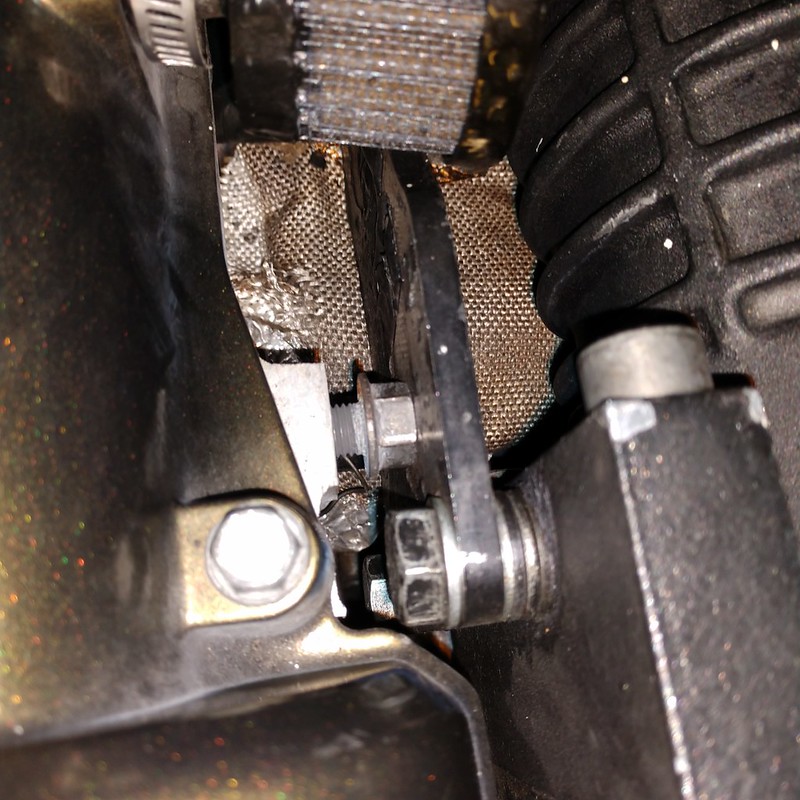
While I was determining where to run the ground wires from/to, I noticed that the bolt (which is normally used to attach the front engine lifting point to the engine) that is supposed to be hard up against the supercharger mounting bracket had set itself into the head. Haven’t seen it do that before which is why I wasn’t looking for it.

52652295817_689c2f6f4c_c.jpg


Pulled out my thin wrenches and unscrewed it until it was hard against the bracket:

52653225890_267e8e9f75_c.jpg


I’ll take a measurement, if there is enough room to get a thin nut in there I’ll put one in to positively lock it next time I remove the supercharger.

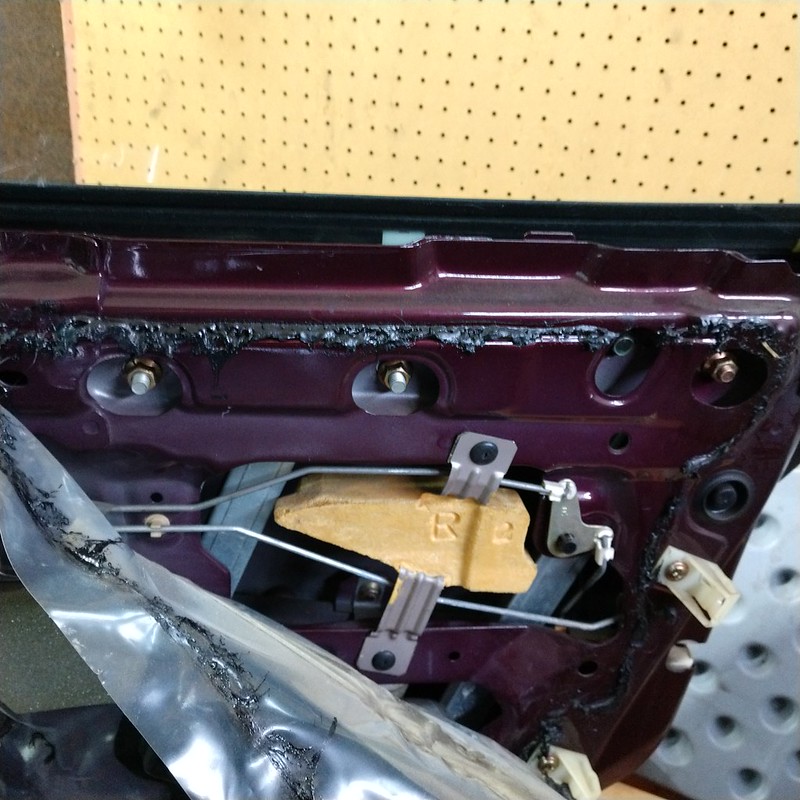
Today the weather was a bit warmer so I set about checking into a rattle I heard in the passenger door. Thought maybe the window was loose in some bracket but everything checked out. While I had the door apart I did some measuring of the clearance between the window and the top weatherstrip bracket to see if I could adjust something to get rid of the remaining slight wind noise I had from the rear of the window. The factory workshop manual has a lot of measurements to check, I only did the ones for the front-to-rear clearances. Ended up moving the window back some, you do this by loosening the upper bolts for the regulator and window guide. Those are the three gold nuts in this picture:

52652786391_3e0ac35c0e_c.jpg


Ended up with the window pretty far back. It may be just a little further than recommended (the way they show the measurements in the manual are a little confusing) but I’m going to see how it sounds next time I go out with the top up.
 
Have something ordered that I’ve been thinking about installing for a while. It’s coming from the UK so probably won’t receive it until week after next. Now we see who does well with suspense…
 
C'mon Mike, you know we don't do well with suspense! And by we, I mean me. Lol

Interested to see what you have up your sleeve!
 
Nah. I want to see you guys squirm.

BTW, if you think I might cave you need to talk to my wife. She hates when I make her wait for surprises.
 
My latest purchase hasn’t shown up as yet, the Royal Mail is slower than USPS (and their tracking sucks too).

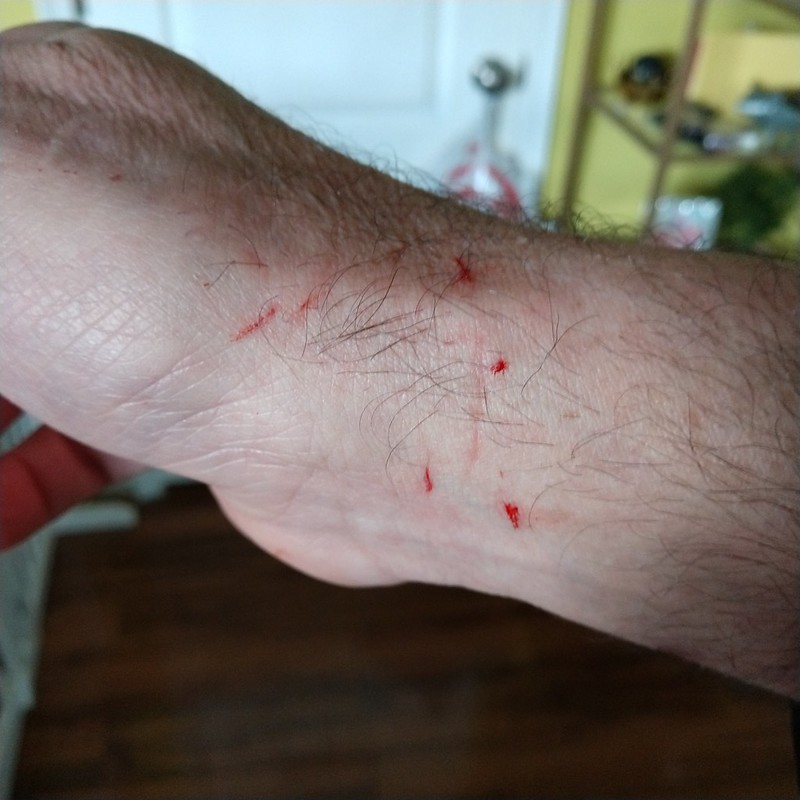
I decided to check my shock rebound adjustment position. I thought I had made a note of this when I adjusted them initially but it wasn’t in my notebook. So, after checking to see the proper adjustment procedure (first turn the knobs fully clockwise to the full hard or 0 position) I went to see what I had. Started at the front (easiest), I found there was one click difference between the two sides. Recommended start is 10 clicks so that is where I set them (basically what I had before). Going back to the rear, I found the left rear was 17 clicks while the right was 23. No idea how that happened. I set both sides to 5 clicks to see how that felt for normal driving. Note that I only pulled back the trunk lining for access. Not a big deal on the passenger side, but the driver’s side has that nifty sheet metal piece to protect the gas filler pipe. Not a huge deal except I had to feel around for the adjustment knob. Sheet metal is sharp.

52670213367_4acc59257a_c.jpg
 
Back