Nd4SpdSe
2004 RX-8 GT & 2011 Mazda2 GS Yozora
- :
- Quebec, Canada.
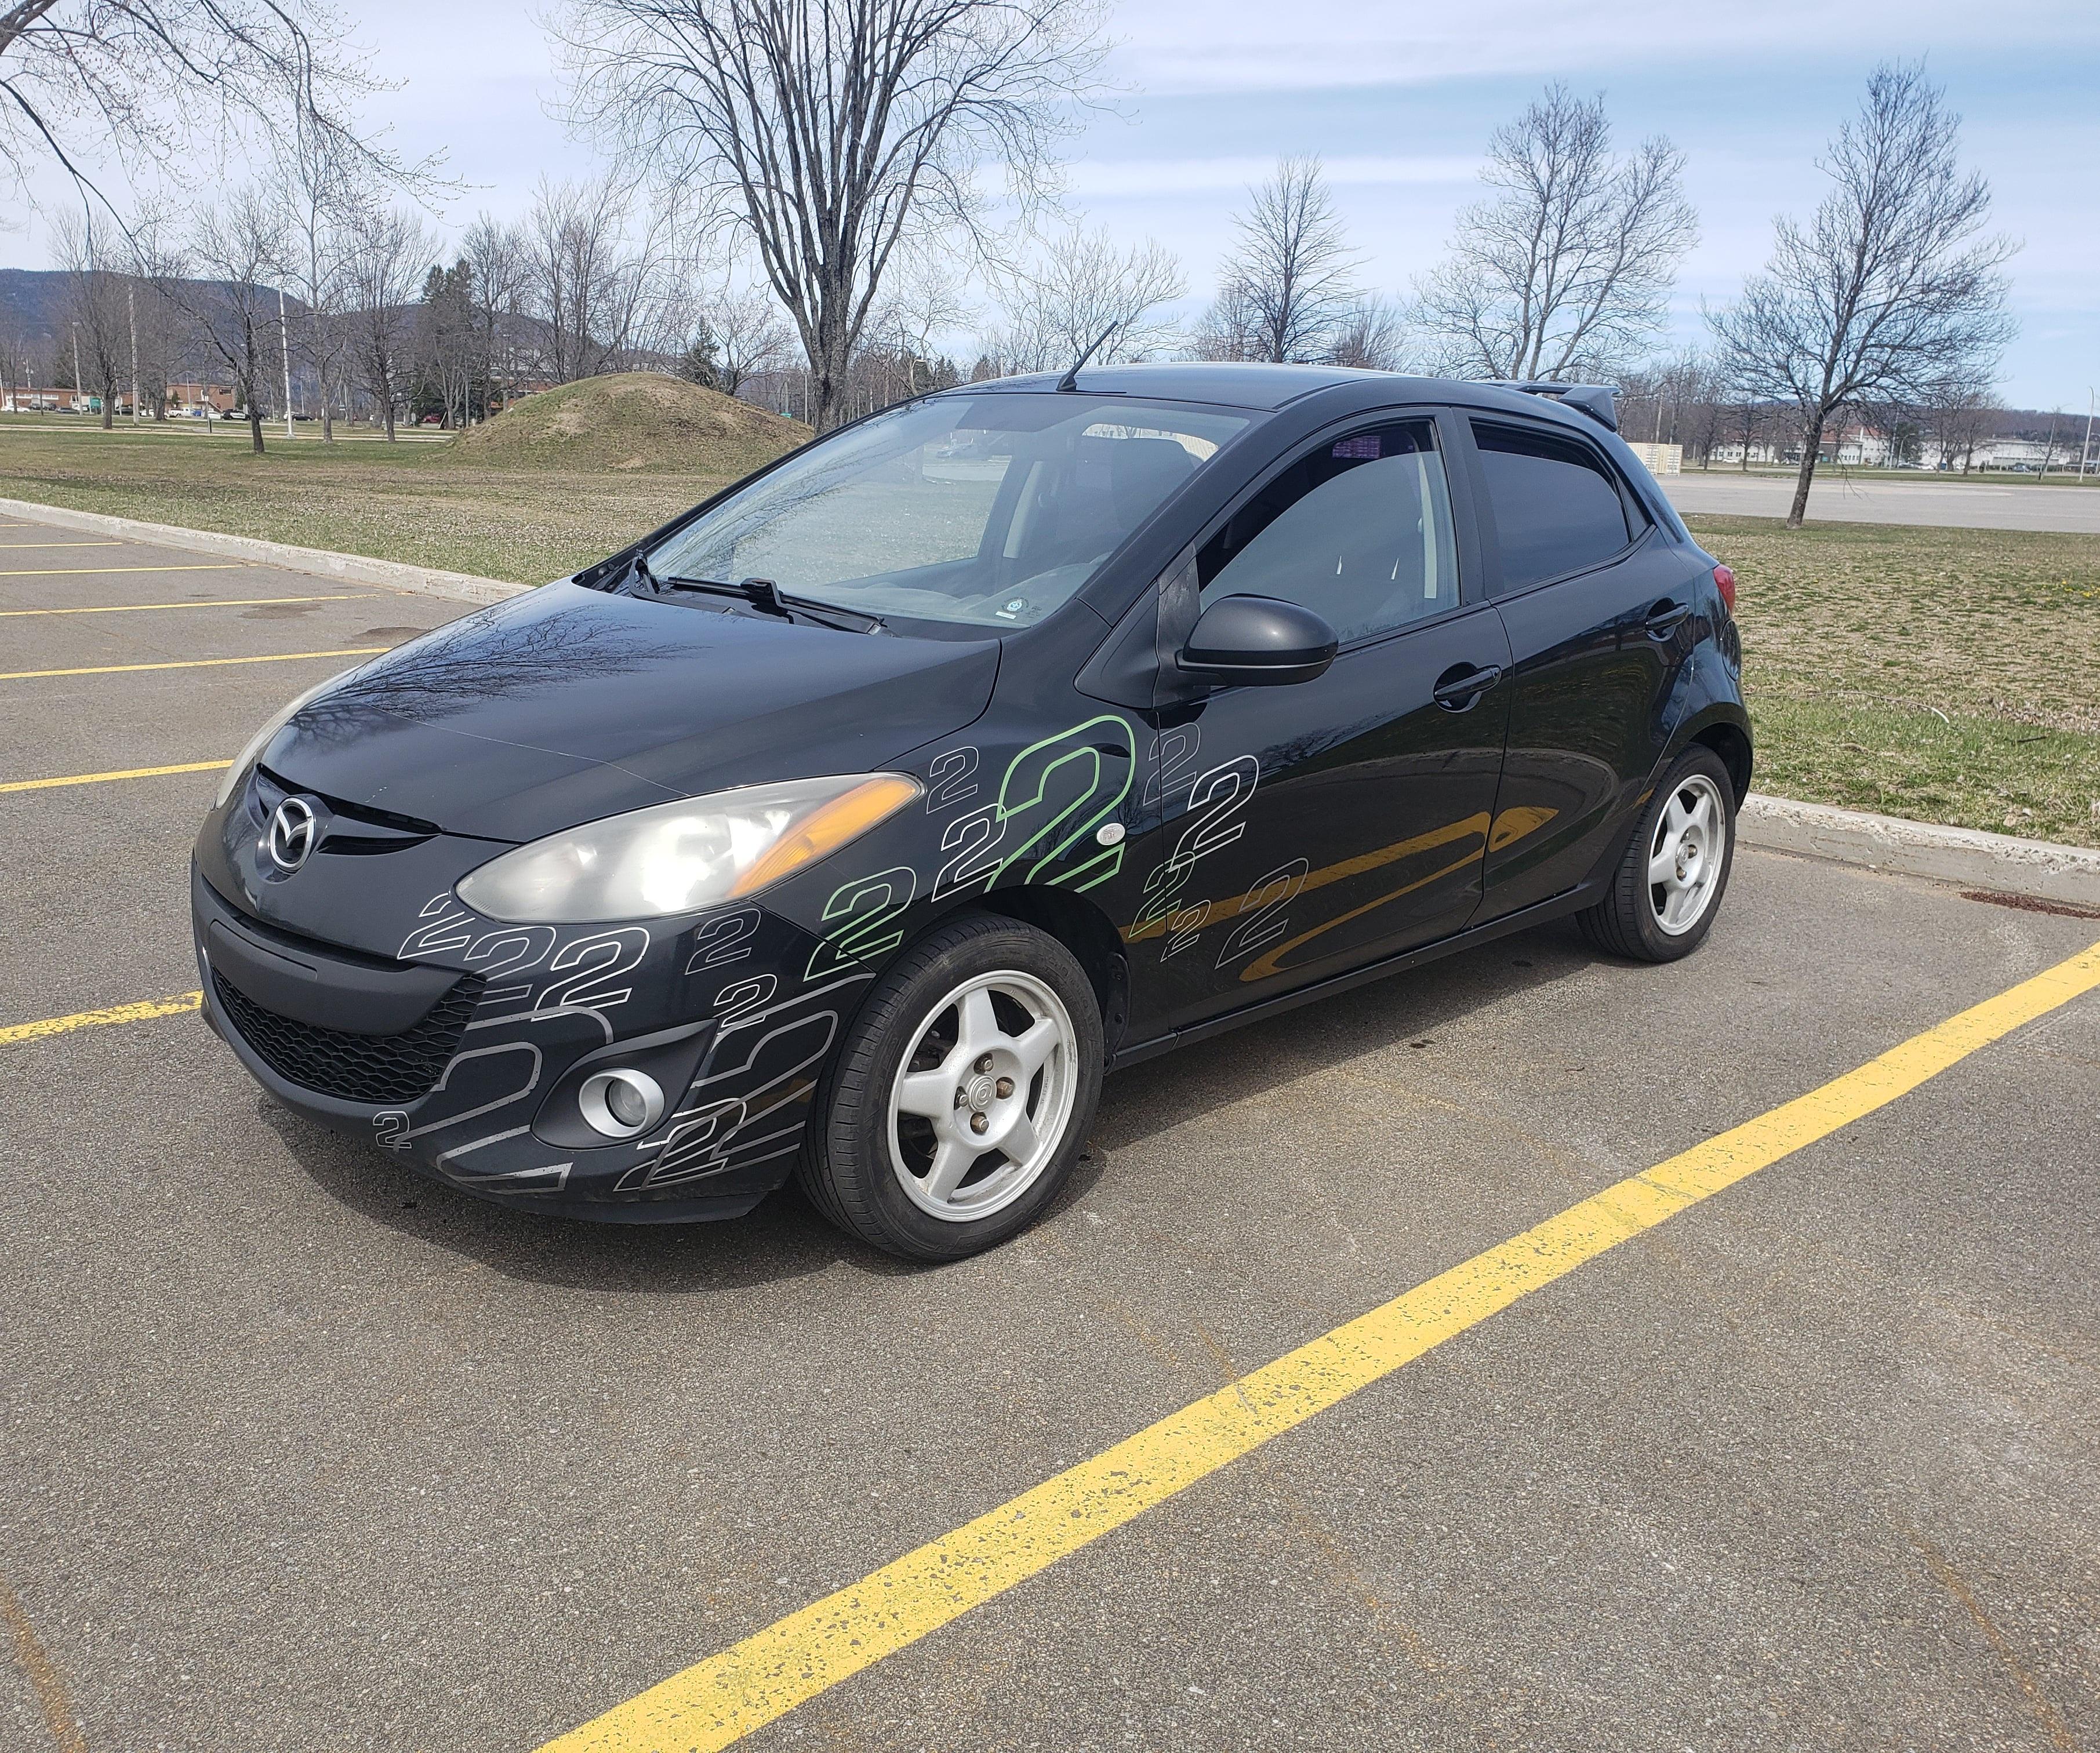
2011 Mazda2 GS 5MT Yozora. 1 of 500.
Purchased Mileage:
73'000kms (October 2017)
Current Mileage
168'000kms (August 2022)
200'000kms (June 2025)
MODS
Drivetrain:
- AWR 62 Durometer Dog Bone, Passenger and Driver mounts
- DDM Works Short Shifter and Bushings
- MZR 1.6L Throttle Body
Tires & Rims:
- 205/50r15 Bridgestone Potenza RE-71RS on MX-3 5-Spoke Rims (Summer)
- 185/65r14 Studded Gislaved NordFrost 200 on Green Painted Steelies (Winter)
-195/50r15 Yokohama Advan Fleva V701 on MX-3 5-Spoke Rims (Summer)
Suspension:
- Bilstein B14 Coilovers
- DDMWorks Rear Sway Bar
Brakes:
- PowerStop Slotted and Drilled Rotors
- PBR Ceramic Pads
Exterior:
- OEM Yozora sticker package
- OEM Yozora Wing and Shorty Antenna
- UK Stubby Rear Bumper with (Right) Rear Fog Light
- Portugal Left Rear Fog Light
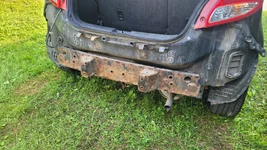
- Modified Rear Crash Bar with 1.25" Tow Hitch Receiver
- 4-Pin Trailer Connector with Converter
- Auxito LED Headlight and Taillight Bulbs
-LastFit LED Headlight bulbs
Interior:
- Weathertech Floor Mats
- Mazda MX-3 Shift Knob
- Heated seat pads installed into OEM seats.
- Intermitent/Auto Wiper Stalk Swap
- Aliexpress HVAC Knobs
-OEM Center Console (Broken)
Electronics
- Kenwood DDX-6905S AA/AC 7" Head Unit
- Focal Speakers + Tweeters
- Mazda6 BOSE Subwoofer + Miata 15" Spare
- AUX audio input changed to a modified USB+AUX
- Remote Starter
- DoD 1080p Dashcam
Introduction/Ownership History
So back in 2017, I started looking for a fun, fuel sipping daily as my modified supercharged Xterra was getting 10mpg, but also aging and it's hard to fix or modify a vehicle you drive every day. The girlfriend's Avenger also wasn't doing well and needed some major work coming up to try to extend its life. I had a price in mind so that I could pay it off quick, and that the fuel savings would have the car essentially pay for itself. I also wanted to have it paid by the time I released from the army and went back to school in 2021, which was going to be a daily 110km round trip. I will not modify it, I said. Famous last words to be sure. What I wanted in my 2 was to have one under 100'000kms, with a manual, air conditioning and cruise control. After months of searching looking around at a few and making sure the girlfriend felt comfortable with learning stick on one, I jumped on a good deal. A 2011 with 73'000kms, even came with a remote starter and some winter tires near the end of the life, but enough top get me through its first. What I didn't know is what was a Yozora edition and how rare it was. It was however missing the (Miata) rims that it would have had from the factory and just had a set of steelies with hubcaps.
First thing was to replace the battery that was missing some CCA's to start when it was very cold. Come spring I found out the AC was not blowing cold. It had a leak in the condenser so I replaced it and got the system recharged. After a while, I grew frustrated with the classic AM/FM/CD radio. Not only with crappy phone holders and an AUX and charge cable in the way of the shifter, but also crappy Quebec radio. I installed an Android Auto Kenwood DDX-6509S radio, which really improved my daily pleasure of driving the car and made it fell much less antiquated. While I was at it I also installed a Black Friday special dash cam I had laying around for a few years that was supposed to do into the Xterra and also some heated seat pads from Amazon as the little 1.5 doesn't warm up quick when it's under -20*C out. It also does wonders for the back on long trips.
That summer I picked up some MX-3 5-spoke rims from a friend to replace the ugly steelies, with a tip of nostalgia.
While the radio did help improve sound quality, after some time it felt like it was missing in the SQ department. The next step I changed out the OEM speakers that use fridge magnets for some Focal speakers with a pair of tweeters. I also picked up a Bose spare-tire sub from a Mazda6 and along with a new 15" rimmed spare tire from a Miata to cover the low frequencies the Focals were missing.
Then the pandemic hit, the car sat for a few months and the rotors warped (as well at those in the girlfriend’s Avenger) so I took the time to upgrade the rotors to some PowerStop slotted and drilled rotors. I decided to take a page out of my MX-3 playbook and ordered from PBR ceramic pads, but this time round I couldn’t find a Canadian reseller and had to order them directly from them in the USA.
At this point, it has been a very pleasant daily, but this is where things go off-track. In 2021 AWR was doing a group buy for a passenger side motor mount. While their dog bone mount is well known to crisp up shifts and was on my to-mod list, the passenger mount group buy was missing a few people and likely be a one-off batch, and I just cannot let those get by. At the same time, I order up a DDM Works short shifter and bushings. To finish the combo, I ordered an MX-3 shift knock to get rid of the econobox-looking one that came with the car. The AWR mounts came in their softest 62-durometer bushings, and it did take a few months for them to settle down, they did have an unexpected, positive side effect. What I felt the 2 was missing was also what I had in my MX-3 was a strut tower bar. While it was always argued back then that it was useless but I swore by my pair of CorkSports and has dearly missed the front one until I could figure out a way to get it to clear the intake manifold of my KL-ZE swap. The same argument was said about the 2 and that it’s useless. I did look a bit, some being in heavy steel, others having issues clearing the brake booster in the left-hand drive cars. I also would believe it as the strut towers are much closer to the firewall compared to the MX-3. What the Passenger and Dog Bone passenger mounts did was give me the feeling I was looking for by reducing understeering and improving steering response. This is where the handling bug had bit.
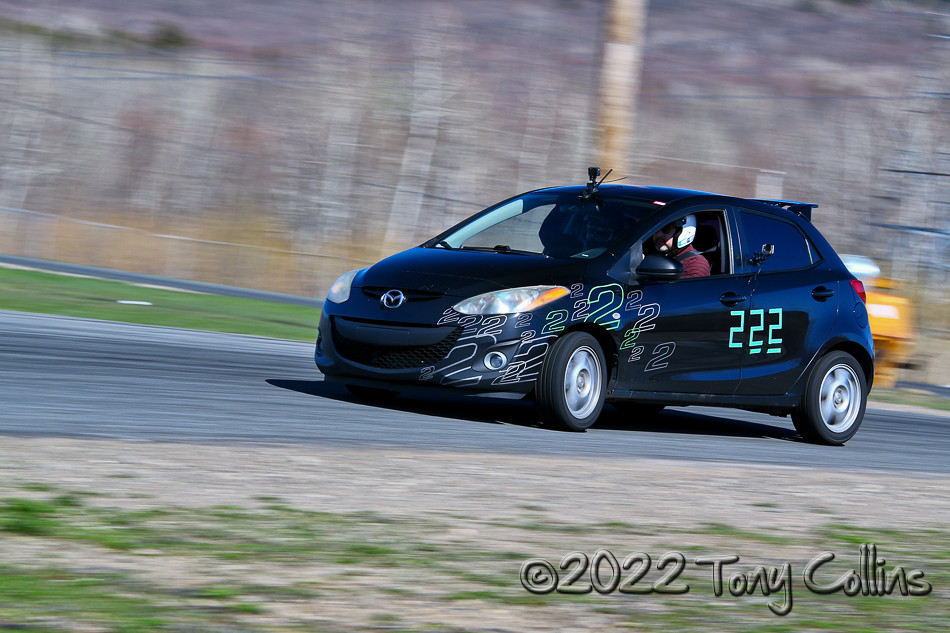
For 2022, the 2’s suspension, especially in the rear, was showing its age and summer tires that came with the car didn’t have much meat left. I bought some Yokohama Advan Fleva V701 tires, which not only drastically improved grip over the cheap tires it came with, but also oddly, improved fuel economy, shaving about 0.5L/100KM from my average. Not long after I bought the last Bilstein B14 kit from RockAuto, install it that week, had it aligned the next day. She was suppose to get tie rods and an alignment but ended up getting a new steering rack to remove the play. The next day after we bought her to her first Autocross event. I haven’t done any since I was in my MX-3 back in 2007. This would also be the fist time the girlfriend would take a car on the track as she wasn’t a passenger but registered her as a 2nd driver. We had a blast and I can’t wait to go back.
Then to follow up, AWR then decided to come out with a new driver’s side motor mount, so I had to get in on that order as well. While I was waiting for that to come in, I got a brainwave. One thing that also bothers me with my 2 is the lag of the Drive-By-Wire system. Rev matching has to be deliberate and less natural, and on upshifts, I’ll power shift if I’m too quick with the pedals. I did read that you could get a tune to compensate, but I vaguely remembered someone using the throttle body from a 1.6L MZR. This had to come from overseas and found one from Poland. I waited to do the TB install at the same time as the AWR driver mount. With the new TB, the power s**** have greatly disappeared; rev-matching downshifts are can be done WAY more naturally. Low end was also significantly improved, allowing for 2nd gear rolling stops to the point where you could almost start it from a dead stop.
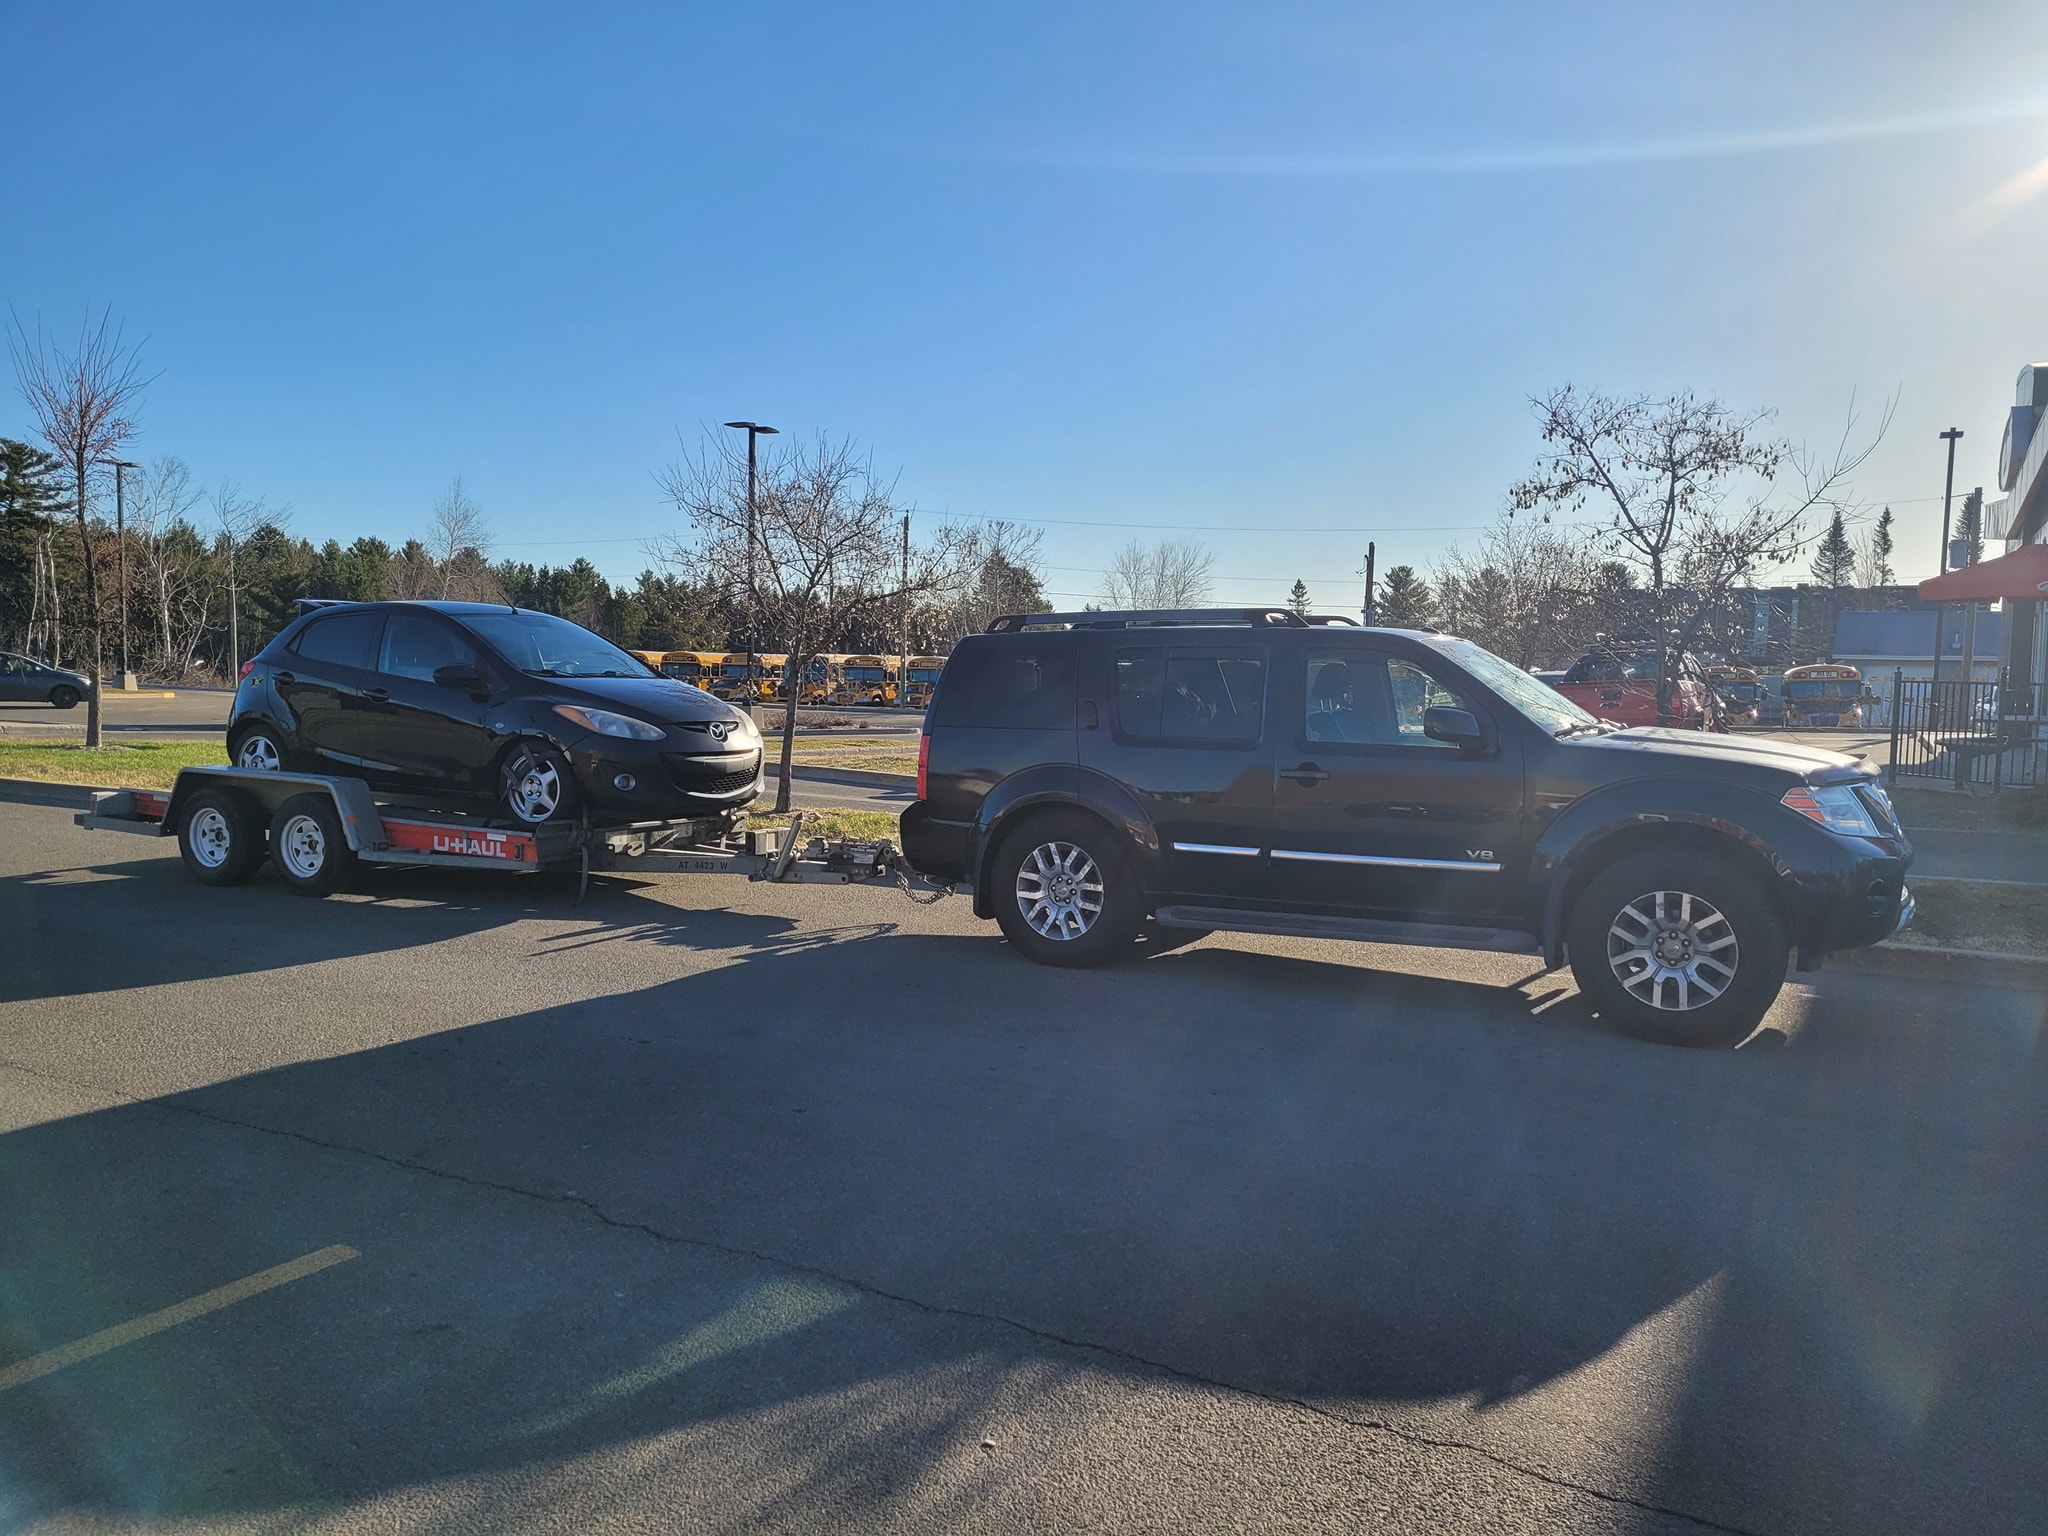
Since then I’ve been driving here and there but no real time to enjoy it as I’ve been hard into landscaping and using the truck (V8 Pathfinder) regularly for those duties. I’d love to head back to an autocross event before the end of the summer. Not too many other mods planned at the moment other then controlling a few rust spots, but I’m still contemplating getting a tune to further reduce DBW lag, raise redline a tag. You can feel the engine want to keep going above the hard 6300rpm redline. A cold air intake is tempting and so are some headers, but we’ll see as I get inspired with time.


Purchased Mileage:
73'000kms (October 2017)
Current Mileage
168'000kms (August 2022)
200'000kms (June 2025)
MODS
Drivetrain:
- AWR 62 Durometer Dog Bone, Passenger and Driver mounts
- DDM Works Short Shifter and Bushings
- MZR 1.6L Throttle Body
Tires & Rims:
- 205/50r15 Bridgestone Potenza RE-71RS on MX-3 5-Spoke Rims (Summer)
- 185/65r14 Studded Gislaved NordFrost 200 on Green Painted Steelies (Winter)
-
Suspension:
- Bilstein B14 Coilovers
- DDMWorks Rear Sway Bar
Brakes:
- PowerStop Slotted and Drilled Rotors
- PBR Ceramic Pads
Exterior:
- OEM Yozora sticker package
- OEM Yozora Wing and Shorty Antenna
- UK Stubby Rear Bumper with (Right) Rear Fog Light
- Portugal Left Rear Fog Light
- Modified Rear Crash Bar with 1.25" Tow Hitch Receiver
- 4-Pin Trailer Connector with Converter
- Auxito LED Headlight and Taillight Bulbs
-
Interior:
- Weathertech Floor Mats
- Mazda MX-3 Shift Knob
- Heated seat pads installed into OEM seats.
- Intermitent/Auto Wiper Stalk Swap
- Aliexpress HVAC Knobs
-
Electronics
- Kenwood DDX-6905S AA/AC 7" Head Unit
- Focal Speakers + Tweeters
- Mazda6 BOSE Subwoofer + Miata 15" Spare
- AUX audio input changed to a modified USB+AUX
- Remote Starter
- DoD 1080p Dashcam
Introduction/Ownership History
So back in 2017, I started looking for a fun, fuel sipping daily as my modified supercharged Xterra was getting 10mpg, but also aging and it's hard to fix or modify a vehicle you drive every day. The girlfriend's Avenger also wasn't doing well and needed some major work coming up to try to extend its life. I had a price in mind so that I could pay it off quick, and that the fuel savings would have the car essentially pay for itself. I also wanted to have it paid by the time I released from the army and went back to school in 2021, which was going to be a daily 110km round trip. I will not modify it, I said. Famous last words to be sure. What I wanted in my 2 was to have one under 100'000kms, with a manual, air conditioning and cruise control. After months of searching looking around at a few and making sure the girlfriend felt comfortable with learning stick on one, I jumped on a good deal. A 2011 with 73'000kms, even came with a remote starter and some winter tires near the end of the life, but enough top get me through its first. What I didn't know is what was a Yozora edition and how rare it was. It was however missing the (Miata) rims that it would have had from the factory and just had a set of steelies with hubcaps.
First thing was to replace the battery that was missing some CCA's to start when it was very cold. Come spring I found out the AC was not blowing cold. It had a leak in the condenser so I replaced it and got the system recharged. After a while, I grew frustrated with the classic AM/FM/CD radio. Not only with crappy phone holders and an AUX and charge cable in the way of the shifter, but also crappy Quebec radio. I installed an Android Auto Kenwood DDX-6509S radio, which really improved my daily pleasure of driving the car and made it fell much less antiquated. While I was at it I also installed a Black Friday special dash cam I had laying around for a few years that was supposed to do into the Xterra and also some heated seat pads from Amazon as the little 1.5 doesn't warm up quick when it's under -20*C out. It also does wonders for the back on long trips.
That summer I picked up some MX-3 5-spoke rims from a friend to replace the ugly steelies, with a tip of nostalgia.
While the radio did help improve sound quality, after some time it felt like it was missing in the SQ department. The next step I changed out the OEM speakers that use fridge magnets for some Focal speakers with a pair of tweeters. I also picked up a Bose spare-tire sub from a Mazda6 and along with a new 15" rimmed spare tire from a Miata to cover the low frequencies the Focals were missing.
Then the pandemic hit, the car sat for a few months and the rotors warped (as well at those in the girlfriend’s Avenger) so I took the time to upgrade the rotors to some PowerStop slotted and drilled rotors. I decided to take a page out of my MX-3 playbook and ordered from PBR ceramic pads, but this time round I couldn’t find a Canadian reseller and had to order them directly from them in the USA.
At this point, it has been a very pleasant daily, but this is where things go off-track. In 2021 AWR was doing a group buy for a passenger side motor mount. While their dog bone mount is well known to crisp up shifts and was on my to-mod list, the passenger mount group buy was missing a few people and likely be a one-off batch, and I just cannot let those get by. At the same time, I order up a DDM Works short shifter and bushings. To finish the combo, I ordered an MX-3 shift knock to get rid of the econobox-looking one that came with the car. The AWR mounts came in their softest 62-durometer bushings, and it did take a few months for them to settle down, they did have an unexpected, positive side effect. What I felt the 2 was missing was also what I had in my MX-3 was a strut tower bar. While it was always argued back then that it was useless but I swore by my pair of CorkSports and has dearly missed the front one until I could figure out a way to get it to clear the intake manifold of my KL-ZE swap. The same argument was said about the 2 and that it’s useless. I did look a bit, some being in heavy steel, others having issues clearing the brake booster in the left-hand drive cars. I also would believe it as the strut towers are much closer to the firewall compared to the MX-3. What the Passenger and Dog Bone passenger mounts did was give me the feeling I was looking for by reducing understeering and improving steering response. This is where the handling bug had bit.
For 2022, the 2’s suspension, especially in the rear, was showing its age and summer tires that came with the car didn’t have much meat left. I bought some Yokohama Advan Fleva V701 tires, which not only drastically improved grip over the cheap tires it came with, but also oddly, improved fuel economy, shaving about 0.5L/100KM from my average. Not long after I bought the last Bilstein B14 kit from RockAuto, install it that week, had it aligned the next day. She was suppose to get tie rods and an alignment but ended up getting a new steering rack to remove the play. The next day after we bought her to her first Autocross event. I haven’t done any since I was in my MX-3 back in 2007. This would also be the fist time the girlfriend would take a car on the track as she wasn’t a passenger but registered her as a 2nd driver. We had a blast and I can’t wait to go back.
Then to follow up, AWR then decided to come out with a new driver’s side motor mount, so I had to get in on that order as well. While I was waiting for that to come in, I got a brainwave. One thing that also bothers me with my 2 is the lag of the Drive-By-Wire system. Rev matching has to be deliberate and less natural, and on upshifts, I’ll power shift if I’m too quick with the pedals. I did read that you could get a tune to compensate, but I vaguely remembered someone using the throttle body from a 1.6L MZR. This had to come from overseas and found one from Poland. I waited to do the TB install at the same time as the AWR driver mount. With the new TB, the power s**** have greatly disappeared; rev-matching downshifts are can be done WAY more naturally. Low end was also significantly improved, allowing for 2nd gear rolling stops to the point where you could almost start it from a dead stop.
Since then I’ve been driving here and there but no real time to enjoy it as I’ve been hard into landscaping and using the truck (V8 Pathfinder) regularly for those duties. I’d love to head back to an autocross event before the end of the summer. Not too many other mods planned at the moment other then controlling a few rust spots, but I’m still contemplating getting a tune to further reduce DBW lag, raise redline a tag. You can feel the engine want to keep going above the hard 6300rpm redline. A cold air intake is tempting and so are some headers, but we’ll see as I get inspired with time.
Last edited:
")