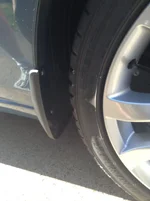
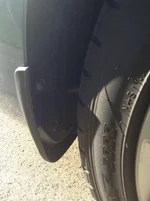
I installed them last week. On the rear, you remove the two bolts on the bottom side of the rear bumper cover, then you can seperate the black plastic wheel well liner from the bumper cover. If you look with a flashlight closely, you can see two sections with two scribe lines in the plastic about an inch apart. I just used side cutters to snip the plastic lines then connect them to cut out a notch. The cut doesn't have to be perfect as the mud flap will cover the cut plastic. If you don't remove the wheels you will have to use a ratchet handle with a screwdriver bit inside a 1/4" socket to have clearance. I jacked the rear of the car up for more room.

")