
I had posted some info on the MSP sway bar kit previously see:
http://www.msprotege.com/forum/showthread.php?t=100504&page=1&pp=15
but thought I should consolidate it in one place and write it up as a proper How-to so here goes. Basic instructions first, then a bunch of photos. I will try to answer any questions you have.
WARNING: Mazda recommends use of the MSP sway bars only with the MP3/MSP struts since they have stronger mounting tabs. Using these bars with DX/LX/ES/P5 struts may cause the end link mounting tabs on your struts to break off. For more info, use "Search."
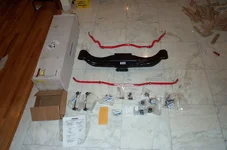
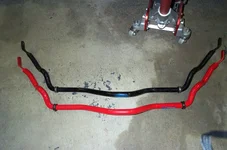
MSP FSB Installation
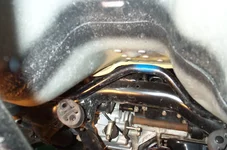
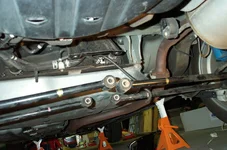
This job isn't very hard but it's more involved and takes longer than it seems like it should for a sway bar. The problem is that the bar fits in pretty closely between the subframe and the firewall and has lots of twists and curves which make it impossible to remove the bar without disconnecting a bunch of other things and freeing up room to wiggle the bar out.
You have to remove:
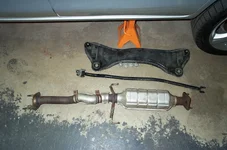
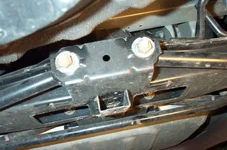
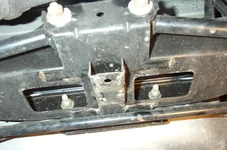
(1) transverse cross member (4 bolts)
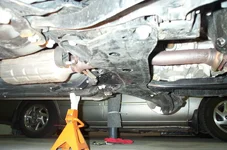
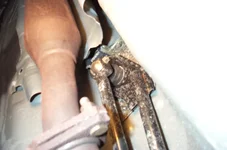
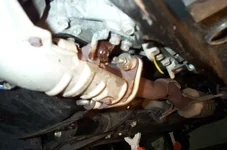
(2) exhaust middle section,
(3) shift rod (both ends) and support rod (front end only, back end stays attached),
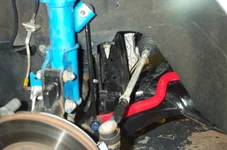
(4) longitudinal support brace (from under radiator to behind engine),
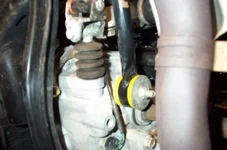
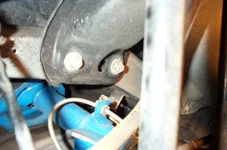
(5) unbolt steering rack (4 bolts) from subframe (leave tie rod ends connected,
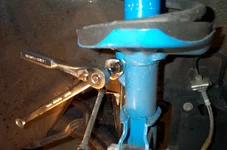
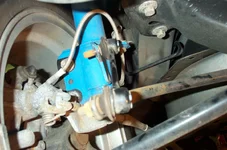
(6) unbolt struts from upright (4 bolts) and pop brake clip off and move brake line out of mounting hole (to give more room for brake line to flex when subframe moves down)
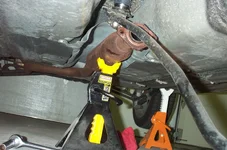
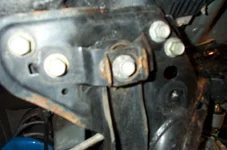
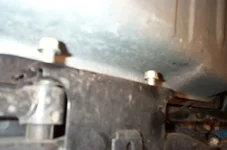
(7) unbolt subframe from chassis (8 bolts)
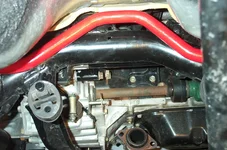
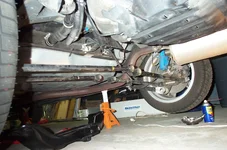
This will allow you to lower the subframe a few inches. With a friend pulling down on the back of the subframe, you should be able to fish the bar out. The reason you need a friend to "pull down" on the subframe (even though you've unbolted almost all of it), is that it is still connected to the control arms, which are connected to the drive shafts, which are connected to the engine/transmission, which are connected to the chassis by the motor mount next to each wheel well (and possibly the front and rear motor mounts also, although I ended up removing those as well).
I was doing this alone and wasn't able to pull the subframe down enough while fishing the bar out by myself so I removed the rear motor mount (NOT an easy task unless you have already installed the AWR rear mount, which I had - see How-to I wrote on that). Removing the rear mount lets you drop the subframe a few more inches and get the needed clearance. It's possible that, with the stock rear engine mount, there is enough flex to pull the subframe down and get the bar out without a friend's help, but this did not seem doable with my rear AWR mount in--that really tightens things up back there.
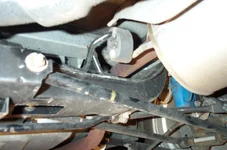
NOTE: If you are installing the MSP front bar but haven't installed the AWR rear mount BUT THINK YOU MAY EVER WANT TO INSTALL THE AWR REAR MOUNT, then remove the 10mm nut on the bottom of the plastic bracket when you have the subframe dropped. This will save you lots of time later when you install the AWR rear mount. See AWR rear mountHow-to for more info on this.
http://www.msprotege.com/forum/showthread.php?t=100504&page=1&pp=15
but thought I should consolidate it in one place and write it up as a proper How-to so here goes. Basic instructions first, then a bunch of photos. I will try to answer any questions you have.
WARNING: Mazda recommends use of the MSP sway bars only with the MP3/MSP struts since they have stronger mounting tabs. Using these bars with DX/LX/ES/P5 struts may cause the end link mounting tabs on your struts to break off. For more info, use "Search."
MSP FSB Installation
This job isn't very hard but it's more involved and takes longer than it seems like it should for a sway bar. The problem is that the bar fits in pretty closely between the subframe and the firewall and has lots of twists and curves which make it impossible to remove the bar without disconnecting a bunch of other things and freeing up room to wiggle the bar out.
You have to remove:
(1) transverse cross member (4 bolts)
(2) exhaust middle section,
(3) shift rod (both ends) and support rod (front end only, back end stays attached),
(4) longitudinal support brace (from under radiator to behind engine),
(5) unbolt steering rack (4 bolts) from subframe (leave tie rod ends connected,
(6) unbolt struts from upright (4 bolts) and pop brake clip off and move brake line out of mounting hole (to give more room for brake line to flex when subframe moves down)
(7) unbolt subframe from chassis (8 bolts)
This will allow you to lower the subframe a few inches. With a friend pulling down on the back of the subframe, you should be able to fish the bar out. The reason you need a friend to "pull down" on the subframe (even though you've unbolted almost all of it), is that it is still connected to the control arms, which are connected to the drive shafts, which are connected to the engine/transmission, which are connected to the chassis by the motor mount next to each wheel well (and possibly the front and rear motor mounts also, although I ended up removing those as well).
I was doing this alone and wasn't able to pull the subframe down enough while fishing the bar out by myself so I removed the rear motor mount (NOT an easy task unless you have already installed the AWR rear mount, which I had - see How-to I wrote on that). Removing the rear mount lets you drop the subframe a few more inches and get the needed clearance. It's possible that, with the stock rear engine mount, there is enough flex to pull the subframe down and get the bar out without a friend's help, but this did not seem doable with my rear AWR mount in--that really tightens things up back there.
NOTE: If you are installing the MSP front bar but haven't installed the AWR rear mount BUT THINK YOU MAY EVER WANT TO INSTALL THE AWR REAR MOUNT, then remove the 10mm nut on the bottom of the plastic bracket when you have the subframe dropped. This will save you lots of time later when you install the AWR rear mount. See AWR rear mountHow-to for more info on this.
Last edited:


")


