A Protege Story

SOLID - motor mount

good lord. I installed my front motor mount finally. I had all the other crap off cause of the bumper so I thought it was a good time.

My stock mount was ripped pretty bad on both sides. not all the way through but might as well have been.

I put the keys in and fired her up to back out of the garage and I couldn't believe the difference. I can tell driving is going to be a whole new ball game. i like it already, got the side inserts but i am waiting on that. if anybody has done those already let me know. got mine second hand and a little confused about the bulky vs non bulky set.
 
thanks for the props + link.

whatcha want photoshopped?

To me, the car looks a little bit cleaner w/o the silver trim...
but I bet with a few other silver accents on the outside of the car, it'll look pretty sweet.
 
neoturner said:
Well progress has been slow. My stepsister came to Atl for a few days and it's been raining like a mofo. I also had to make an apperance out in the world so people don't start sending the search parties. Had to see various doctors and pay some bills.

Just when the garage was starting to clear up I started into the turbo project. It's a freaking mess again. bumpers and bolts and s*** everywhere. I have a new bumper to put in so I have to find out where the intercooler is going to be and in order to do that i have to know where to run the piping and in order to do that i had to lose my ac fan. hopefully i don't have to lose the other one cause replacements aren't cheap.

Going with a spal 10" low profile push fan mounted on the front side of the radiator similar to the mam setups. then i will run the ic piping up through the large gap created. with the sedans you can't run the ic the same without replacing the radiator and condensor and all that s*** so i figured this was the quickest and more importantly the easiest solution. i can live without ac till i figure this s*** out.

Updated the project list:
http://www.msprotege.com/forum/showpost.php?p=2427247&postcount=33

have a couple pics of project silvertrim. I like the look so i am going to move on to the other side. PRODIGY if you are reading this i need your master PS skills to test out a look for the mirrors. Shoot me a PM if you read this, should be cake.

If anybody missed his handy work lately check out this thread.

http://www.msprotege.com/forum/showthread.php?t=123634383

Pics:

1 & 2 - Silvertrim, 3 no trim. lemme know what you guys think about the look. I know i need to figure out something with the mirrors but the idea is that the rear valance and chrome bar in front will also have the charcoal trim.


I'm so glad you got that chrome taken off. it was HORRID.. now it looks great. keep it up man.
 
boostdprotegelx said:
I'm so glad you got that chrome taken off. it was HORRID.. now it looks great. keep it up man.

lol great. I haven't taken any chrome off yet! hummm we'll see as I make a little more progress.
 
Prodigy said:
thanks for the props + link.

whatcha want photoshopped?

To me, the car looks a little bit cleaner w/o the silver trim...
but I bet with a few other silver accents on the outside of the car, it'll look pretty sweet.

Well it's all about being different too. tons of black protege's with all the black fixins so we'll see where this one goes.

Anyway in the second picture I want to make the outside of the mirror silver where it wraps around the mirror. then I have some black mirror covers that I will paint to match the car so they will go in the regular mirror cover. I will also paint the part of the mirror that attaches to the car the same color as the car.

So if you can chuck some silver around the trim of the mirror on the first two (or just one of them) I'd like to see what that looks like.
 
winty87 said:
Slap on a MSP/MP3 body kit and your good to go(nana)

got a 3.5 rear lip and a Corksport type CS front bumper. Not sure what I am going to do about sideskirts. I want the lowest profile ones that exist for our cars and i'm not sure which ones those are. I am working on fitting the new bumper so I'll try and chuck up some pics.
 
Bumper Update, IC Core Mounted

I just realized that boosted was probably talking about project silvertrim when he was talking about the chrome. think he looked at my drivers side pic and though that was the finished product. Stick with me on this one though, think it's going to work out.

So I got my IC core mounted today which officially kicks off my boost project. all the hardpipes I bought will have to be redone but Jay gave me a bunch of extra pipe and urethane connectors so I am hoping it works out.

Sedan to turbo won't allow you to run msp pipes because of the radiator. The guy who had the turbo before me ran the pipes right where the wiper tank is for the hot side because he had a cf hood and didn't need it. I want to hold onto that so I'm following Mam's IC design hoping for the best. Not sure what to do with the device that sits above my stock intake by the throttle body. Read something on that somewhere so I gotta track it down.

Been working for two days on this damn bumper. It's not ready to bolt on as they say. I'll go into that on the next post.

Pics

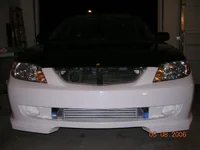
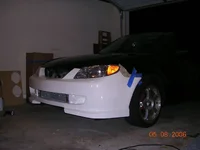
Bumper on with core mounted. It's a tight ass fit. I pushed that thing all the way back to my hood support and even banged on that for a while to flatten it out. that b**** isn't going any further back and I still have to cut the bumper.
 

Attachments

  • DSCN1142.webp
    DSCN1142.webp
    112.7 KB · Views: 264
  • DSCN1134.webp
    DSCN1134.webp
    104.6 KB · Views: 264
Bolt on?

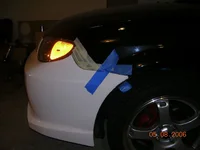
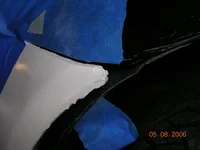
yeah so I get this bumper and right away I see where they pulled it off the mold and didn't clean it up. On top of that they primed the whole thing which was pointless cause I gotta bondo the s*** out of the edges to fix that not to mention the corners that didn't come out of the mold.

I can tell the chips were there when they shipped the thing cause they primed right over it. I planned on glassing custom scoops where the studs are next to the fog light pockets so it's not a huge deal. I'm just worried about the corners holding up and the mounting tabs on the side being made out of glass. I am definately going to re-inforce those bad boys before I do any hard driving.

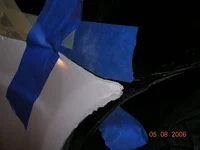
pic 1: chipped corner, yeah I'd love to know who didn't notice that one.

If anybody had done any body work of this type I'd love some advice on glassing around edges and corners. I have body filler, bondo glass, glazing cream and real deal resin and matt. Can't say I am any better at one or the other but I've used them all.
 

Attachments

  • DSCN1139.webp
    DSCN1139.webp
    82.6 KB · Views: 250
  • DSCN1137.webp
    DSCN1137.webp
    133.9 KB · Views: 242
  • DSCN1138.webp
    DSCN1138.webp
    103.9 KB · Views: 205
neoturner said:
I just realized that boosted was probably talking about project silvertrim when he was talking about the chrome. think he looked at my drivers side pic and though that was the finished product. Stick with me on this one though, think it's going to work out.

So I got my IC core mounted today which officially kicks off my boost project. all the hardpipes I bought will have to be redone but Jay gave me a bunch of extra pipe and urethane connectors so I am hoping it works out.

Sedan to turbo won't allow you to run msp pipes because of the radiator. The guy who had the turbo before me ran the pipes right where the wiper tank is for the hot side because he had a cf hood and didn't need it. I want to hold onto that so I'm following Mam's IC design hoping for the best. Not sure what to do with the device that sits above my stock intake by the throttle body. Read something on that somewhere so I gotta track it down.

Been working for two days on this damn bumper. It's not ready to bolt on as they say. I'll go into that on the next post.

Pics

Bumper on with core mounted. It's a tight ass fit. I pushed that thing all the way back to my hood support and even banged on that for a while to flatten it out. that b**** isn't going any further back and I still have to cut the bumper.


dude, anythign that you do will come out great. I'm at work so i just glance and type. anyways, the best way I've seen, is the way Wagner did my intercooler piping(for us sedans) you have to buy the MSP radiator. take out the SMIC and you run the piping through that area. it looks pretty bad.
 
that piece is horrible! best of luck man, that's some work fixin that mess...you are ambitious!!
 
I think it will look great once your done, you have inspired me to do some interior upgrades..

Bump for a great thread.
 
Blade4804 said:
I think it will look great once your done, you have inspired me to do some interior upgrades..

Bump for a great thread.

cool man. that is what it is here for. I never notice how much i have done till people that remembered how my car used to be get in and are like 'jesus christ dude' then i'm like yeah only cost me 6 months of my life!

let me know if you have any questions or need how to's or any of that.
 
Blade4804 said:
to I need to prep any of the interior plastic pieces before i paint them? and what type of paint should I use?

There is ALWAYS prep needed no matter what you paint. that s*** seems to only want to stick to the floor of my damn garage.

Prep and paint depends on the look you are going for.

Krylon Fusion - will paint onto any textured pieces you have

The easiest and most durrable for a novice is to go the Krylon Fusion route. No sanding, no sanding and no sanding required. Although I would at the very least skuff the surface with a skuff pad (anywhere paint is sold) looks like a brillo pad or something.

Now you are limited in the colors you can use but I found Wally World has the largest selection of Krylone Fusion. Homedepot gets a big fat D- on the paint selection. Auto stores carry some but not many.

You can't just dick around with it because it's a one step process. Fusion is nice but if you have to start over it's a b**** to sand. If you are reading some other how to you can't treat fusion like regular paints so don't sand between coats unless you are fixing some fuzz or s*** that landed between. then do a light sanding on that spot.

Other than that just read the directions on the can and practice on something you don't care about. will save you trips to the store for more paint trust me.

Prep of any piece being painted

Clean the s*** out of that damn thing. Break out the hose (remove any electronics of course) and car wash and get any grime and s*** off first. THEN hit it up with some acetone (any auto/hardware store) Powerful solvent so don't get it where you don't want color to go bye bye. Get everything greasy or non plastic off the piece. Paper towels leave behind fibers that are annoying so you might want a microfiber 3M towel to do the final wipe down.

Let the piece dry for several minutes. Make sure you set it up so you can get to all sides of it. The most neglected areas on my paint jobs are the edges and corners make sure you get those straight on cause the will be the first to chip.

Auto finish gloss Jobs

Now if you are trying to match the paint of your car or something, or want a slick glossy finish like the real deal you have to take all the texture out of the piece you are painting. For our cars it take a lot to do that.

I started with 60 to really get every stupid groove out then up to 120 and then 320 before Priming. I use Duplicolor import auto spray 5oz(bigger ones clog) for color, any sandable primer is good for primer, and a big can of duplicolor clear coat. keep your nozzles clean and always do the upside down spray after EACH coat to clear the nozzle. Seems like a waste but it is necessary. You can also wipe the tip with acetone if it gets ugly.

Here is my routine for painting a piece after months of trial and error. The timing is significant for a good look. you can stop your day at any of the sanding points if needed.

prime
10min
prime
10min
prime
30min
wet sand - 400
prime
10min
light wet sand - 400
paint
10min
paint
10min
paint
20min
wet sand - 600
paint
10min
paint
10min
very light wet sand - 800
clear
10min
clear
10min
clear
10min
light sand - 800 or 1000
clear
10min
clear

wait 48 hours

light rubbing compound (its like a mild sand paper) followed up with a decent car wax to protect the clear coat

admire
 
now is that exterior or interior? or both? I want to repaint some... alot of my interior plastic pieces white. like the outside of my car, and eventually get dark seats... I don't plan on doing any body work on the car and I would like to keep the texture of the plastic...
 
Blade4804 said:
now is that exterior or interior? or both? I want to repaint some... alot of my interior plastic pieces white. like the outside of my car, and eventually get dark seats... I don't plan on doing any body work on the car and I would like to keep the texture of the plastic...

It won't look like the outside if you want to keep the texture. You can't use a clear coat so it will just be a dull white, which is fine if thats what you want I'm just saying. I would definately paint non textured pieces the other way. your smooth pieces only need to be sanded with 320 before priming so it's not as hard. The radio bezel is a good piece to start with.
 
Proverbs

I read a quote recenly on this forum whose author I don't know. If you happen upon this thread give a shout out so proper credit can be given. It read:

"If you can't afford to do it right you can't afford to redo it."

Truer words were never spoken.

I have nicknamed my shortcut personality Johnny Two Times. It is such a catch 22 because if you sit there and think about the right way to do things you find yourself going in circles and NOTHING gets done. You almost have to **** up to figure it out but I find my conscience is right when I know something isn't working out and it is at that point you save yourself money and time by starting over. So don't feal bad if you have to do something over that you have never attempted before. If that doesn't happen then you aren't doing it right.

I think this quote applies more to the point you get when you have spent 3 times as much as you thought you would and you press on because starting over will mean that you should have just paid to have the damn thing done. Just let it go. It will pay off. Your cost estimates will be a whole lot more accurate and when you consider the next step you know a little bit more about what you are signing up for. If you pay for all this s*** to be done you aren't learning s*** and what fun is that. Think about that the next time you call yourself and idiot.
 

New Threads and Articles

Back