
- :
- Canada
This is a DIY How-To for a dashcam installation for the 2nd Generation Mazda CX-9. I decided to document this process as it seems nobody has done it yet. Please note that this guide is specifically for the installation of the Viofo A129 Duo dashcams (front and rear), hardwired to the Homelink-enabled rear view mirror with an Invisicord.
This process was documented/photographed by myself, using my crappy cellphone camera and my 2018 Mazda CX-9 Signature as the "demo" vehicle. This DIY is provided as a learning aid and reference guide. I assume no responsibility for any warranties you may void or damages you may inflict on yourself or your vehicle.
The camera set I installed is the Viofo A129 Duo. Both front and rear cameras record in 1080p 30 FPS (if the rear is disconnected, the front changes to 1080p 60 FPS). It takes still photos, and has a mic. Along with other standard features, it has GPS and Wi-Fi functionality, and can accept up to a 256gb microSD card. Viofo has stated that the best cards to use for their dashcams are Transcend High Endurance. Samsung Pro cards also work well, but they will not honor the 10 year warranty if the card is used for "surveillance recordings". Since both cameras write to the single card in the front camera, it makes sense to splurge for the higher capacity SD cards designed for dashcam use.
What you'll need:
- A pry tool
- MicroSD card (Ensure that you buy one specifically used for dashcams, like a Transcend High Endurance card)
- Invisicord (micro connectors with mini USB cable)
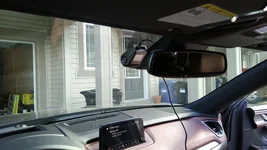
1. Figure out where you want to mount the dashcam. If your camera has a video display, you can connect the power cable and turn the car on, then mount the camera using the video output as a guide. After mounting the camera, turn off the car.

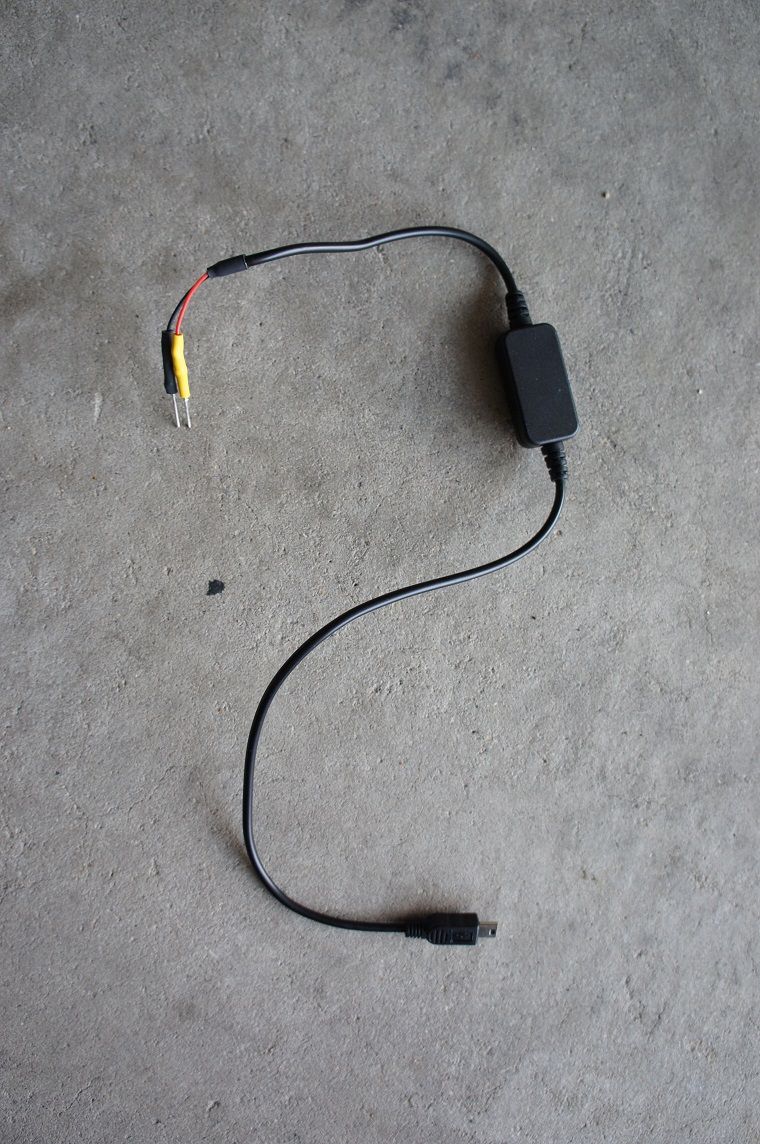
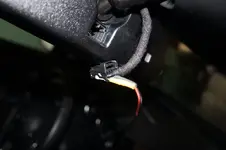
2. This is the Invisicord. The yellow lead is the positive tap, and the black lead is the negative/ground tap. The other end is a mini USB connector that will plug into my dashcam.
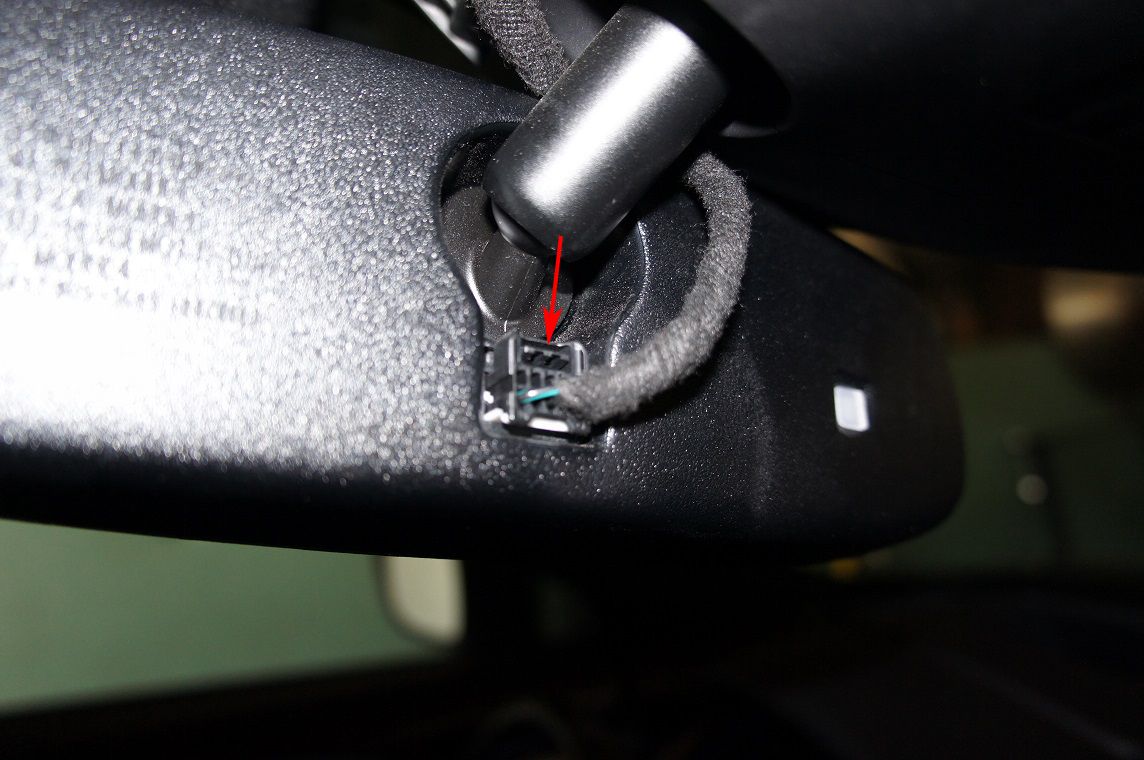
3. Locate the wiring harness on the back of your homelink rear-view mirror. Press down on the tab and pull the connector out.
Note that on models with the frameless rear view mirror, the wiring harness is located inside the enclosure mounted to the windshield. See post #38 for more info.
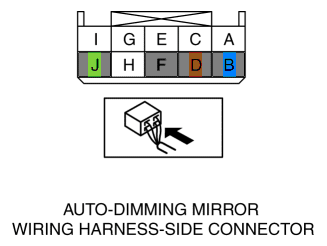
4. Refer to the diagram below (credit: DBLXX). As you can see, the green/black wire on the bottom left is your constant power. The bottom middle (black) is the ground.
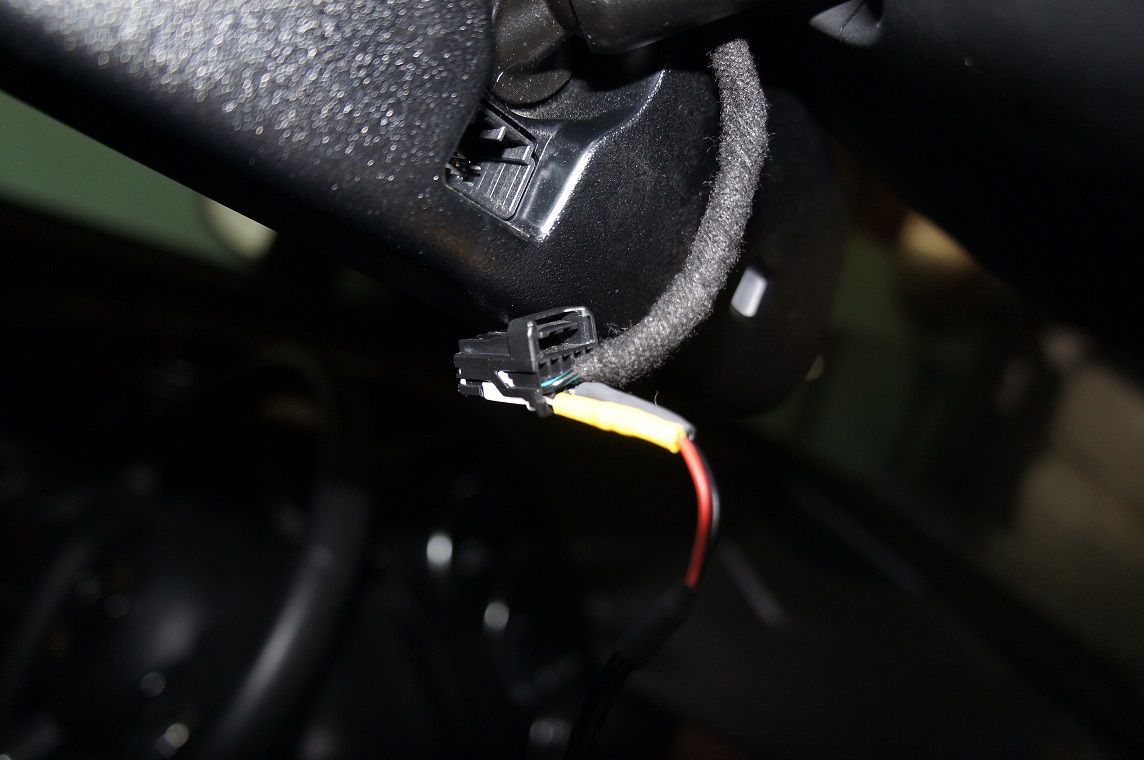
3. Press the black lead into the grounding socket of the harness (bottom middle, black wire). Then, without letting the yellow lead touch anything, insert it into the constant power socket (bottom left, green and black wire). The leads require some effort to get into the sockets, but once they're in, they won't easily wiggle/vibrate out. Also, if you're worried about accidentally blowing fuses, you can just disconnect the battery before this step.
4. If you disconnected the battery, reconnect it now. Connect the mini USB connector to the dashcam, and it should power on.
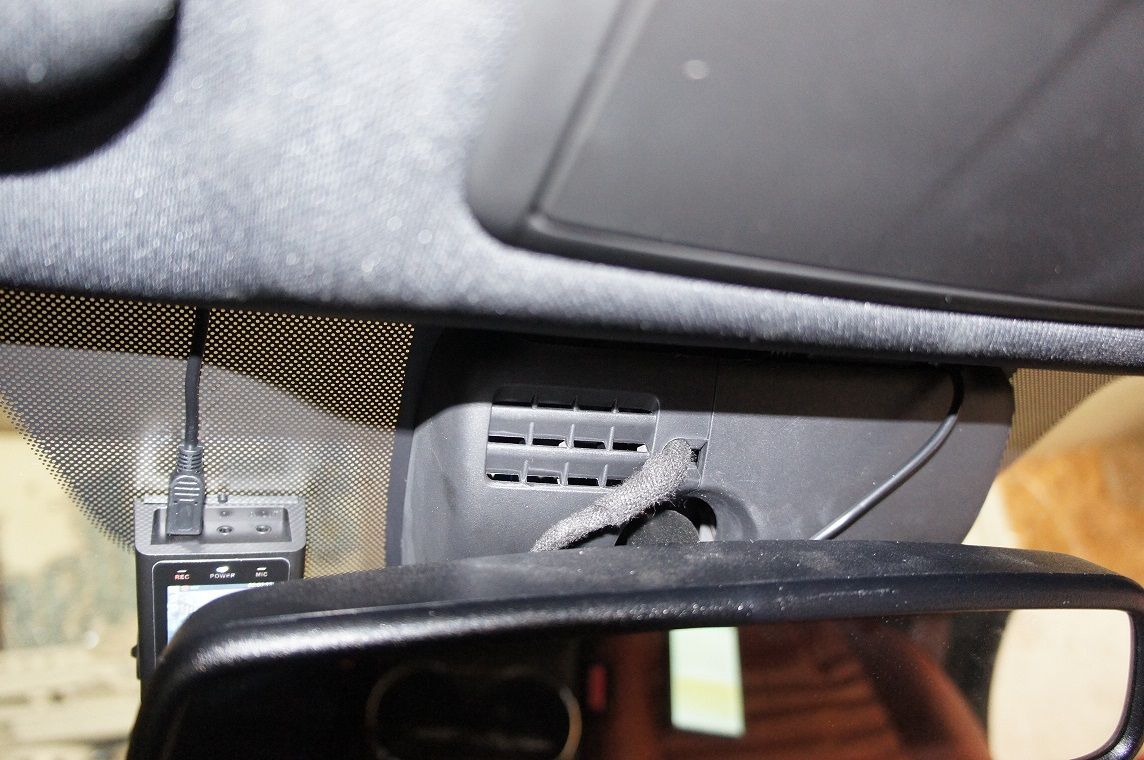
5. Push the extra cabling into the headliner.
6. Turn the motion detection feature on, and that's it!
Hope that helped you guys out! If you have any questions, post them here and I'll do my best to answer them.
This process was documented/photographed by myself, using my crappy cellphone camera and my 2018 Mazda CX-9 Signature as the "demo" vehicle. This DIY is provided as a learning aid and reference guide. I assume no responsibility for any warranties you may void or damages you may inflict on yourself or your vehicle.
The camera set I installed is the Viofo A129 Duo. Both front and rear cameras record in 1080p 30 FPS (if the rear is disconnected, the front changes to 1080p 60 FPS). It takes still photos, and has a mic. Along with other standard features, it has GPS and Wi-Fi functionality, and can accept up to a 256gb microSD card. Viofo has stated that the best cards to use for their dashcams are Transcend High Endurance. Samsung Pro cards also work well, but they will not honor the 10 year warranty if the card is used for "surveillance recordings". Since both cameras write to the single card in the front camera, it makes sense to splurge for the higher capacity SD cards designed for dashcam use.
What you'll need:
- A pry tool
- MicroSD card (Ensure that you buy one specifically used for dashcams, like a Transcend High Endurance card)
- Invisicord (micro connectors with mini USB cable)
1. Figure out where you want to mount the dashcam. If your camera has a video display, you can connect the power cable and turn the car on, then mount the camera using the video output as a guide. After mounting the camera, turn off the car.
2. This is the Invisicord. The yellow lead is the positive tap, and the black lead is the negative/ground tap. The other end is a mini USB connector that will plug into my dashcam.
3. Locate the wiring harness on the back of your homelink rear-view mirror. Press down on the tab and pull the connector out.
Note that on models with the frameless rear view mirror, the wiring harness is located inside the enclosure mounted to the windshield. See post #38 for more info.
4. Refer to the diagram below (credit: DBLXX). As you can see, the green/black wire on the bottom left is your constant power. The bottom middle (black) is the ground.
3. Press the black lead into the grounding socket of the harness (bottom middle, black wire). Then, without letting the yellow lead touch anything, insert it into the constant power socket (bottom left, green and black wire). The leads require some effort to get into the sockets, but once they're in, they won't easily wiggle/vibrate out. Also, if you're worried about accidentally blowing fuses, you can just disconnect the battery before this step.
4. If you disconnected the battery, reconnect it now. Connect the mini USB connector to the dashcam, and it should power on.
5. Push the extra cabling into the headliner.
6. Turn the motion detection feature on, and that's it!
Hope that helped you guys out! If you have any questions, post them here and I'll do my best to answer them.
Attachments
Last edited:


")

