What have you done to your P5 today?

Screenshot_20220226-231521_Acrobat for Samsung.jpg


Along with hinges and catches,..

Don't forget to lubricate your cables and gear mechanisms.

The dust boots on either ends are removable so you can apply oil and grease to the wire inside,..

Be sure to use rubber grease (silicone grease/lube) so you don't dissolve your rubber dust boots,..

Screenshot_20220226-234134_Acrobat for Samsung.jpg
Screenshot_20220226-234219_Acrobat for Samsung.jpg

Screenshot_20220226-235011_Acrobat for Samsung.jpg

Screenshot_20220226-235059_Acrobat for Samsung.jpg

Screenshot_20220226-235208_Acrobat for Samsung.jpg
 
Is 60k miles the recommended timing belt replacement interval for the FS-DE?

If you decide to change your Timing-Belt at either 60,000 or 100,000 km, make sure that you check the condition of your Timing belt Idler and Tensioner pulleys for slop.

Any noticeable wobble is not acceptable.

Screenshot_20220227-002523_Acrobat for Samsung.jpg


If you drive your car hard, you wear the teeth of the T-belt on both sides with acceleration and down-shifting, stretching, wearing and stressing your belt, and pulleys.


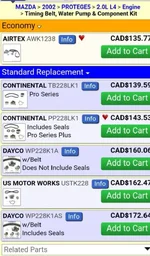
A complete kit for a T-belt job is worth the money.
It includes the water pump and all seals and gaskets.
You may still need to buy a valve cover gasket as well,..


Screenshot_20220227-004236_DuckDuckGo.jpg

Screenshot_20220227-004439_DuckDuckGo.jpg


And remember, the most important 4 dollar part on your entire car.
The Tensioner Pulley Spring.

If you stretch the sH¡T out of it while installing your belt, the belt will skip teeth and throw the valve timing off on your engine.

Hook it up after you have installed your T-belt if you can.


Screenshot_20220227-004604_DuckDuckGo.jpg


Keep in mind that our engines were Non-Interference engines when they were new.

Only a very few people have bent valves after a T-belt break.

It does happen, but it is Very Rare.

If you drive your car hard the chances of your engine becoming an interference engine greatly increases, so replacing your T-belt before it snaps is a good idea.

I remember one one guy that snapped his belt three times and just replaced the belt every time.
No engine damage.
 

Attachments

  • Screenshot_20220227-004054_DuckDuckGo.jpg
    Screenshot_20220227-004054_DuckDuckGo.jpg
    84.8 KB · Views: 75
Gotcha. I did some digging and found some people asking the same thing. I remember looking this up in the past and coming to the conclusion that it was somewhere around 100k. But I guess realistically it can be a range depending on conditions.

If my engine goes and I get a new one, I will definitely be doing all seals, the full timing belt kit, valve adjustment, new mounts and new clutch and flywheel on the replacement engine.

As it sits, I don't have any record of a timing belt change, but at 171k miles, it has to have been done. It would have gone by now if not, given my driving style and somewhat cool conditions here in the good ol' PNW. I need to do my valve cover gasket anyway, so I can have a look when I'm in there...if it ever gets done.
 
,.. I need to do my valve cover gasket anyway, so I can have a look when I'm in there...if it ever gets done.

One thing I remember is that there is very little torque on the valve cover bolts, and it's really easy to overtighten them.

My car had one of the valve cover bolts broken when I got the car.

The torque specs are in inch/pounds,..

Screenshot_20220227-120825_Acrobat for Samsung.jpg


You might want to get new grommets for the valve cover bolts.
They get old and cracked and start to leak.

Screenshot_20220227-121541_DuckDuckGo.jpg


You don't need new bolts or spacers, they can be reused.
All you need are the grommets,..

Screenshot_20220227-121622_DuckDuckGo.jpg


Most of the valve cover gaskets come with new grommets at Rockauto.

My valve cover gasket didn't come with grommets back when I bought mine.

I remember that the picture of the gasket showed the grommets and spacers being included, that's why I chose the one that I did, but my gasket showed up without grommets or spacers.


Screenshot_20220227-130236_DuckDuckGo.jpg
 
Last edited:
Don't forget the silicone sealant in the places indicated, or oil will leak on to your timing belt,..

Screenshot_20220227-154944_Acrobat for Samsung.jpg


And don't forget to follow the tightening order for the cover bolts.
Go around 3 or more times tightening them a bit at a time.


Rock Auto shows two lengths of valve cover bolts/spacers, but I'm pretty sure there are three different lengths?

The diagram appears to show three bolt lengths too,..

Screenshot_20220227-155121_Acrobat for Samsung.jpg
 
As it sits, I don't have any record of a timing belt change, but at 171k miles, it has to have been done.

Maybe not?
A lot of people don't have a clue about changing their timing belt or if they do, they don't want to spend $1000.

I was quoted $1600 CAD for a new timing belt and water pump.
I did it myself for about $450.


Thread 'Protege5 - How many miles have you gone before changing the timing belt?' Protege5 - How many miles have you gone before changing the timing belt?
 
What a comprehensive list, this service might end up costing more than the car lol
And yep, 7-10 Nm is basically juuuust over finger tight :)
 
phwew, Got the timing belt done today, in addition to that, one motor mount, spark plugs (ngk oem) and the valve cover cover gasket including removing the prev owners attempt to seal it. I must have re timed the engine 5 times even though I had it right the first time. The little notch on my crank pulley did NOT line up with the "T" on the cover, i used an extension down no1 to find it and line my marks with paint before pulling the belt off. I did the twice over manual rotation to check and everything lined up, so, I put the new plugs in and cranked it over and had no compression on one cyl, rinse and repeat untill I said to hell with it and put it almost all the way together to see if it would run. It fired right up! I will prob kick myself for not doing the seals but they were bone dry and the belt was what I think is OEM from japan. both pulleys were loose and also from japan. I am making a bet that it was serviced at a dealer before it was sold to it's last couple of owners, only a light/medium varnish under the valve cover.
 
And day two, brake booster, front trans mount, sway bar bushings, and fuel injector seals. that clears my vacuum leaks out, just need to replace the rear motor mount and I will have used up all the parts I got last week. The oil pan gasket, control arms and maybe some bushings in the rear to quiet it down and I can move on to tackling the interior rattling. It's much more evident without the sway bar bushing clunking 😂
 
Can't have interior trim rattles if you don't have interior trim *taps head

But seriously, some self adhesive matting and double-sided tape will do wonders for rattles, that and buy one of those mega-kits of the little plastic clips and replace them all as you go

Good work so far, there's a lot going on!
 
,.. I must have re timed the engine 5 times even though I had it right the first time. The little notch on my crank pulley did NOT line up with the "T" on the cover,..

That's Not Good !!

The harmonic balancer is two pieces and glued together with rubber.
They have been known to slip and even completely come apart.

The crankshaft keyway needs to be in alignment with the missing tooth on the toothed ring for proper crankshaft information and ignition timing.


Screenshot_20220308-100524_DuckDuckGo.jpg


The timing marks on the crankshaft pulley and the toothed ring are on the outer part of the pulley.

The ECU can compensate to a certain degree but if the toothed ring is too far off your engine won't run, and if it has already slipped, it will probably keep slipping.

I remember one guy went to a wrecker for a crank pulley and checked several cars and the timing marks were off on all of them.

If the crank data is wrong the ECU will shut down the engine after one rotation and one spark.


I will prob kick myself for not doing the seals but they were bone dry and the belt was what I think is OEM from japan.

A lot of people had problems with the replacement seals.
One guy ended up having to replace his seals every year after doing the seals.
I didn't replace my seals because I didn't want to create a problem.

I figured that it was a case of "If it ain't broke, don't fix it"
 
,.. just need to replace the rear motor mount and I will have used up all the parts I got last week...

Are you aware of the issues with the rear mount?

Apparently the easiest way to do it is from the top with several ½ inch extensions, a 6 point socket, and a breaker bar.

You have to break a small stud off (and seal the hole) to gain access from the top.

The process can be a huge PITA.
 
Thanks for all the advice, I will check on the balancer again, the rubber looked okay when I had it off, wonder if that's what that belt squeal I keep getting is. I did look into the process for r/r the mount and decided to call it a day after seeing the stud plus removing the intake. Are the extensions part of a way to avoid removing the intake? or is that a guaranteed "I gotta pull the intake"
 
Thanks for all the advice, I will check on the balancer again, the rubber looked okay when I had it off,

It may look OK, but it sounds like it slipped.
The keyway notch on the crank pulley is always accurate, and the timing marks should always line up with that.

If the two don't align perfectly, then your harmonic balancer/crank pulley is faulty.

Screenshot_20220308-195543_Acrobat for Samsung.jpg


wonder if that's what that belt squeal I keep getting is.

I doubt it.
If your outer ring was spinning on the inner ring enough to squeal, your engine would most likely shut down.

It's the tiny little alternator pulley with only a tiny bit of belt rolling over the pulley that is most likely squealing.


Screenshot_20220308-200755_Acrobat for Samsung.jpg


I did look into the process for r/r the mount and decided to call it a day after seeing the stud plus removing the intake. Are the extensions part of a way to avoid removing the intake? or is that a guaranteed "I gotta pull the intake"

As far as I remember, you don't have to remove anything.

The ½ extensions give enough wobble room to bend past everything, but you have to press down HARD from the top to make sure that you don't round off your nuts so that even a Mazda shop can't fit the proper socket on it.

The socket needs to push down squarely and firmly on the nut.


Even removing the stud can be a PITA.

You have to pound on it to break it off.

I think it's supporting some wires too or something nearby is?

You don't want to chop through the wires by accident,..
 
Last edited:
Good info! Hoping it translates into good luck when I tackle that one. In fifteen years doing my own maintenance and repairs, I have learned to stop if I'm not sure and hop on here and have a look around first.

sticking to the "what did I do to the P5 today" Re-tried the resistor fix on my ac, one guide suggested a 1kΩ and a 2kΩ resistor, one to gnd and then into the end of the diode and back to the pad the diode was removed from, another guide suggested a 470Ω and 200Ω in the same place, but, involved splicing wires on the pigtail going to the ac controller. I chose to return to the board and solder them there and that solved it. someone must have already tried the new switch method on mine as the one in there is newer and no burned plastic on the plug. Working for now and ready for the summer!
 
sticking to the "what did I do to the P5 today" Re-tried the resistor fix on my ac, one guide suggested a 1kΩ and a 2kΩ resistor, one to gnd and then into the end of the diode and back to the pad the diode was removed from, another guide suggested a 470Ω and 200Ω in the same place, but, involved splicing wires on the pigtail going to the ac controller. I chose to return to the board and solder them there and that solved it. someone must have already tried the new switch method on mine as the one in there is newer and no burned plastic on the plug. Working for now and ready for the summer!
I should probably try this again. For the 3rd time.

I did the classic one where you splice the resistors with wires and all, but the AC controls went haywire instead of being fixed. Doing it directly to the PCB seems a bit more proper.
 
I'd recommend a longer narrow tip to get the resistor attached to the third pin, I did a little impromptu plastic shaping while I was in there 🤣 it was much faster this time around to get everything out and back though. Oh and be careful lifting the diode off of it's trace, I took part of the pad off with mine but still had continuity thankfully. They apparently bend the pins inward before soldering to hold them in place at assembly time.
 
I should probably try this again. For the 3rd time.

Don't forget about a new fan switch if you haven't done that yet.

An old and worn out fan switch can have enough resistance and voltage drop across it to trip the sense circuit.


I did my own fix and used four 30 amp relays wired to the fan switch.
I has been fine for 5-10 years now.

I reduced the current through the fan switch from around 12 amps to around ⅓ of an amp.
 
New tires x2, fresh alignment, new oil and filter, sparkplugs and air filter to start off the 300,000km maintenance program

The car is going through it's annual roadworthyness check next week so fingers crossed they don't spot anything major!
 
Back