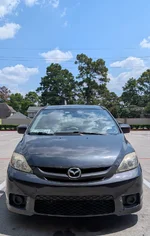
What have you done to your Mazda5 today?

Well, not just today.. 😅

Week ago i took my headlights apart and painted the crome housing dark grey.
PSX_20250720_174314.webp

PSX_20250720_174447.webp


After painting I left them to cure.
And today, after a week I went back to my garage and istalled those housings.
I did also made the headlights shiny again by sanding them and used headlight vapor kit.
PSX_20250720_172815.webp

I think that they came out really nice.
Overall looks of the Mazda 5 came little bit meaner.
PSX_20250720_173615.webp
 
Well, not just today.. 😅

Week ago i took my headlights apart and painted the crome housing dark grey.
View attachment 342813
View attachment 342814

After painting I left them to cure.
And today, after a week I went back to my garage and istalled those housings.
I did also made the headlights shiny again by sanding them and used headlight vapor kit.
View attachment 342815
I think that they came out really nice.
Overall looks of the Mazda 5 came little bit meaner.
View attachment 342816
That looks amazing! I was contemplating taking apart mine to do something similar, but I have never taken apart a head light housing before. Maybe if I pick some spares housings at a junkyard I could get around to it. But I am curious what a headlight vapor kit entails. I sanded and used the Spraymaxx clear which worked well, but it is peeling on the edges, since I didnt remove the headlights from the car when spraying.
 
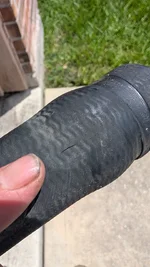
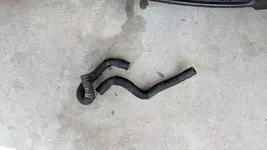
I was checking my oil when pumping gas, and noticed a small hissing noise coming from my intake. Upon further inspection I noticed that the radiator hose underneath the intake had a small leak and the hissing noise was the steam from the coolant. Car wasn't overheating and was running as normal. But I did top it off later on that day when the car had cooled off sufficiently.

Ordered some hoses online through O'reilys, since they could get them next day in the morning.
Gate's Coolant Hose GAT 24549 - Upper Radiator to Engine
Gate's Coolant Hose GAT 25428 - Lower Radiator to Thermostat

The Upper Radiator Hose from Gate's was actually a millimeter or two thicker than the OEM, so when I tried reassembling it with the old hose clamps, I found it super tight just getting the clamp on to the hose, and when I did get it on the hose, when the hose was on the inlet, it was damn near impossible to get the clamp to go over the inlet. So I went to the parts store and bought some 1 1/4 - 1 3/4 clamps. Those did the trick and I just used a tiny hand ratchet with 9/16 socket to tighten them up.

The Lower Radiator Hose was so much simpler. The hose had the clamps already on the hose with some sort of adhesive. So all I had to do was just slip both ends on to their respective inlets and use the pliers to snap the clamps shut.

Then just put the intake/air box back on, got my funnel kit, and started topping off the radiator until I would stop seeing bubbles. Once it was full, I would fill the funnel up and then run the car as it would burp the rest of the system while getting up to operating temp. After 10-15 minutes I was seeing no more air bubbles. Shut the car off, let it cool down so the rest of the coolant in the funnel would recede once cooled. Follow with an additional top off and slapped on the cap.
 

Attachments

  • PXL_20250720_165546697.MP.webp
    PXL_20250720_165546697.MP.webp
    143.1 KB · Views: 5
  • PXL_20250720_170005372.MP.webp
    PXL_20250720_170005372.MP.webp
    360.1 KB · Views: 5
I managed to do little bit sound deadening.
I took the front seats off removed the carpet as much as possible.
PSX_20250723_180221.webp


The added as much I could 2mm butyl based deadening.
PSX_20250723_180305.webp

Forgot to take second picture when the passenger side was also done.

Made a little difference, not a luxury vehicle still..
But now on highway the noise "stage" feels little bit higher.
That the noise isn't coming so much underneath.

I think it was worth it, even tough most likely my kids won't notice anything. 😂
 
Back