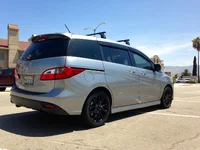
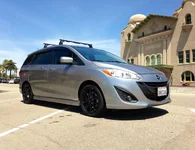
What have you done to your Mazda5 today?

^^ Didja get the one specifically for the 5 or one meant for the 3? I'll be interested to see what you think of it. I wish there were more options available for headers for these things...

I got the one for the mazda3. Its the same header that guy Dima put on his 5. He said he liked it and he felt a difference.I hope the install dont kick my butt too much. I think I will use my G Tech and do some before and after 0-60 runs to see if there is much of a difference.
 
Keep us updated on it. I'm just starting down the slippery slope with mine, looking at messing with the exhaust, maybe removing the resonator to start. I'm thinking the gains would be easier to feel on a stick shift 5 so I'm not 100% sold on the idea of a header for mine.
 
Finally put on the MS3 RSB. Paired it with Prothane bushings and Moog MS3 end links. The MS3 Moog end links are tricky to put on but there's a trick. This is how the car should have rolled off the assembly line! Still unsure if I want to do the FSB too... Next month or two, hope to put on the MS3 brakes back on and if time permit do the Coilovers.


EDIT:
Moog end links are MUCH beefier. For those considering Moog end links, it can be a pain to install. There's an opening to slide in an open wrench to hold the it down while you tighten. You then need a locking vice grip pliers to hold the wrench steady. I dont have one but a ratcheting wrench would be very helpful. Moog does NOT use center allen wrench to hold it down like OE end links.


MS3 OEM bushing collars are nothing more than crimp-on. You can easily unclip it and move to anywhere you want.


The black nuts are from the Moog kit. I like the MS3 nut more (taller and has locking channel inside) so I reused them. The left most are the dinky Mz5 nuts.


End product. The Prothane buisngs look like that is the size it should have came out of the assembly line. MS3 using the same OE bushing clamp as the Mz5, different bushing size.


Finish product. I did not have clucks to start with but no new noise either. The rear end is much tighter (not stiff).

I went the exact same route...those moog links are definately a PIA, but look like they should hold up for a long time. I got a cheap set of thin wrenches to avoid tearing the boot. Mine did make some noise for the first couple weeks. Also, the info about the adjustable OEM collars is a big help! I did not even notice they were moveable. The passenger side endlink has been sitting at an angle, but since it hasn't been creating any issues I was going to leave it. I will be re-aligning things as soon as I have a few minutes to get back under there.
 
I went the exact same route...those moog links are definately a PIA, but look like they should hold up for a long time. I got a cheap set of thin wrenches to avoid tearing the boot. Mine did make some noise for the first couple weeks. Also, the info about the adjustable OEM collars is a big help! I did not even notice they were moveable. The passenger side endlink has been sitting at an angle, but since it hasn't been creating any issues I was going to leave it. I will be re-aligning things as soon as I have a few minutes to get back under there.

So you didn’t figure out the trick :)

If you take a look at where the rear LCA mounts to the rear cross member, you’ll notice there’s a slit opening. This slit is a “just” big enough opening to allow you to insert an open ended wrench inside of the hollow LCA, which then catches the head of the end link and voila! I used a standard (14 or 15mm, I think?) Craftsman wrench so nothing special from an everyday wrench. You have to pay attention to orientation of the wrench as the open end side has a slight angle. A locking vice or helping hand is needed to hold it in place. Oh, careful not to over tighten or the wrench will get stuck -don’t ask how I know :p. Once there’s enough friction to hold the end link without the wrench, remove wrench and tighten the rest to sepc. It was as though Mazda made that slit there for aftermarket end links (OE links use allen wrench to hold it down).


Review Update: I definitely enjoy this mod. There’s a noticeable improvement in the rear rotating more on turns. This car is already pretty good on tight turns and U turns (folks like 0-60, I like small turn radius -go figure), this makes it even better :). However, I feel the car is not as stable as before. I’d summarize it as feeling a tad dart-y. This could be a mix of things, which I won’t get into. I’m sure some (most) of you are probably opposed to a beefier FSB on a FWD car but I think it will help to better balance the car if you upgrade the RSB. I can’t image what it is like on the stiffest setting of an aftermarket bar + OE FSB. Problem is you need to drop the front sub-frame to get the FSB out. Wouldn’t be as much of a concern if the car was new but can be an unnecessary challenge on a 5+ year NE car.
 
Last edited:
So you didn’t figure out the trick :)

If you take a look at where the rear LCA mounts to the rear cross member, you’ll notice there’s a slit opening. This slit is a “just” big enough opening to allow you to insert an open ended wrench inside of the hollow LCA, which then catches the head of the end link and voila! I used a standard (14 or 15mm, I think?) Craftsman wrench so nothing special from an everyday wrench. You have to pay attention to orientation of the wrench as the open end side has a slight angle. A locking vice or helping hand is needed to hold it in place. Oh, careful not to over tighten or the wrench will get stuck -don’t ask how I know :p. Once there’s enough friction to hold the end link without the wrench, remove wrench and tighten the rest to sepc. It was as though Mazda made that slit there for aftermarket end links (OE links use allen wrench to hold it down).


Review Update: I definitely enjoy this mod. There’s a noticeable improvement in the rear rotating more on turns. This car is already pretty good on tight turns and U turns (folks like 0-60, I like small turn radius -go figure), this makes it even better :). However, I feel the car is not as stable as before. I’d summarize it as feeling a tad dart-y. This could be a mix of things, which I won’t get into. I’m sure some (most) of you are probably opposed to a beefier FSB on a FWD car but I think it will help to better balance the car if you upgrade the RSB. I can’t image what it is like on the stiffest setting of an aftermarket bar + OE FSB. Problem is you need to drop the front sub-frame to get the FSB out. Wouldn’t be as much of a concern if the car was new but can be an unnecessary challenge on a 5+ year NE car.

just for clarification, you are running a 2008 GT with stock suspension, and an upgraded rear sway bar only?
 
So you didn’t figure out the trick :)

Yup I did (actually my wife did, she wanted to help and has small hands), but my standard wrenches had to go partially on the boot, and I didn't want to lift up the boot and get grease everywhere. Or tear the boot.

just for clarification, you are running a 2008 GT with stock suspension, and an upgraded rear sway bar only?

He's got a 2012.
 
just for clarification, you are running a 2008 GT with stock suspension, and an upgraded rear sway bar only?
stock '08 GT +KYB GR2 in the rear and worn tires that are overdue for rotation.


Yup I did (actually my wife did, she wanted to help and has small hands), but my standard wrenches had to go partially on the boot, and I didn't want to lift up the boot and get grease everywhere. Or tear the boot.
Cool. Always nice to have an understanding and helpful significant other. You shouldn't need thin wrenches but bottom line it's done. Enjoy the car. How do you like it?
 
stock '08 GT +KYB GR2 in the rear and worn tires that are overdue for rotation.

cool, exactly what we have, with the exception of the KYB's - i installed koni yellows in the rear.

i've been looking for a set of speed3 (or comparable) sway bars, but i would want to install front and rear.
 
stock '08 GT +KYB GR2 in the rear and worn tires that are overdue for rotation.


Cool. Always nice to have an understanding and helpful significant other. You shouldn't need thin wrenches but bottom line it's done. Enjoy the car. How do you like it?

Oops, thought you had a 2nd gen...must've got you confused with someone else on here. I know there's someone around here that put the ms3 rsb on a 2nd gen. And she can definately be helpful, though the only car I think she actually enjoyed working on was the '99 miata we had.
 
I'm a little late...but 2 weeks ago I took a day trip to Yosemite with a good buddy...Mazda 5 did great.

tQBY6tO.jpg


jtPgcDX.jpg
 
Oops, thought you had a 2nd gen...must've got you confused with someone else on here. I know there's someone around here that put the ms3 rsb on a 2nd gen. And she can definately be helpful, though the only car I think she actually enjoyed working on was the '99 miata we had.

That would be me!!! I have the 2012 with a 1st gen MS3 sway bar, end links and Prothane bushings. Awesome set up btw!!
 
New freshly painted gloss black heels for my girl!
 

Attachments

  • image.webp
    image.webp
    263.9 KB · Views: 263
  • image.webp
    image.webp
    306.7 KB · Views: 244
You need gas?

Or that you are trying to look like a manual trans car... when your dash tells a different story. lol.
 
Both lol, yeah, I've always liked the look of manual cars ( previous car was a 5-speed) and eventually I'd like to add a color shift boot to change the monotone black and grey of the interior interior.
 
Thats a really cool idea! I like it a lot. You never really look at the shifter when you are putting it in gear and such, that what the dash display is for! I'm going to assume that you just ordered a manual trans shift surround and it goes right over the auto shifter, right? Or did you also shorten the shifter? And yes, Davicho the compliment was directed at you car is looking GOOD.
 
Yeah, I was able to acquire the entire bezel on ebay. You will have to dremel some of the material away. In park mode the rod will interfere with the inner bezel that sandwiches the shift boot to the visible outer bezel.

tf3l.jpg


Another thing is you will have to completly removed one of the feet that screws on the the visible outer bezel because it makes the bulge a bit, but that's if you really want to be picky. I've decided not to remove it yet because I'll be getting a colored shift boot in a bit and that's when I'll finish the adjustments. This images shows what parts of the inner bezel will need to be cut (the picture shows the underside):

c94h.jpg


One thing, you don't have to cut all the way across, you can get away with cutting only half the big yellow rectangle. I made my first cut on the right hand side of the picture, but then found out I really need to do the left hand side, so said screw it and went across.

Internally of the auto shifter you'll need to remove the clear plastic that distributes the green LED light to the drive modes and the housing too. The cover that has a ribbon looking plastic part will also have to be removed and the white plastic bracket that is used for when the car doesn't want to disengage from park mode (careful not to loose the spring in case you want to reverse the mode)
 
Last edited:
Back