Installed some Mazdaspeed Alloy Sports Pedals recently. Love it.
See Post in Mods & Accessories for photo
See Post in Mods & Accessories for photo
Last edited:

^^^ Product details? How are they working out?
")


... so I bought a screw-in folding one and fitted it on the centre console;
Where did you get this? Did you use self tappers?
Bought it and took it home! Got it in red. Hello everyone!
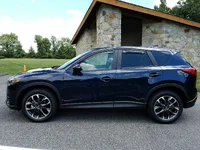
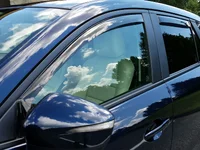
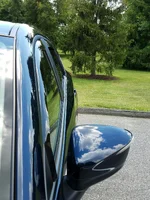
Last night after dinner I installed the WeahterTech vent visors. Waited until today to take some pics since she needed a bath first. First set of WeatherTech that I have bought and install was simple. I was scared I was going to snap them when bending them into place. I also had to use some double sided tape on the back edge of the front window visors. When I lowered the windows and released the pressure off of that back edge it would fall back and the window would hit it and stop when I tried to raise them. Easy enough fix but something I think WeatherTech should have discovered during the research phase. Opted for the dark color vs. the light color.
Did you leave the windows up for 12 hours like they say to do for windows with the auto-up feature? With regular windows you roll them up/down about 5 times or something, but on auto-up windows they say to just roll it up once and leave it up for 12 hours.
Odd, I thought all WeatherTech visors had tape.