In need of advice for a Timing Belt Install....

north42g

Member
:
Mazda Protege5
Hello all-
I am in the middle of replacing my timing belt (and related components) I am having trouble keeping the Camshaft Sprockets to stay in line. They continue to rotate about a tooth or so out of spec. Its making it rather difficult to get the belt on in correct time.
Does anyone have any tips or advice?
Its getting very frustrating!
Thanks You.
 
I know exactly what you're dealing with. It would Really help if you had someone to hold the two wrenches on the cam shaft bolts in place while you put the belt on. I didn't even know until I was done, there is a hexed spot on each cam shaft that you can put wrenches on, then zip tie them together which helps to hold everything still.
I ended up using both hands, both elbows and about 4 hours (including frustration breaks) to finally get it right. I had the damn belt on and off almost a dozen times,... I was very annoyed. MAKE SURE that you turn the crankshaft over at least twice and re-check the marks. About three of my dozen times it looked perfect until I spun everything and they off by a tooth. I finally realized that I was always off by a tooth so I set the belt off by a tooth in the other direction at the start and finally got it. The two zip tied wrenches may very well have saved me a lot of head-ache. If it looks right spin it all around a whole bunch of times and re check it at least a couple of more times.
I also realized that the tensioner was always in the way and pushing it out of the way all the time may very well stretch the spring, so I used a length of thin wire with a small loop in the end and attached it to the "pin" end of the spring. That way I could attach the spring to the pin when everything was done by pulling on the wire and using a small flat head screwdriver, was able to hook the spring on the pin and then remove it from the spring. It's almost impossible to reach in there and attach the spring after the belt is installed. The spring can only be attached to the tensioner itself before it's installed.
 
Last edited:
yeah, this is a tough one. I have completed timing belts on various other engines/vehicles with little trouble, but this one isn't cooperating!
So what you are saying is to zip tie two 14mm wrenches together? Are you talking about the the 14mm bolt that holds the camshaft sprocket to the camshaft? I think I understand. Could you elaborate on that procedure please?
 
I haven't actually done it myself,... just read about it. I'm thinking you use the hexed part on each cam shaft instead of the cam bolts. The wrenches are kinda in the way on those bolts anyway. I haven't even seen the hexed spot on the cams,... I learned about them after doing the job. I think you just put two wrenches on the hexes of the cams and put a zip tie connecting the boxed ends together (I haven't even seen a picture of this) and that at least hold the two so they both have to move together,... my guess is there would be enough friction to the movement that it would hold still. I noticed the Exhaust valve lobe on #1 cylinder is just starting to push on the lifter so it springs back from its timing position under a bit of tension.
I think the wire on the spring is a great idea as well (I did do that) because it helps prevent over stretching the spring. That spring is always active,.. some timing belt systems just add preload to the tensioner wheel then the wheel is locked down when you tighten it. Our tensioner wheel is always moving.

One guy mentioned to put some paint marks on the belt and all three gears. If you get it all on again and it's off by a tooth again,.. put a paint mark starting at the crank where the belt is touching the gear (mark the gear and belt tooth) and the timing mark is lined up. Then mark the two cam gears the same way but mark the tooth of the belt where it Should be, not where it's wrong, that way on your next attempt, you'll know if it's the right tooth (especially on the exhaust gear). There's so much slack until it's on, you don't know if it's right until you spin it a few times.

I hope this helps,... I remember having to take about five smoke breaks doing it,.. I was ready to take a hammer to everything. Remember I was holding the the cam gear wrench with my elbow while using both hand to feed the belt on,... what a freakin challenge,... it's a good thing I'm flexible.
 
Last edited:
I got it! What I did was; I used and old plastic handle from a broken flat file and stuck it inbetween the cams, adjusting the cams so they were a tooth off in either direction so when they rested against the plastic handle, they could only go so far, thus forcing them to be in line. (I tried to describe it the best I could, I hope you get what I mean.)I should've taken a picture but I was just happy to have the belt finally on.

Next question: when adjusting the tensioner...with the spring in place, using the 6mm hex key/allen wrench rotating clockwise, until belt tension is reached, then I tighten the 14mm bolt. after the 14mm bolt is torqued to proper spec, should the tesioner be 100% fixed in one position? OR does the spring allow the tensioner to have a little "play" in it?

I tightened the 14mm bolt on the tensioner and I am still able to rotate tensioner in either direction slightly. What are you thoughts on that?
 
Ok thanks. I just re read the shopkey5 install proceedure. Says to install belt around Crank then Idler pulley, then around both Cam's , letting belt rest against installed tensioner WITH-OUT spring installed. Rotate Crank twice to check timing.
THEN install spring over hook. Again Rotate Crank twice to check timing. And if all checks out...Then all is well.
 
yea but getting that spring back on is a pain i had to use a few small zip ties looped into each other to ook the spring back on cuz that spring is sharp n will puncture ur skin
 
^^ yea, that's why I tied the wire to the end of the spring, It's really hard to reach in there.
The tensioner remains "active" when fully installed,.. which I question,... is it not possible for the crank shaft to decelerate faster than the cams at some point, forcing the tensioner out of the way and putting slack on the wrong side of the crank gear leading to a skipped tooth ???
 
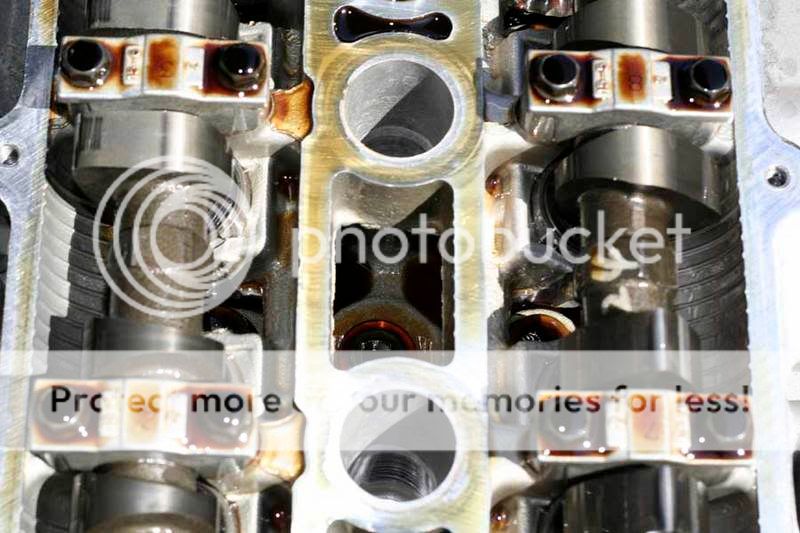
19mm Wrench on the cam to hold it in place..

Where the #4 is on the Ex Cam..
cams2.jpg
 
Not my pic but I've used that technique three times now. Works like a charm. :)
 
^^Awesome I will keep that in mind,.. only 91,000 more km till I get to try it!!
 
I have a red plastic tool that I bought off the tool truck. maybe Snap-On, it is a Cam sprocket holder. It is supposed to be universal, fitting all size cam's. But not this time...didn't work so hot. It fits inside the teeth of each sprocket holding them in place. It has worked very well on other DOHC engines. Volvo, Chrysler, Honda...it doesn't like this FJ Mazda size cam for some reason. Oh well, I got it done. Thanks every one.
 
Back