
You are using an out of date browser. It may not display this or other websites correctly.
You should upgrade or use an alternative browser.
You should upgrade or use an alternative browser.
NB MX-5 Hey, it's Minnie!
- Thread starter chiefmg
- Start date
- :
- 92 & 16 Meyatas
Update needed!
- :
- 92 & 16 Meyatas
Whatever
- :
- 92 & 16 Meyatas
Still waiting, patientlyPatience is a virtue. I'm at work now. All I can offer is that my last package is at the house, it'll have to tide you over for another three months.

Still waiting, patiently
No, you're not. You're not fooling anyone. Just for that, I'm staying another three weeks.

Don't let it go to your head. Our schedule got changed, and my usual relief decided he wanted to sit out this rotation so they had to find someone else. That's been done so just have to wait it out at this point. At least I will have almost the whole month for pay (been spending some money, just not on the Miata).

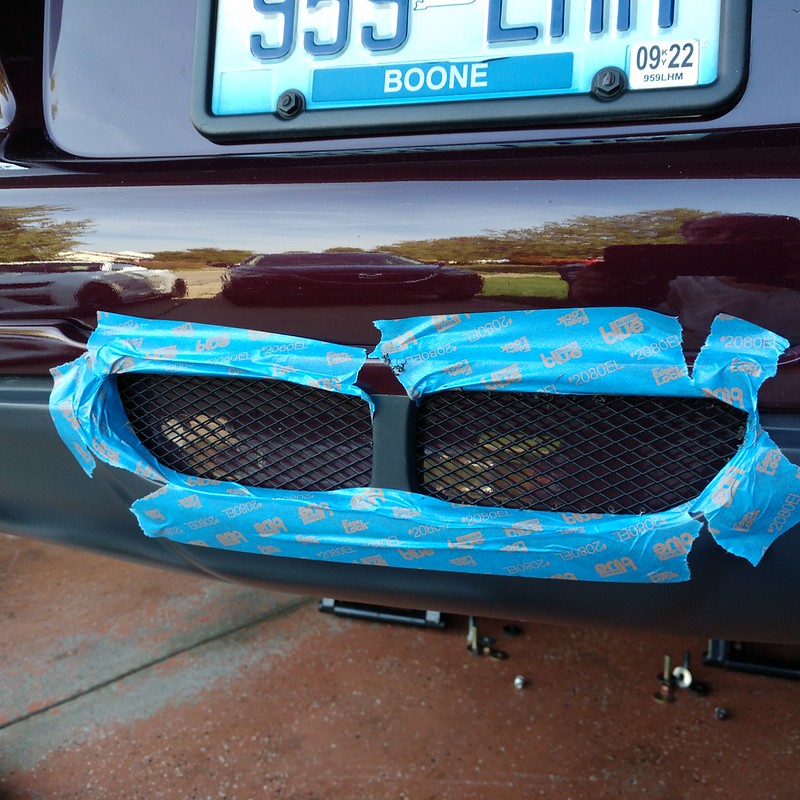
I decided to cut out the opening in the bumper cover to allow airflow through the mesh in the upper diffuser. Got started on that this morning. First thing was to put some tape around the opening for protection against the drill (note: this didn’t completely work but it mostly did):
Next was drilling some pilot holes around the periphery of the opening as so:
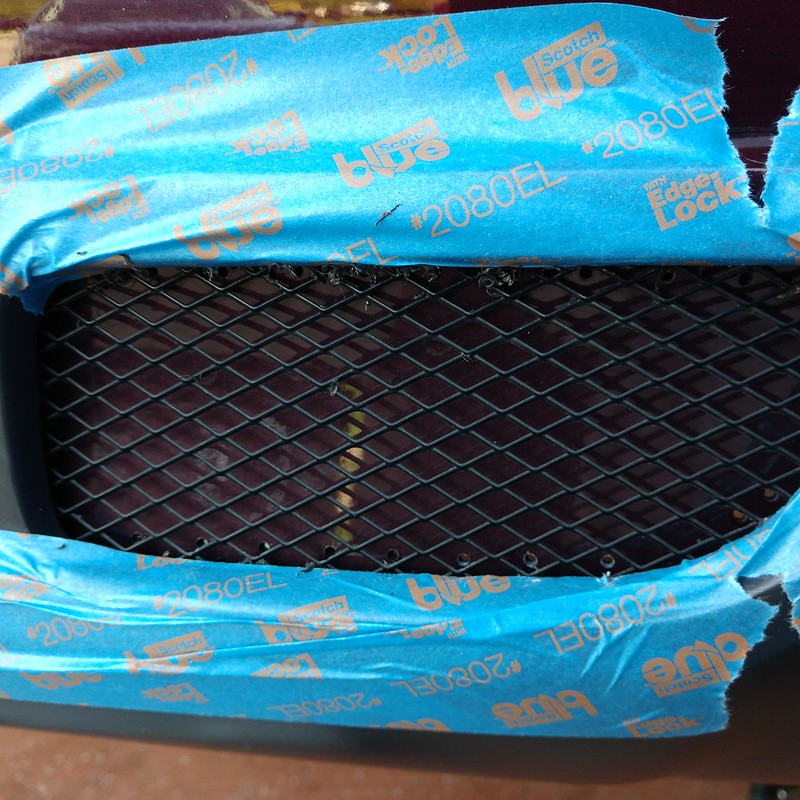
Here is how that turned out:
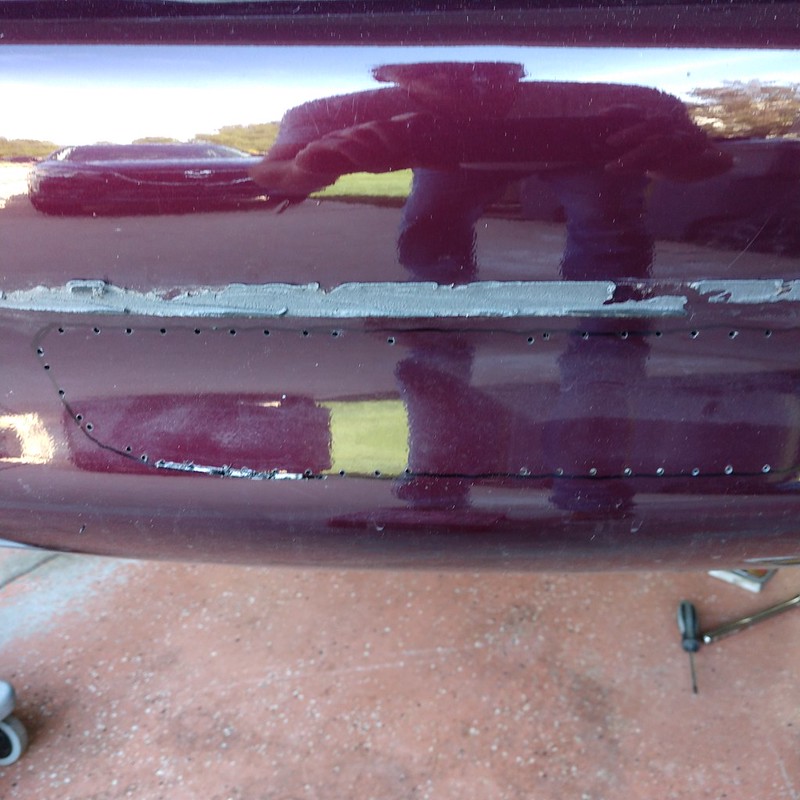
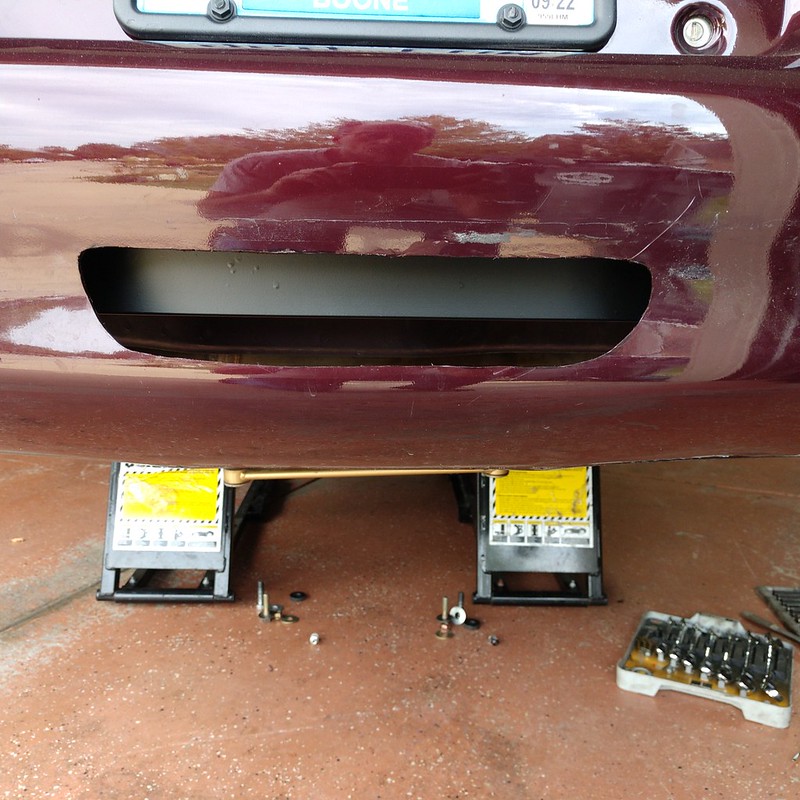
I connected the dots with a Sharpie (so to speak) to give me a line to follow. I tried cutting the bumper cover using my multitool but ended up using a cutoff wheel in my Dremel. Here is the end result before sanding:

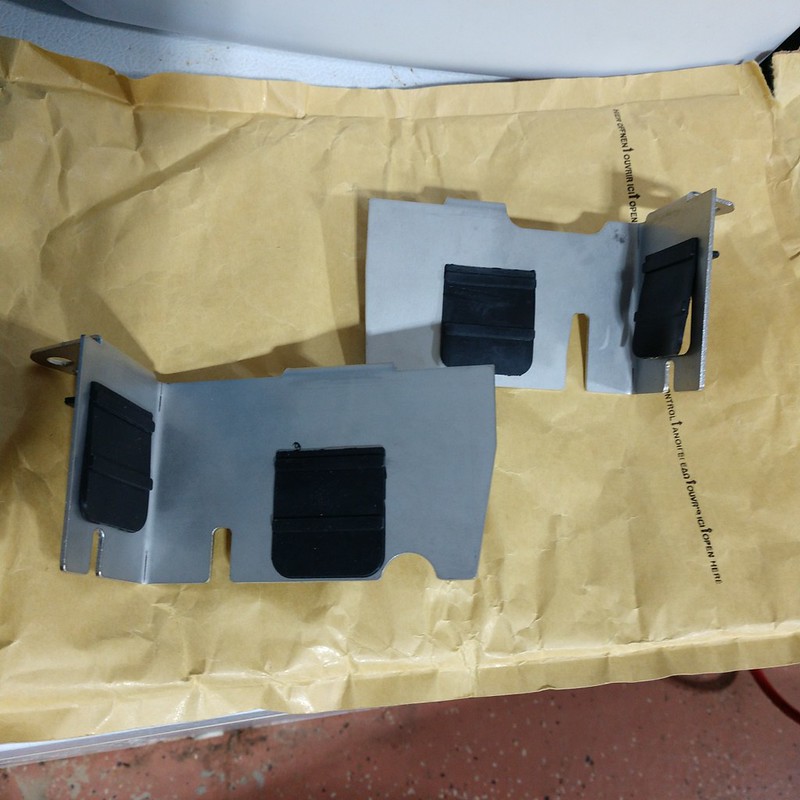
As you can see, the bumper reinforcement is showing behind the cutout. In order to keep that from standing out I used some of this to coat the area behind the cutout:
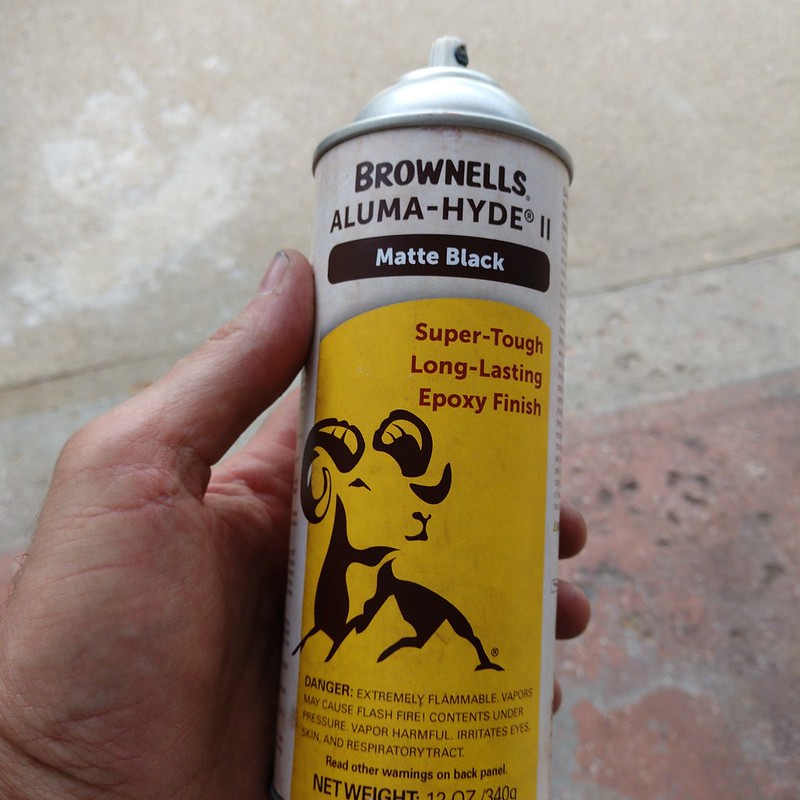
This is sold for coating firearms, seems to work well for this application too. Once everything was done and back together, here is how it looked:
After that I just assembled everything again. Biggest PITA was removing all the double-sided tape from the upper diffuser and cleaning it all up. I installed the speed nuts I bought last time home, they worked a treat when putting the screws between the upper and lower diffusers:
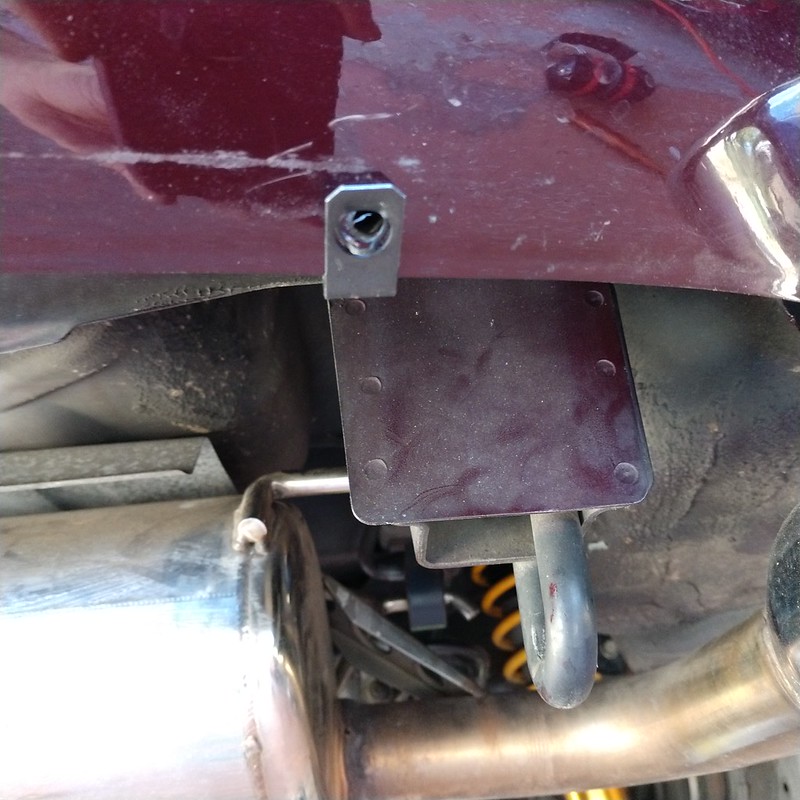
Before I buttoned everything up, I ground off the extra muffler hanger I installed last time and relocated/welded it. Unfortunately after a short test drive the muffler ended up offset to the left as it was before. I guess I’m going to have to look at this closer to get it fixed right. No final pictures as you have seen it all before, and it’s hard to see the opening behind the mesh unless your face is right there. I am sure I gained a few MPH due to not having the bumper cover act as a parachute. I do need to do a little cleanup around things thanks to using acetone for cleaning the old double-sided tape off. I figured six hours of work today was enough.
Next was drilling some pilot holes around the periphery of the opening as so:
Here is how that turned out:
I connected the dots with a Sharpie (so to speak) to give me a line to follow. I tried cutting the bumper cover using my multitool but ended up using a cutoff wheel in my Dremel. Here is the end result before sanding:
As you can see, the bumper reinforcement is showing behind the cutout. In order to keep that from standing out I used some of this to coat the area behind the cutout:
This is sold for coating firearms, seems to work well for this application too. Once everything was done and back together, here is how it looked:
After that I just assembled everything again. Biggest PITA was removing all the double-sided tape from the upper diffuser and cleaning it all up. I installed the speed nuts I bought last time home, they worked a treat when putting the screws between the upper and lower diffusers:
Before I buttoned everything up, I ground off the extra muffler hanger I installed last time and relocated/welded it. Unfortunately after a short test drive the muffler ended up offset to the left as it was before. I guess I’m going to have to look at this closer to get it fixed right. No final pictures as you have seen it all before, and it’s hard to see the opening behind the mesh unless your face is right there. I am sure I gained a few MPH due to not having the bumper cover act as a parachute.
I do need to do a little cleanup around things thanks to using acetone for cleaning the old double-sided tape off. I figured six hours of work today was enough.I noticed the upper diffuser was pulling away from the bumper cover. I figured the double-sided tape I had used was just old so bought some new 3M black tape yesterday. Removed the upper diffuser, cleaned it up and installed again. No pictures because it was just the same as before.
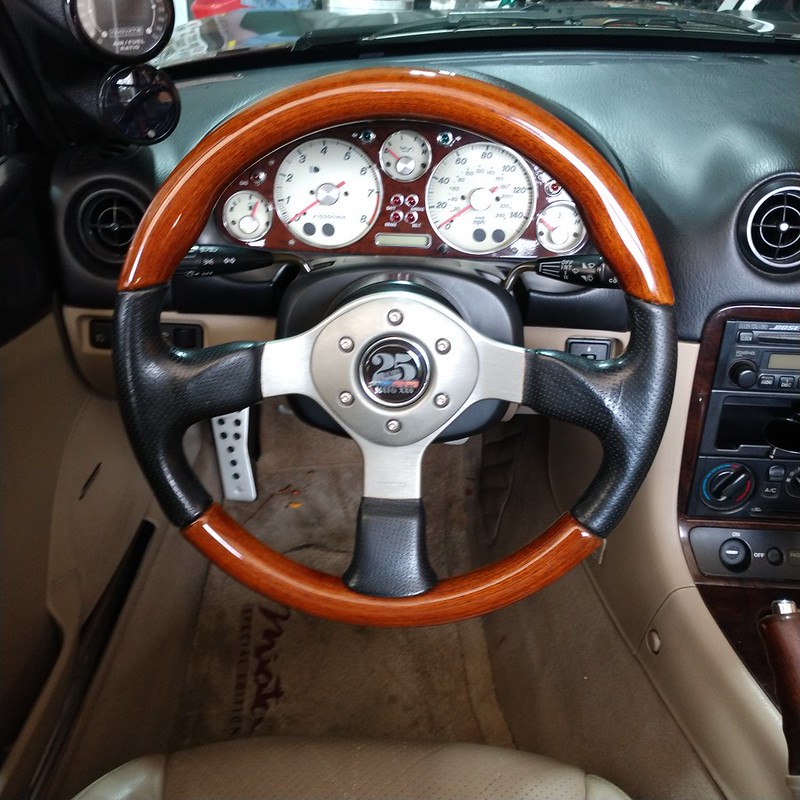
Today I stopped by a friend’s house and picked up the horn button he got for me from MATG 25. I couldn’t make it this year but I now have a memento.
I stopped by the dealer a few days ago and ordered the door weatherstripping because both of them had been damaged at the front from the windows going up too far. Picked up the passenger side today, the driver’s side doesn’t have a delivery date yet. I figure the restock is probably sitting on a ship off Long Beach so who knows when it will arrive?
A few days ago I decided I needed to make sure I hadn’t left the wideband output offset when I initially installed it. I couldn’t find the connection cable so ordered another one. Once that came in I removed the gauge thinking that all I needed to power the gauge was the connection cable. WRONG! So I had to put that back in place and connect the cable once the power was restored. As it turned out I had removed the offset but it was good to confirm that.
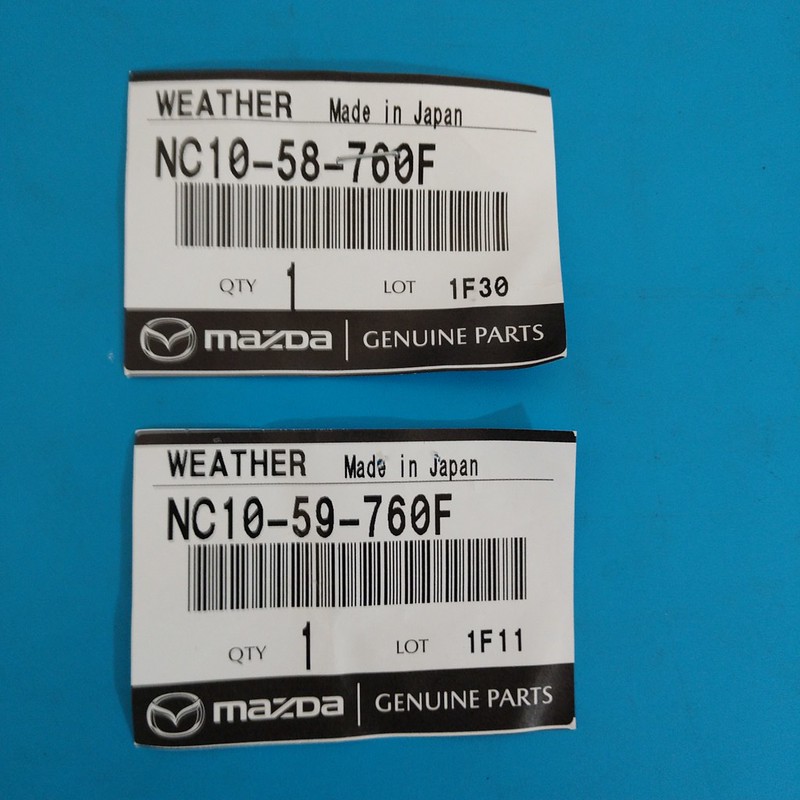
Yesterday the dealer called to say the other weatherstripping piece had arrived. I was wrong, the first one that showed up was the driver’s side and this was the passenger side. Reason I was wrong is because the larger part number is for the driver’s side (go figure). Here are the part numbers you want if doing this:
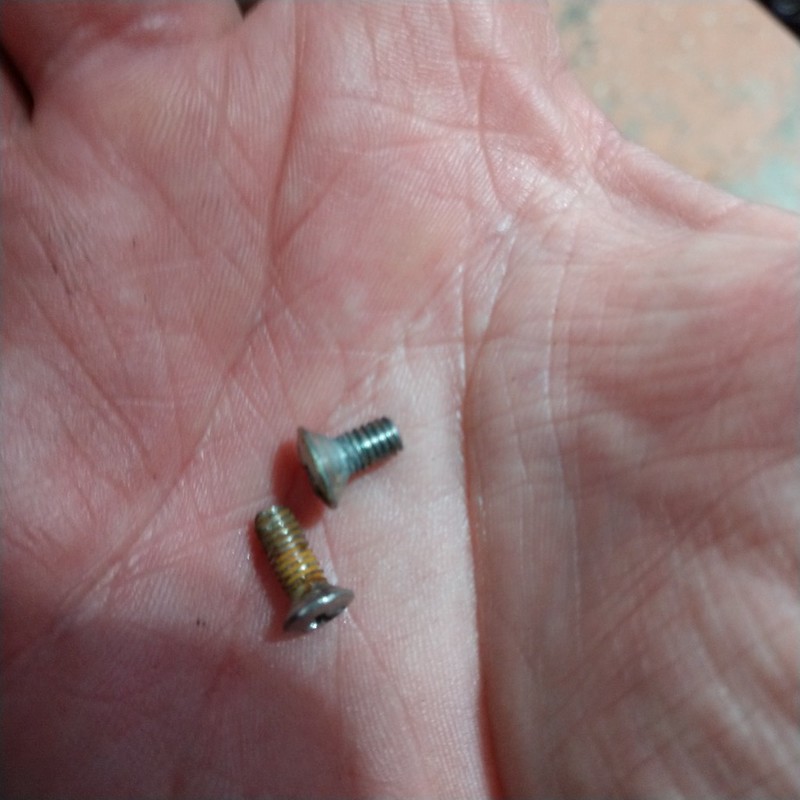
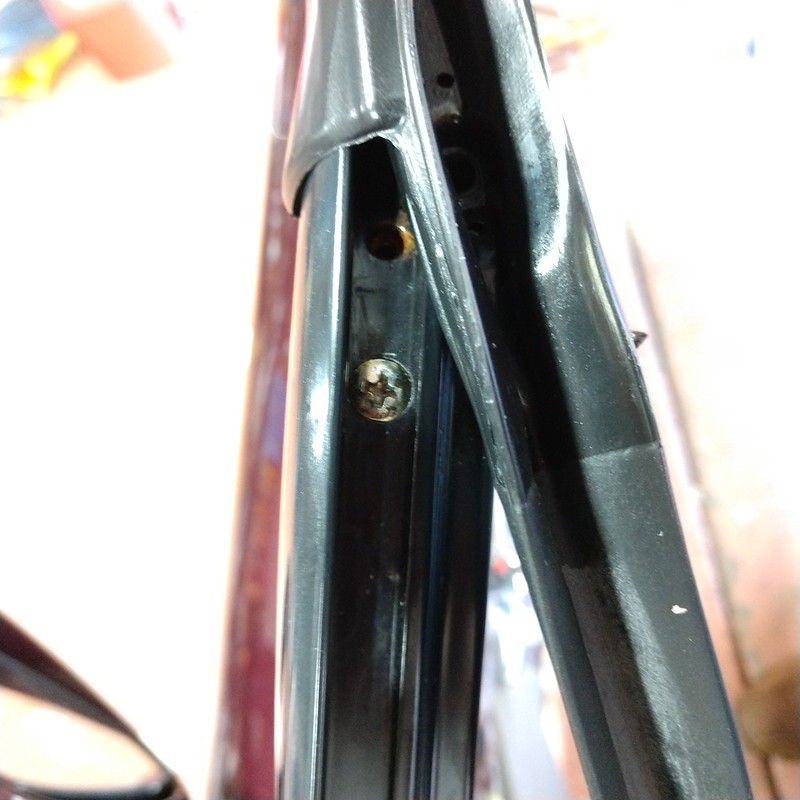
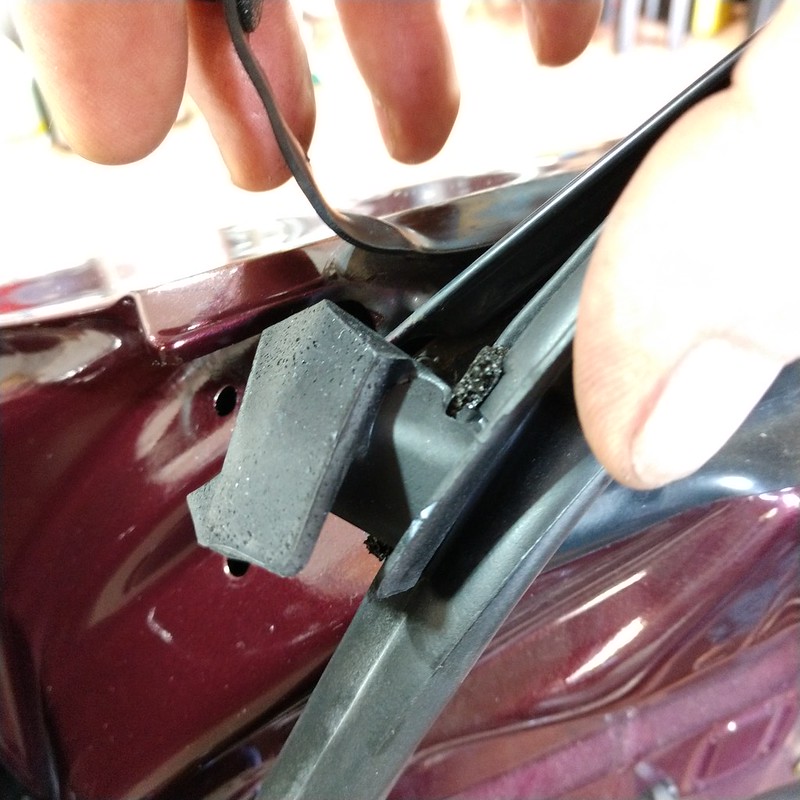
My schedule was slack today so I dove into the job. The first thing I did was adjust the window position and top weatherstripping using the factory manual to be sure everything was where it should be. I ended up lowering the forward window stopper on both sides, the other measurements were within spec. I also made some minor adjustments to the top strips on both sides so they would line up better. I should note I did the work on the driver’s side first then the passenger side (which is where I took all the pictures). First step is to remove the door interior panel. On the driver’s side I discovered one of the wires to my tweeter had broken and was intermittently making/breaking contact. This was probably the cause of my occasionally losing the left channel, so glad I found that. Once the door panel is off you need to peel back the vapor barrier at least in the front half. Next you want to remove the lower bolt holding the vertical piece for the vent window. Then go to the top of the window and remove the screw in that piece that is visible in the middle of the weatherstrip. The factory manual talks about removing the vertical piece but I just left it in place and loose. I then pulled out the part of the weatherstrip that goes down into the door on the vertical piece. Once that’s out continue peeling it back and then remove the second screw at the top of the vertical piece. Note that those two screws are different sizes. The larger diameter, shorter length screw is the one underneath the weatherstrip and will be in the hole towards the front of the door. See pictures below:
There are several plastic fasteners that you will need to reuse, one at the front of the door and one at the rear. I used some WD-40 to soak them prior to attempting removal. Fasteners are here:
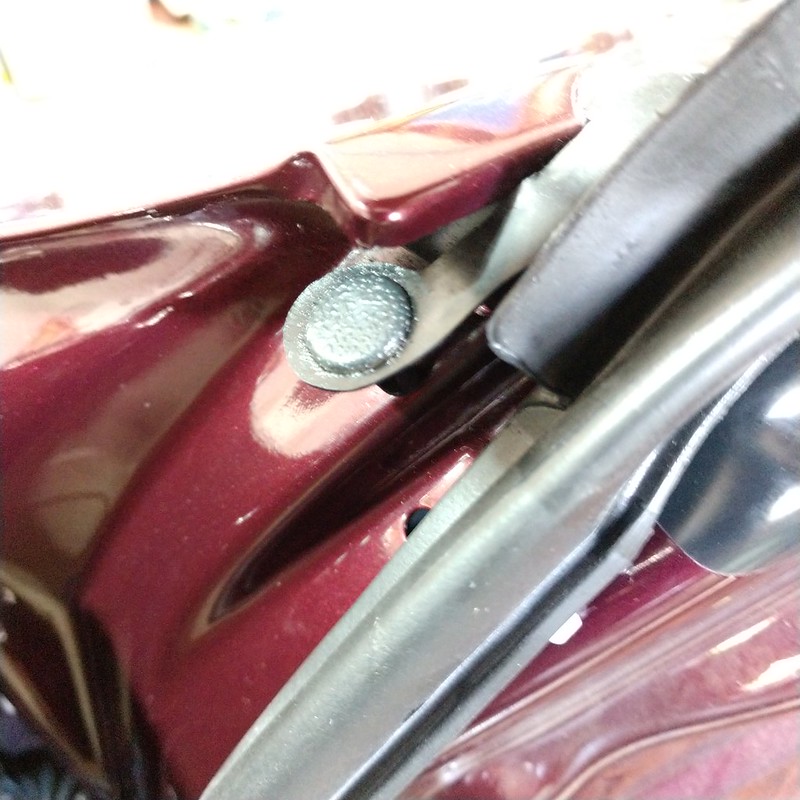
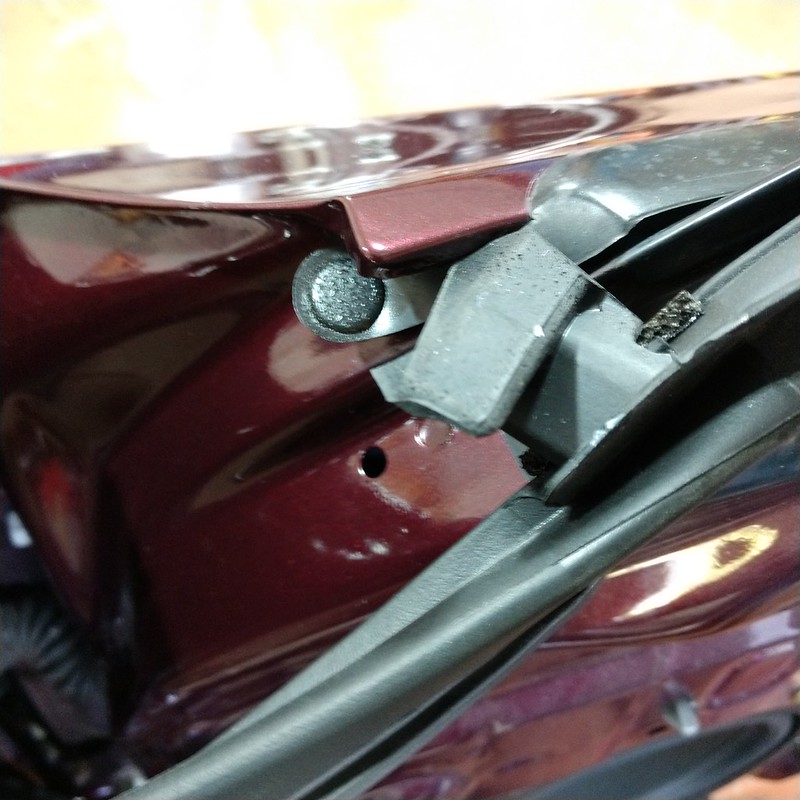
You can coax the large tab on the weatherstrip out from under the front fastener while it soaks. The new weatherstrip comes with two of the fasteners on the rear of the strip so you don’t have to be as careful removing those. What I did then was pull the weatherstrip off the numerous small fasteners located around the perimeter of the door, leaving those in place. I gave those the WD-40 treatment as well.
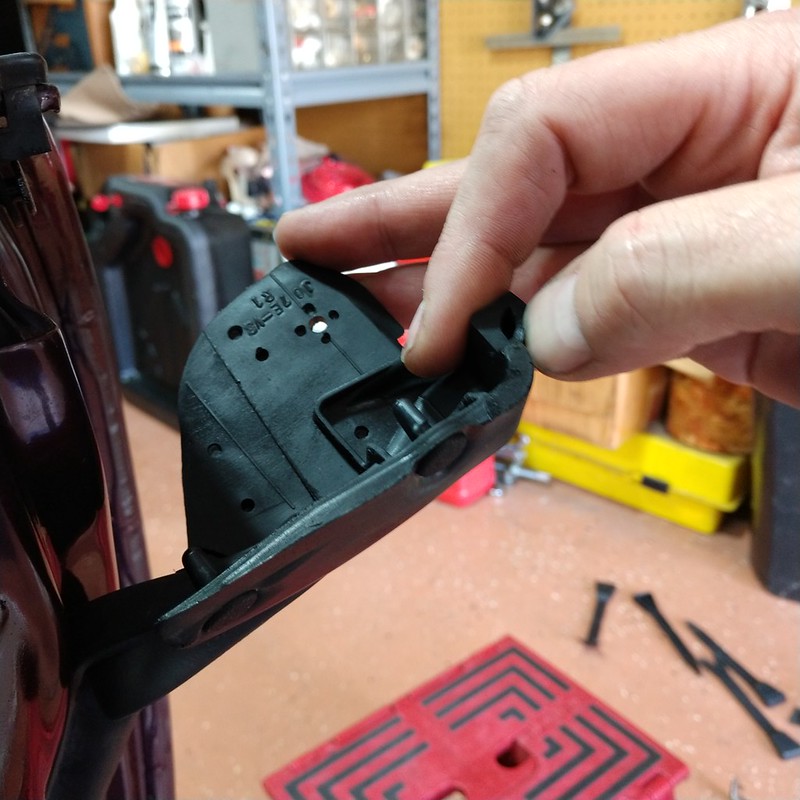
Here is what the weatherstrip looks like off the car:
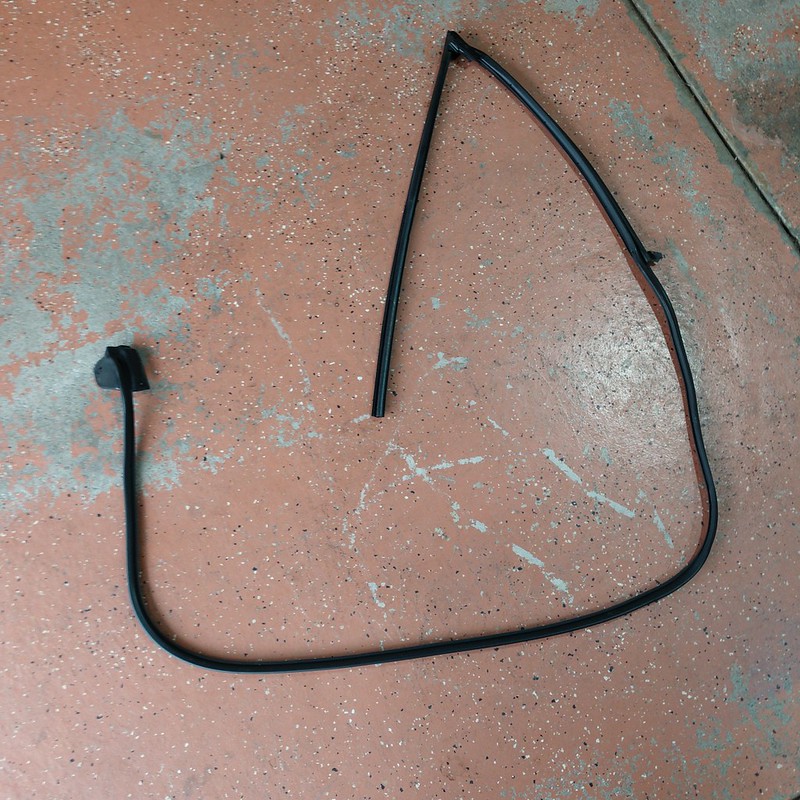
It’s a large piece as you can see.
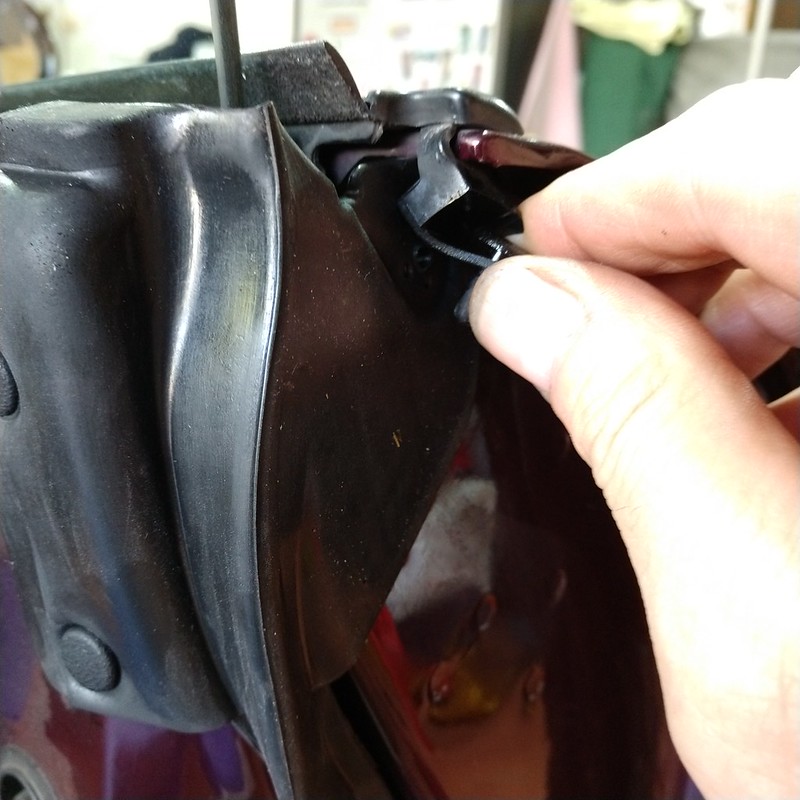
After a little soak time I started playing with different removal methods on the small clips. What worked amazingly easily was using a small flat-blade screwdriver to get underneath the flange on the fastener with the screwdriver held perpendicular to the wings of the fastener (see picture):
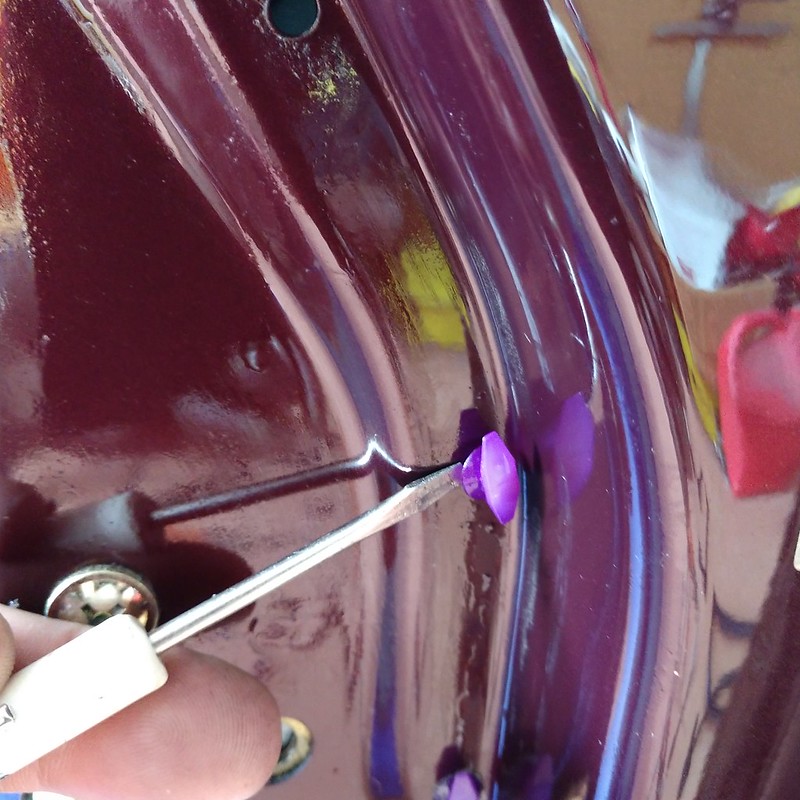
You push inward and the fastener will release at least on that side. While holding that side away from the door, rotate the fastener until you can access the opposite side and do the same. Voila! They pop right out. There were a couple that only required the push on one side to come out for whatever reason.
After that it’s just a matter of putting the new weatherstrip in place. I used some normal silicone spray to lube up the channels where I had to slip the weatherstrip in. I also used some ShinEtsu grease on the inside of the strip where the window would ride. I inserted the strip in the vertical window piece first, working it down until it was far enough that I could reach in the bottom and pull it down. Procedure looked like this:
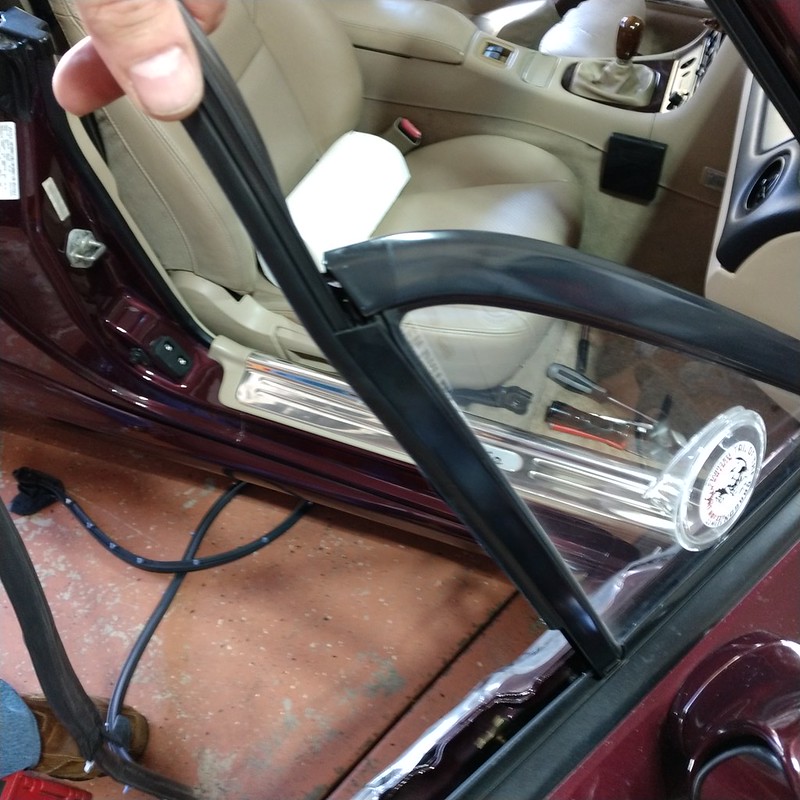
Once that is in place you just work your way around the door. One thing to watch out for is the routing on the hinge side, you need to go between the hinges and the stopper bar:
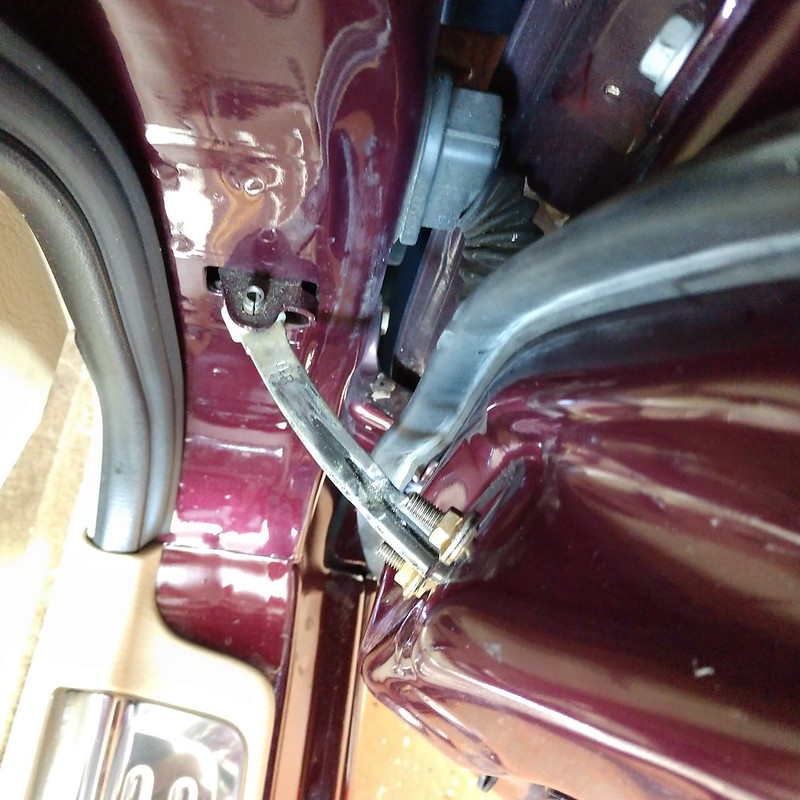
Put all the plastic fasteners you saved back in place and you are done. Well, after you install the door panel.
Yesterday the dealer called to say the other weatherstripping piece had arrived. I was wrong, the first one that showed up was the driver’s side and this was the passenger side. Reason I was wrong is because the larger part number is for the driver’s side (go figure). Here are the part numbers you want if doing this:
My schedule was slack today so I dove into the job. The first thing I did was adjust the window position and top weatherstripping using the factory manual to be sure everything was where it should be. I ended up lowering the forward window stopper on both sides, the other measurements were within spec. I also made some minor adjustments to the top strips on both sides so they would line up better. I should note I did the work on the driver’s side first then the passenger side (which is where I took all the pictures). First step is to remove the door interior panel. On the driver’s side I discovered one of the wires to my tweeter had broken and was intermittently making/breaking contact. This was probably the cause of my occasionally losing the left channel, so glad I found that. Once the door panel is off you need to peel back the vapor barrier at least in the front half. Next you want to remove the lower bolt holding the vertical piece for the vent window. Then go to the top of the window and remove the screw in that piece that is visible in the middle of the weatherstrip. The factory manual talks about removing the vertical piece but I just left it in place and loose. I then pulled out the part of the weatherstrip that goes down into the door on the vertical piece. Once that’s out continue peeling it back and then remove the second screw at the top of the vertical piece. Note that those two screws are different sizes. The larger diameter, shorter length screw is the one underneath the weatherstrip and will be in the hole towards the front of the door. See pictures below:
There are several plastic fasteners that you will need to reuse, one at the front of the door and one at the rear. I used some WD-40 to soak them prior to attempting removal. Fasteners are here:
You can coax the large tab on the weatherstrip out from under the front fastener while it soaks. The new weatherstrip comes with two of the fasteners on the rear of the strip so you don’t have to be as careful removing those. What I did then was pull the weatherstrip off the numerous small fasteners located around the perimeter of the door, leaving those in place. I gave those the WD-40 treatment as well.
Here is what the weatherstrip looks like off the car:
It’s a large piece as you can see.
After a little soak time I started playing with different removal methods on the small clips. What worked amazingly easily was using a small flat-blade screwdriver to get underneath the flange on the fastener with the screwdriver held perpendicular to the wings of the fastener (see picture):
You push inward and the fastener will release at least on that side. While holding that side away from the door, rotate the fastener until you can access the opposite side and do the same. Voila! They pop right out. There were a couple that only required the push on one side to come out for whatever reason.
After that it’s just a matter of putting the new weatherstrip in place. I used some normal silicone spray to lube up the channels where I had to slip the weatherstrip in. I also used some ShinEtsu grease on the inside of the strip where the window would ride. I inserted the strip in the vertical window piece first, working it down until it was far enough that I could reach in the bottom and pull it down. Procedure looked like this:
Once that is in place you just work your way around the door. One thing to watch out for is the routing on the hinge side, you need to go between the hinges and the stopper bar:
Put all the plastic fasteners you saved back in place and you are done. Well, after you install the door panel.
Gave her a bath today and was happy to note no dribbles on the inside of the windows as used to happen before my adjustments. Unfortunately I also discovered that the weld I did when relocating the fourth muffler hanger broke and the muffler was hanging low on that side. Safety wire to the rescue for now, will try getting back underneath tomorrow to fix that.
Put her up in the air after some cars & coffee this morning and set about rewelding that muffler hanger. Took me a couple of tries, I wasn’t getting good penetration with the tacks I made to target the hanger so I finally said screw it, pulled the muffler off and eyeballed the location (the tacks helped with that). Built it up pretty well on both sides, it ain’t pretty but seems pretty solid (at least it didn’t move when I hit it with my chipping hammer). After I got everything back together I went ahead and calibrated the wideband O2 sensor while I was under there.
One of my neighbors came over with some friends of his. He asked if I was boosted (he hadn’t seen the engine bay yet) so I said yes and opened the hood. One of the guys was saying something about having worked on Miatas as he walked to the front, then when he saw what I have he said, But not like this! It’s nice wowing people.
One of my neighbors came over with some friends of his. He asked if I was boosted (he hadn’t seen the engine bay yet) so I said yes and opened the hood. One of the guys was saying something about having worked on Miatas as he walked to the front, then when he saw what I have he said, But not like this! It’s nice wowing people.
I’ll be taking a trip in a few days and decided to use my hardtop, so I stopped by my storage this morning to pick up the side pieces I have cut for the side latches. Cleaned those up once home, installed them and put on the Beatrush lower latches.
While I was welding on the muffler hanger, I noticed the exhaust gasket I had been using at the muffler joint had been leaking. The Racing Beat site shows a round donut gasket as being used. I spent some time looking at the O’Reilly’s site (as well as Amazon) to try and find one I could get quickly. Turned out that O’Reilly’s had this one:

It’s a Nickson 31585, my local store had one in stock for $4.99. It doesn’t quite match the dimensions of the recess in the muffler (60mm ID X 85mm OD) but it’s not far off. I put that in this evening after doing the work on the side panels and the test afterwards shows it sealed nicely.
While I was welding on the muffler hanger, I noticed the exhaust gasket I had been using at the muffler joint had been leaking. The Racing Beat site shows a round donut gasket as being used. I spent some time looking at the O’Reilly’s site (as well as Amazon) to try and find one I could get quickly. Turned out that O’Reilly’s had this one:
It’s a Nickson 31585, my local store had one in stock for $4.99. It doesn’t quite match the dimensions of the recess in the muffler (60mm ID X 85mm OD) but it’s not far off. I put that in this evening after doing the work on the side panels and the test afterwards shows it sealed nicely.
Picked up and installed my hardtop. It was buried in my storage so took a bit to unearth it, I had just gotten everything stowed again and was driving off when it started spitting rain. Unfortunately I didn’t drive through enough rain to clean the dust off the top so she’s getting a bath as some point. Got home and proceeded to pull the wiper cowl to lubricate the wiper arm linkages. I used a PB Blaster product for that (a lube, not the penetrating oil). Checked/filled my spare tire, then started cleaning the interior. Got the vinyl and leather all cleaned, shampooed the carpet behind the seats as it was pretty dirty. Once that’s all dry I’ll be conditioning the vinyl and leather, and vacuuming the shampooed carpet. Finally, I set the rear spoiler to the middle (flat) position. You know, for less drag at speed.
Well my trip came to an abrupt halt Saturday morning. I was enroute in the dark and rain when I noticed it seemed like my dash lights were dimming. Thought maybe I was imagining things, then I noticed the wipers were slowing down. Started feeling dread, I turned around and headed back home (I had traveled fifty miles at that point). About twenty miles back everything got worse, then I got the E9 error on the wideband followed by my headlights just going out. I knew what that meant, I was already headed for an exit but I still had to drive in the dark and rain with no lights for two miles. Managed to keep her going long enough to pull into a gas station. Sat there for about ten minutes to let the battery recover, then she fired right up. Made it the rest of the way home without event (helped that it was getting light out so less electrical load). It’s frustrating because I thought when I replaced the alternator last year that took care of this particular issue, and it hadn’t made any sort of appearance since. When I get home I have some troubleshooting to do. It is either a bad alternator or a problem with the regulator circuit in the Megasquirt.
Got home from training, after recovering from driving 1100 miles in 15 hours 47 minutes I had a look today. Despite the CEL coming on every time I started her for my trip (three times if you’re counting), the CEL never lit. Battery measured 12.7 volts beforehand. Fired right up, measuring voltage while she was running at high idle and got 14.5 volts. I was going to do some datalogging but for some reason it wouldn’t start. So now I am left with a mystery. Just going to drive her some and see what transpires. Will try firing up as many electrical drains as I can to see if that causes anything.
So far haven’t been able to figure out the charging situation. Have to keep on it.
Last week I had the chance to buy one of the Moss Miata front grilles locally so took it. When it showed up it looked like the UPS folks tried folding it up in two places. Luckily I was able to fold it flat with no distortion (helpful hint: if you ship something lightweight that can be bent, back it up with some sort of board. Cardboard won’t cut it). I removed the old grille by pulling the two socket head capscrews used. Here’s a picture of the old and new together:
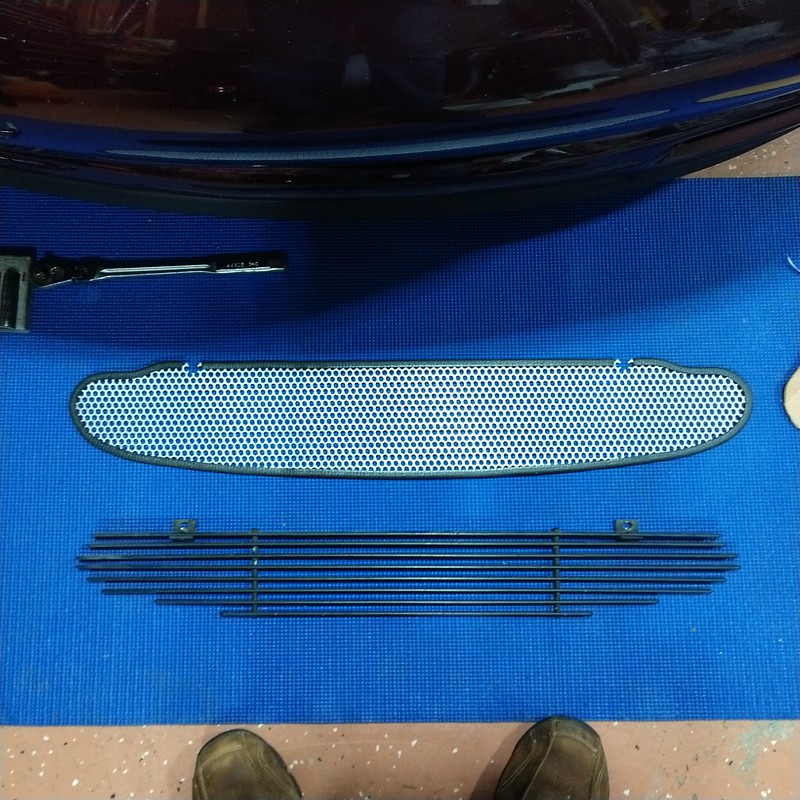
The installation instructions say to remove the baby teeth. Mine are gone but I do have a tow hook which came in handy once so I left it in place. This required some cutting on the new grille. I made a cardboard template, mocked it up in the bumper and marked where the cut should be. Once that was all done I transferred the marks to the grille and cut it using aviation snips. Here is how that ended up:
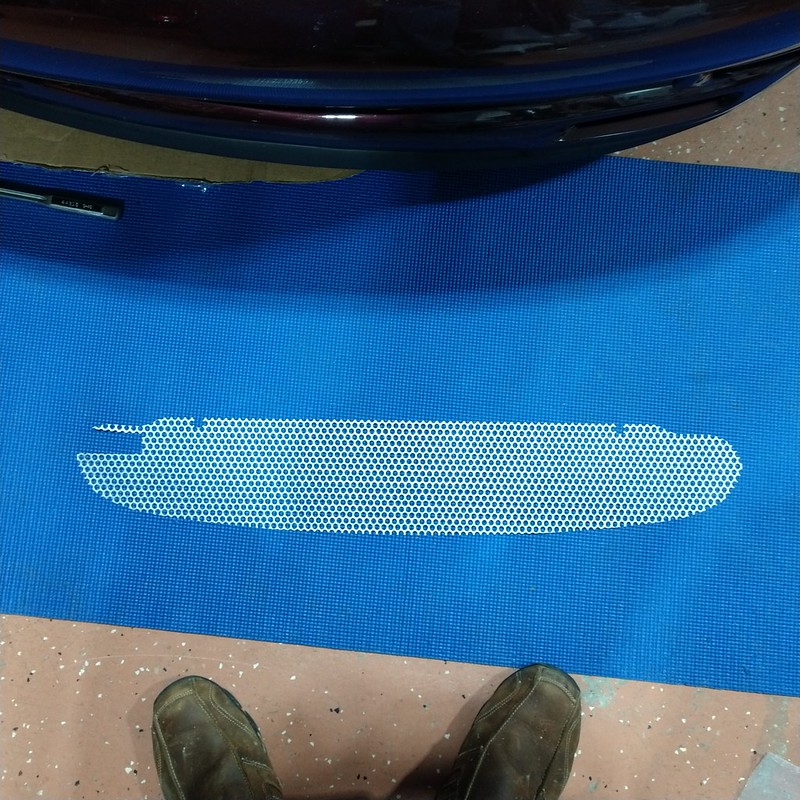
There was no way I was leaving that large silver blob in the front bumper, so I prepped it and then painted it using the same epoxy I used on the rear bumper reinforcement. I didn’t have any spare factory bolts I could use to mount it so ran up to Ace. Unfortunately they didn’t have any flanged M6 bolts, so I ended up getting some stainless M6 X 20mm bolts with fender washers. I prepped those and painted them as well. Pictures of all that will follow once the paint is dry and I install the grille.
Last week I had the chance to buy one of the Moss Miata front grilles locally so took it. When it showed up it looked like the UPS folks tried folding it up in two places. Luckily I was able to fold it flat with no distortion (helpful hint: if you ship something lightweight that can be bent, back it up with some sort of board. Cardboard won’t cut it). I removed the old grille by pulling the two socket head capscrews used. Here’s a picture of the old and new together:
The installation instructions say to remove the baby teeth. Mine are gone but I do have a tow hook which came in handy once so I left it in place. This required some cutting on the new grille. I made a cardboard template, mocked it up in the bumper and marked where the cut should be. Once that was all done I transferred the marks to the grille and cut it using aviation snips. Here is how that ended up:
There was no way I was leaving that large silver blob in the front bumper, so I prepped it and then painted it using the same epoxy I used on the rear bumper reinforcement. I didn’t have any spare factory bolts I could use to mount it so ran up to Ace. Unfortunately they didn’t have any flanged M6 bolts, so I ended up getting some stainless M6 X 20mm bolts with fender washers. I prepped those and painted them as well. Pictures of all that will follow once the paint is dry and I install the grille.
New Posts and Comments
- Replies
- 178
- Views
- 19K

- Replies
- 10K
- Views
- 3M

- Replies
- 9
- Views
- 494
New Threads and Articles
-

-
14 CX-5 power drivers seat won't go forward, all other directions work
- By rickprins
- Replies: 2