Man it’s easier then you think. It doesn’t take much.Loving this dude, epic. My dream. Check out my build, I am making my car for the exact same purpose, track racing.

You are using an out of date browser. It may not display this or other websites correctly.
You should upgrade or use an alternative browser.
You should upgrade or use an alternative browser.
FSZE Protege5 Track Build
- Thread starter JITB
- Start date
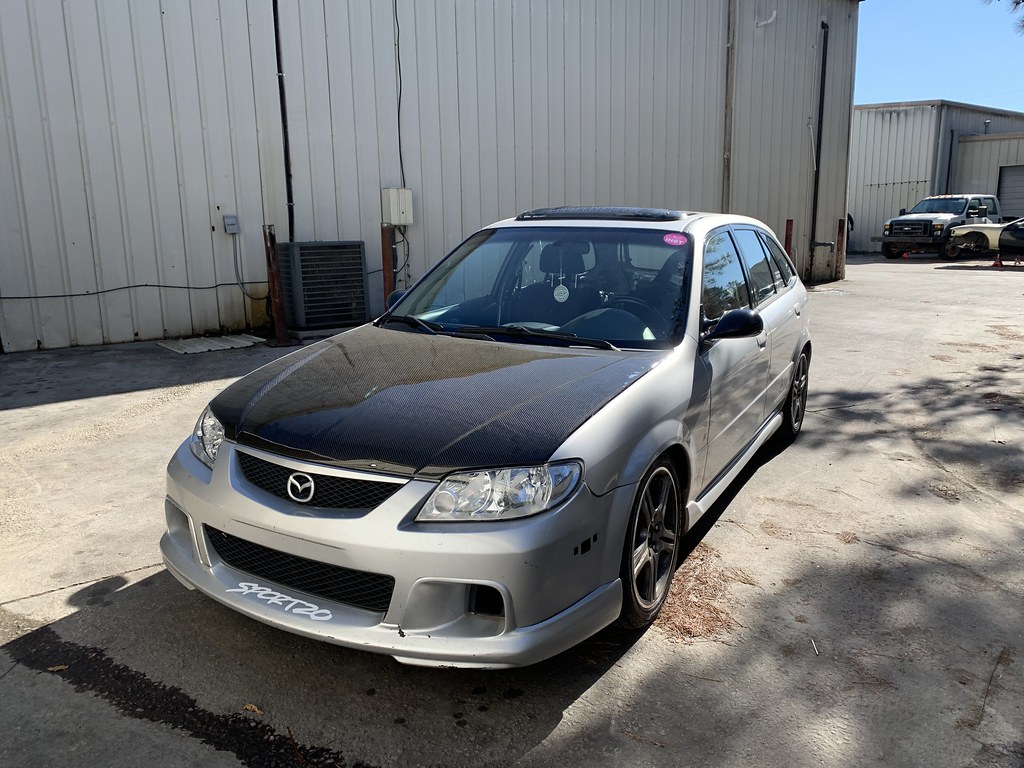
With the JDM engine installed last year, I had always been curious on what it actually makes in comparison to the US engine...
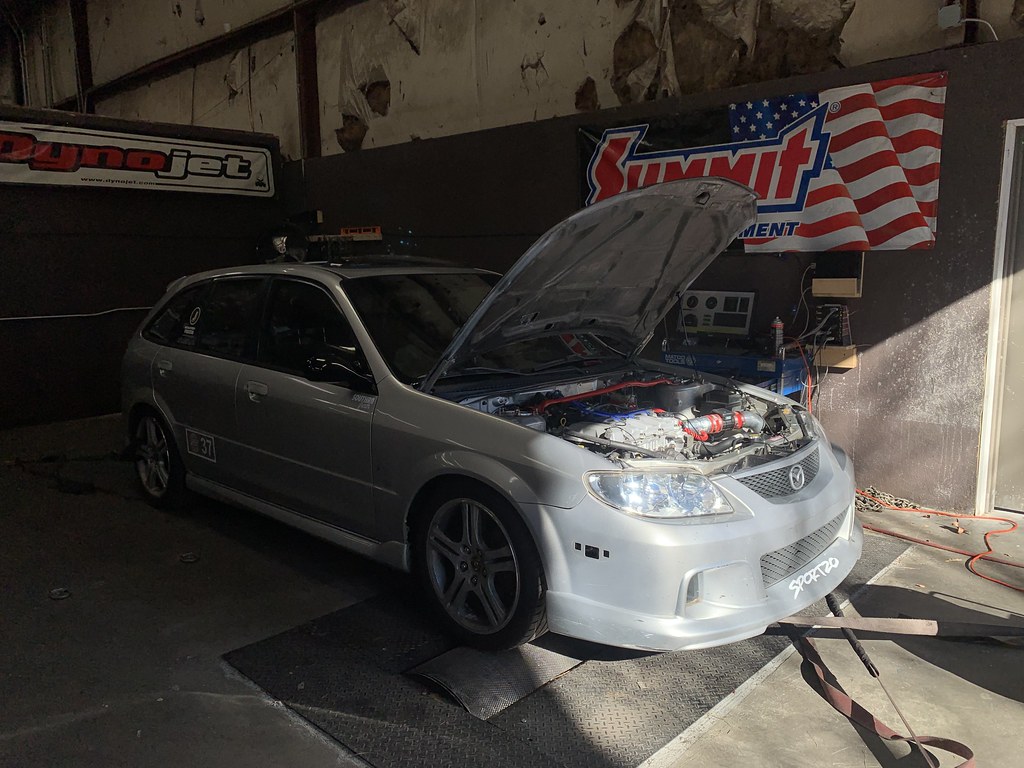
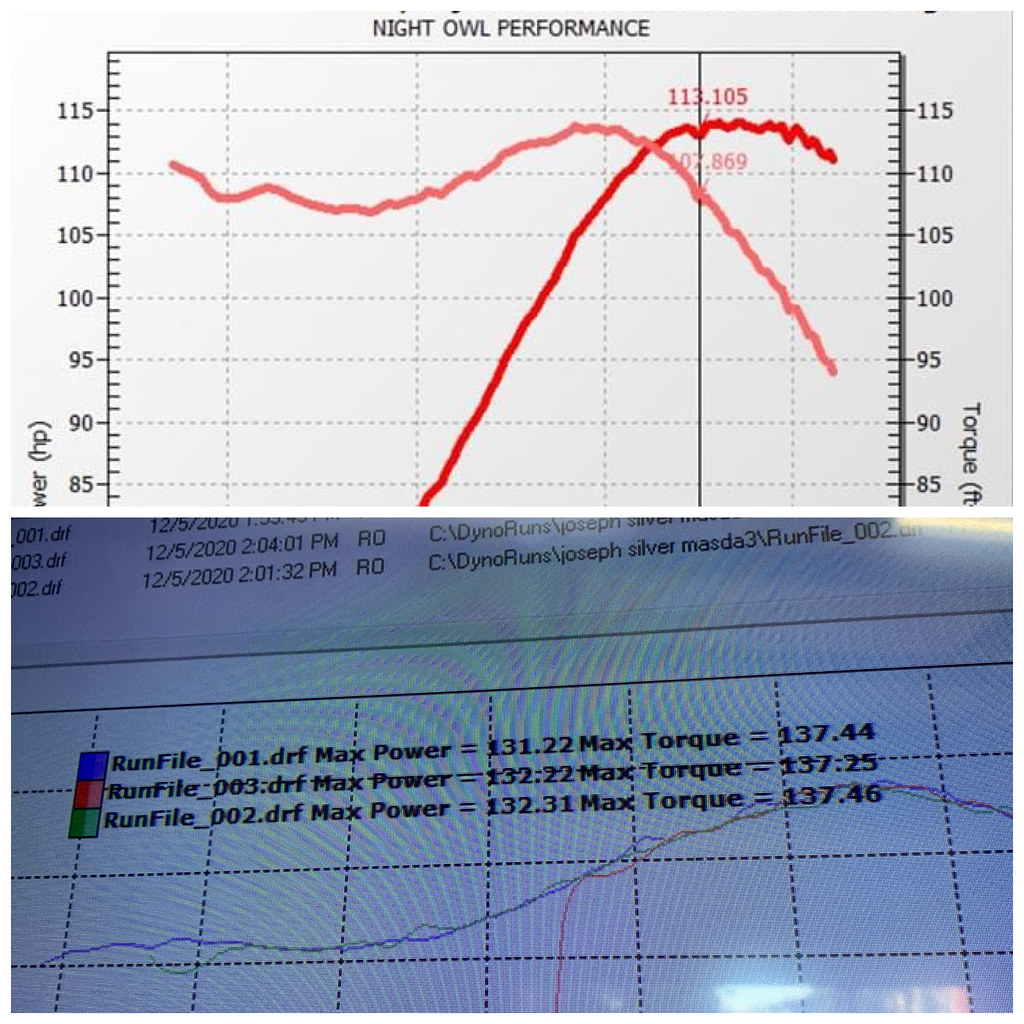
Above, I have the dyno comparison of the US FSDE engine with bolt-ons that makes 113 hp and 102 tq . And with the JDM FSZE my car put down 132hp and 137tq on the dyno using the US engine harness and Mazda MP3 ECU.
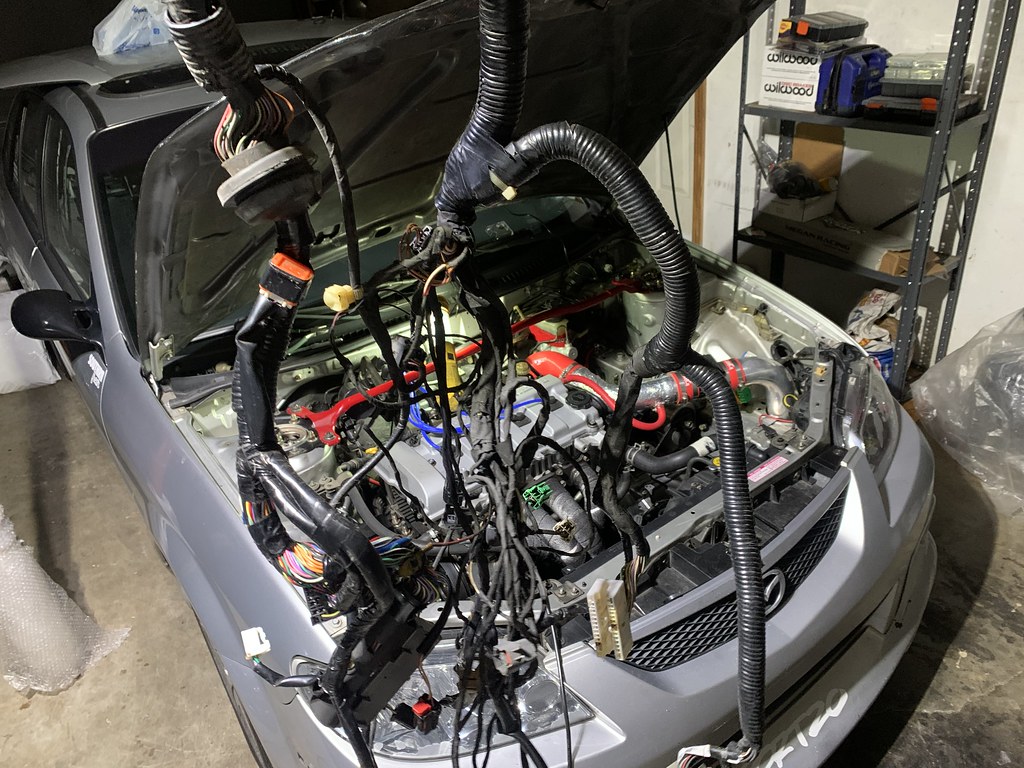
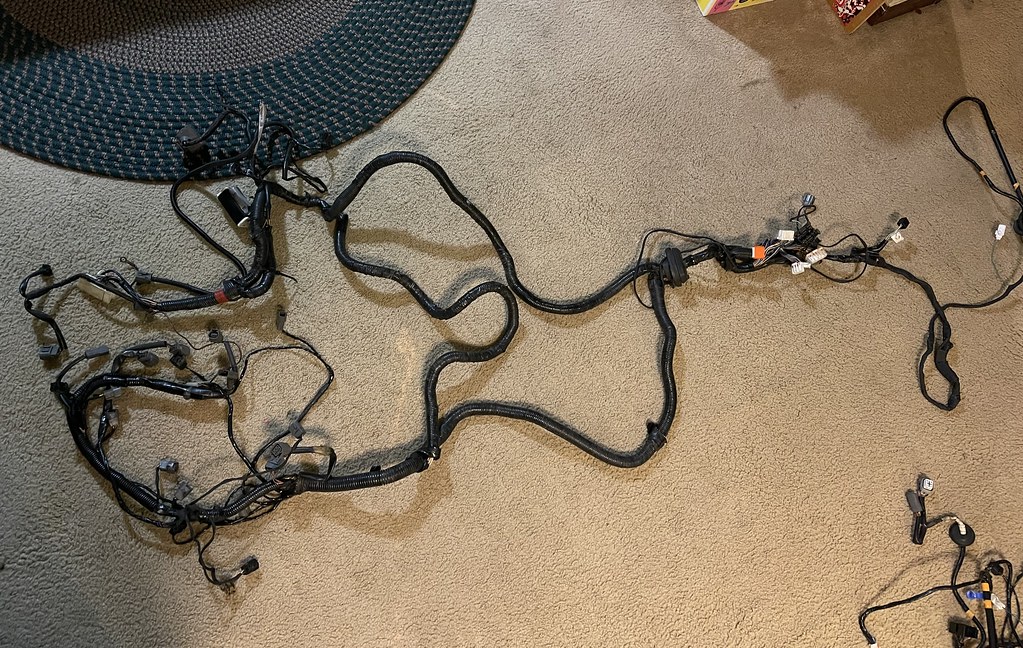
The real reason for going to the dyno was because I was able to source a proper JDM harness and ECU to properly run the FSZE engine in my car. The harness and ECU was from a guy in Canada that had purchased from someone else, that extended it to fit in a LHD vehicle. So I removed the US harness to get ready to install the JDM harness...
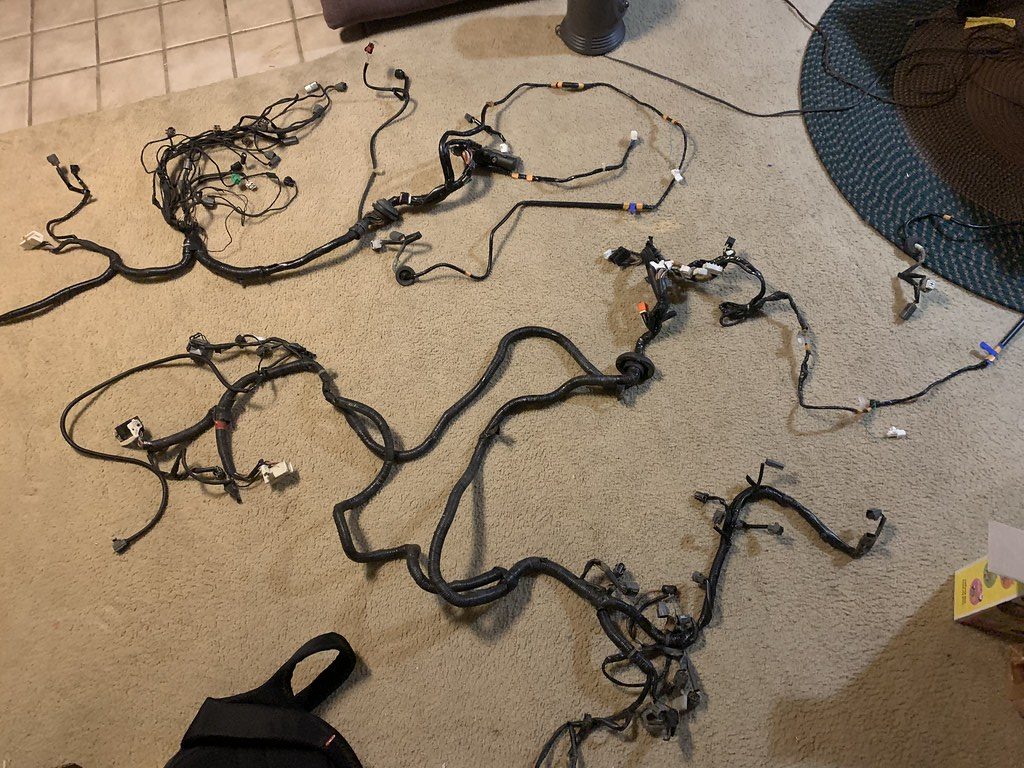
Here is the US harness shown up top, and the japanese harness below. The car that the harness came from was a ABS car, and mine was not, so it is excessively long with things I did not need.

In order to use the FSZE ECU I will need to remove my lightweight pulley and swap the crank sprocket to the matching JDM sprocket on the left...
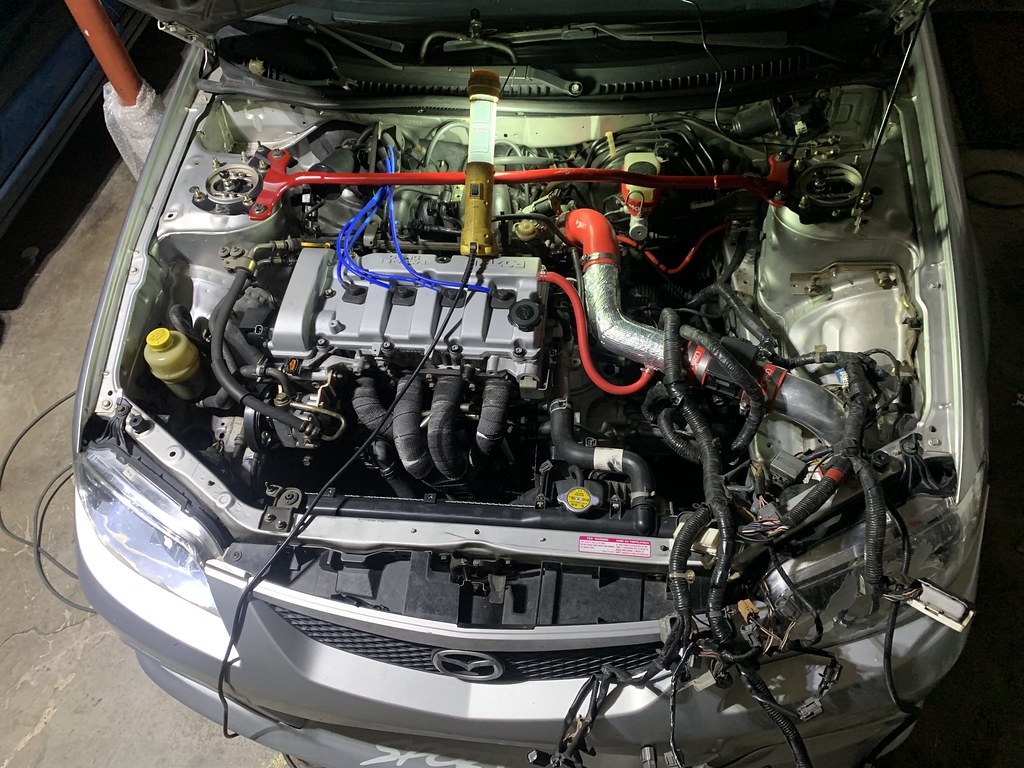
The harness was in, and I just needed to plug in everything and crank it up..
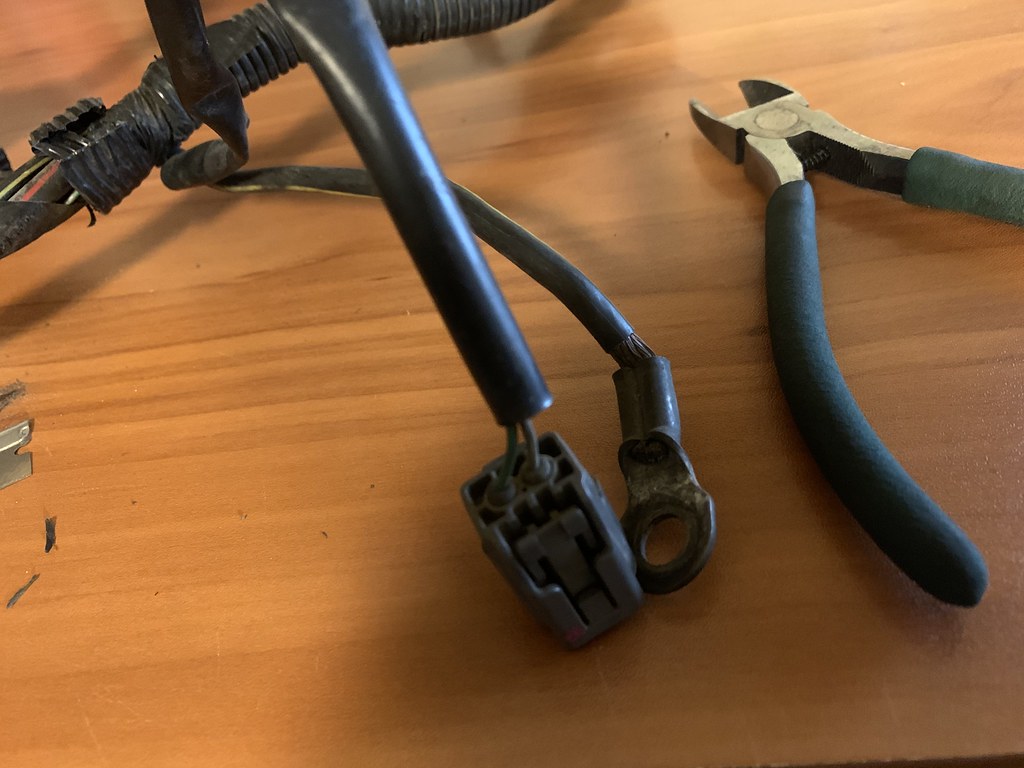
So being that the JDM harness was a ABS car, it used the ABS unit to monitor speed with the speed sensors on each wheel. In order to get around that I needed to run a signal to the speed sensor in the trans.
I had a spare harness to pull the proper connector from and make a harness for the speed sensor.
I was lucky enough to be able to get in touch with a guy from Australia, that had access to the JDM wiring diagram, and combined the information with another local friend that was able to identify the proper pin to remove and install to plug the speed sensor in..
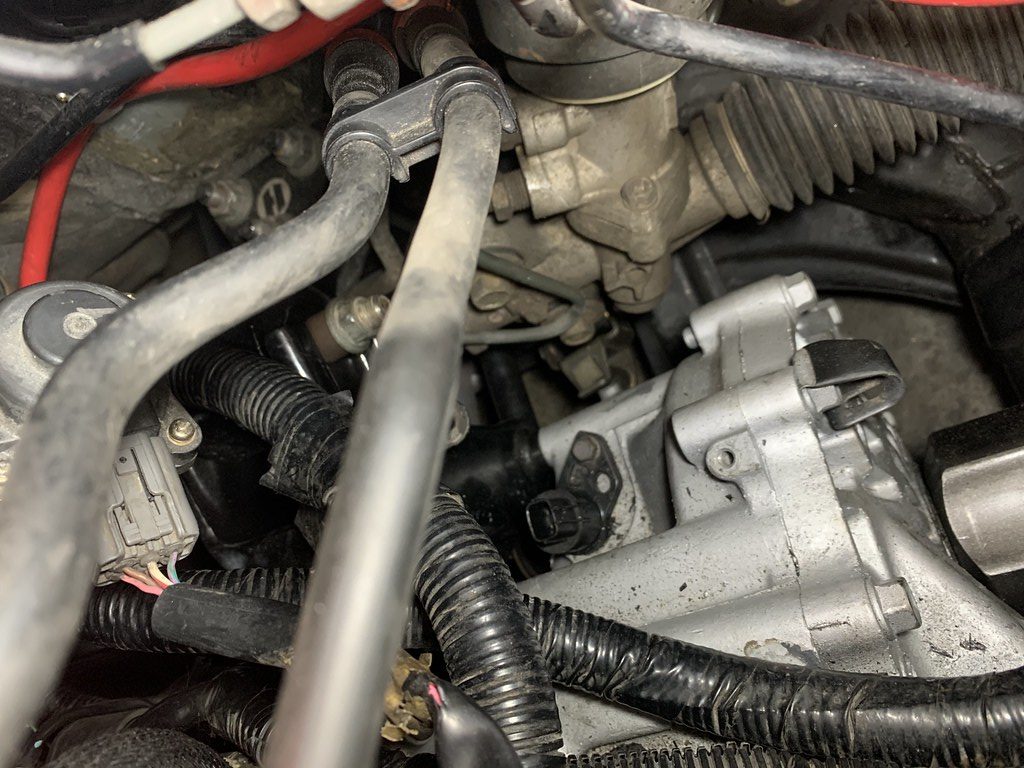
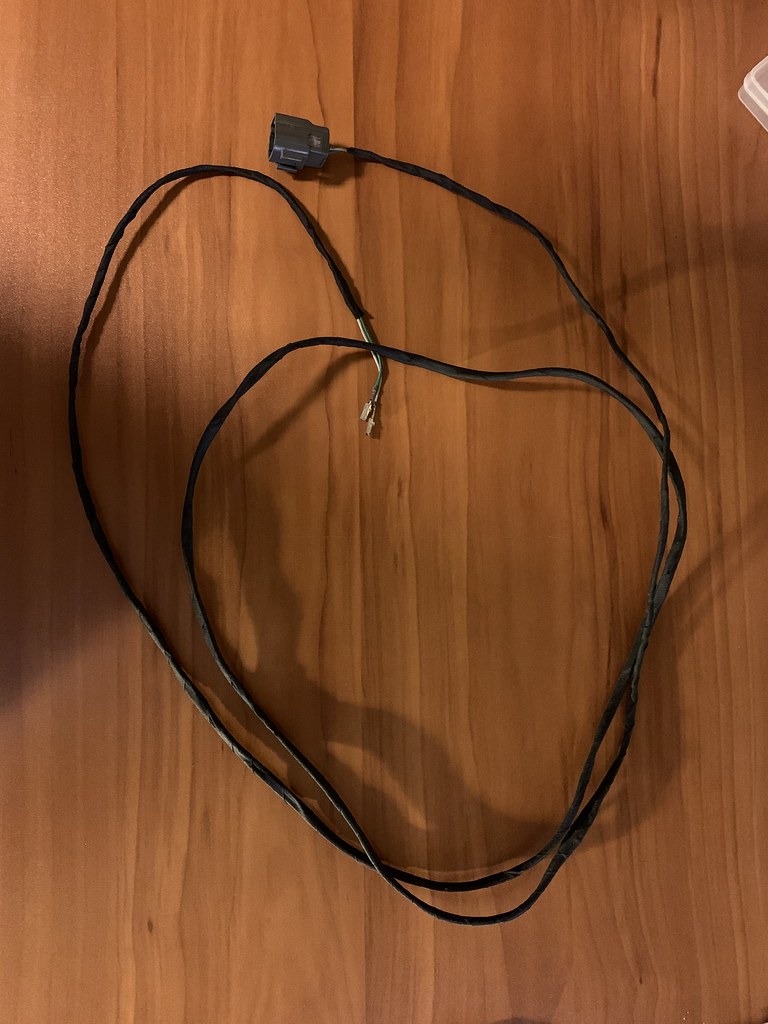
I ran the speed sensor plug to the speed sensor on the trans...
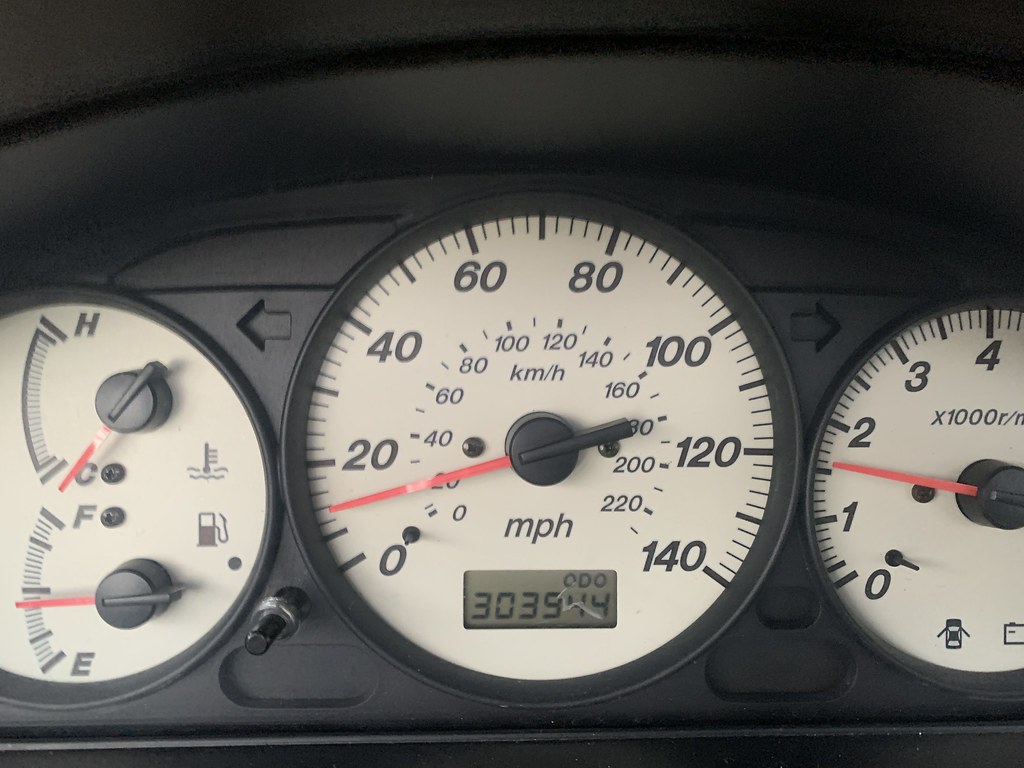
And magic... we have a working speedo!
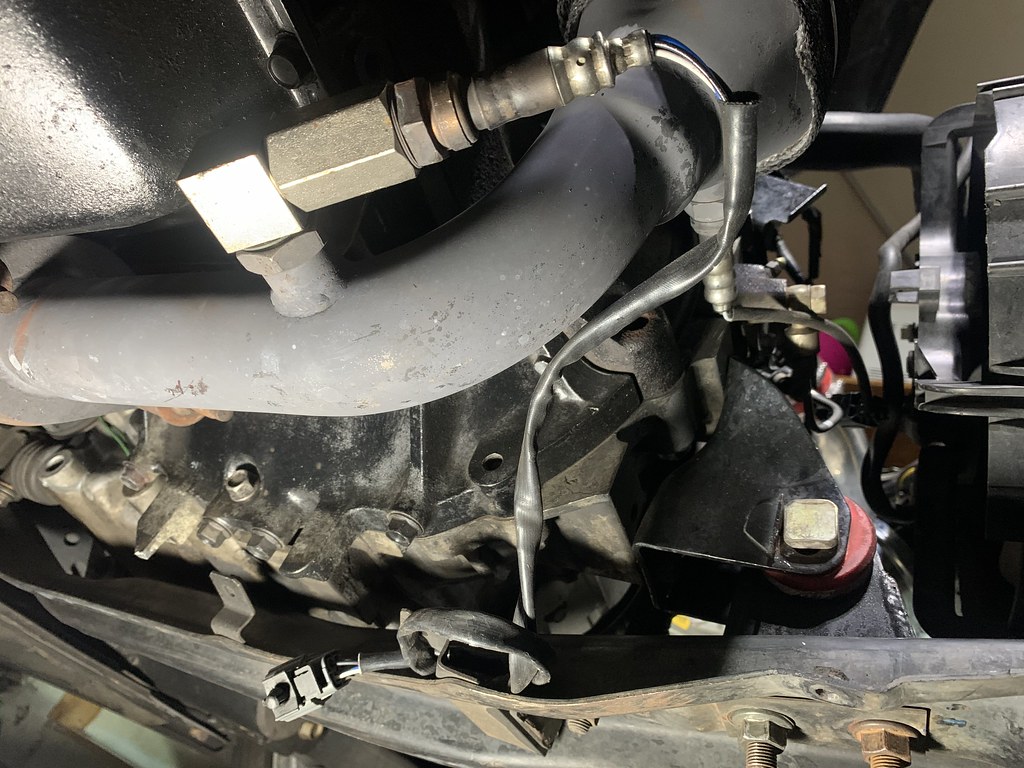
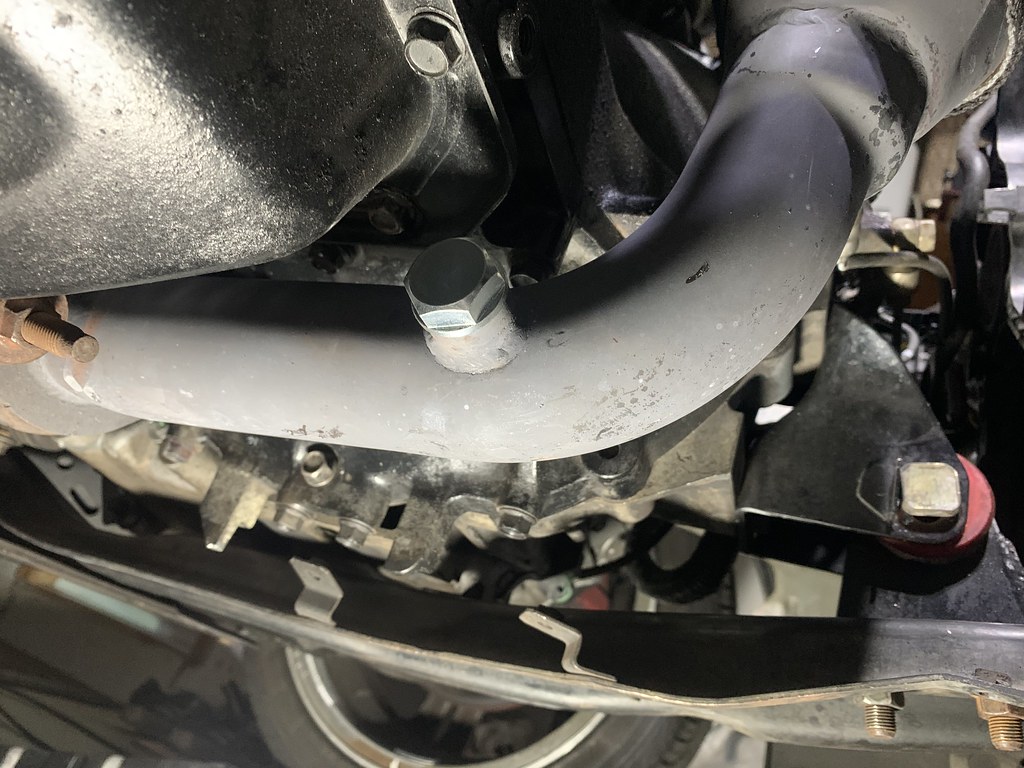
The JDM cars only run off a single o2 Sensor, so I plugged the secondary O2 sensor bung..
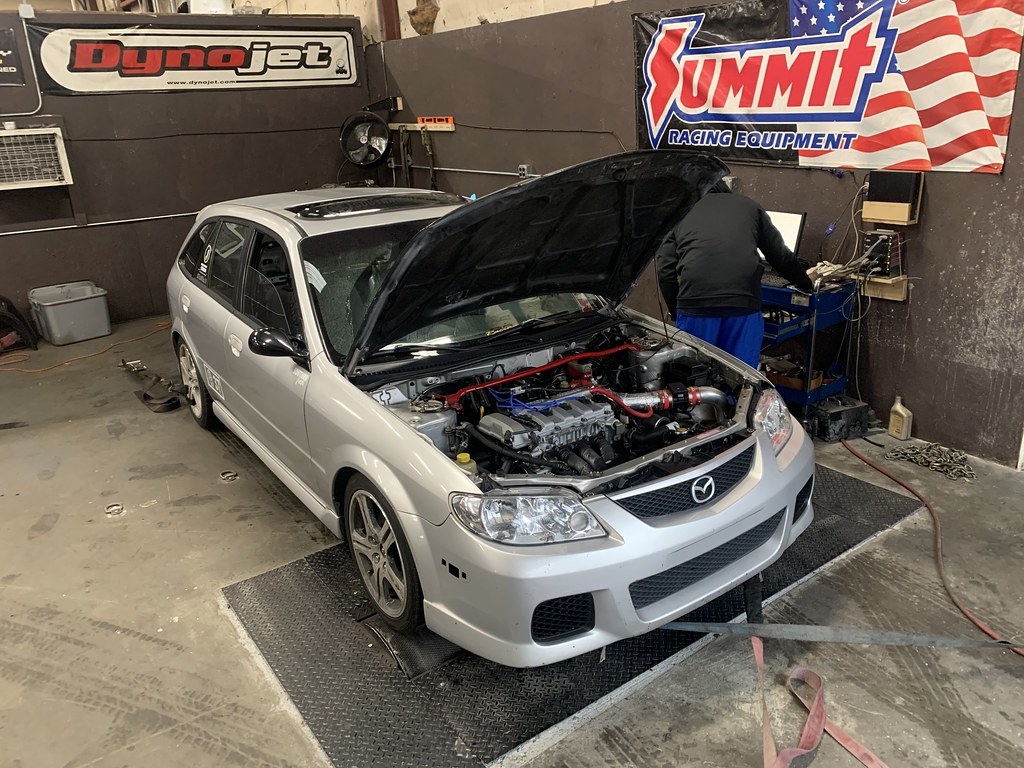
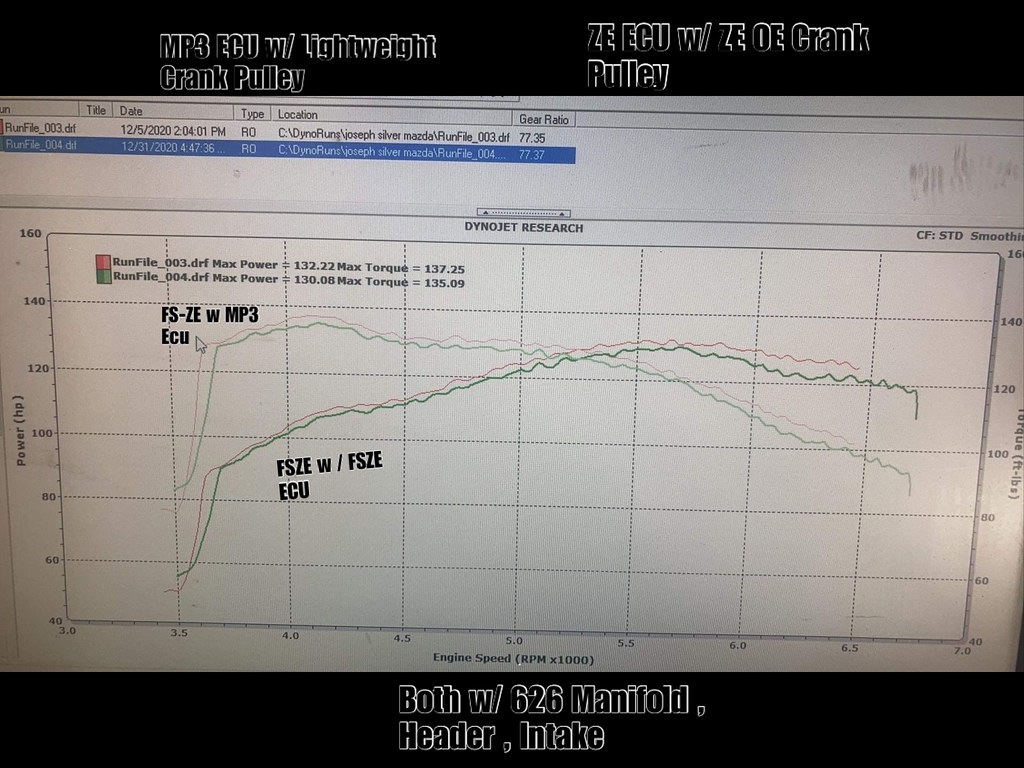
I was able to get back on the dyno and compare the two numbers. So with the US MP3 Ecu the car made 132hp and 137tq, but with a dying power band, that peaks at 3500-4000 rpm and falls down to 90hp at redline...which explains how and why the car drags on the straights.
And with the proper JDM ECU , the car makes 130hp and 135tq... but the powerband is much more useful and ideal . From 3500 rpm to 5500- rpm I am making power and holding it in a decent range to redline...
Here is a video of both sessions..
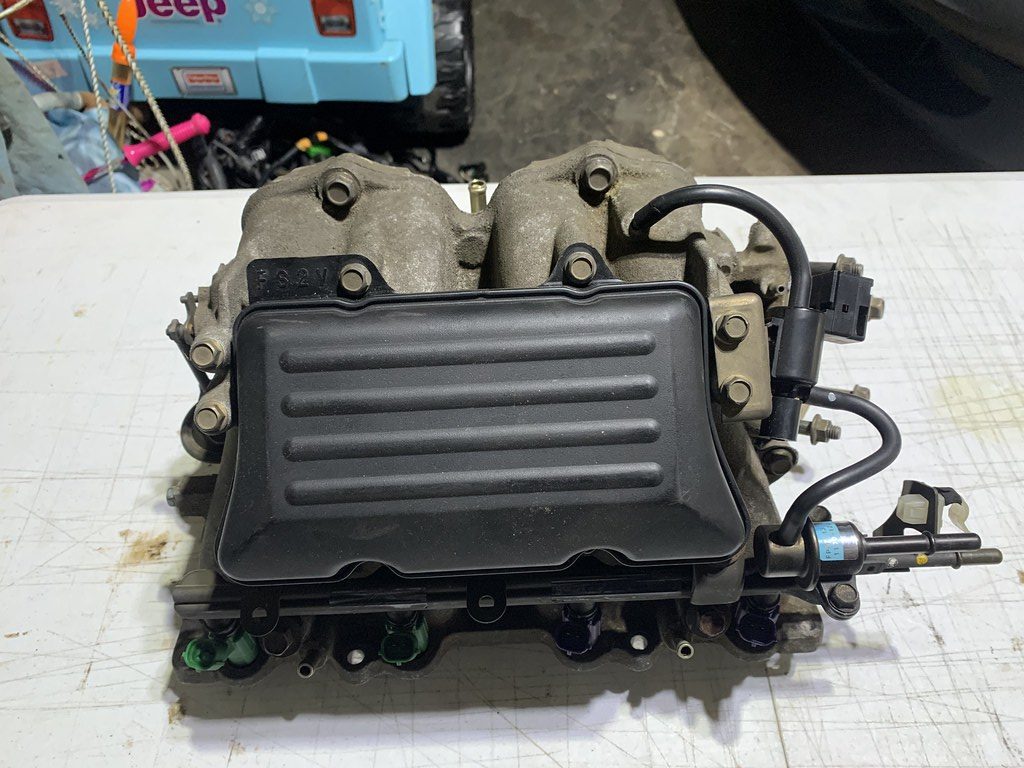
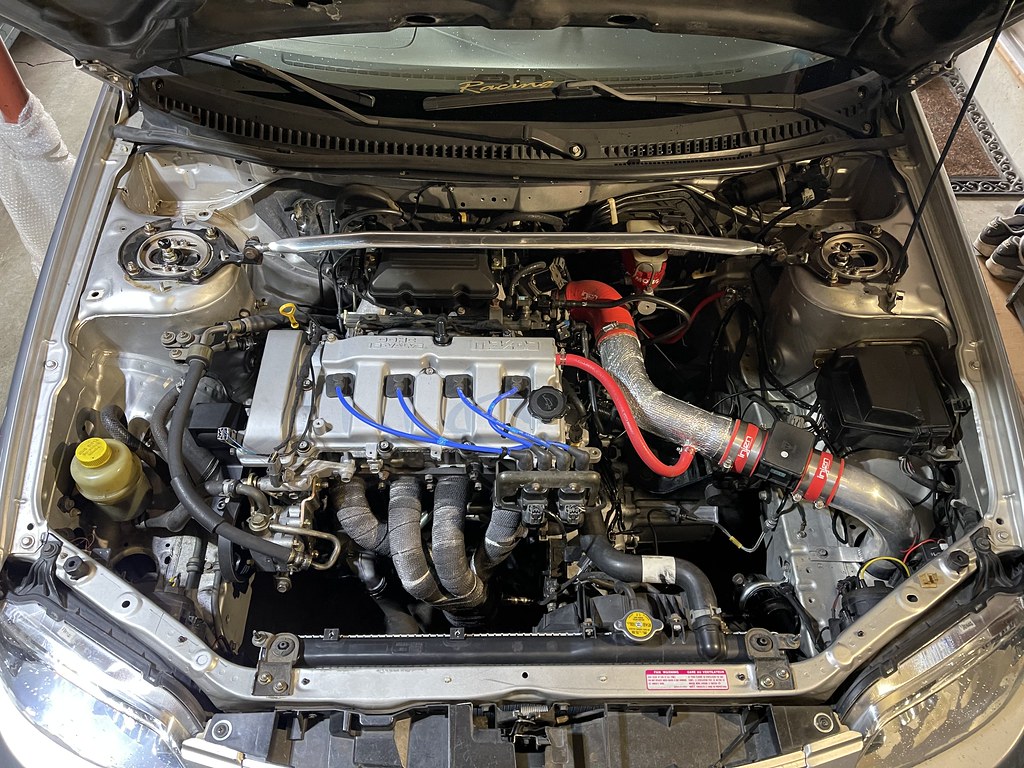
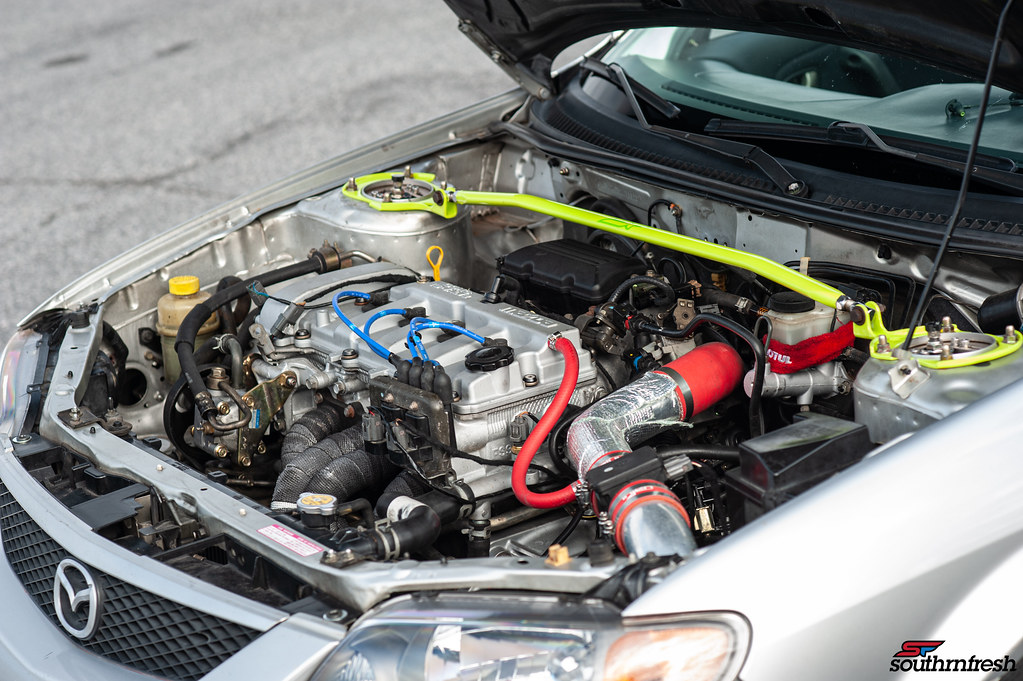
The intake manifold is a oem part, so it fits like a stock manifold would. But the fuel rail is different, which will require some re routing. But its a pretty straight forward install.
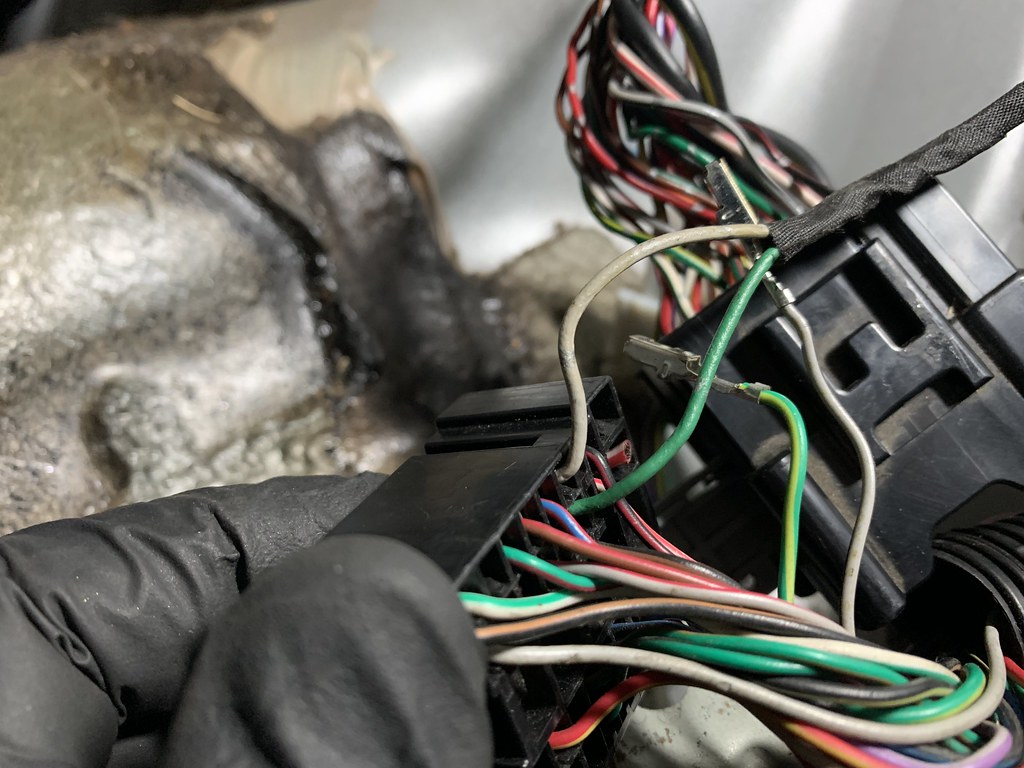
It was time to address the clutter of ABS mess stuffed in corner above. The idea was to remove the covering of the harness, and completely remove the ABS portion, since I had no use for it.
Harness out again...
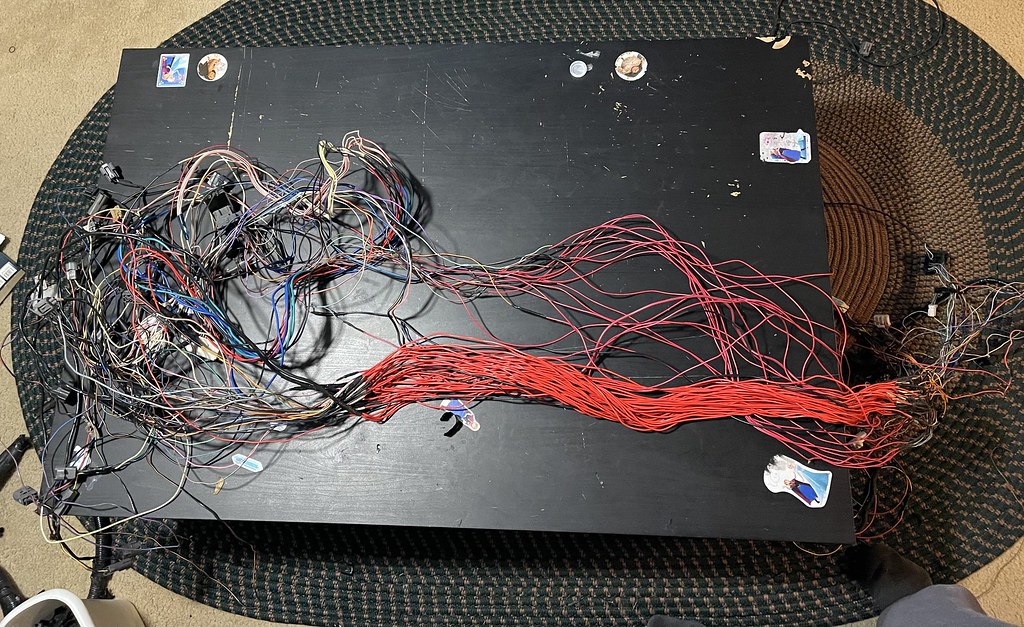
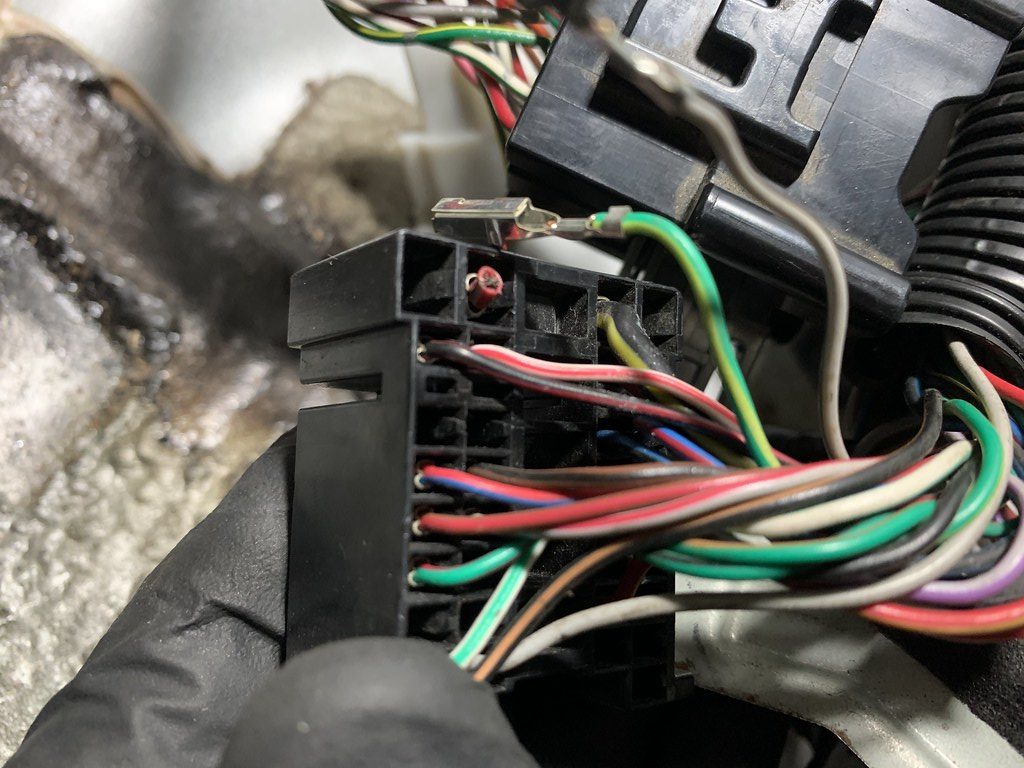
Harness wrap removed, and the exact point of regret set in. As you can see the harness was extended previously by someone else and while they did do a good job. The cluster of red wires just makes this much more tedious.
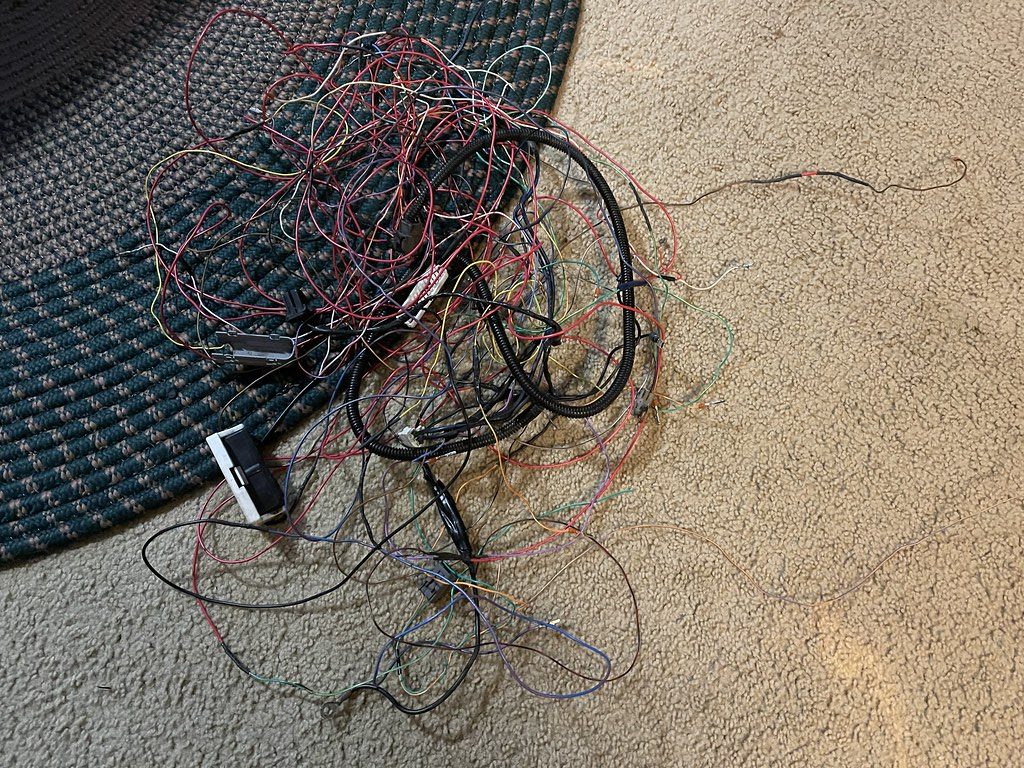
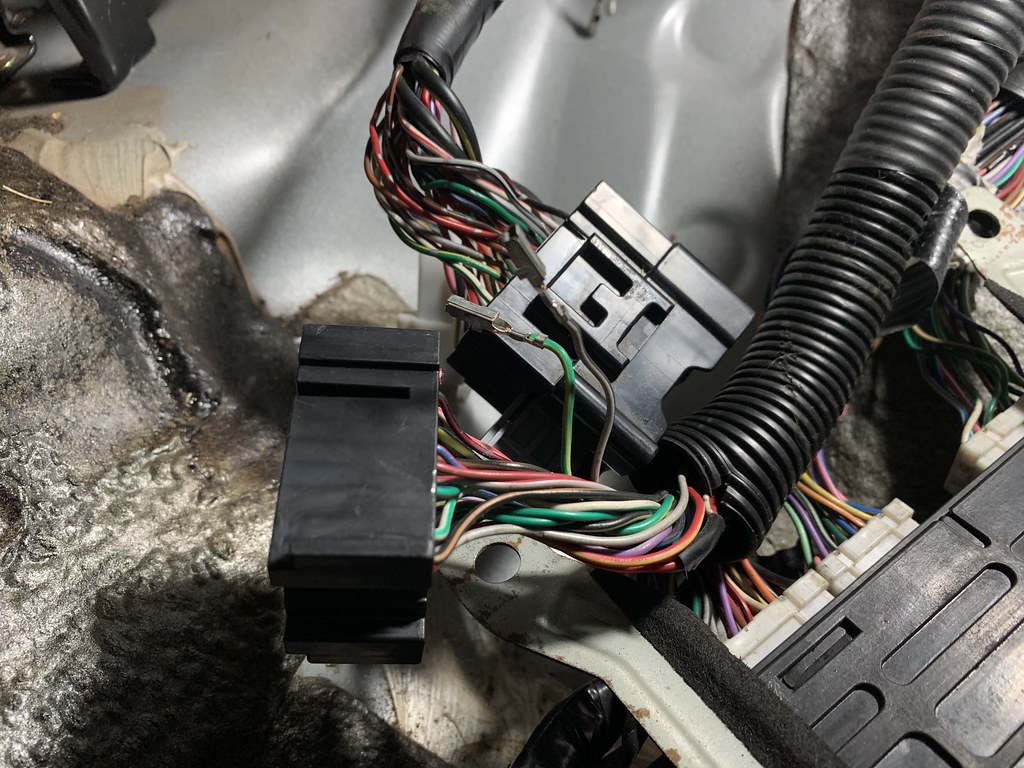
ABS plug , and speed sensors portion removed from the harness.
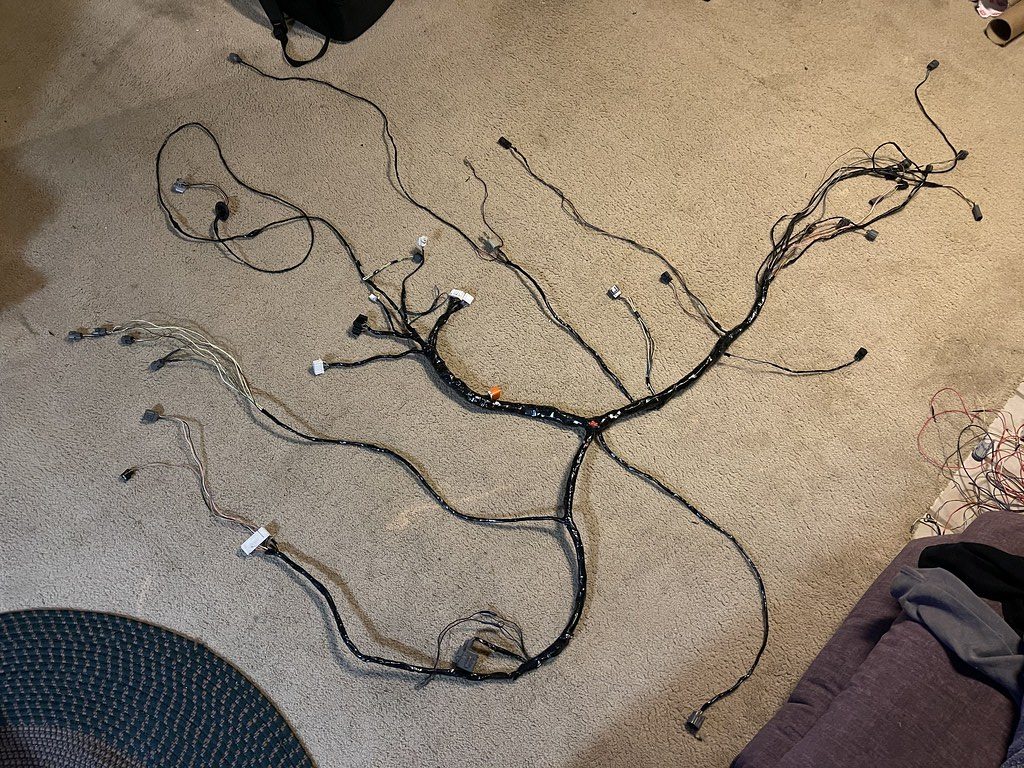
Everything wrapped back up, and ready to go back in the car...
I would be lying if I said everything went as planned. It absolutely did not, first of all when I attempted to install the harness back in the car. I had the lengths off on several sensors, so I had to then go back and extend a few connectors to make it sit properly. Once that was settled the engine bay was much cleaner. And the mess of wires were gone. I am wanting to get back to the dyno and see if the intake manifold changes anything power wise or makes the powerband even better. But I realized I have spent weeks on this hunt for power, and I needed to get back on track with the long list of repairs for the 2021 track season.....
Sa-WEET! I wish there was more knowledge floating around like this when I had my Protege. It was all rumors and speculation about the FS-ZE engine. Glad to see you're tackling the project with success. My guess is you'll see positive gains up top with the FS-ZE manifold. I believe the 626 manifold is choking the top end with it's long skinny runners. Still, 135 hp/ft-lbs at the wheels with an MP3 ECU is strong. They were only rated for 140hp at the engine when new.
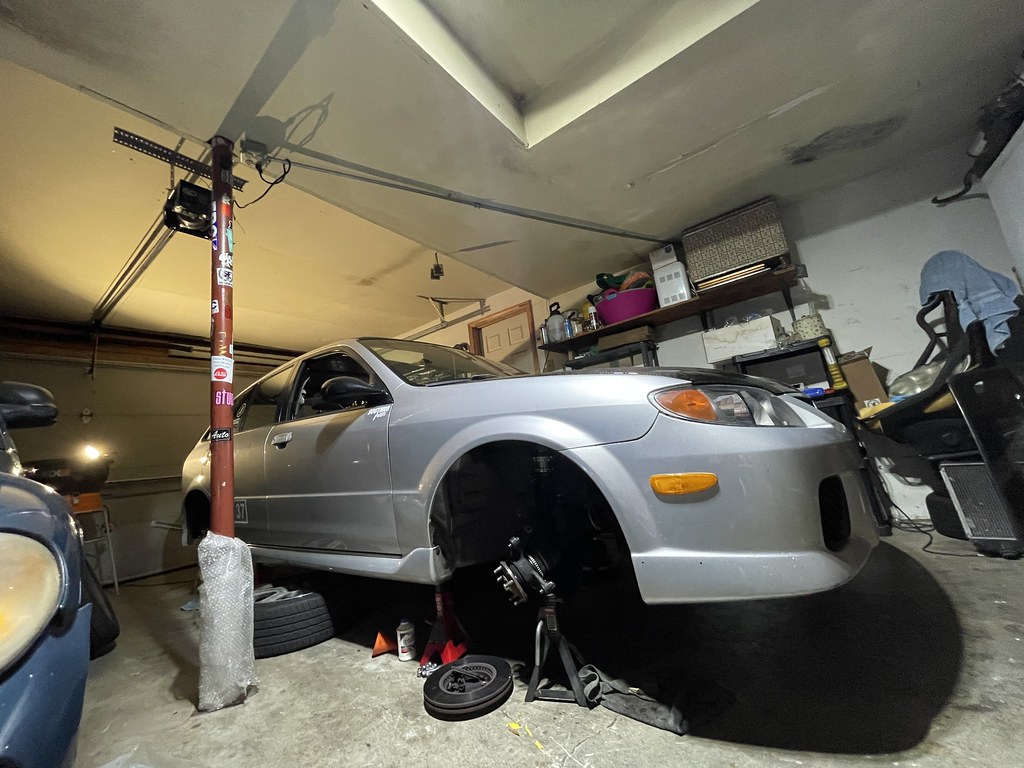
I have been delaying and wasting a lot of time on other things during the winter. And I completely forgot about the repairs that I needed to get done before getting back on track.
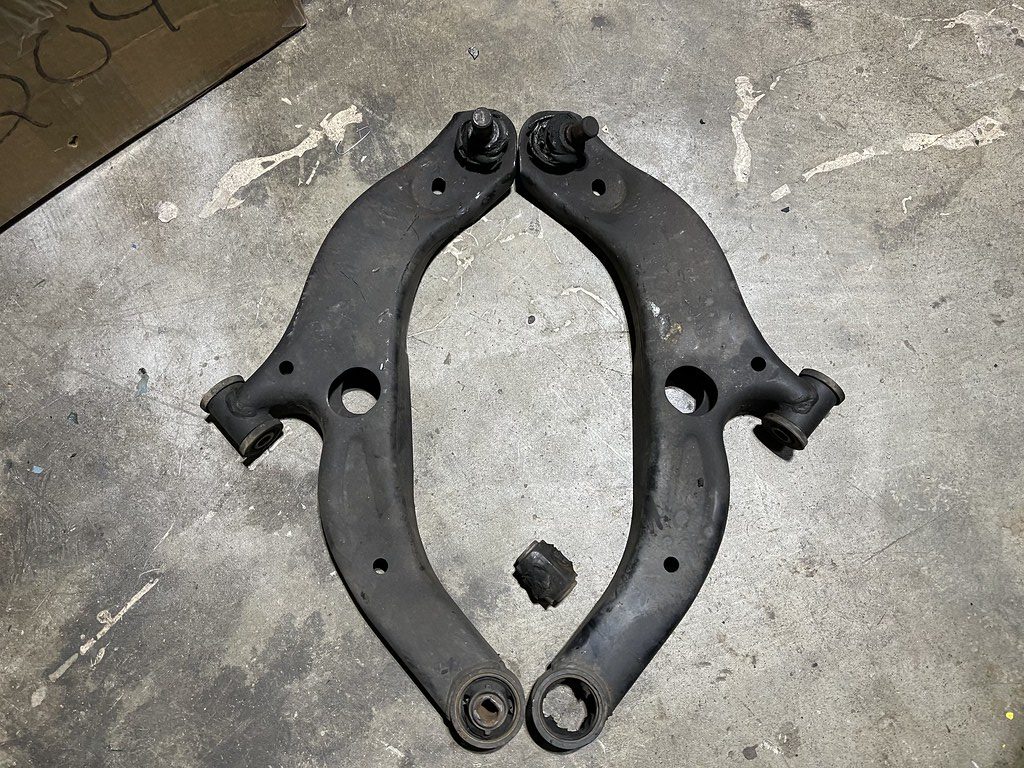
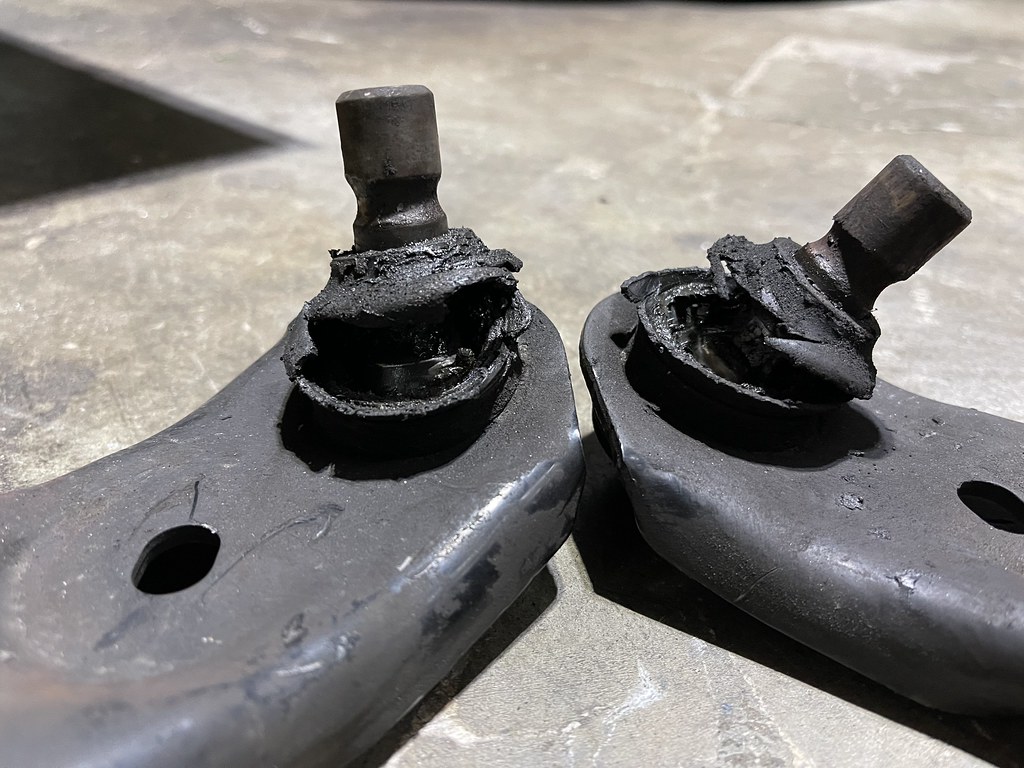
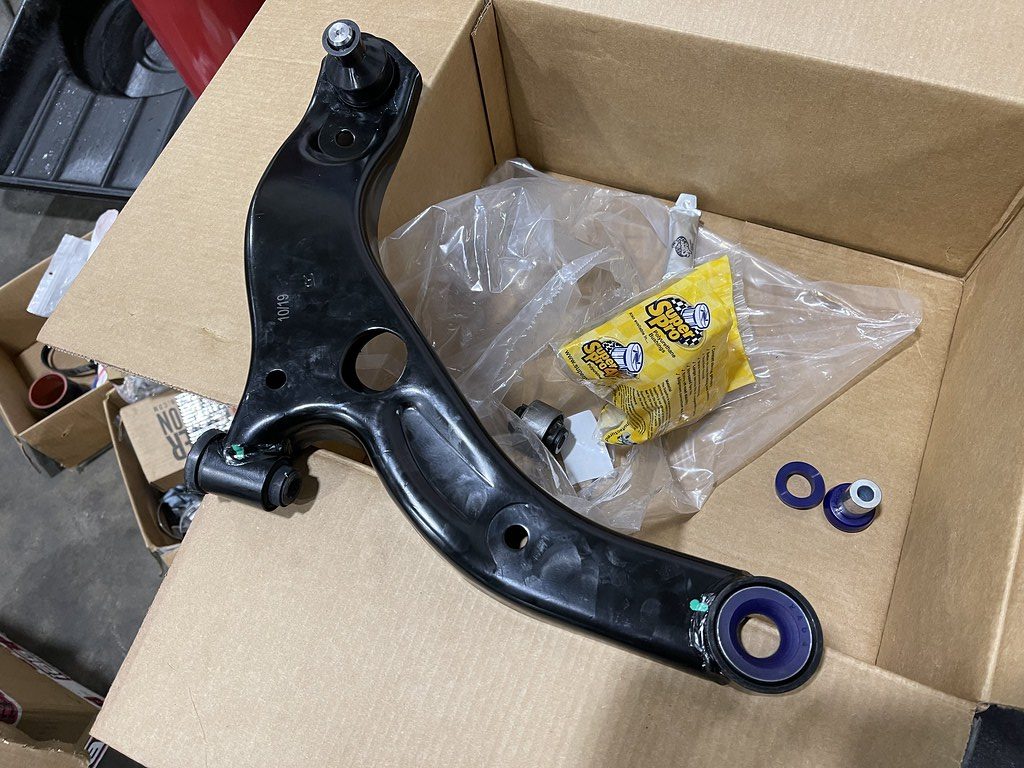
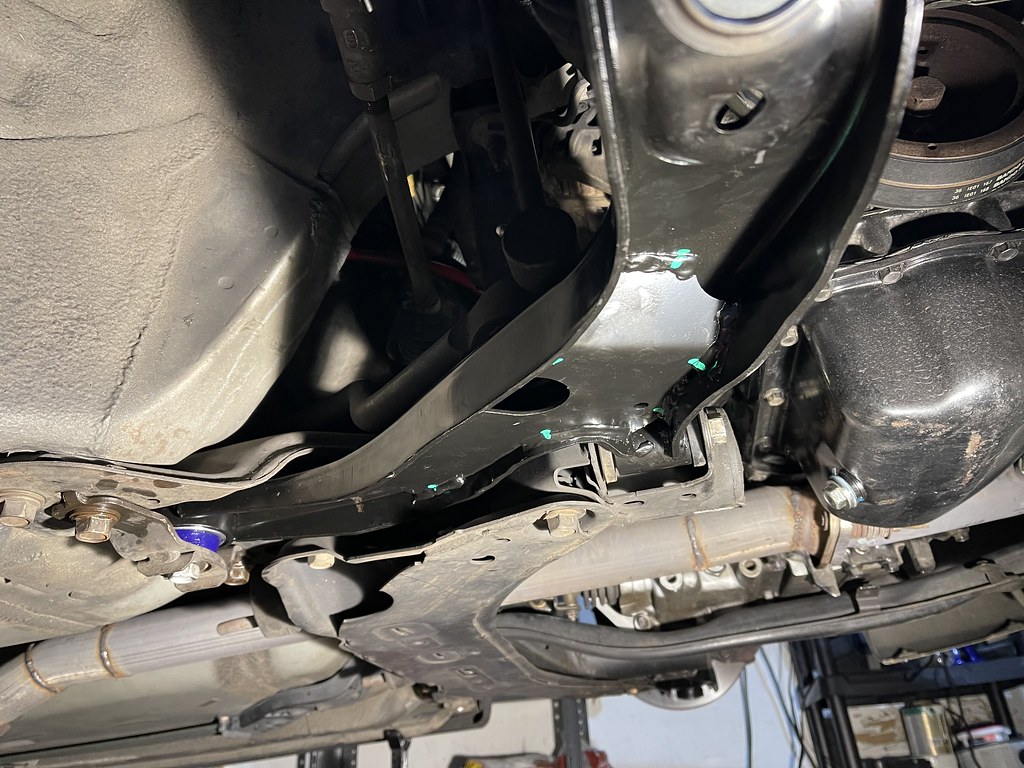
One of the reasons I did not make it to the Barber Motorsports event last year was because of these ball joints. They look to be still stock, and after 300k miles and 19 years they were done.
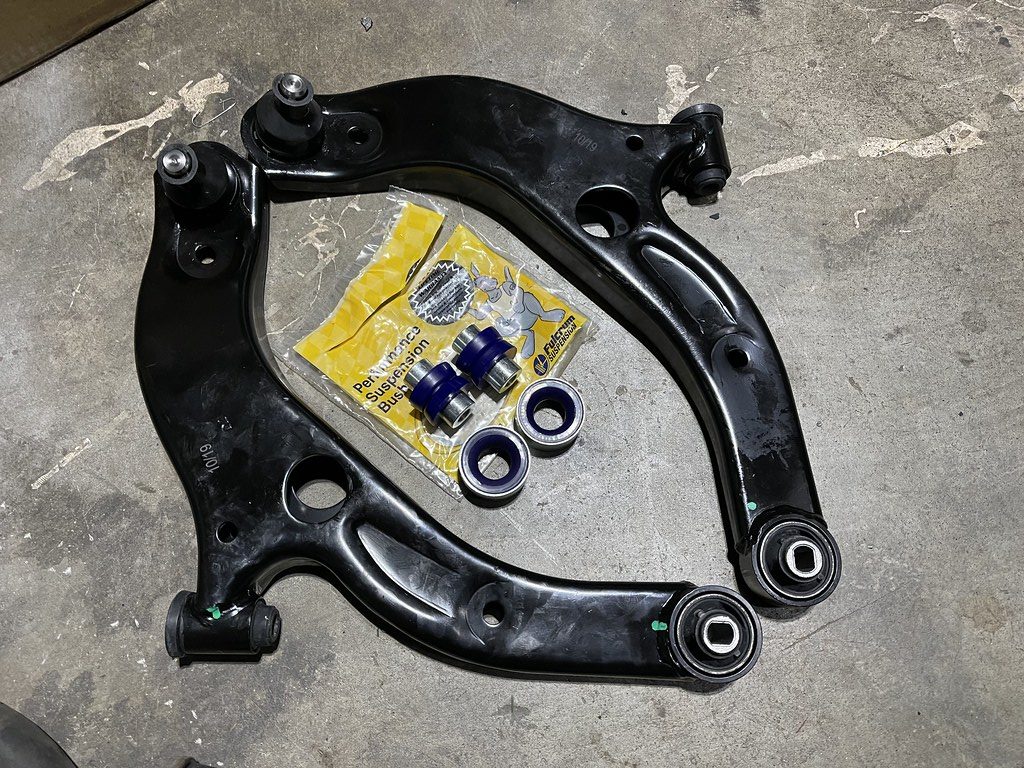

Originally I looked into getting the Hardrace arms, but time and availability were not on my side. So I got new complete arms, and a set of Super Pro Rear Arm Bushings.

This job is impossible to do with out the use of a press. Once you press out the old bearing, you simply press in the new one.
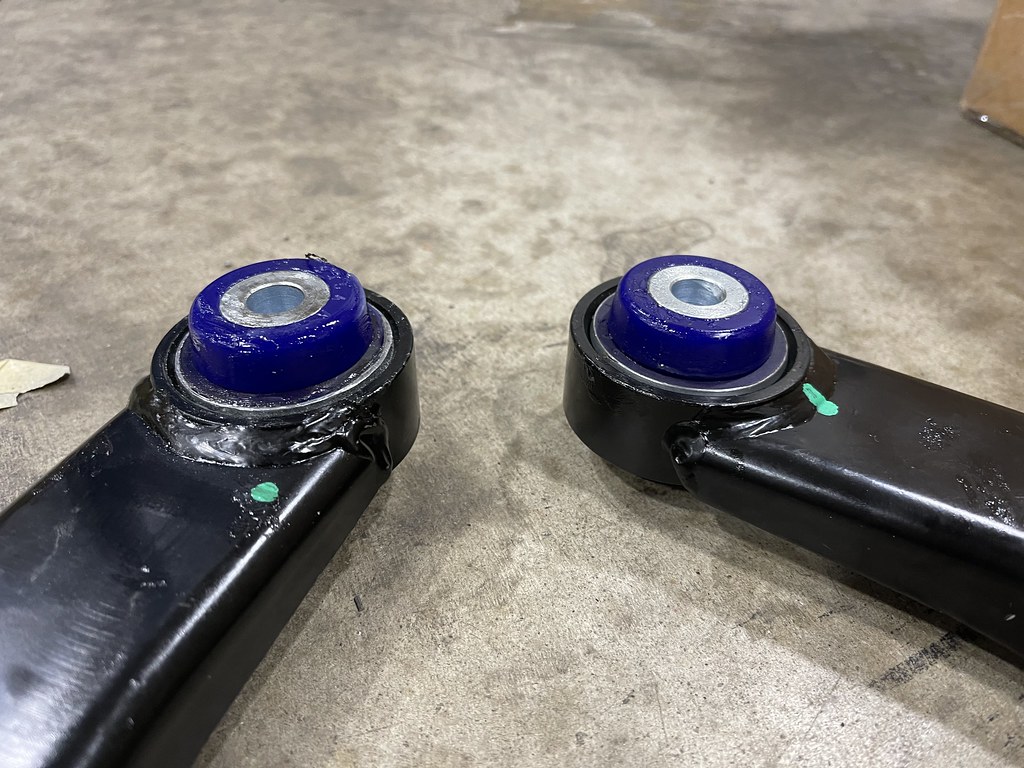
And insert the new inserts and ends into the bushing...
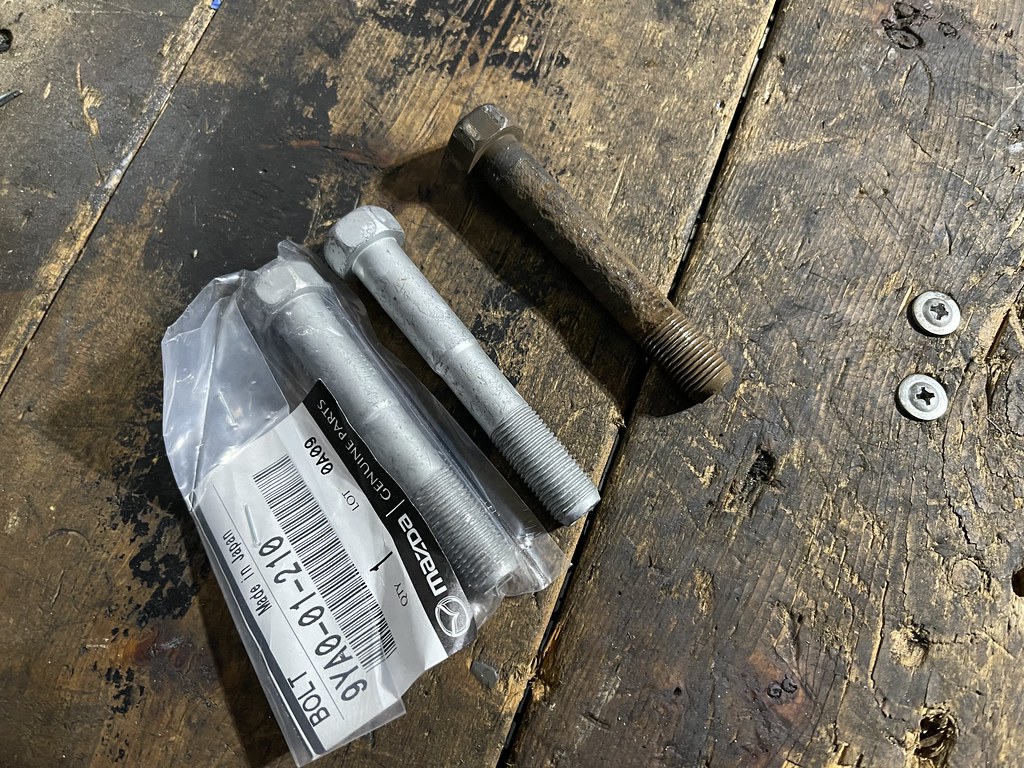
Also while removing the control arm, I noticed how corroded and pitted the old bolt was when I removed it. There was no way I could put that back in, no need in risking failure over a $7 bolt.
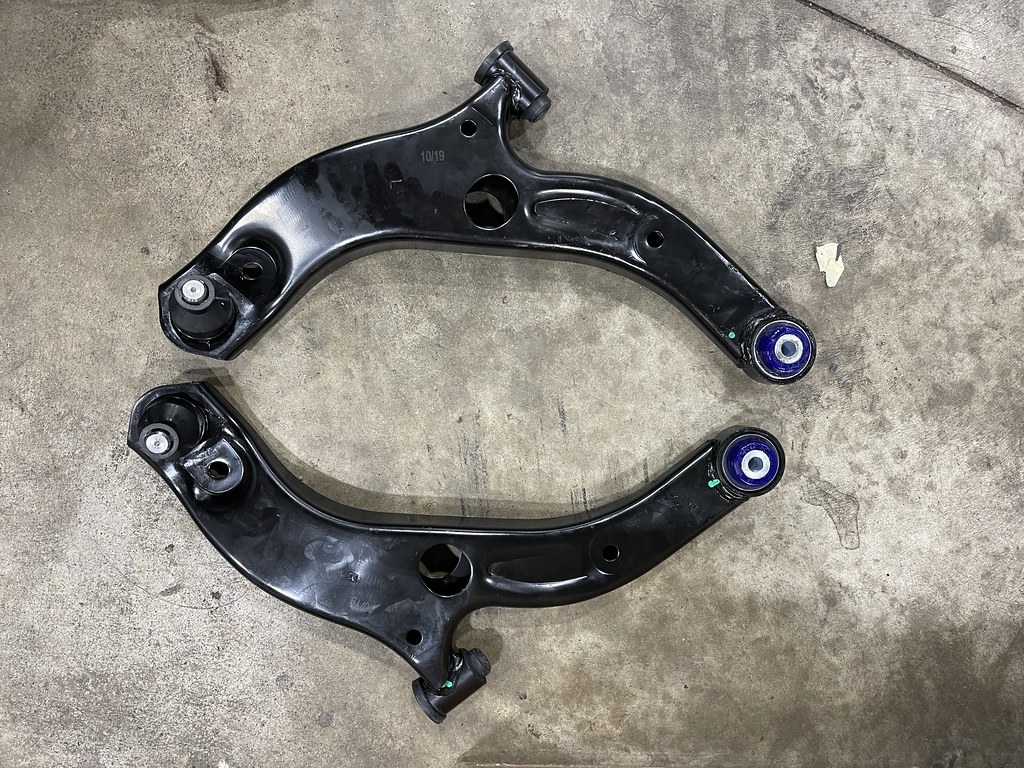
New arm w/ bushings installed...
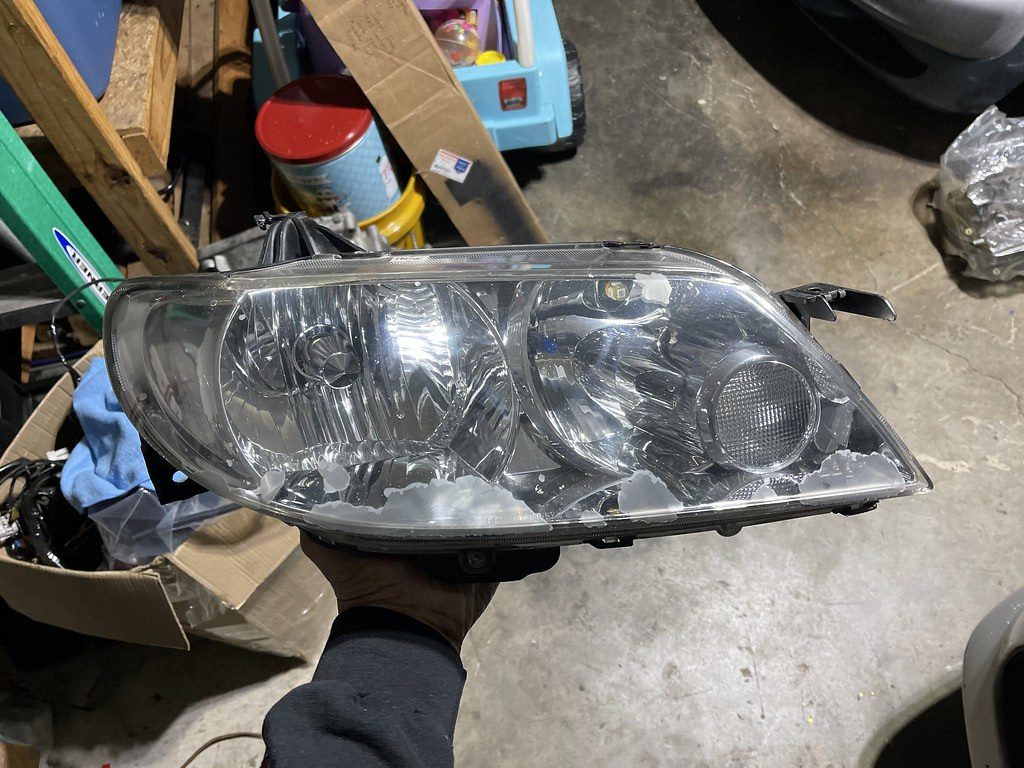
I had these headlights in last season, but they started to peel and look pretty rough.
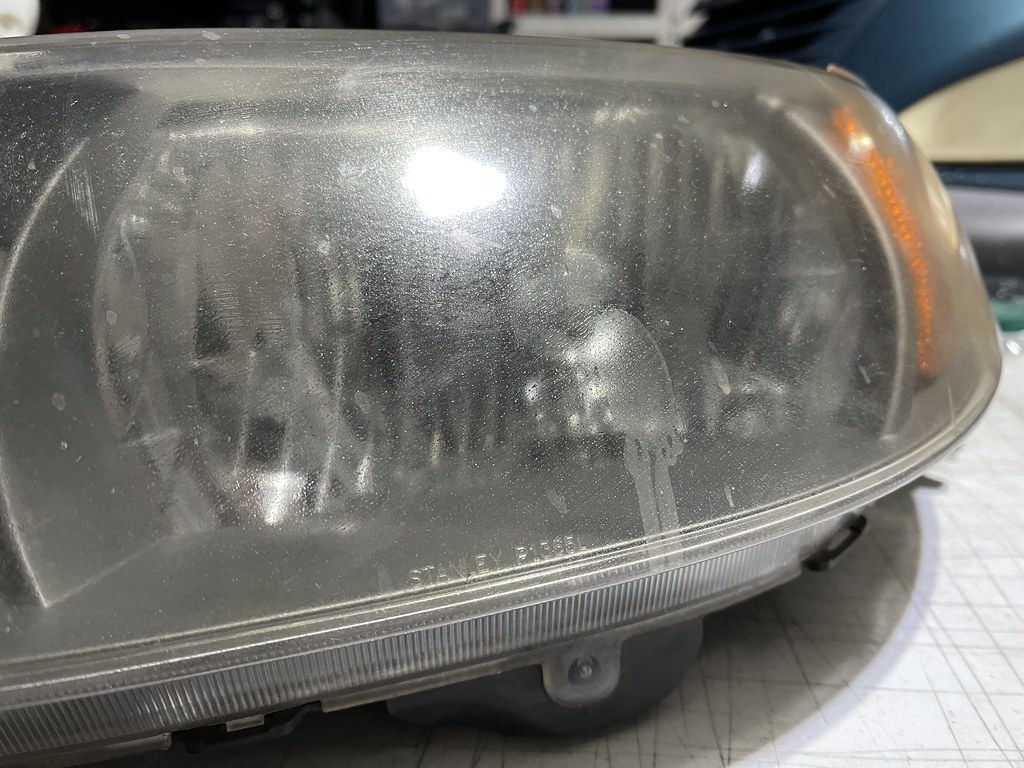
I had a second set of Mazdaspeed Protege headlights from years ago that needed some attention, so I tried my hand at polishing them...
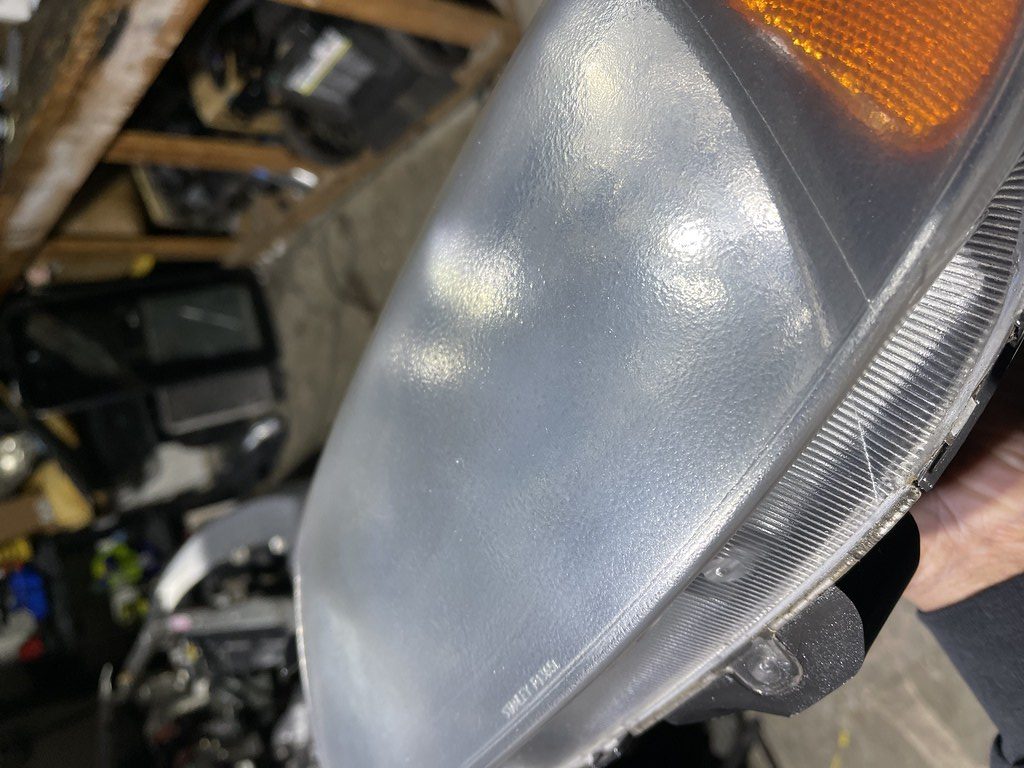
After buffing them, and attempting to clear coat them this was the result. Some sort of matte , smoked transparent wrinkle finish. It was terrible...
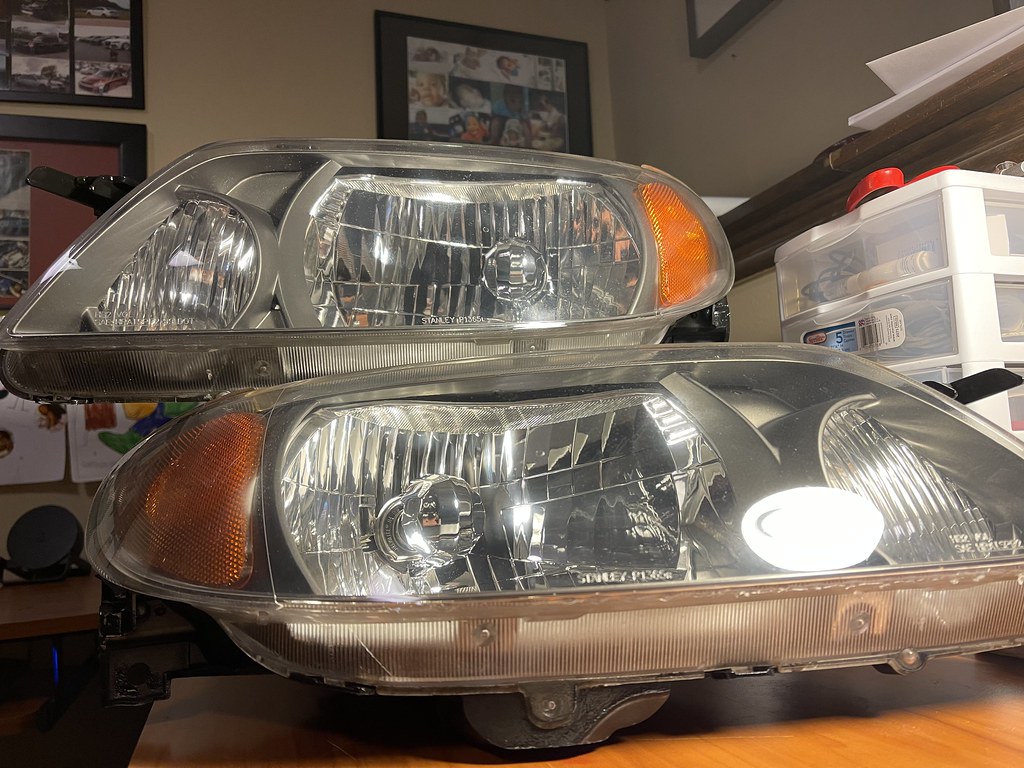
I reached out to a professional (Alex Perrucci ) , and had them do it for me, and the results were a million times better!
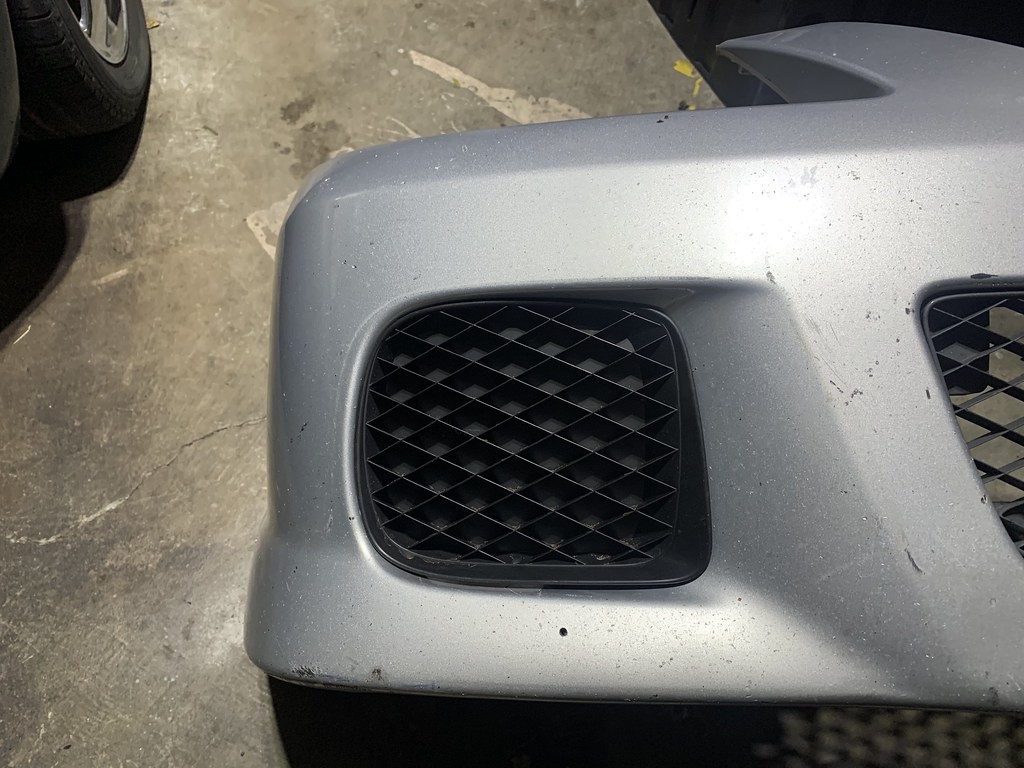
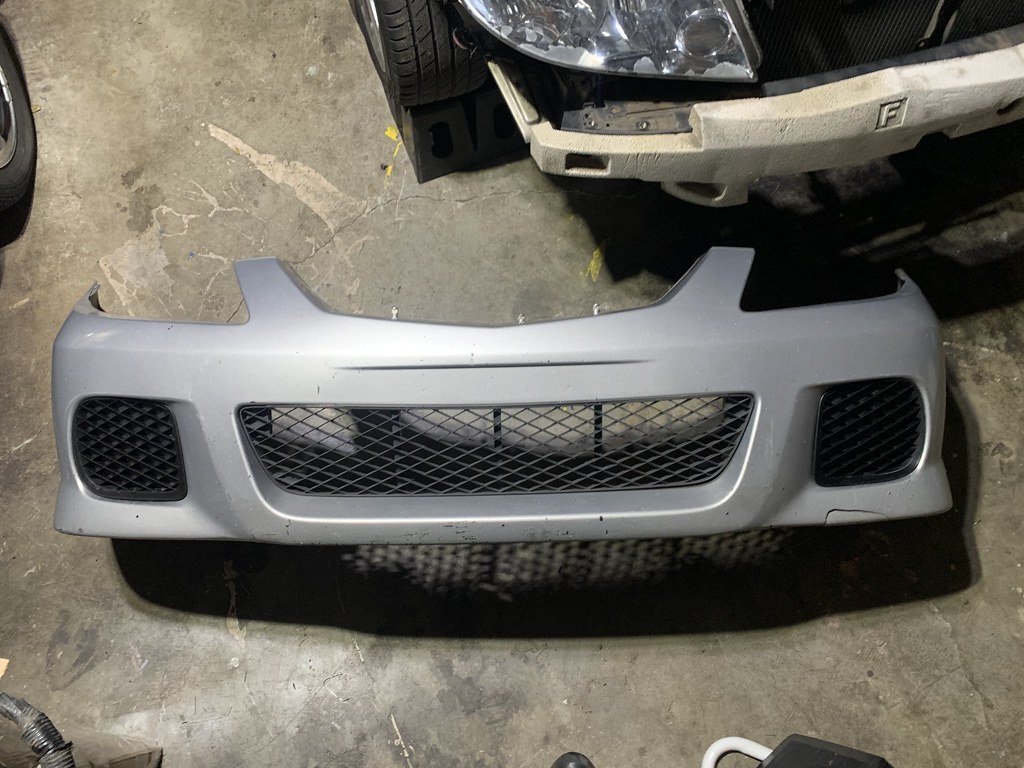
I also decided to remove the Mazdaspeed Protege front lip off the car. It looks good visually, but I wanted to try something simple with the front end. So I sourced a set of the foglight deletes, and removed the front lip.
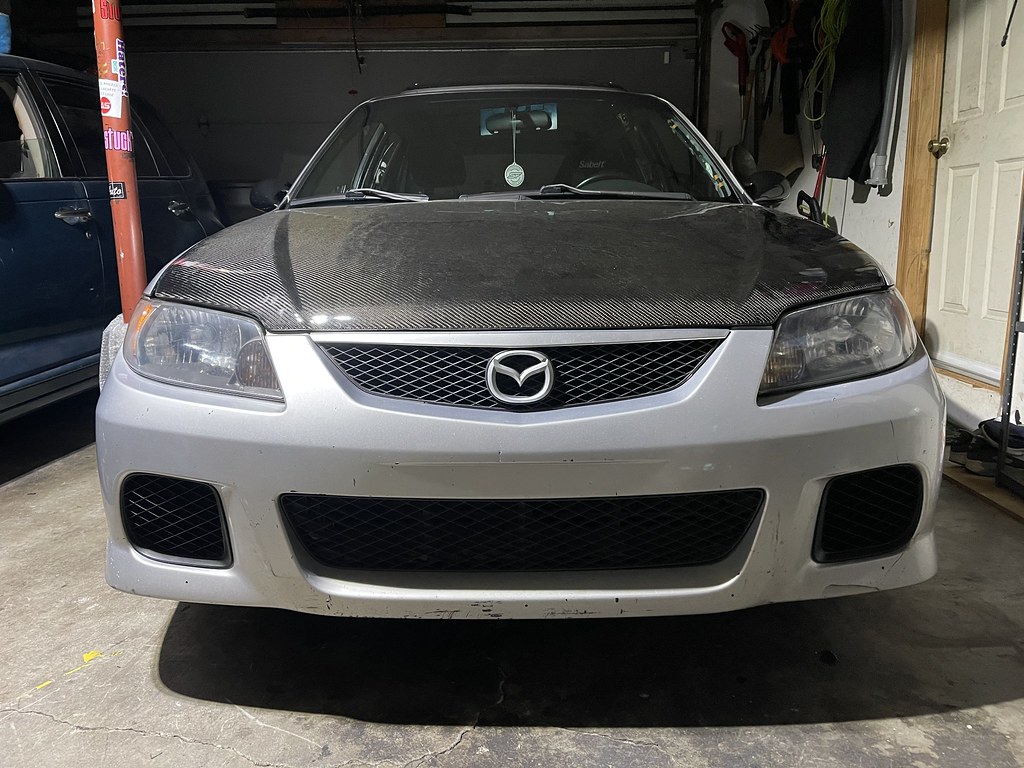
Personally I like the look of the P5 bumper with the foglight deletes. But I am sure no normal person would ever notice the change. Granted my intake filter is directly behind the drive side, something I may address later.
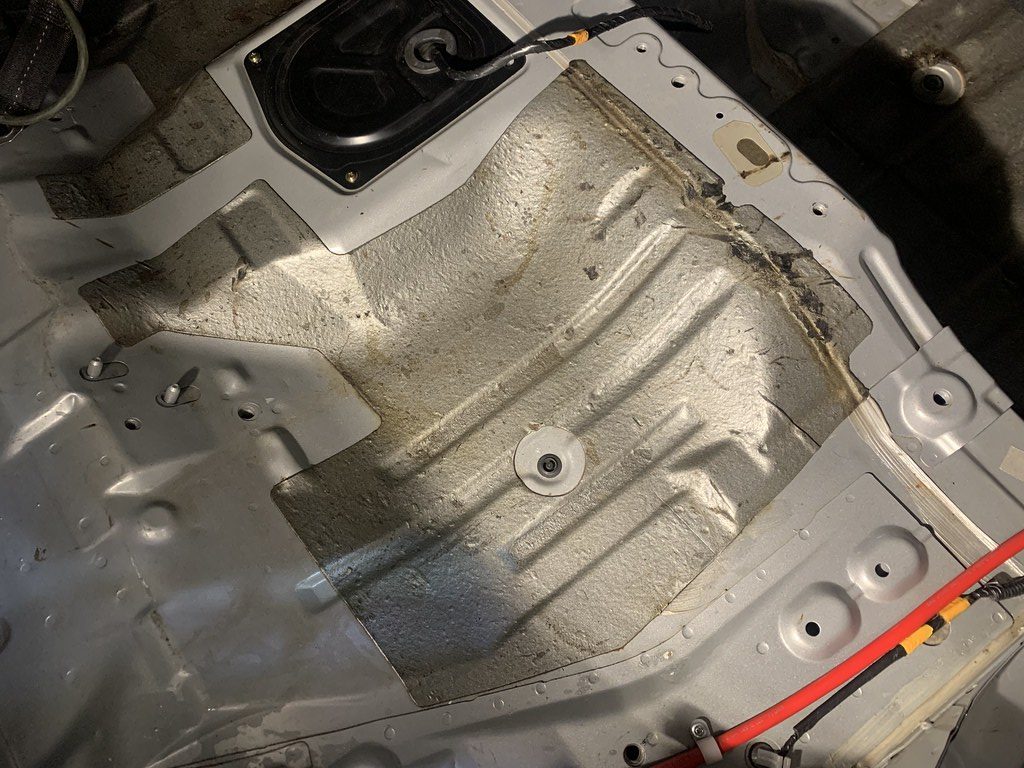
I had always heard about using dry ice to remove sound deadening. So I finally decided to give a try with all hopes of it not working. Or being way more trouble then its worth.
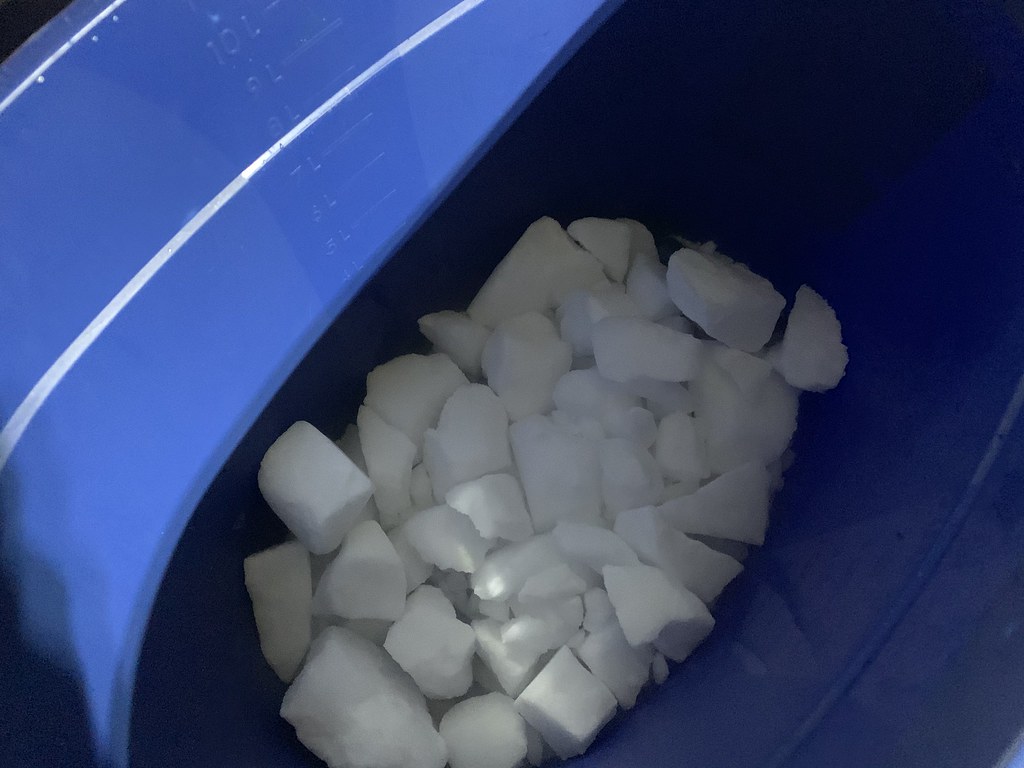
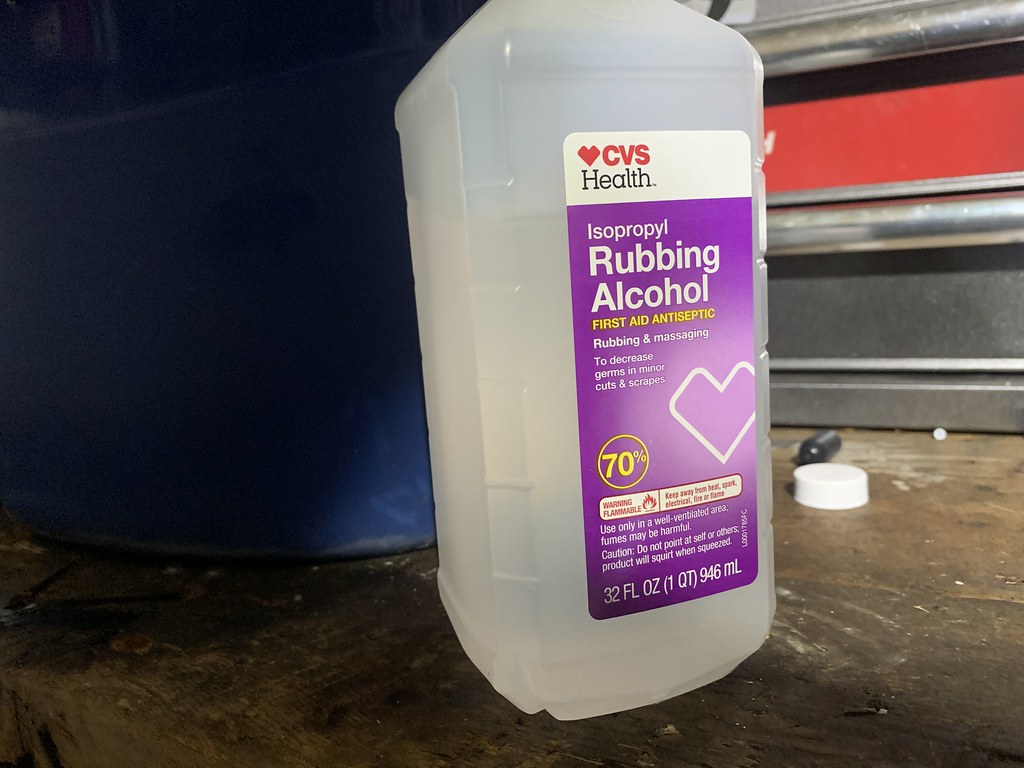
Start off with dry ice, broken up in a bucket. Then you pour in the rubbing alcohol to make it last a little longer and help it spread...

Pour it on the material, and wait...

You will hear it crackle and pop, which is the glue coming apart from the panels.
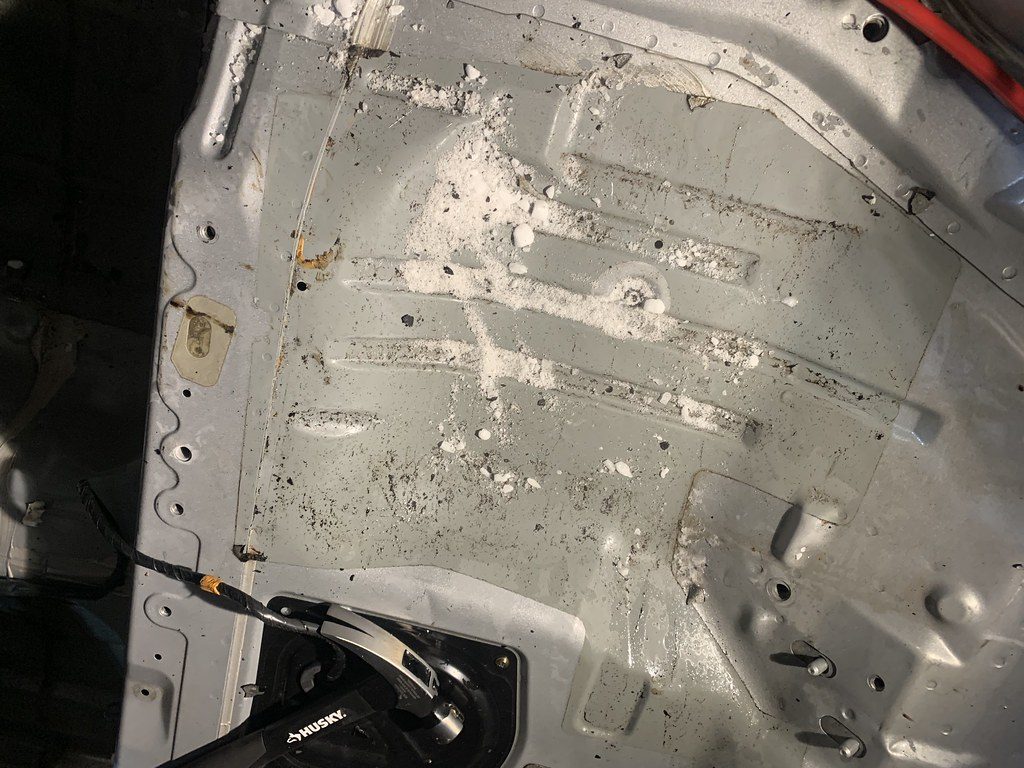
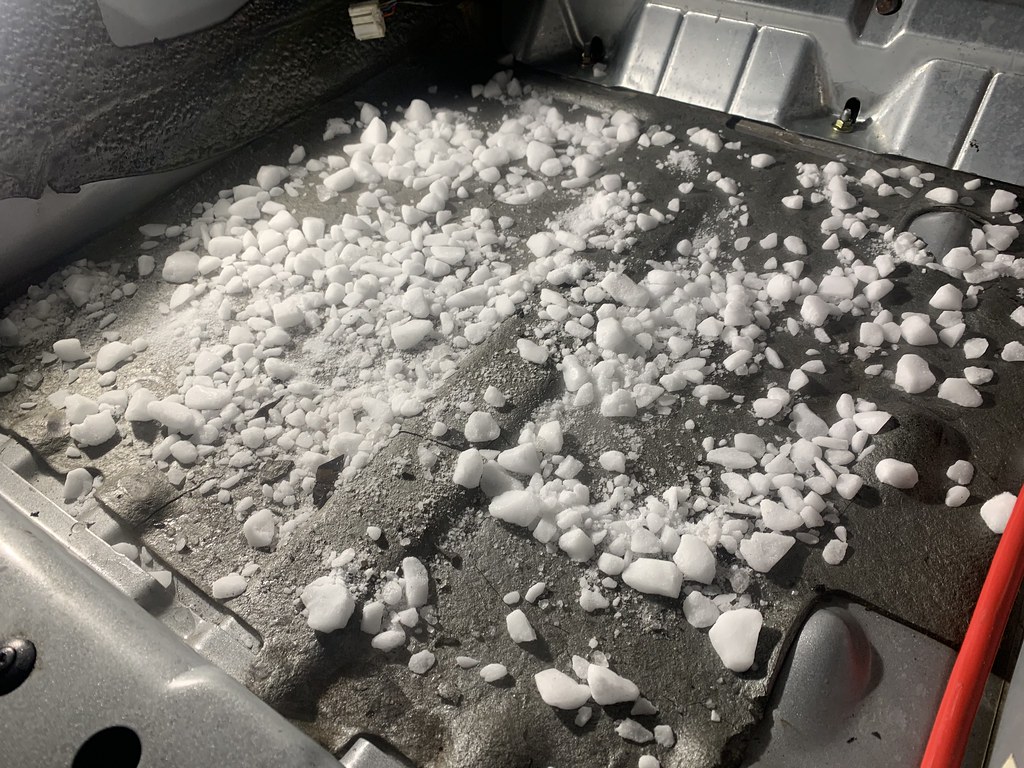
Once it starts to crackle, you take a flat head or a scrapper of some sort, and it will lift on its own. Some pieces may need to be tapped with a hammer, to help break some pieces loose.
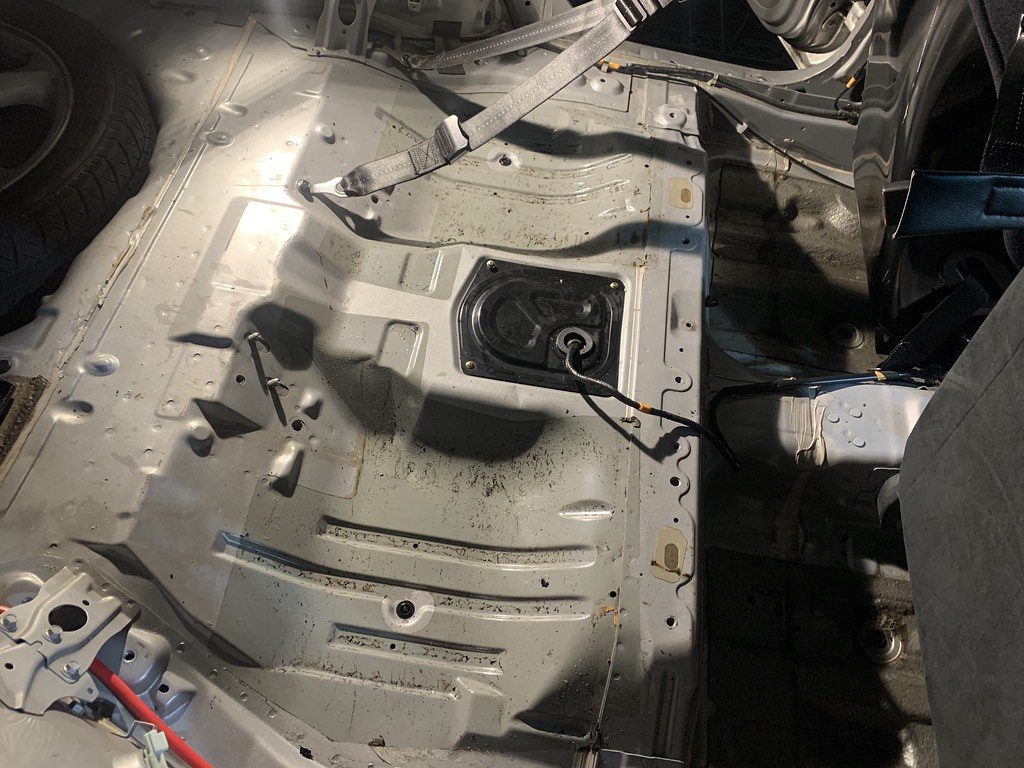
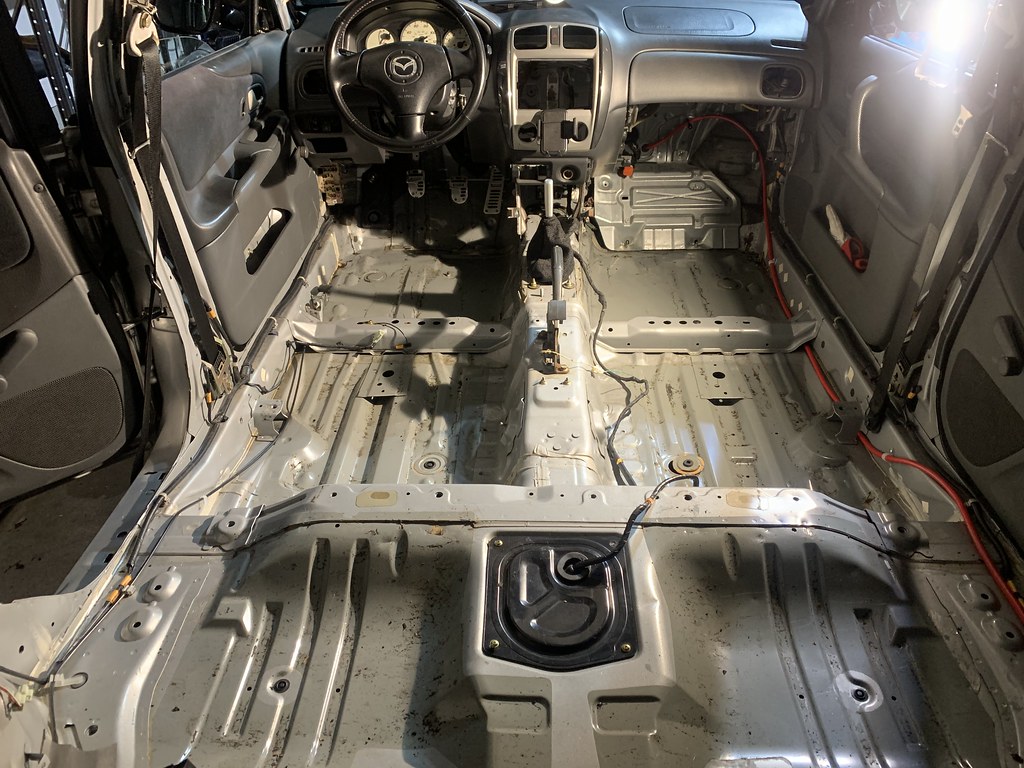
I used about 3lbs worth of dry ice to do all of my interior. There will be some residue left, but you can use mineral spirits to clean it up and make look clean.
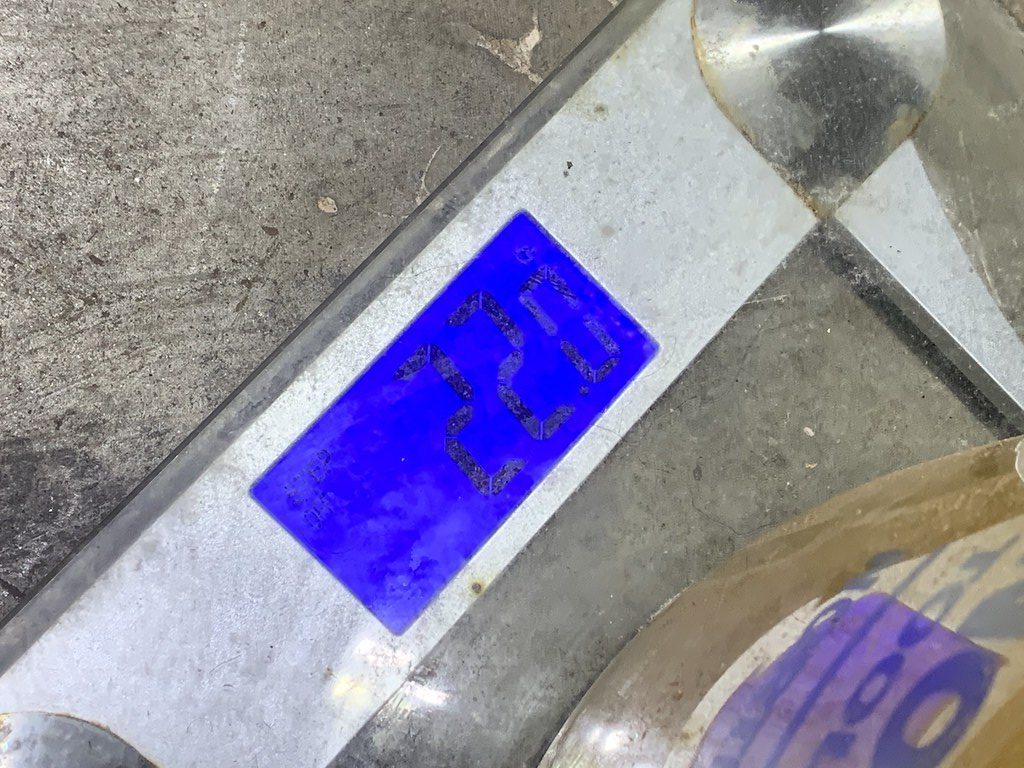
It took all of a hour and a half and $30 to shave off 22 lbs.
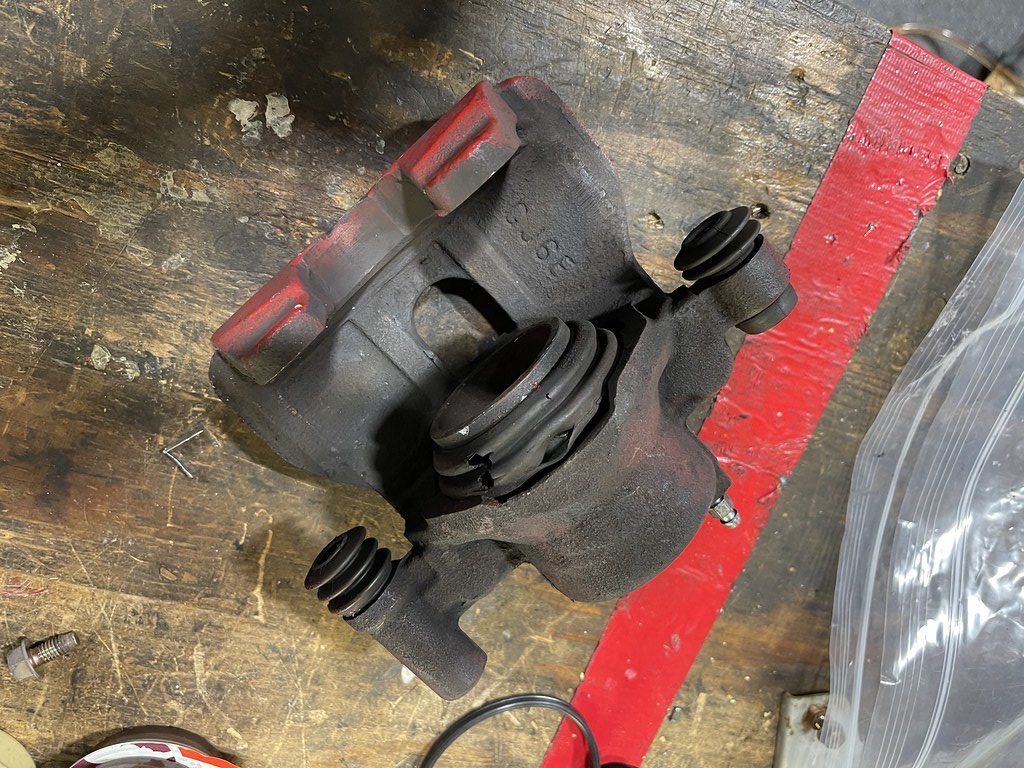
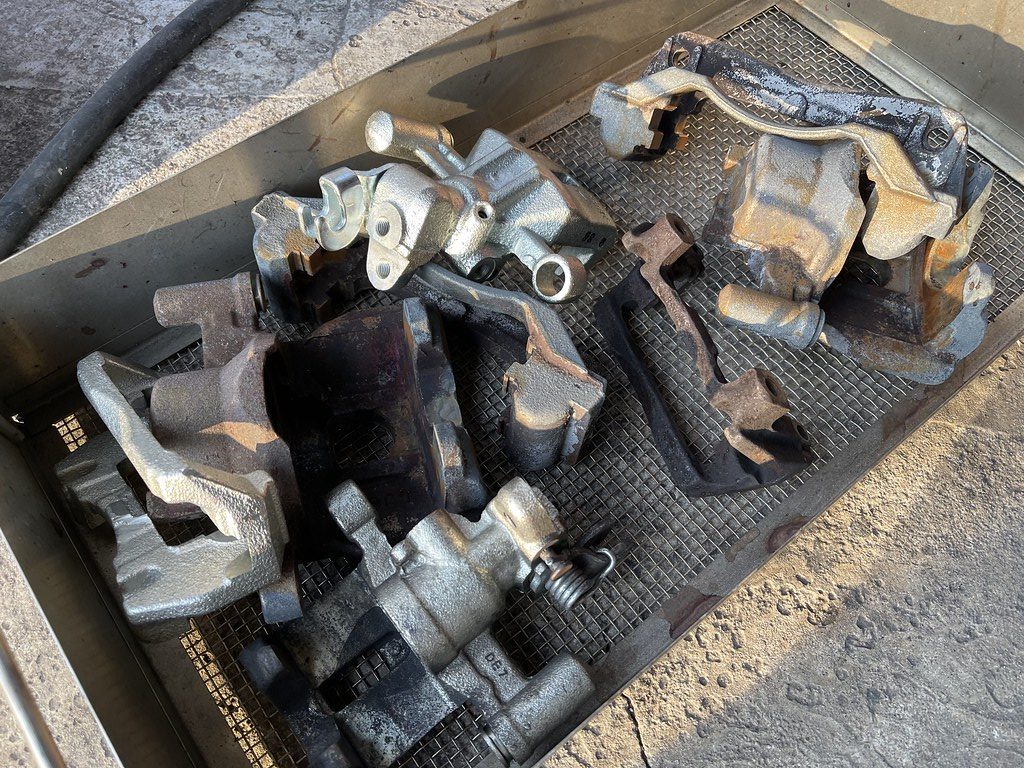
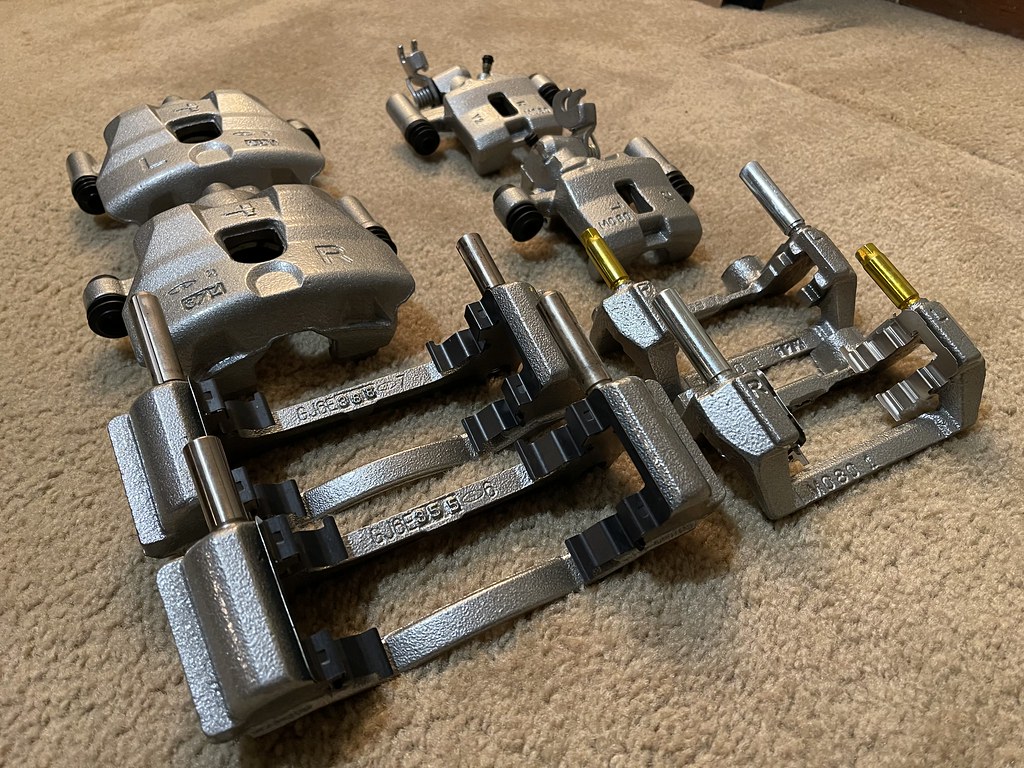
Next project was to rebuild my brake calipers. The front calipers are from a 2004 Mazda 6 that I sourced from my local pull a part. I always had a issue with the car pulling heavy to the right on initial braking. But I never really got into correcting it, because once after a few hard stops it would stop.
Boots removed...

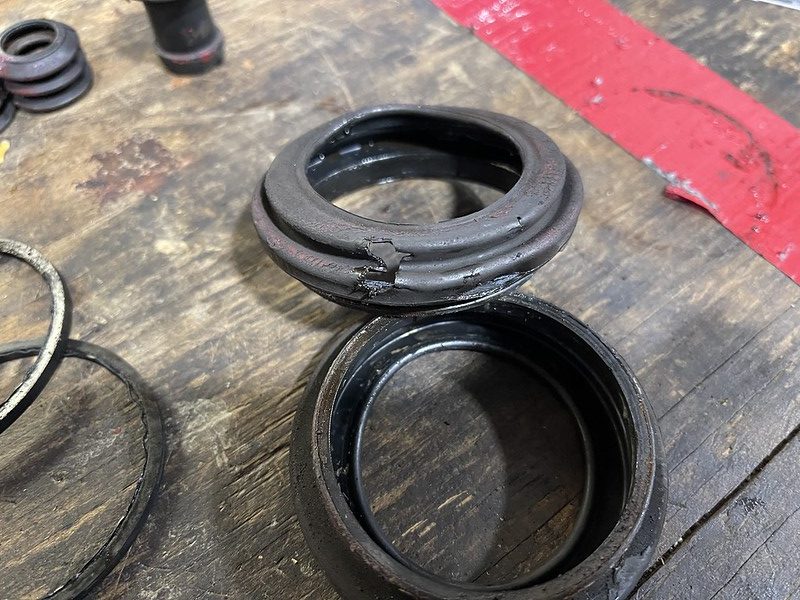
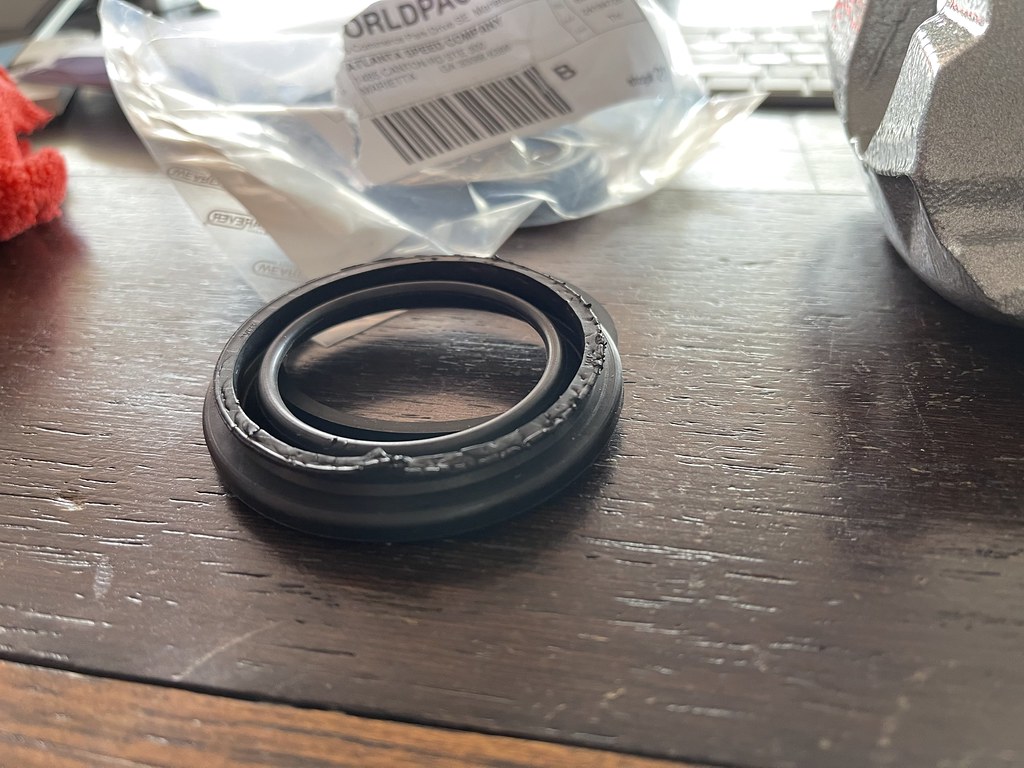
The most important part of the calipers is the piston seals that pretty much the heart and soul of the braking system. And clearly you can see the that they are worn and not sealing to their best ability.
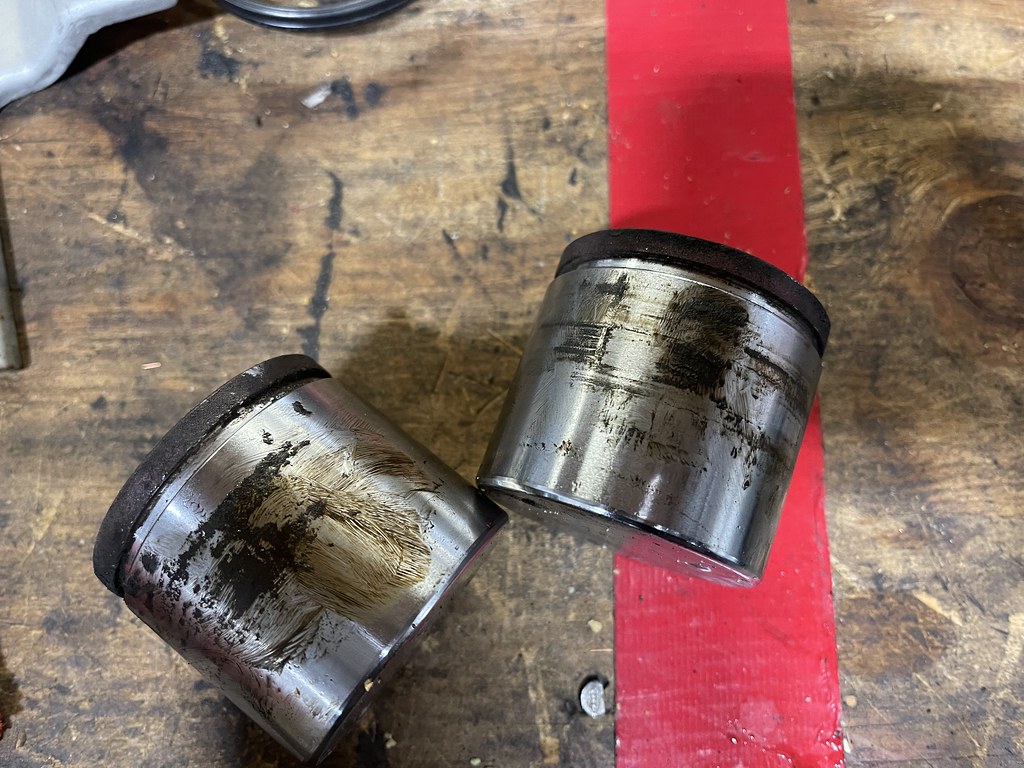
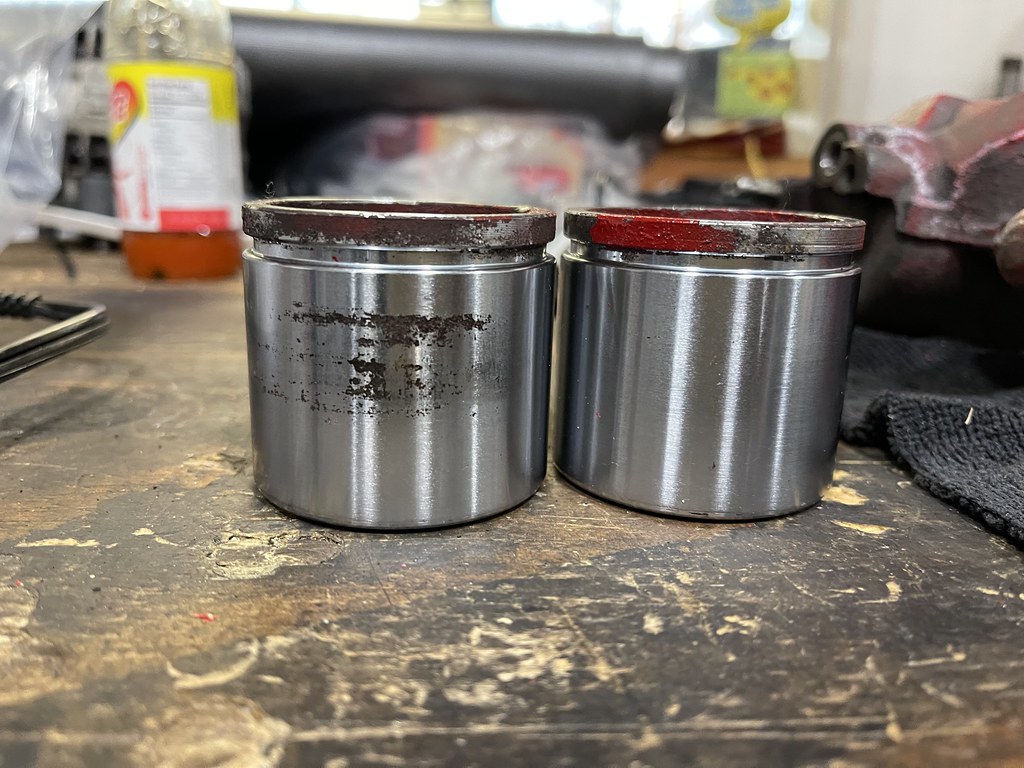
I removed the caliper pistons and cleaned them and found a good bit of corrosion on the driver side. Which would explain why the car would pull so hard right during the initial brake.
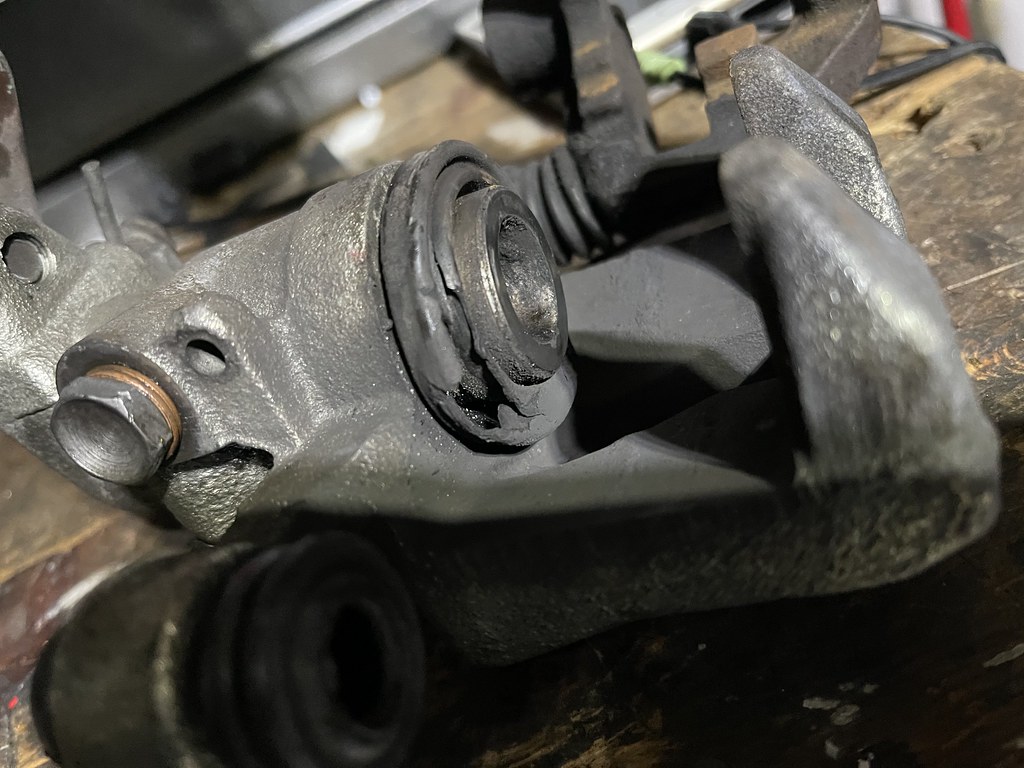
The rear calipers have always been a problem on this car. And its obvious why, the rear boots were hard as a rock to touch, and obviously not keeping the internals clean.

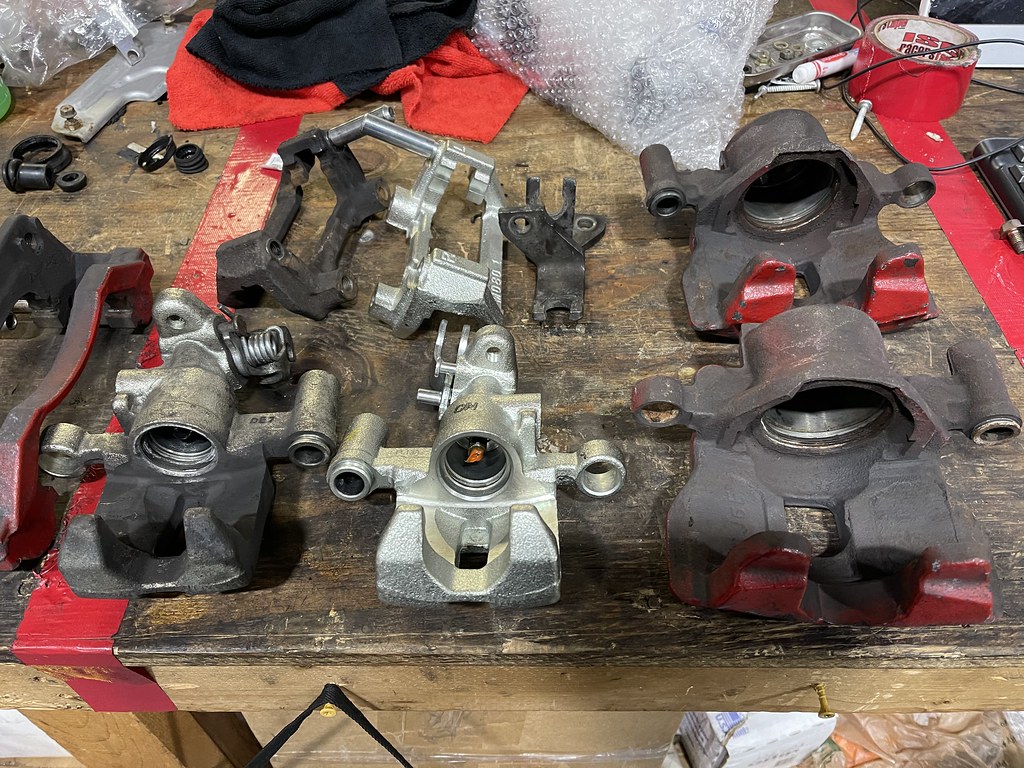
When I took apart the driver rear, one of the sliders for the caliper was stuck , and I decided to just replace it. But another issue that will prevent the car from braking properly. At this time I will be taking the time to get them powder coated and completely rebuild...
As of now the car sits and waiting for the calipers to be powder coated...
One of the reasons I did not make it to the Barber Motorsports event last year was because of these ball joints. They look to be still stock, and after 300k miles and 19 years they were done.
Originally I looked into getting the Hardrace arms, but time and availability were not on my side. So I got new complete arms, and a set of Super Pro Rear Arm Bushings.
This job is impossible to do with out the use of a press. Once you press out the old bearing, you simply press in the new one.
And insert the new inserts and ends into the bushing...
Also while removing the control arm, I noticed how corroded and pitted the old bolt was when I removed it. There was no way I could put that back in, no need in risking failure over a $7 bolt.
New arm w/ bushings installed...
I had these headlights in last season, but they started to peel and look pretty rough.
I had a second set of Mazdaspeed Protege headlights from years ago that needed some attention, so I tried my hand at polishing them...
After buffing them, and attempting to clear coat them this was the result. Some sort of matte , smoked transparent wrinkle finish. It was terrible...
I reached out to a professional (Alex Perrucci ) , and had them do it for me, and the results were a million times better!
I also decided to remove the Mazdaspeed Protege front lip off the car. It looks good visually, but I wanted to try something simple with the front end. So I sourced a set of the foglight deletes, and removed the front lip.
Personally I like the look of the P5 bumper with the foglight deletes. But I am sure no normal person would ever notice the change. Granted my intake filter is directly behind the drive side, something I may address later.
I had always heard about using dry ice to remove sound deadening. So I finally decided to give a try with all hopes of it not working. Or being way more trouble then its worth.
Start off with dry ice, broken up in a bucket. Then you pour in the rubbing alcohol to make it last a little longer and help it spread...
Pour it on the material, and wait...
You will hear it crackle and pop, which is the glue coming apart from the panels.
Once it starts to crackle, you take a flat head or a scrapper of some sort, and it will lift on its own. Some pieces may need to be tapped with a hammer, to help break some pieces loose.
I used about 3lbs worth of dry ice to do all of my interior. There will be some residue left, but you can use mineral spirits to clean it up and make look clean.
It took all of a hour and a half and $30 to shave off 22 lbs.
Next project was to rebuild my brake calipers. The front calipers are from a 2004 Mazda 6 that I sourced from my local pull a part. I always had a issue with the car pulling heavy to the right on initial braking. But I never really got into correcting it, because once after a few hard stops it would stop.
Boots removed...
The most important part of the calipers is the piston seals that pretty much the heart and soul of the braking system. And clearly you can see the that they are worn and not sealing to their best ability.
I removed the caliper pistons and cleaned them and found a good bit of corrosion on the driver side. Which would explain why the car would pull so hard right during the initial brake.
The rear calipers have always been a problem on this car. And its obvious why, the rear boots were hard as a rock to touch, and obviously not keeping the internals clean.
When I took apart the driver rear, one of the sliders for the caliper was stuck , and I decided to just replace it. But another issue that will prevent the car from braking properly. At this time I will be taking the time to get them powder coated and completely rebuild...
As of now the car sits and waiting for the calipers to be powder coated...

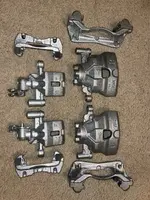
After getting the calipers seals removed, I was able to get some help from my good friend at LLOYDS . He powder coats for a living, and he let me come over and give it a shot. First step was to strip the calipers to strip them and ready to be sand blasted. This is a photo of them fresh out of the stripper.
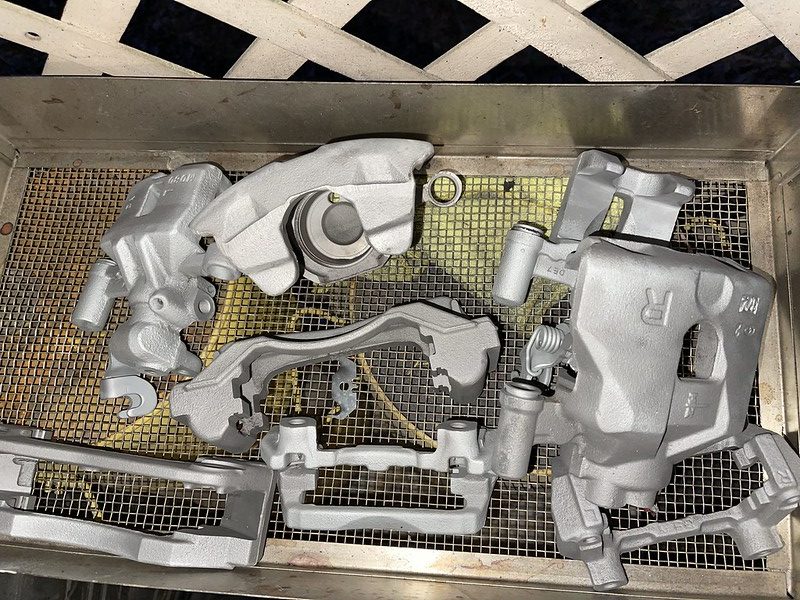
Second step was to sandblast, that gets the surface rust off and the remaining paint and or impurities off and and ready for the powder..
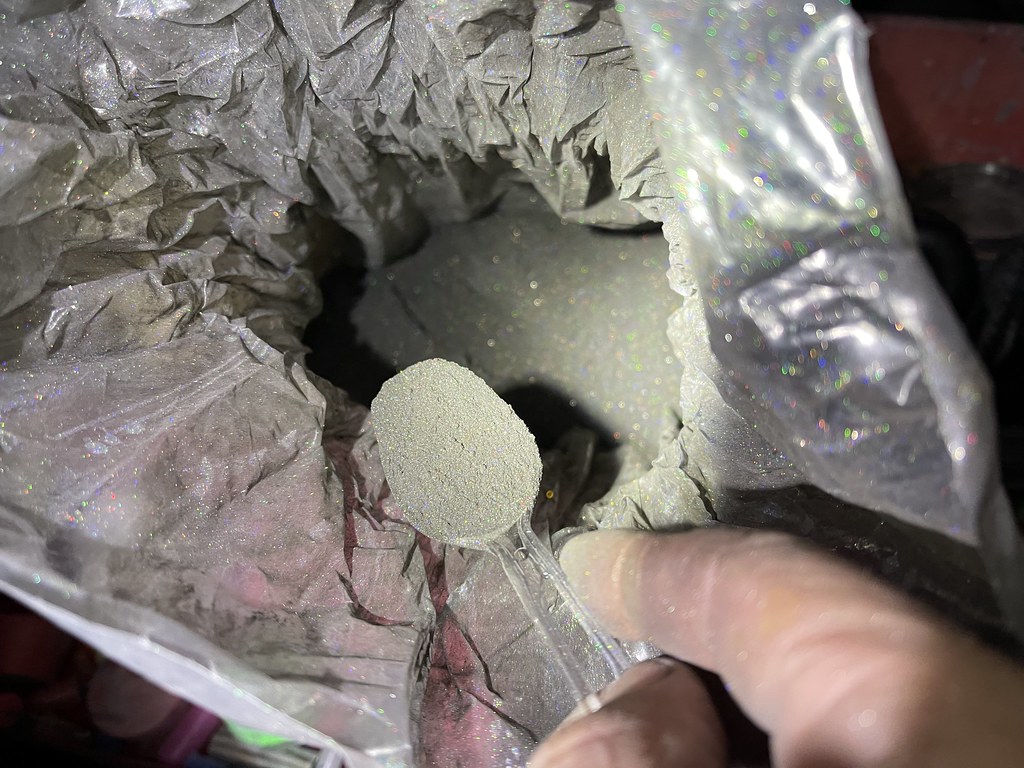
I decided to go with a basic silver and alot of flake, and I added a hint of green just to see what would happen.
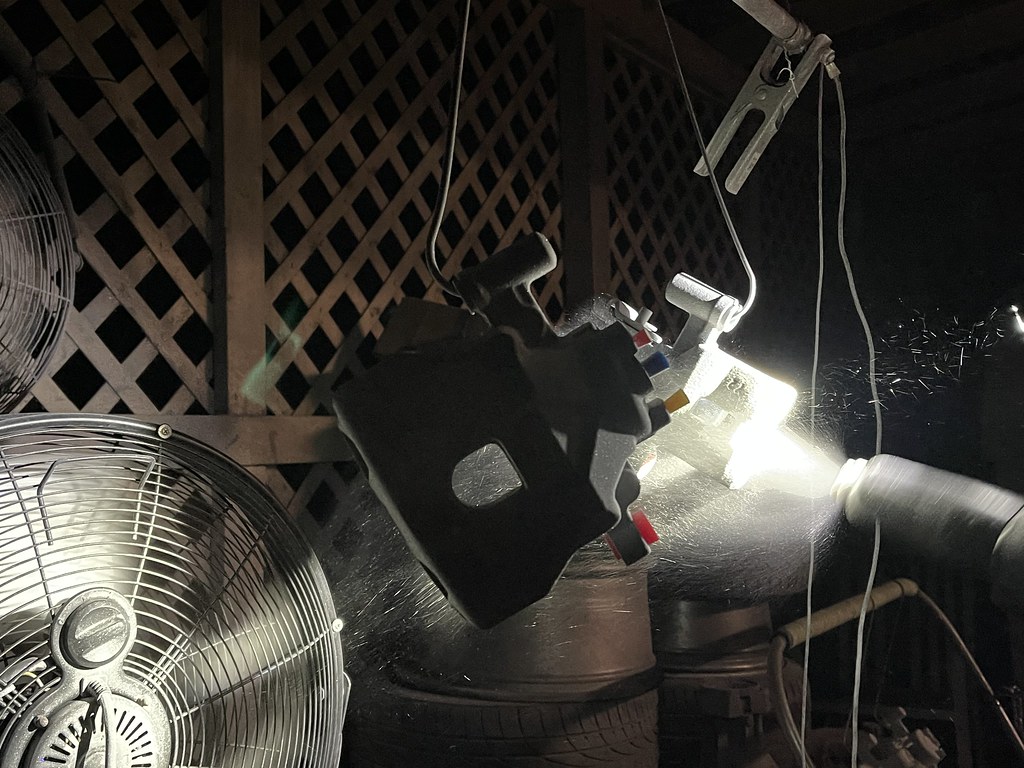
Spraying the powder...
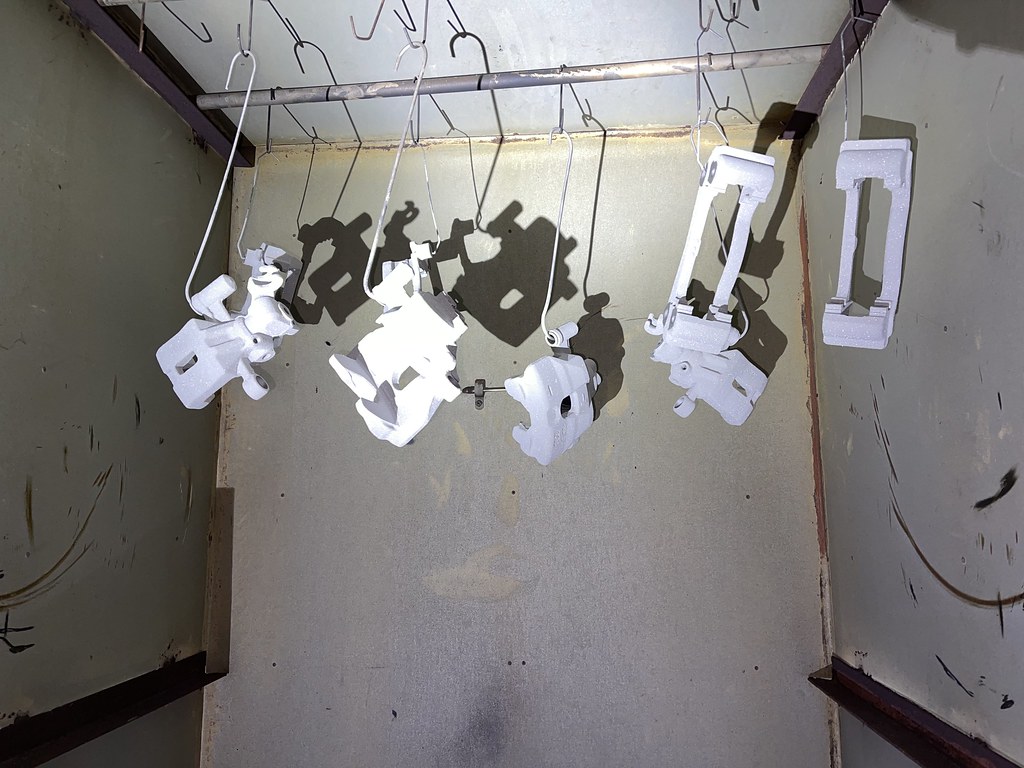
Final Bake with the clear coat...
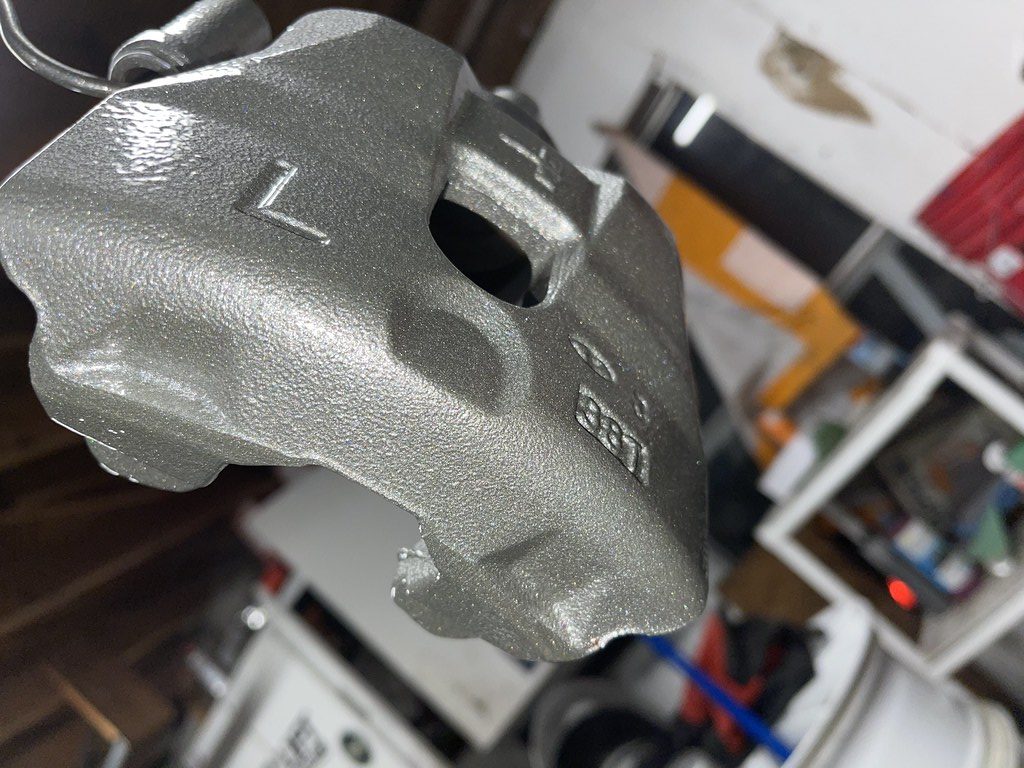
Final product...
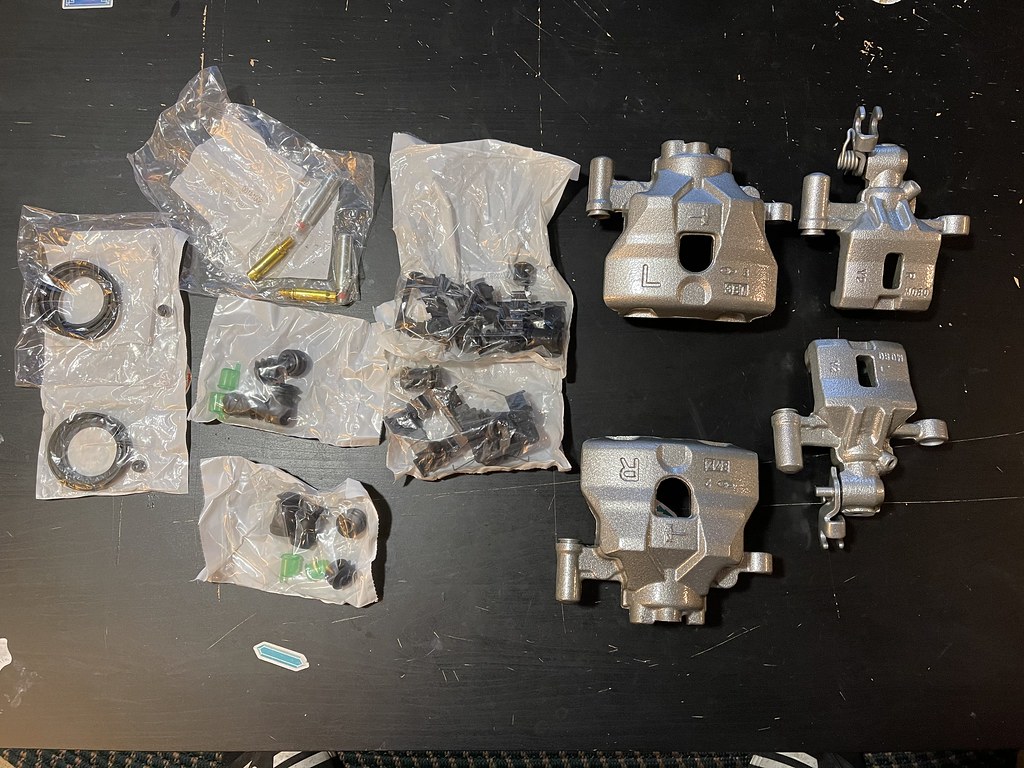
New seals, and slide pins
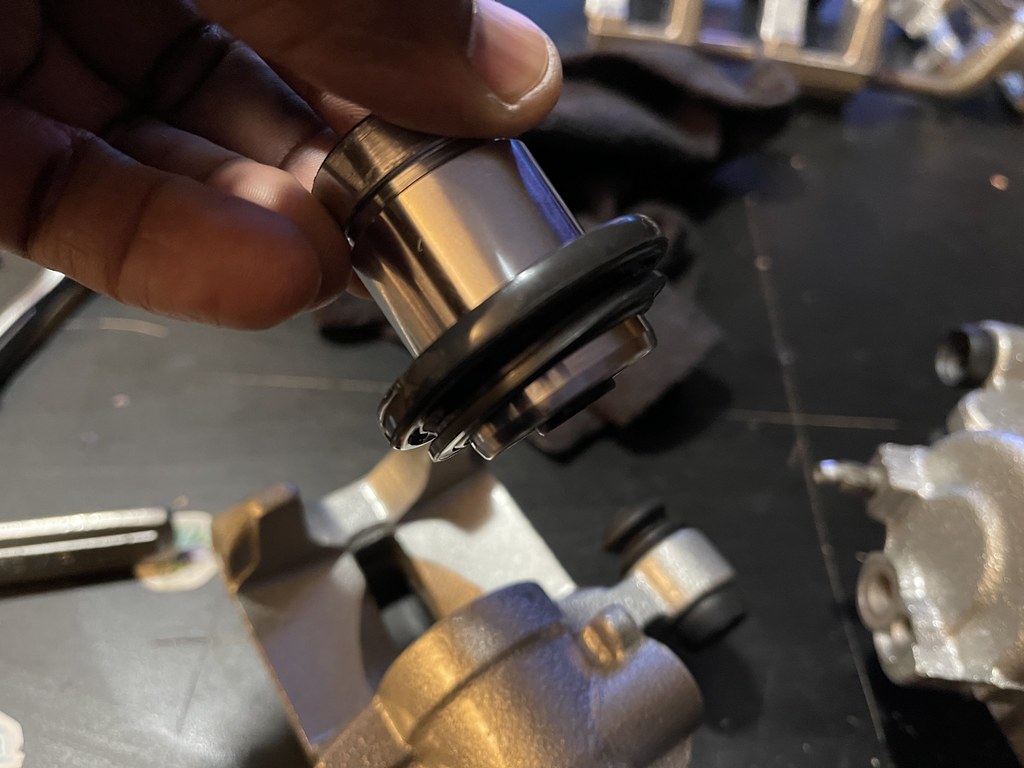
Rebuilding the calipers is pretty simple, but the trickiest part is re-installing the pistons back into the calipers. Initially I laid the seal on the piston and tried to press the piston in with the seal on it, and wrap the seal.
It was very difficult and I ended up damaging the seals trying to put the seals on the ridges of the caliper.
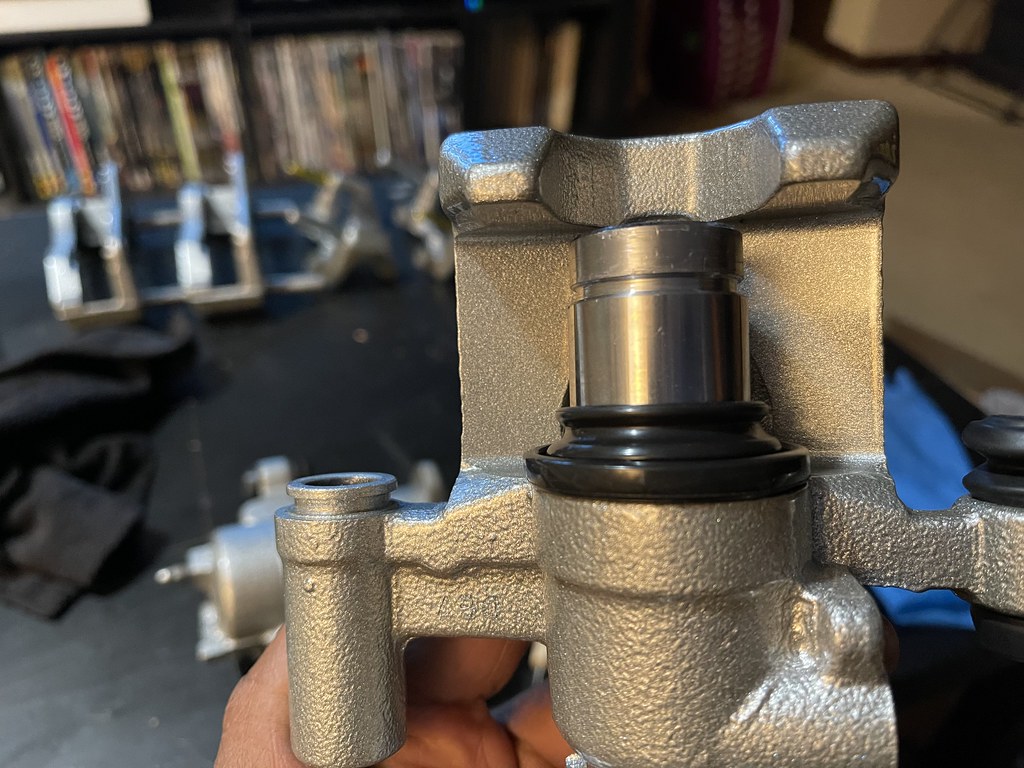
I watched a Youtube video, and found a easier method. Place the seal around the caliper, and then press in the piston into the caliper, and the seal goes right in place with minimal effort....
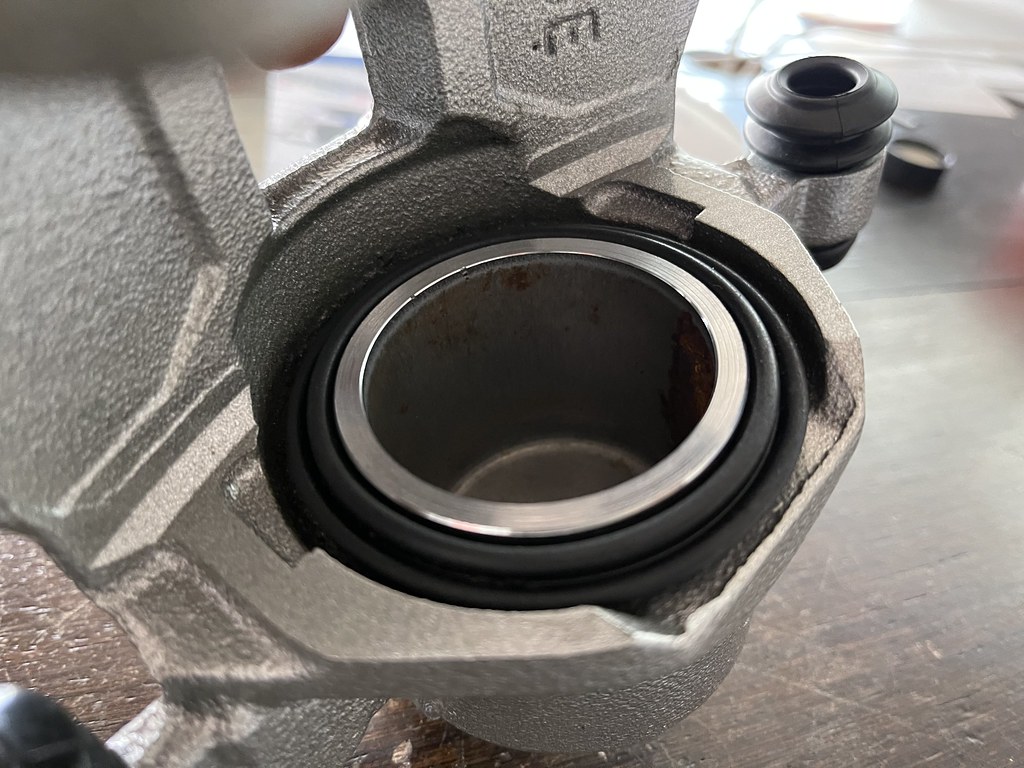
Much easier....
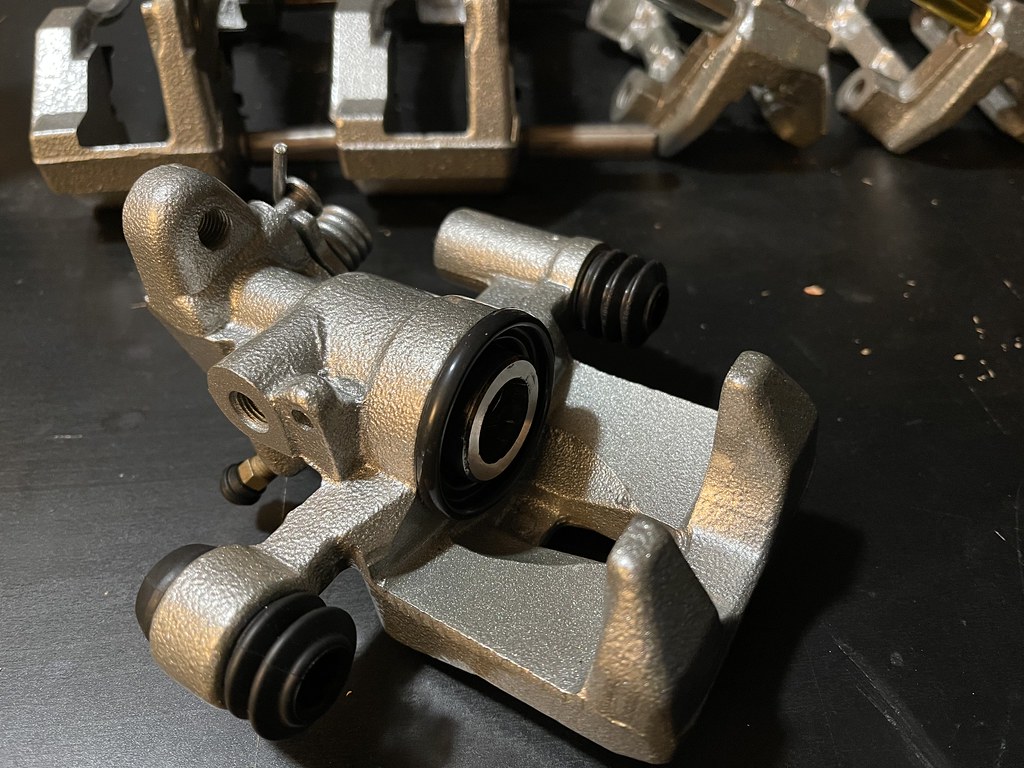
Everything fresh and new ready!
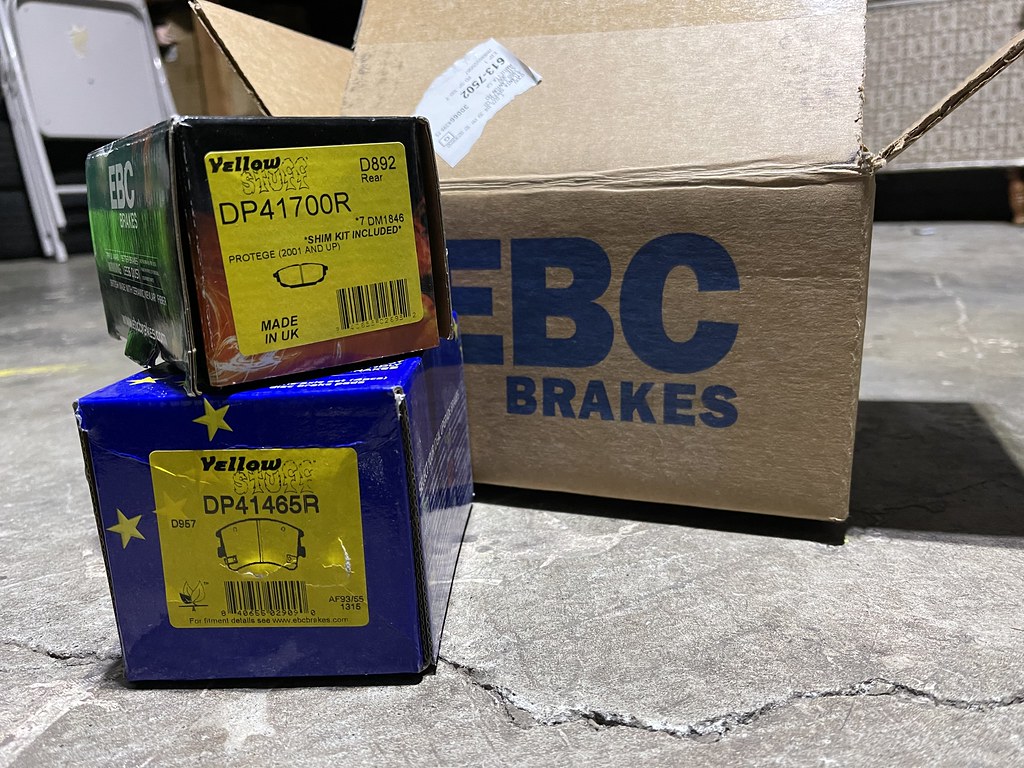
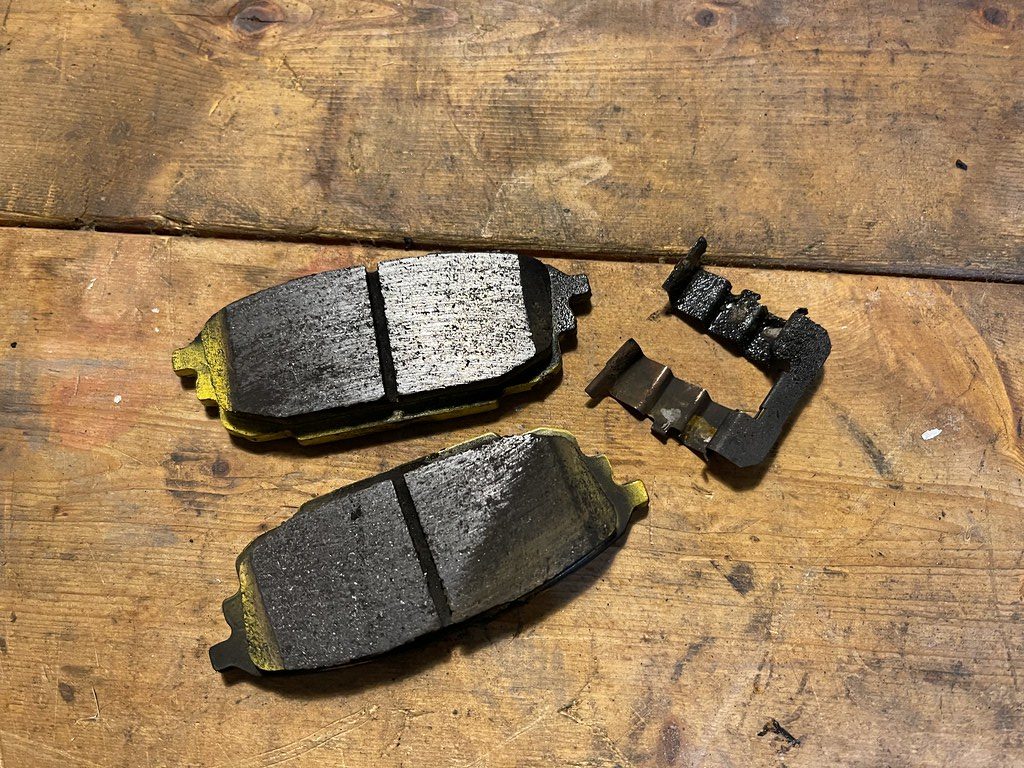
I was initially gonna re-use my Hawk HPS pads. Because I have been trying to find a harder compound, So I wanted to give the EBC yellows a chance. G-Loc makes a pad combo for the Mazda 6 calipers and P5 calipers in the rear.. but I was running low on time
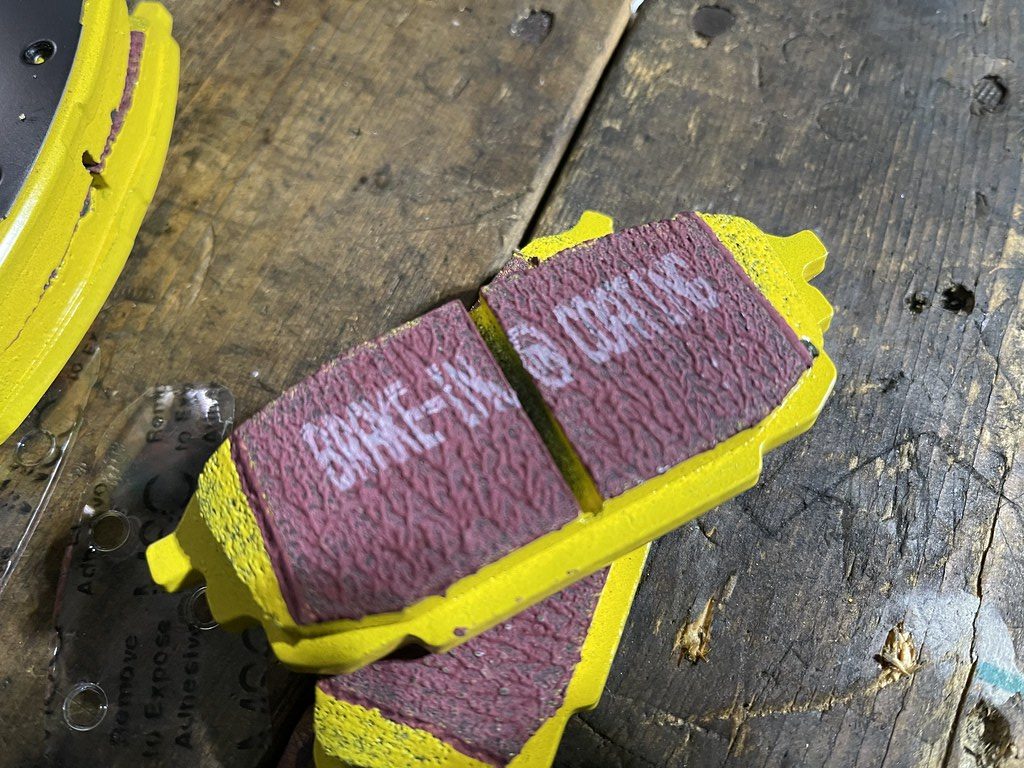
The one thing about EBC is that they have a very intricate break-in period. The initial break-in period is 200 miles, and it continues on up to 1000 miles. But that 200 mile period will have it ready for use..
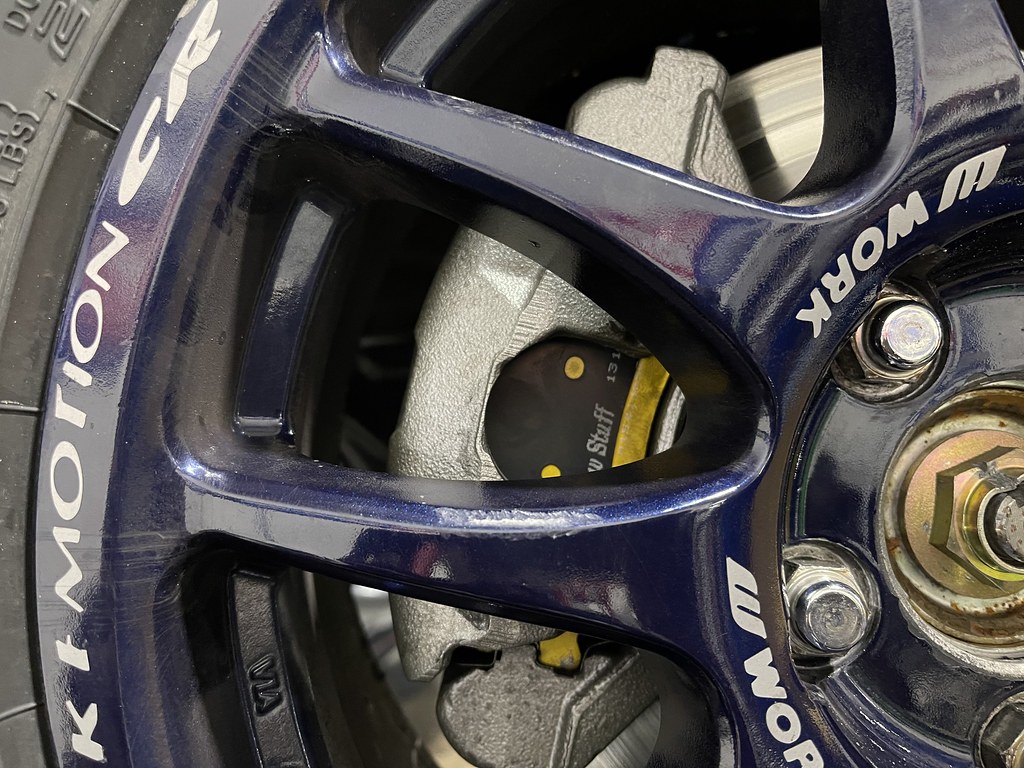
Everything installed...
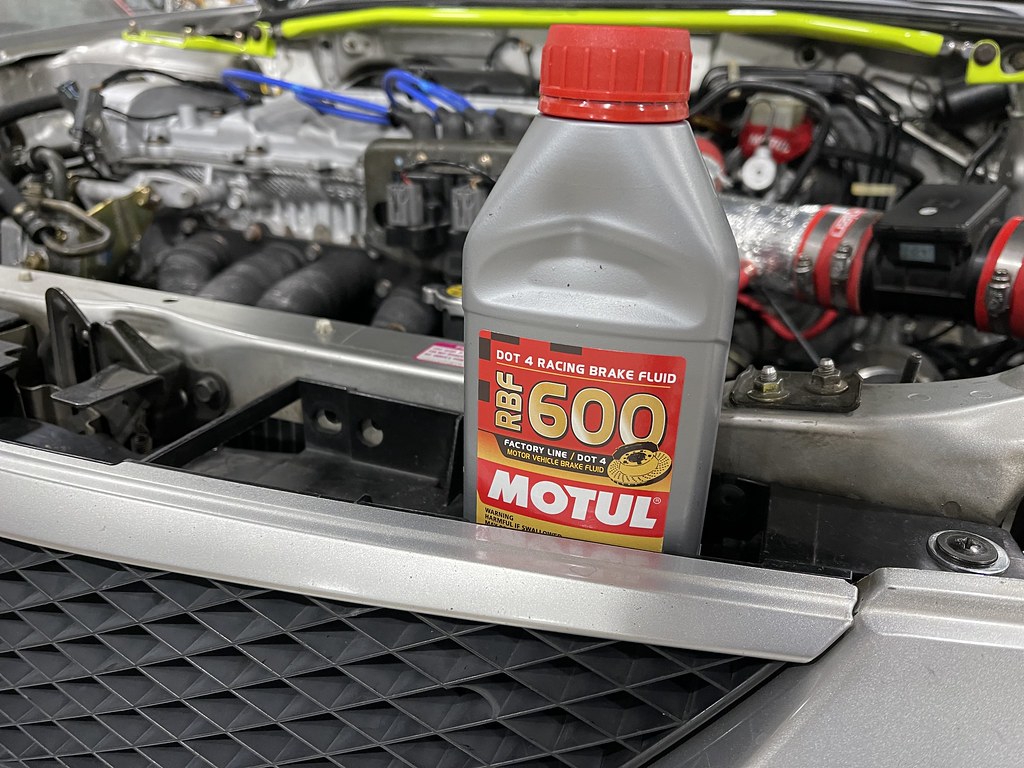
Final step for the brakes, was to get some fresh RBF 600.
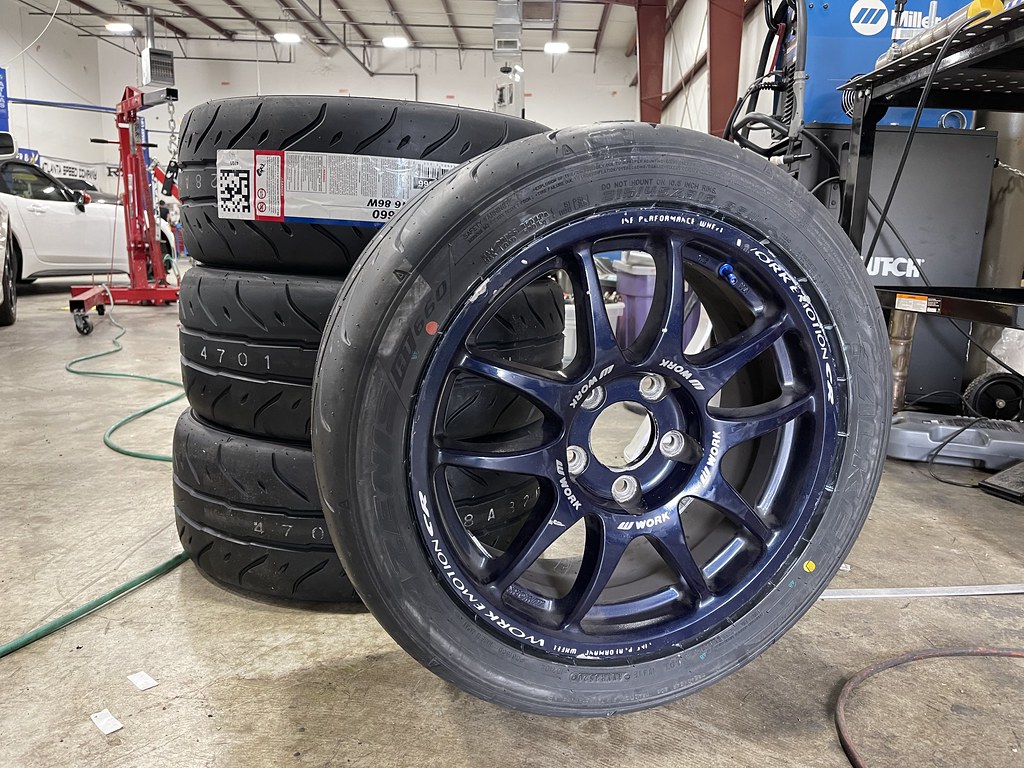
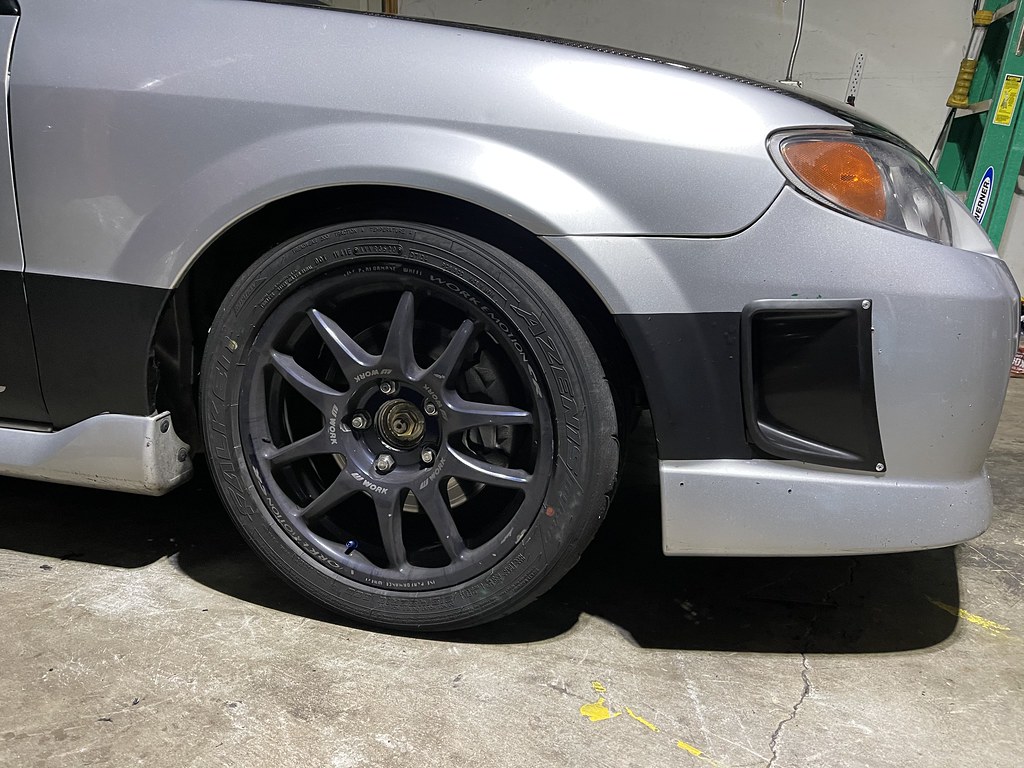
Initially I wanted to sell the Work wheels, and get a set of RPF1s for the weight savings, and go down to a 16x7 from the 16x8. After a month they did not sell, and I didnt want to spend the money on a set of wheels if I didnt need to, so they are going back on. I went down in size from a 225/45R16 R888R to a 215/45R16 in the new Falken RT660 from Atlanta Speed Company . The R888R did well, but I have heard great reviews about the RT660s,and wanted to give them a try.
After powder coating the brake calipers, I was so addicted transforming things, I decided to get the Strut bar done.
Before after sand blasting..

We made a plan to start a transformation with everything and this is the main color choice with it all..
Right now it doesn't match what so ever, but when its all done it will make sense!
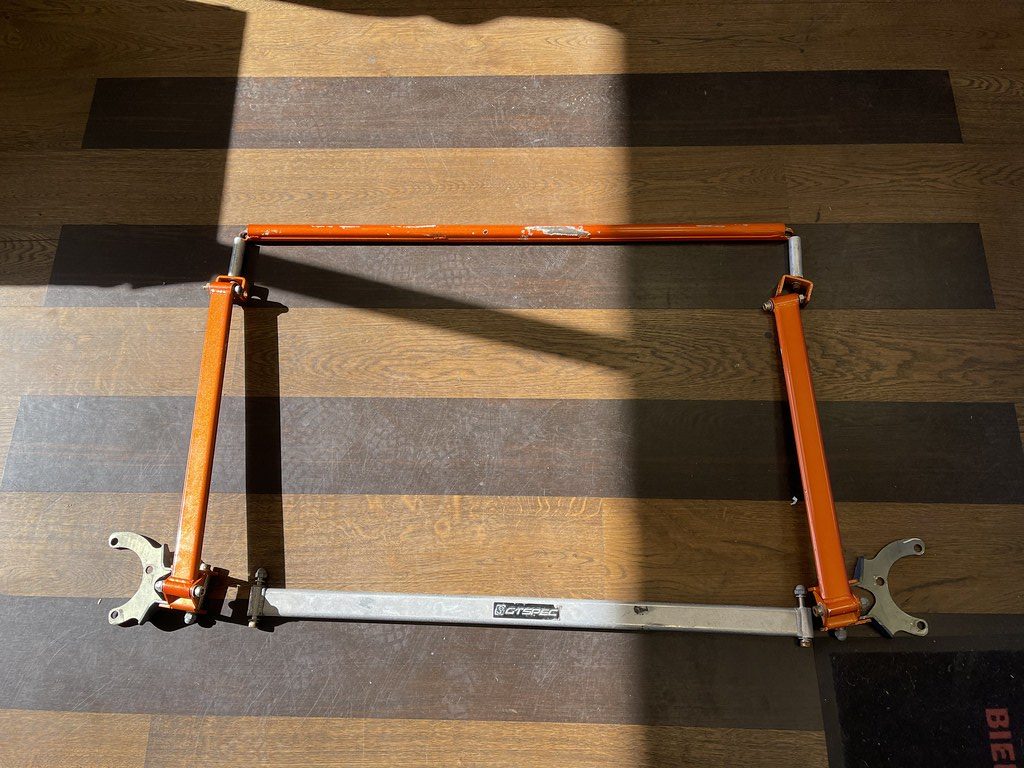
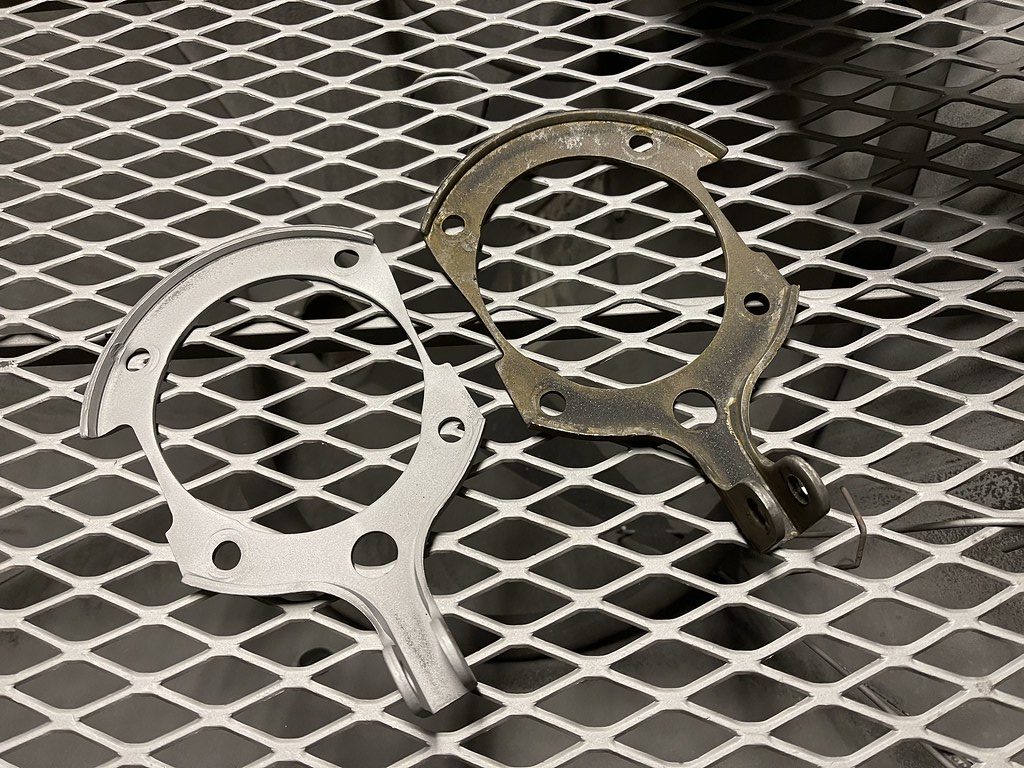
I was finally able to source a long discontinued GT Spec rear trunk brace from a a Protege group member guy in Hawaii. Great upgrade from the Megan Racing strut bar..
Installed...
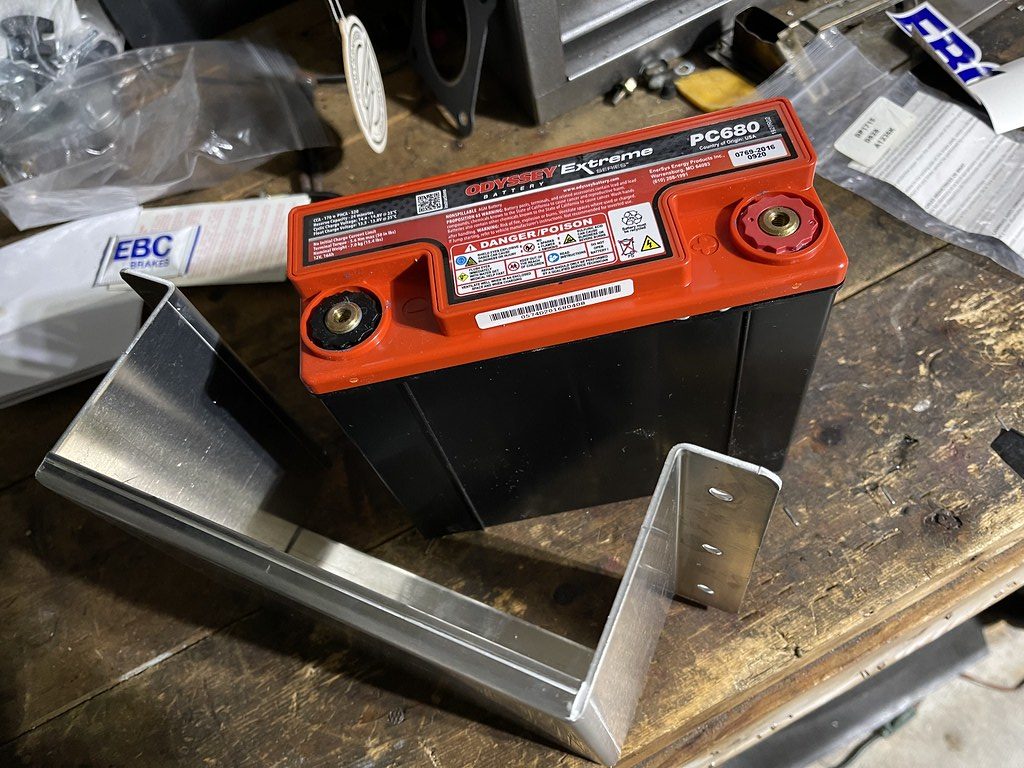
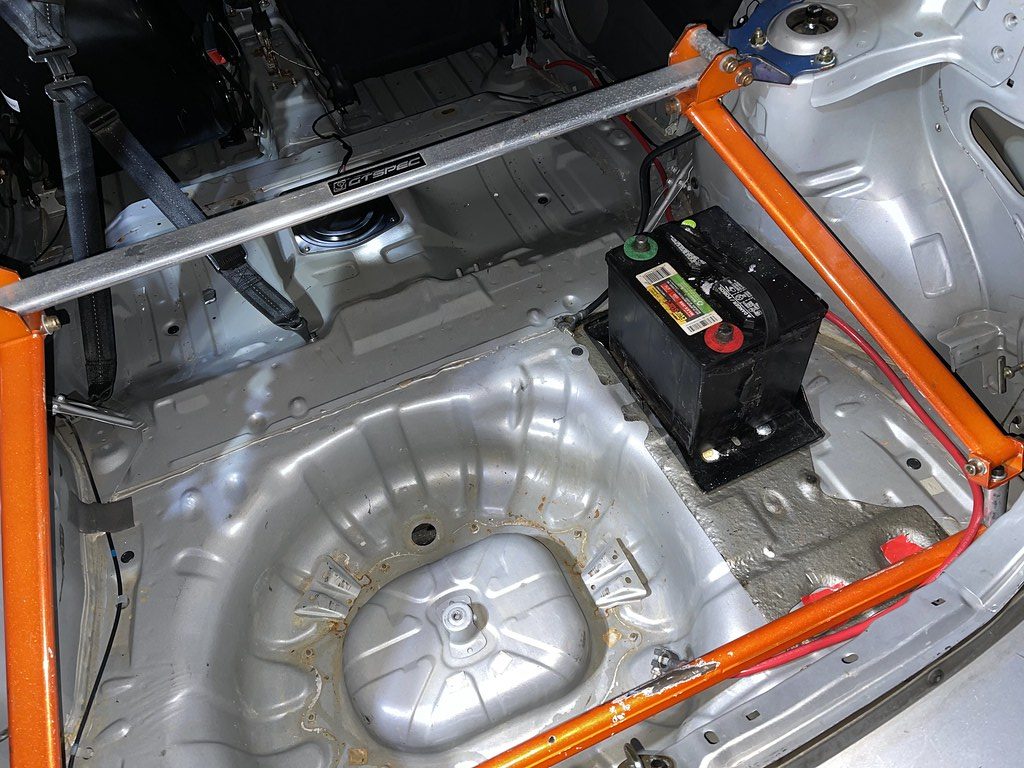
It was finally time to get rid of the huge stock size battery. I found this kit on Ebay , the Odyssey battery is 12lbs, a huge weight savings of 30lbs...
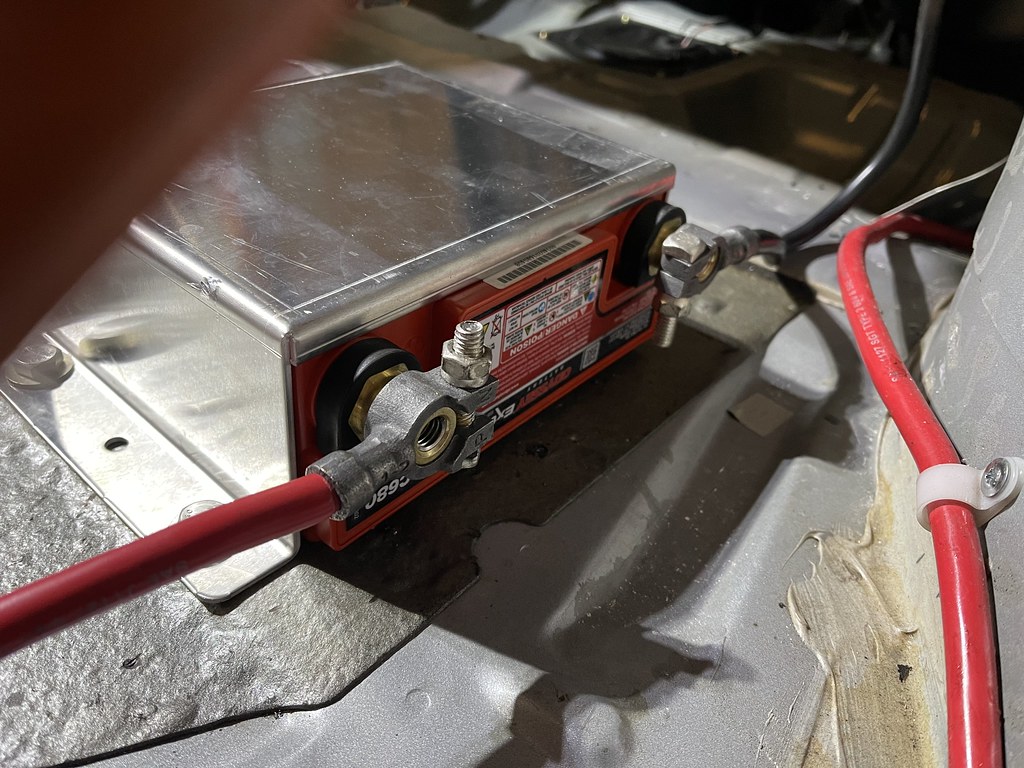
I had to drill out the mounting holes to mound it in the trunk.
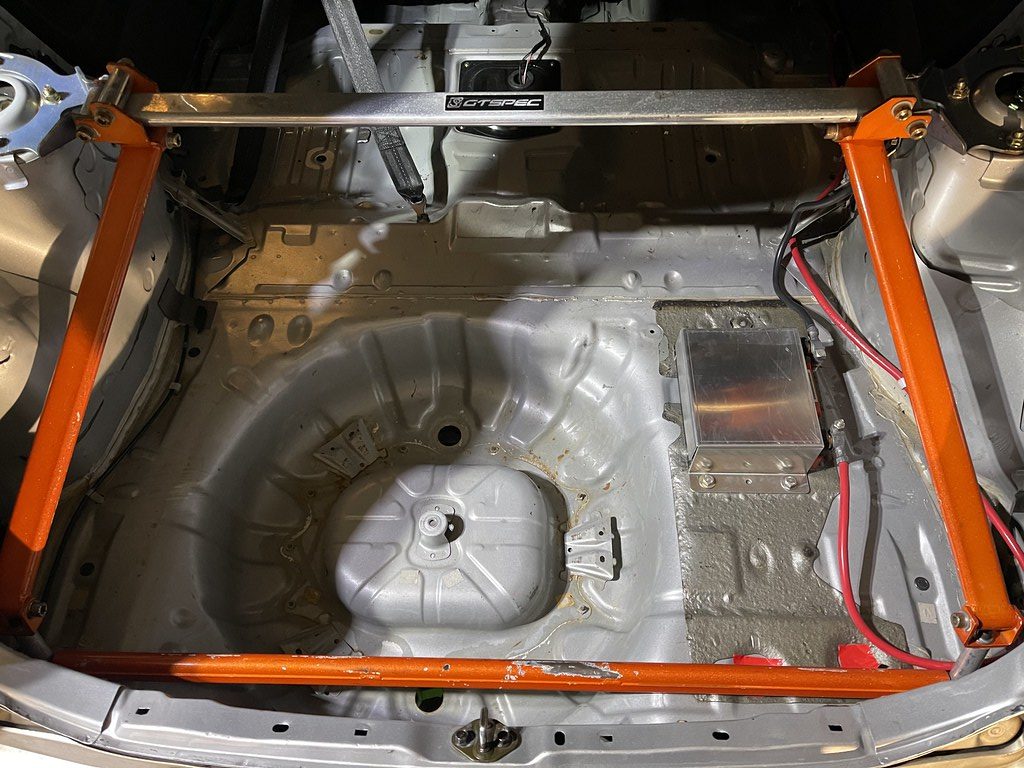
Much better... hopefully I will be able to get the trunk cage refinished...
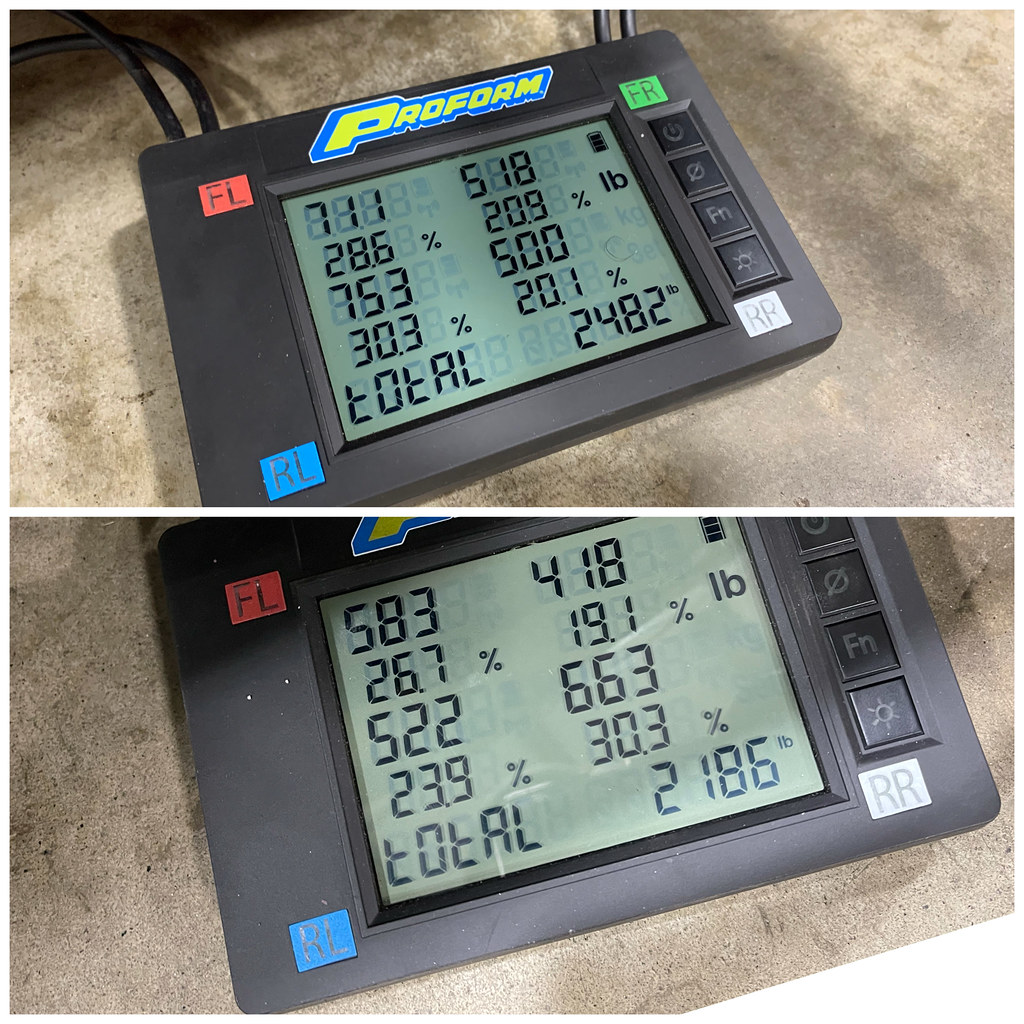
So the results of the diet over the winter, the car was down to 2186lbs from 2482lbs the previous year..
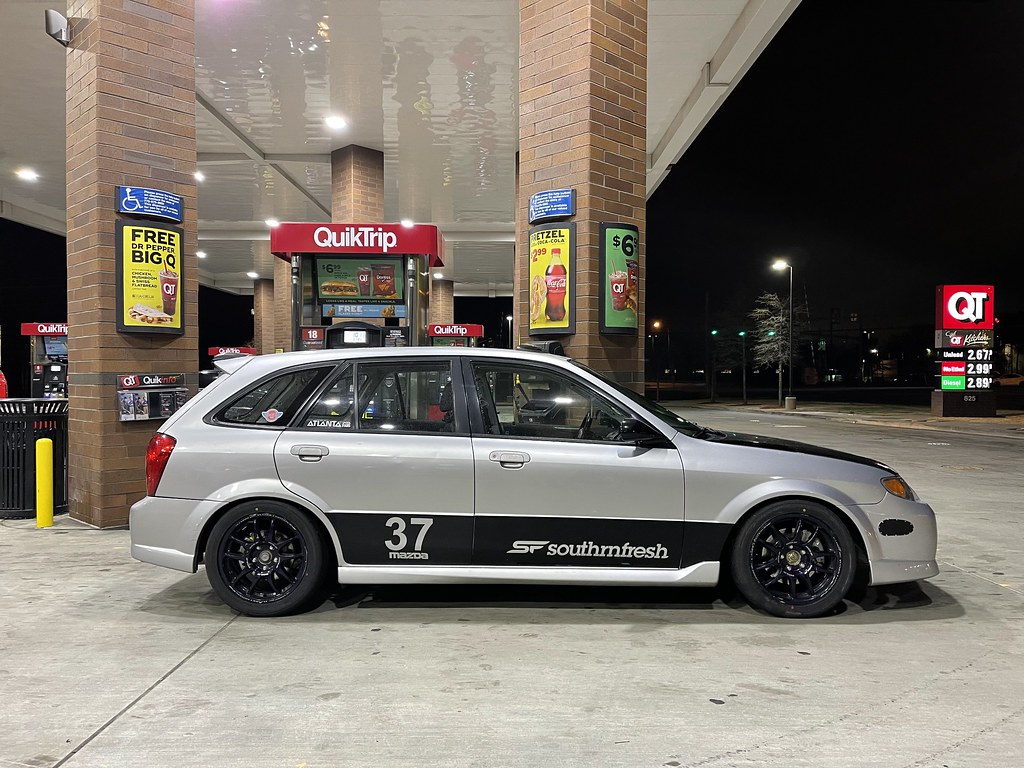
Finally done and ready to roll and get back on track in 2 days. Last minute I decided to add the Southrnfresh lower banner on the car. It came out pretty well from a distance, but up close its pretty rough. But it works...
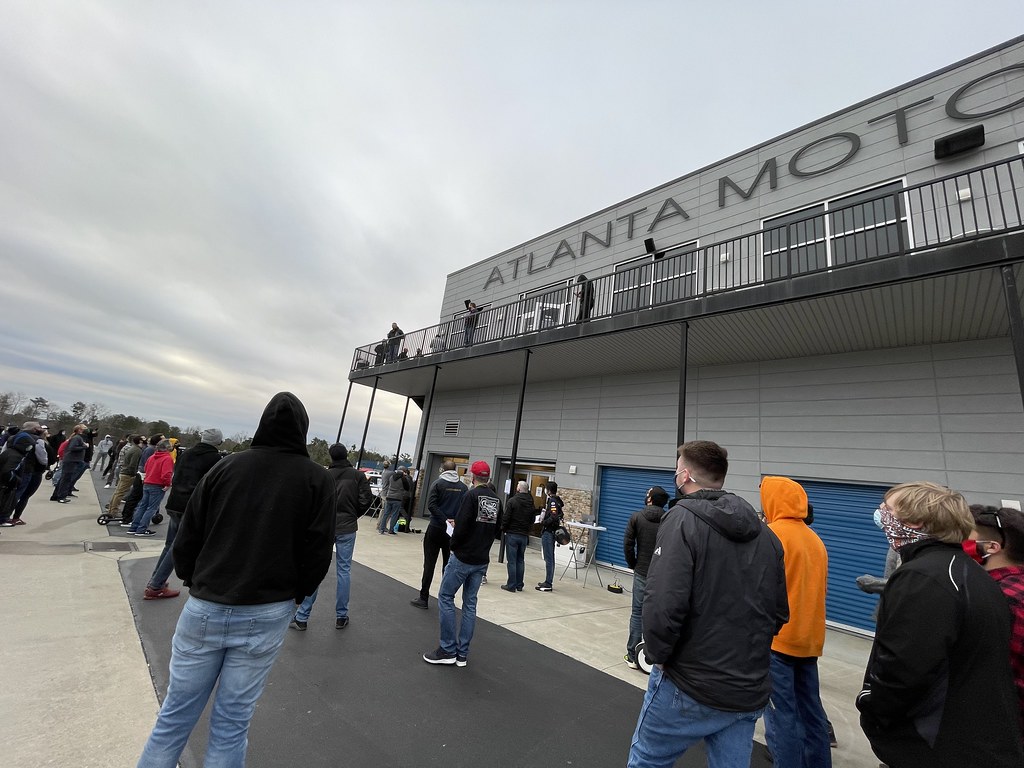
Finally after months and months of wrenching Jzilla track season was officially back . The first track day is always the most nerve wrecking because you are finally putting to use all the changes and updates to the test. I spent a lot of time this winter trying to make things a little better with the car. And just improving things over just adding parts to the car. It was a lot of trial and error and trying out things so I was nervous that I had forgotten to bolt something and or just over looked something. But the drive to Atlanta Motorsports Park was smooth, which usually translates to a smooth track day.
My student for the day was in a Mazdaspeed 3, so some of my personal tips were pretty useful to him out on track.
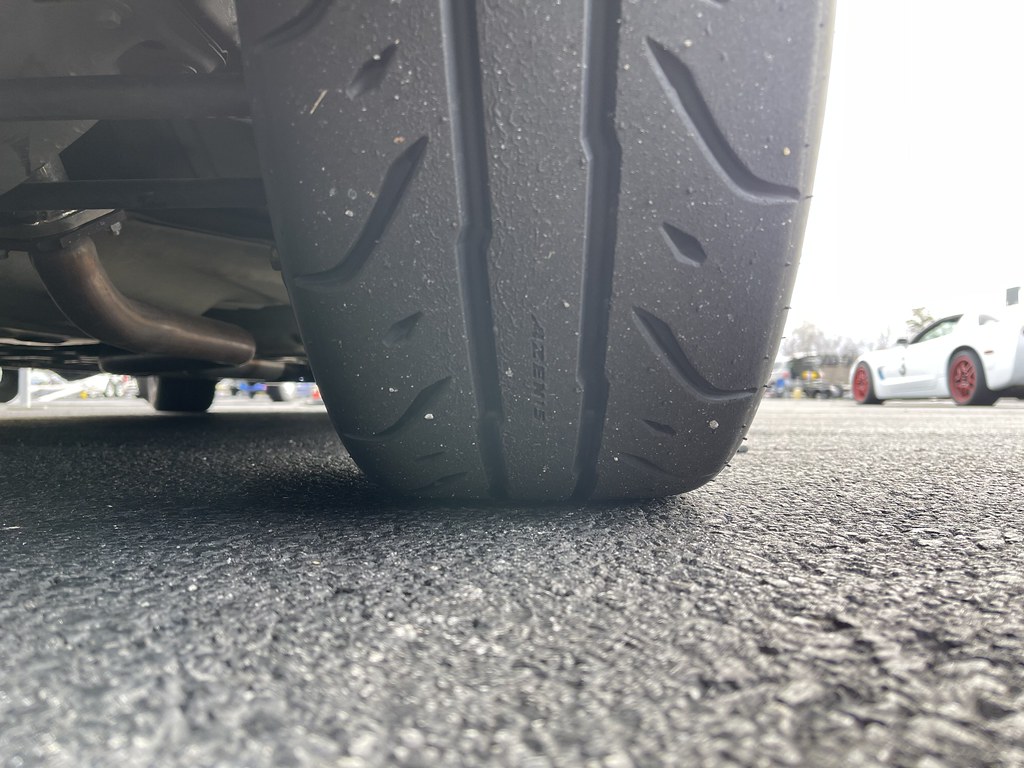
The Falken RT660s were really good. They seemed really consistent throughout the day. From the cool start until the end of the day when it warmed up, they never felt unstable even in the tire killer carousels. The true test will be the summer time track days and the hot days that I will be doing later in the year.
So my Sony camera stopped holding a charge the night before the event, so I had to resort to using my cell phone to record sessions. This video is of me attempting to keep up with Joe Ippolito of 2J Racing . I first met Joe many years ago at Road Atlanta, when he was competing in his VQpowered Sentra Spec V. Amongst all the big power cars and usual track cars it was cool to see something unique out on track and being competitive. We kept in touch and I have seen Joe at many events in many different cars through out the years. But the original VQ Sentra still sits at his shop collecting dust. And every time I see Joe I bug him about the old VQ Sentra..
So it was a personal achievement to be able to get out on track with Joe and attempt to keep up. The video is me trying to keep up as he goes through the traffic in his bolt-on Spec V that he has just purchased. By this time I was all in with the car and was having a blast.
Since I started to track the car I had a issue with locking up one wheel under hard braking. And pulling under hard braking, and just abnormal habits from the brakes. The car stopped great, but it wasnt perfect. I had gotten used to it so now having it working properly took some getting used to. The EBC brakes were perfect, and the car stopped evenly, and the pedal was much more firm and exactly how I wanted it to be. I wish had timed myself because I am sure I would have set a new personal record and gotten under 1:40...
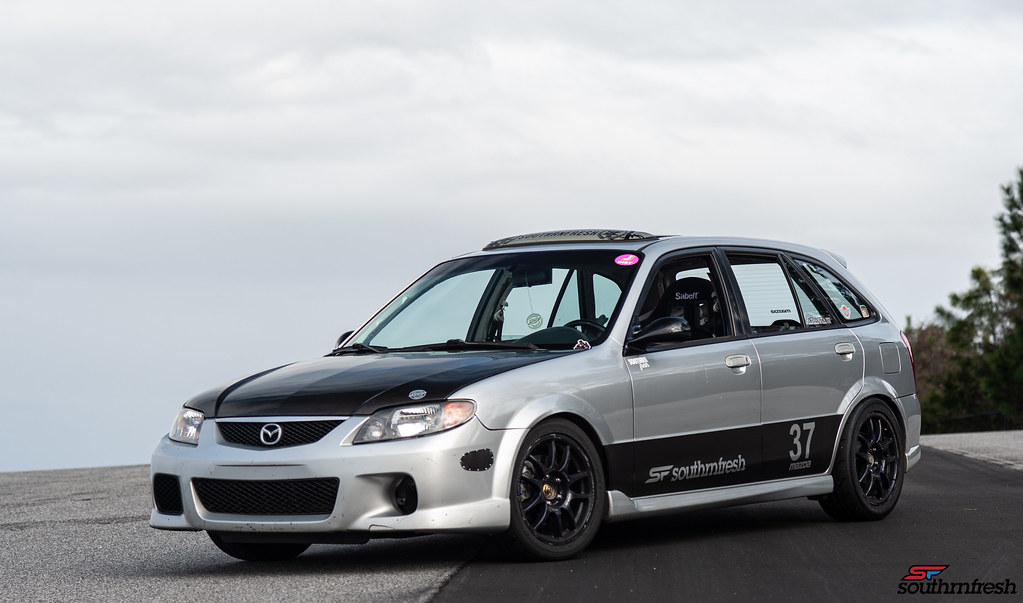
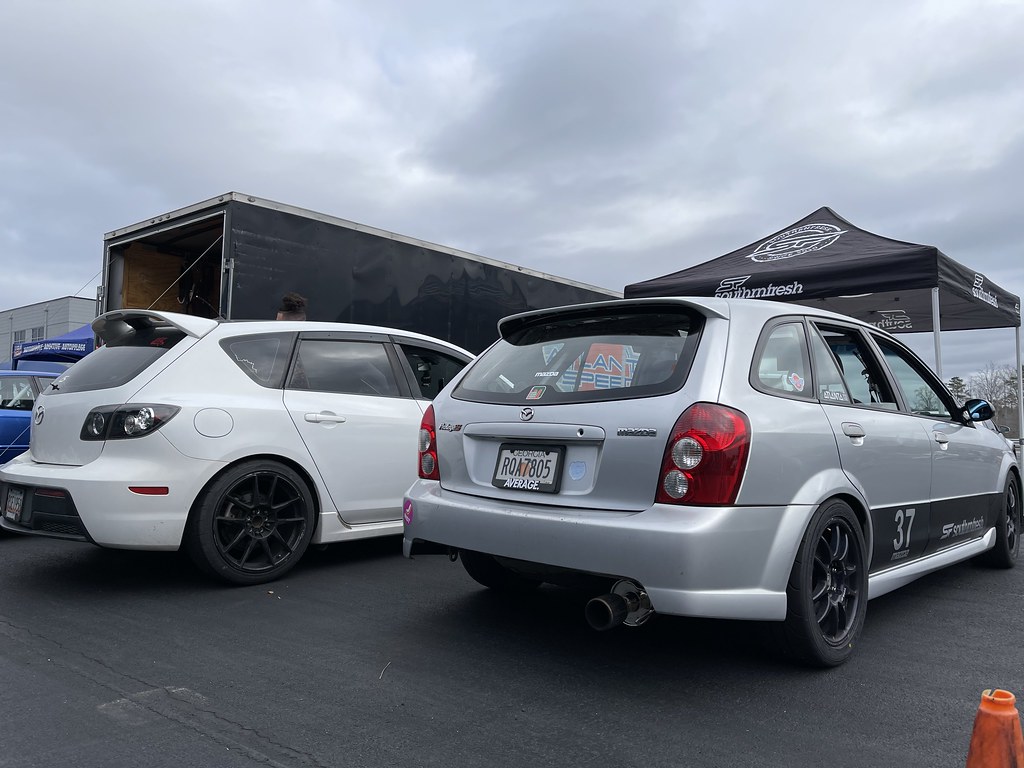
To keep with the tradition I took a minute to celebrate the new look and the start of the season with a fresh set of photos to start the year. I was uneasy about removing the mazdaspeed front lip, but I think it looks pretty simple and clean without it. The side Southrnfresh vinvyl is growing on me. I am usually not a huge decal guy, but I wanted to make the car look much more official.. haha
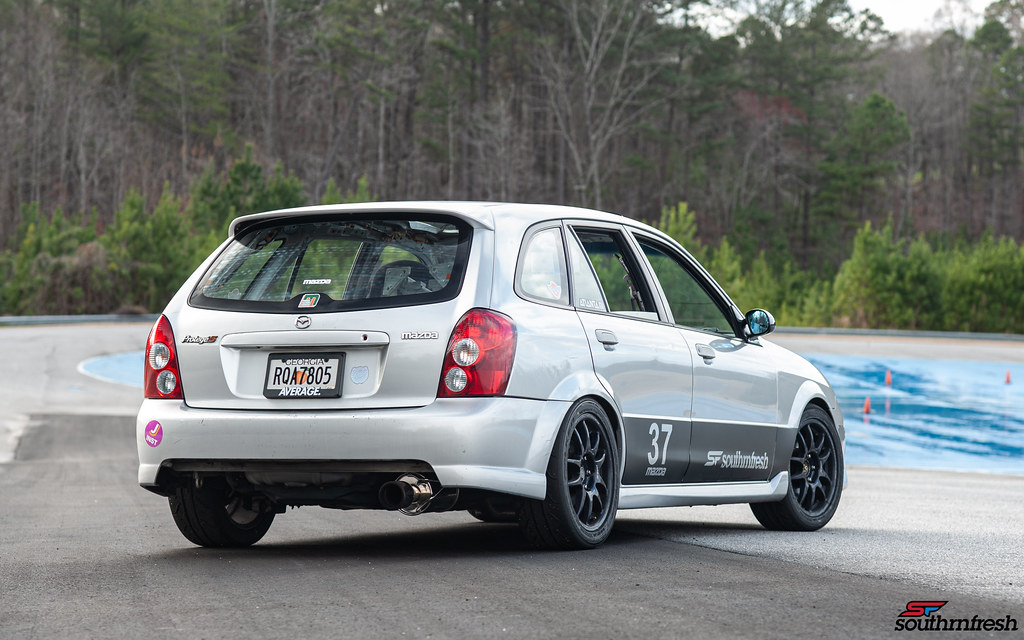
Not much changed from this angle. I may or may not redo the exhaust this year, but the mazdaspeed rear axle back works really well and sounds good..
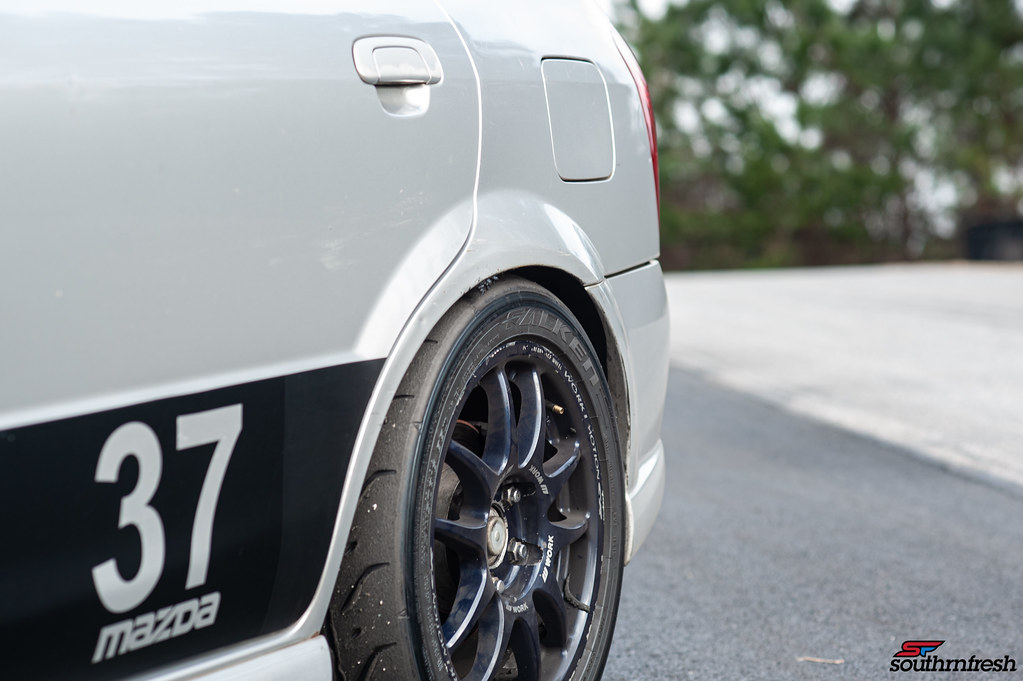
AS mentioned before I was hoping to be able to go with different wheels but I did not get a chance to. As seen sometimes the car rubs in hard high speed turns, and I thought it was because of the 225/45s so I figured it would stop with the 215/45s but apparently not. Its not a big deal I will try and roll the rear fenders a little more.
The best improvement over the winter was improving the power band and making the 135hp useful with the matching FSZE JDM ECU and harness. That change was felt dramatically, I have a set of adjustable cam gears that I need to install and a toyota coil on plug kit as well. So once that is done I will take it back to the dyno and see how much more power I can squeeze out of it...
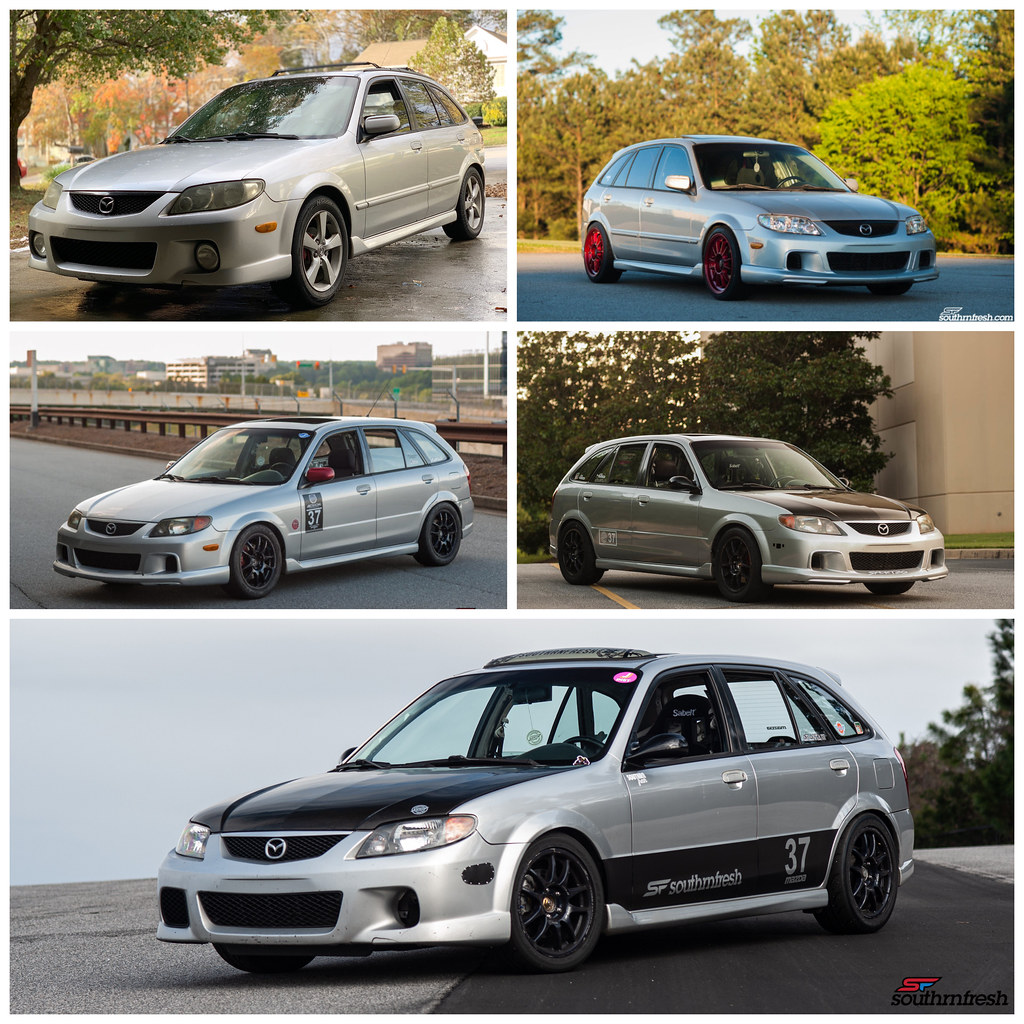
Crazy to look back at all the transitions from stock to current. The car has came so far from being a 288k mile $1200 Protege 5 with a bad wheel bearing to what it is now. We still have plenty work to do!
Nice update man! I always wondered about both Hawk HPS and EBC Yellows pads for just street driving but never pulled the trigger on either but I will be need some brake pads soon. Which one would you recommend? Would the EBC Yellows be overkill for scooting around town? Asking for my MSP and for my Forester at the same time lol. The heavier Forester could prolly use some better bite as it isn't too great how it sits currently and does not instill confidence.
I would suggest stainless steel lines, and Hawk HPS. But the lines themselves will give you such an improvement in the pedal it maybe enough.Nice update man! I always wondered about both Hawk HPS and EBC Yellows pads for just street driving but never pulled the trigger on either but I will be need some brake pads soon. Which one would you recommend? Would the EBC Yellows be overkill for scooting around town? Asking for my MSP and for my Forester at the same time lol. The heavier Forester could prolly use some better bite as it isn't too great how it sits currently and does not instill confidence.
- :
- 03 Mazda Protege Lx
Cool update. Keep us posted on that Coil on Plug coversion. Im hoping to do one as well but with 4g69 or 4b11 Mitsubishi coils, it's simple enough to get working, but I'm waiting on overhauling the engine and mating the ZE pistons to the block while I'm at it. Hopefully I finally get it done this year. I've been missing the old Protege lately and rather use it to and from work since it is a short drive. The trail back is always fun
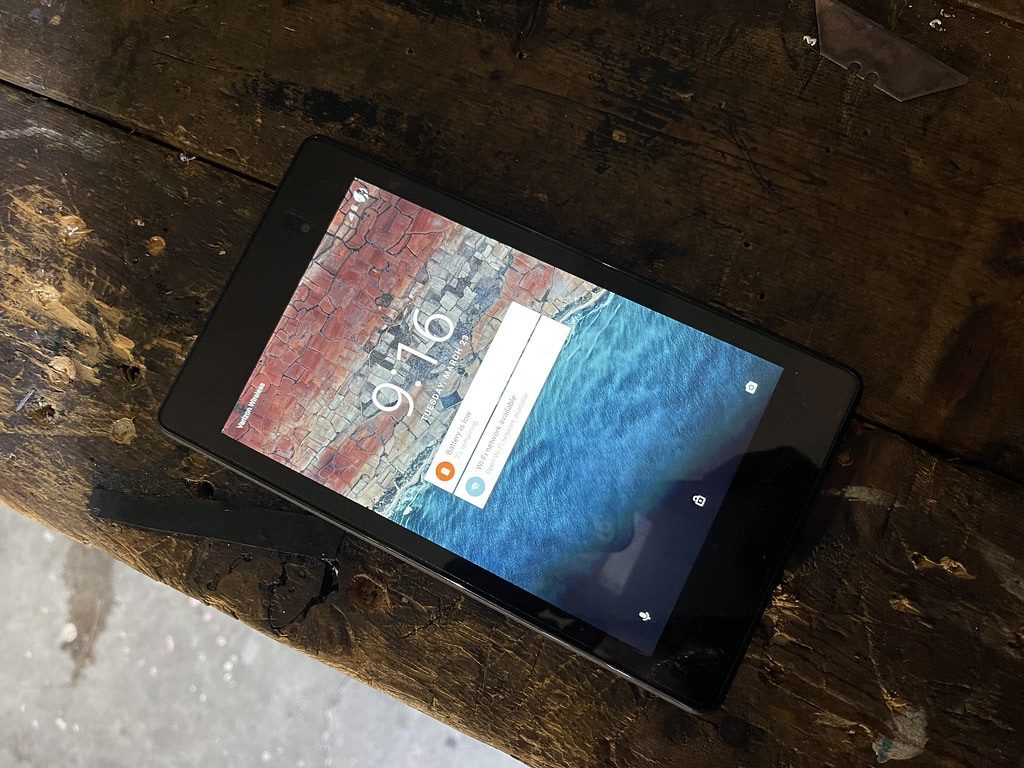
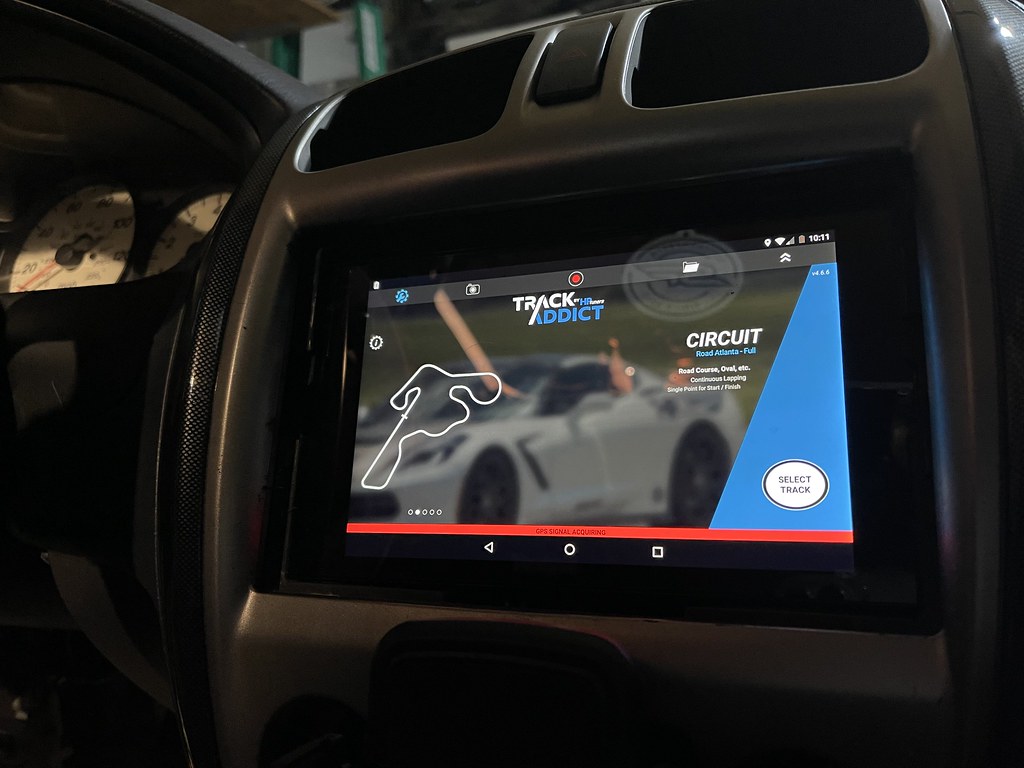
I usually use my cellphone to record lap times and data. But I always wanted to install a tablet to do it instead. I had an old Android tablet for a few years around, that I used for our events to check people in and make sales at the booth.
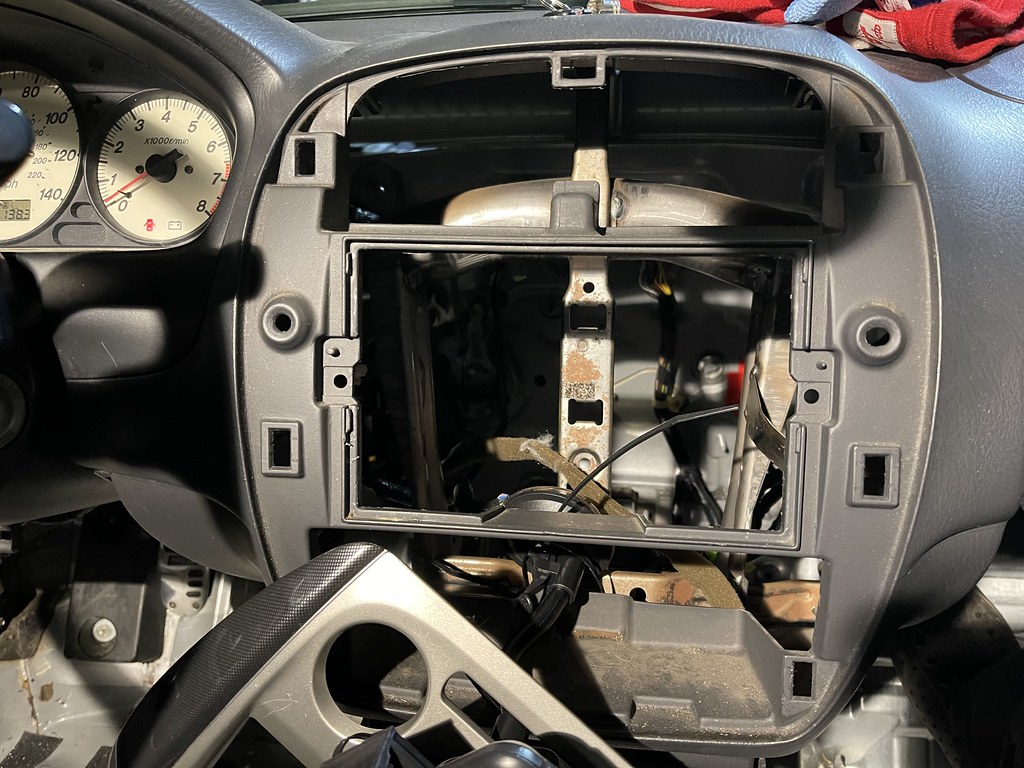
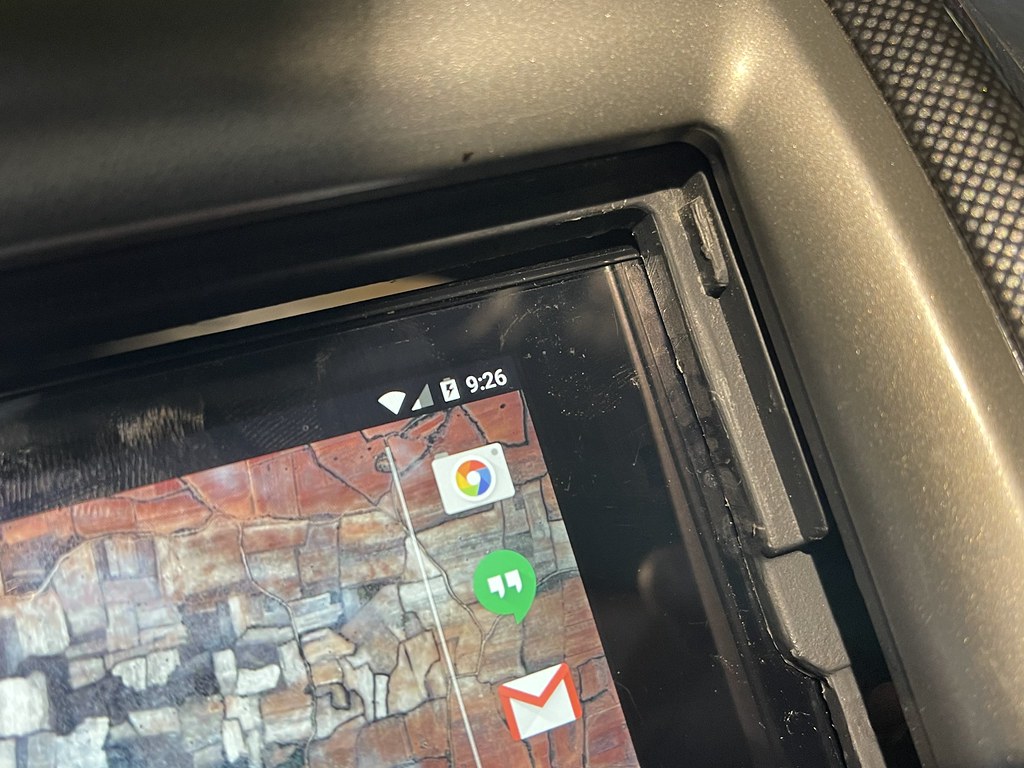
I test fit the tablet behind the center console, and the screen opening fit directly in the double din area.
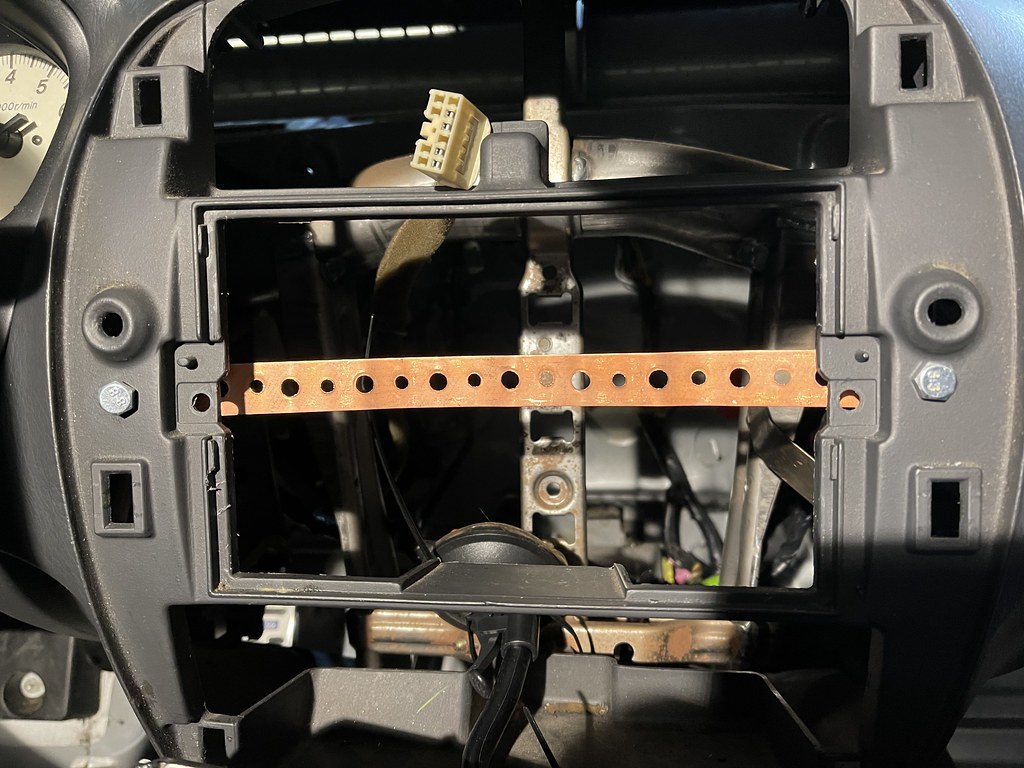

I coincidentally had a piece of punched metal to use a brace to keep it secured. I did have to make a new hole on the left side and I ran a bolt a nut through it.
Now the other part was to be able to keep the tablet charged up. So I got a usb harness and tapped it into the radio fuse so it charges when the car was on.
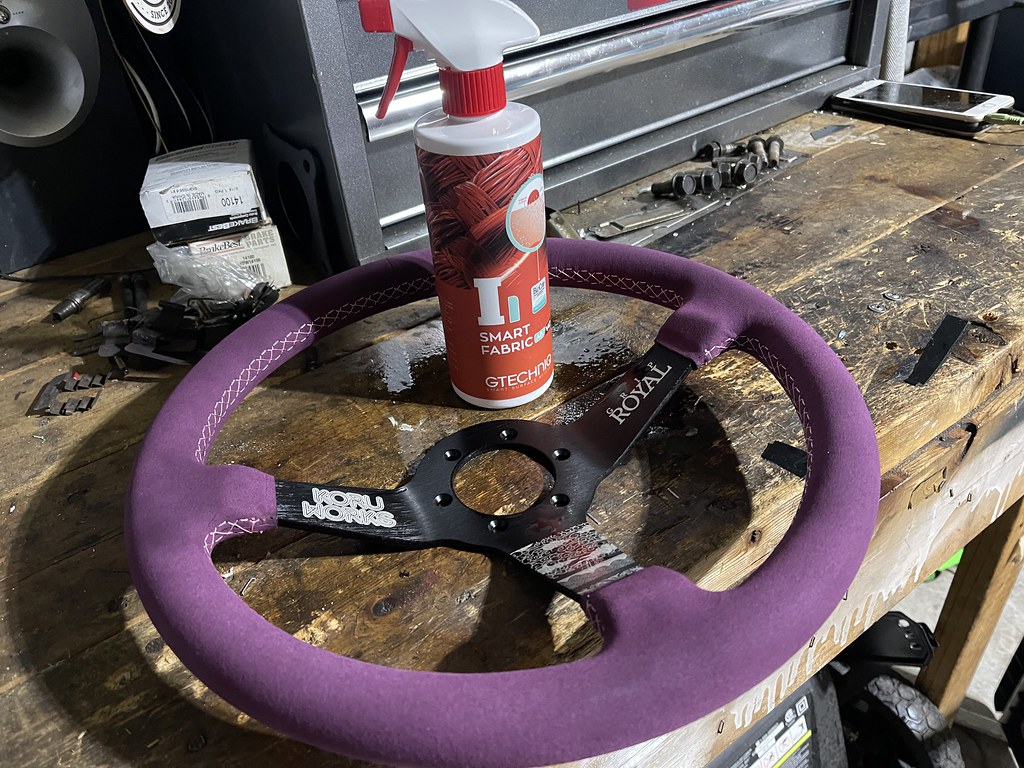
The guys at Koruworks released a limited wheel along with Grip Royal. The colors were not my favorite, but I had to support the home team. I also coated the steering wheel with Gtechniq's Smart Fabric so the sued stayed nice and soft.
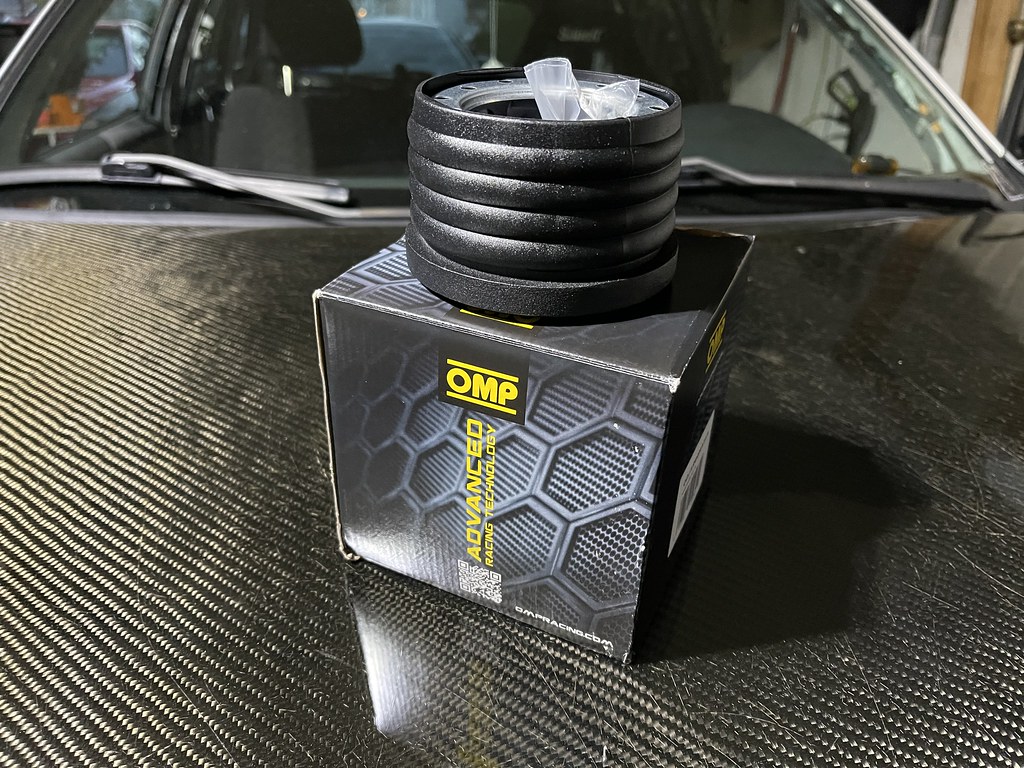
OMP Hub adapter.
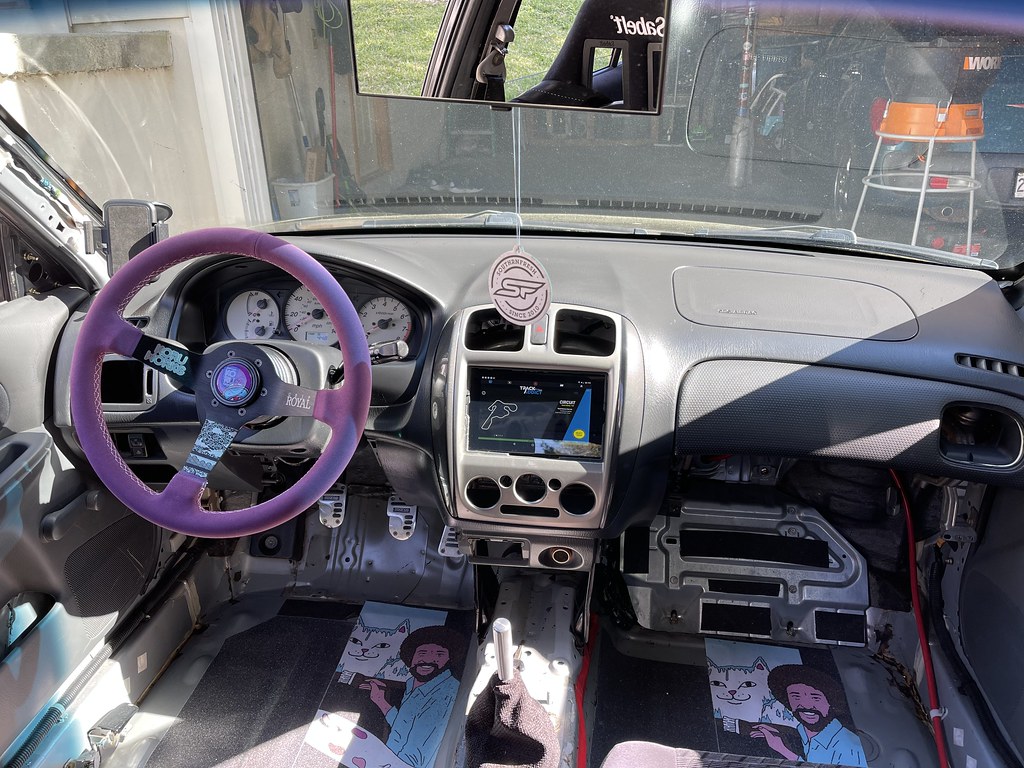
Installed.... Not sure how I feel about the steering wheel color...feels good tho.

I was on Instagram and I ran across a guy that installed these STI bumper vents on his P5. And I wanted to give it a try...
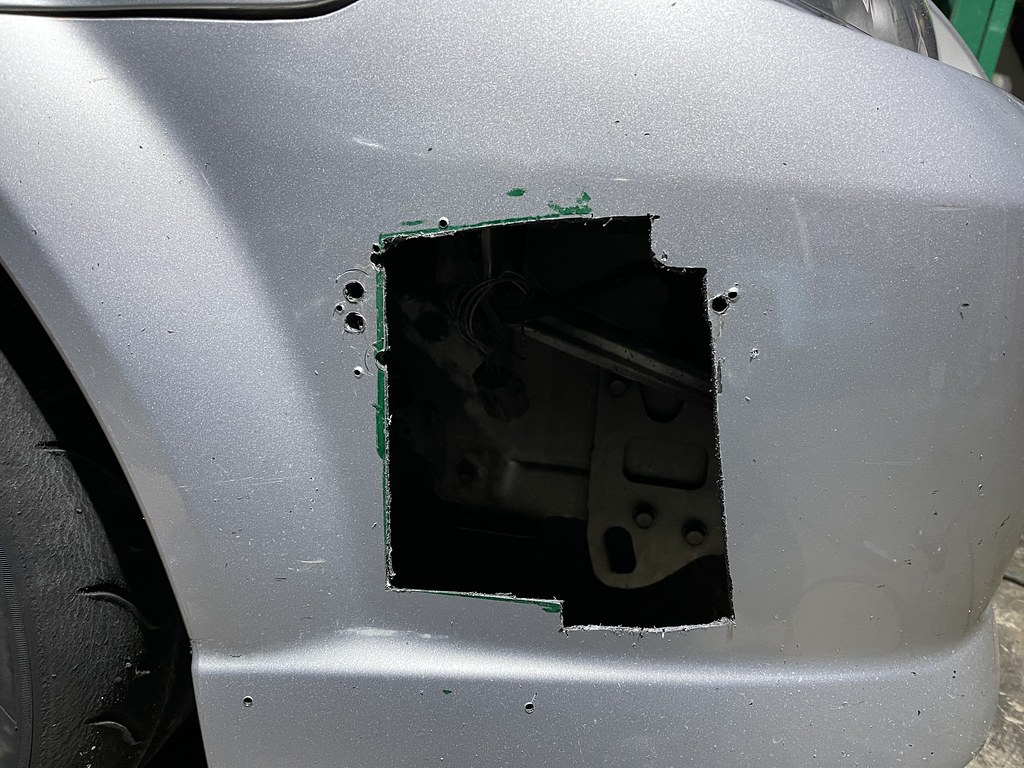
This spot is normally where the turn signal goes. Previously I had removed it and riveted a piece over it to cover the hole it left. So I removed it, and cut a spot for the STi bumper vents.
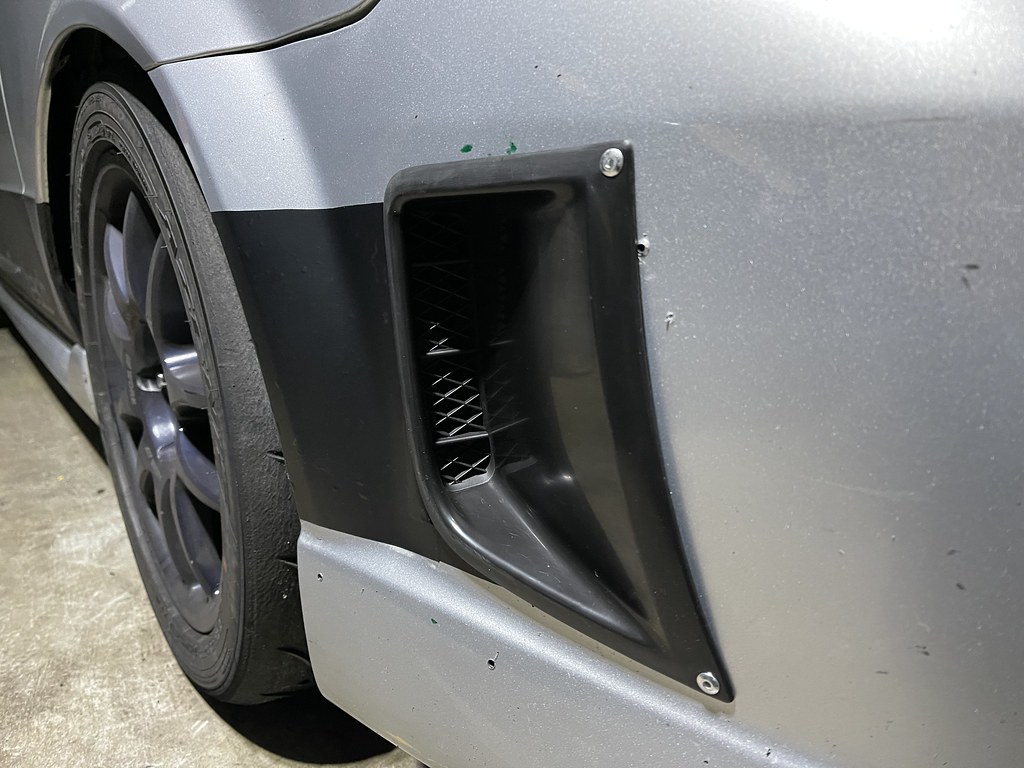
On the STi the vents are facing the other way. But I opted to mount it facing the other way. I am no professional aero engineer... but it looked cool and made sense to me..
I messed up the cut on the bumper, so I had to hide it with the vinyl. Its an experiment, so I will stare at it for awhile and see how I like it.
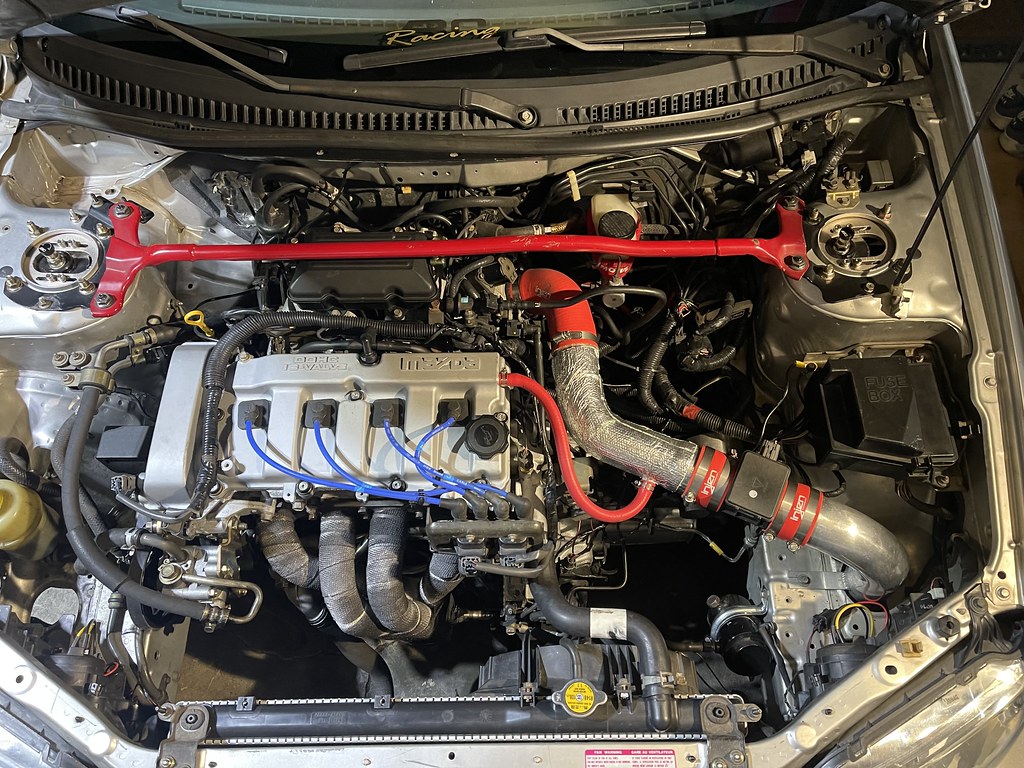
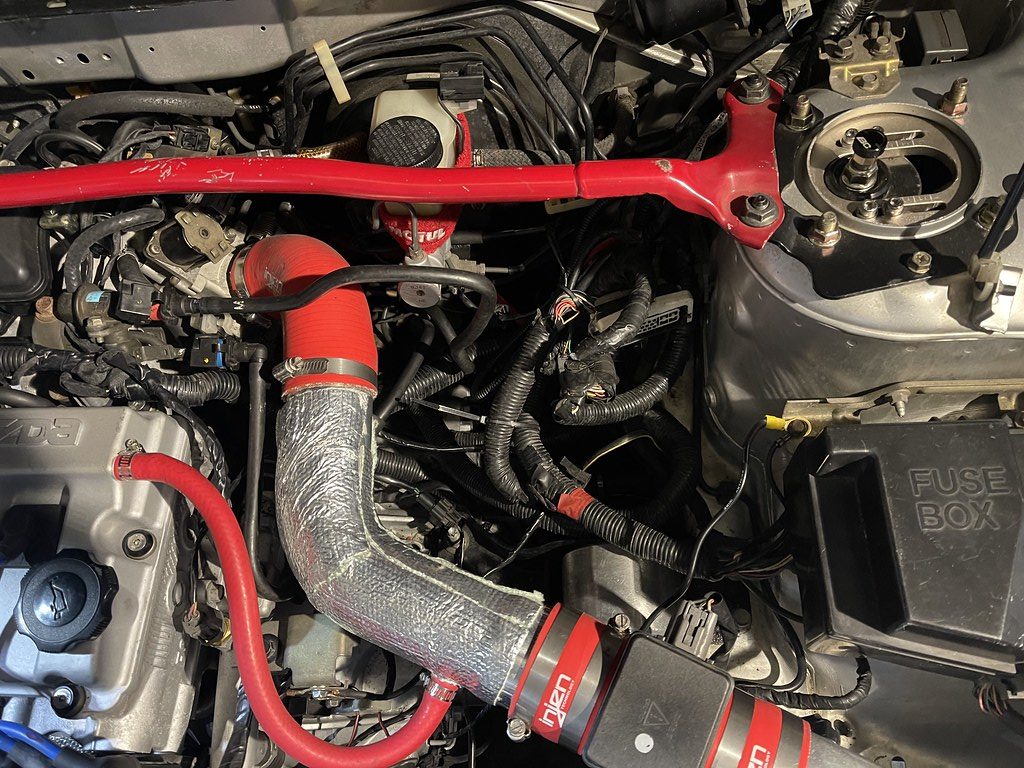
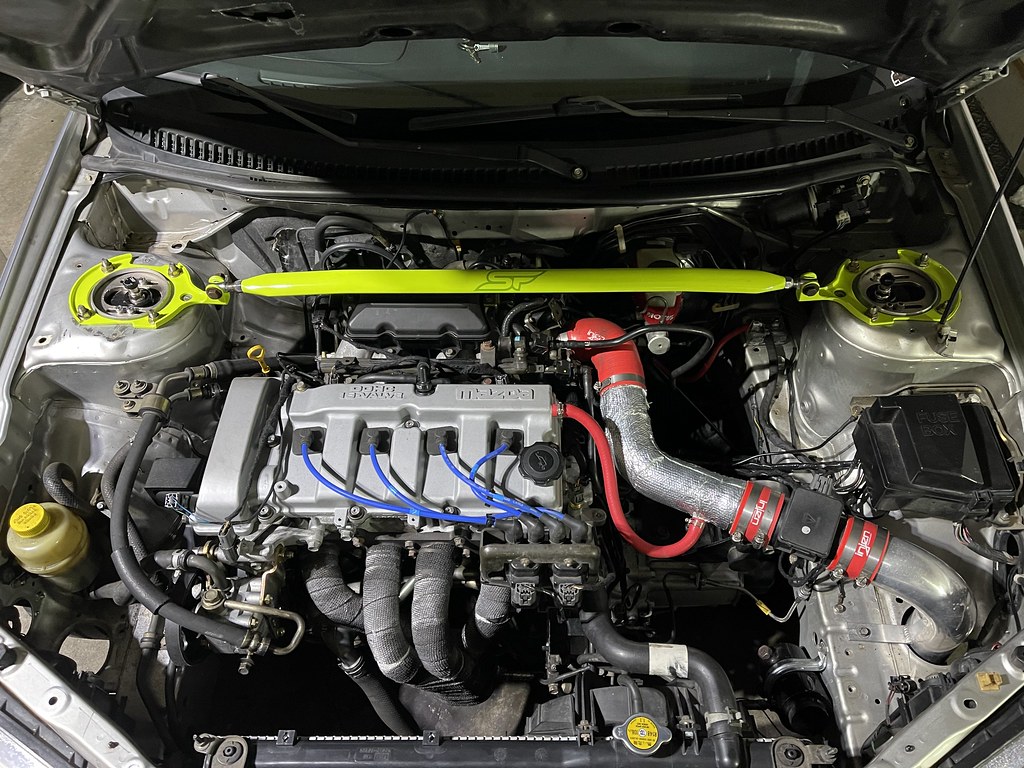
Every since I removed the battery and cleaned up the engine bay, I had always wanted to get rid of the L bend in the Injen cold air intake. And the red silicone always annoyed me.
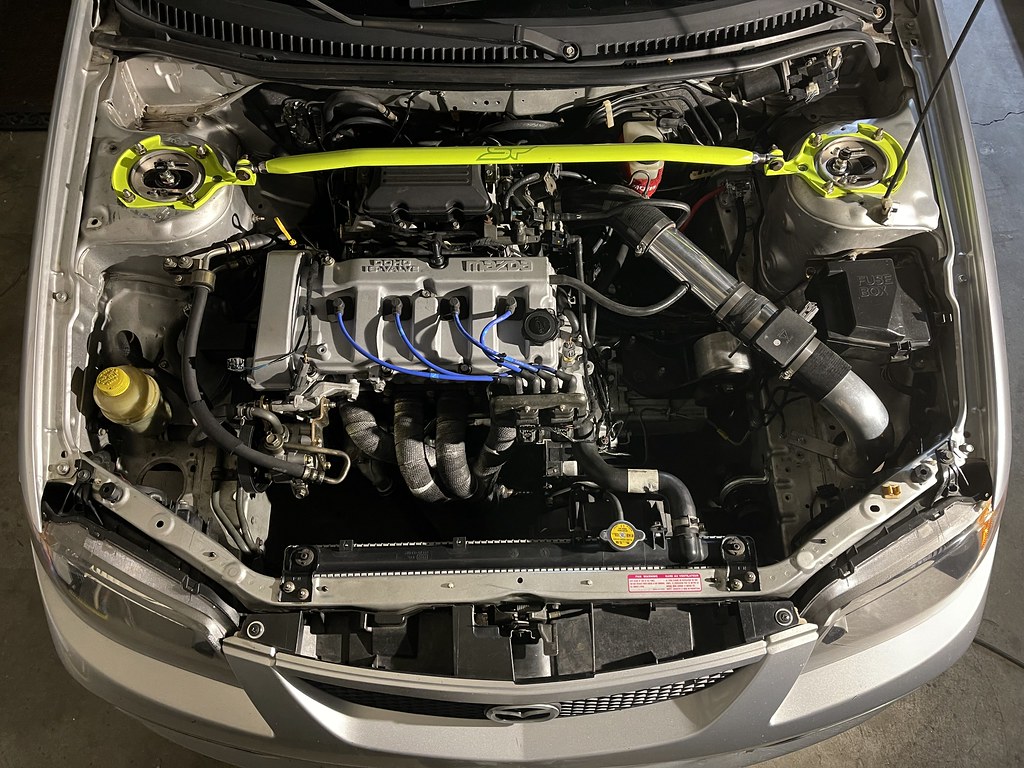
I transformed the injen intake to this with a few pieces from amazon. Much more pleasing to the eye, and my simple logic says that a straight flow into the engine is much better then the L..
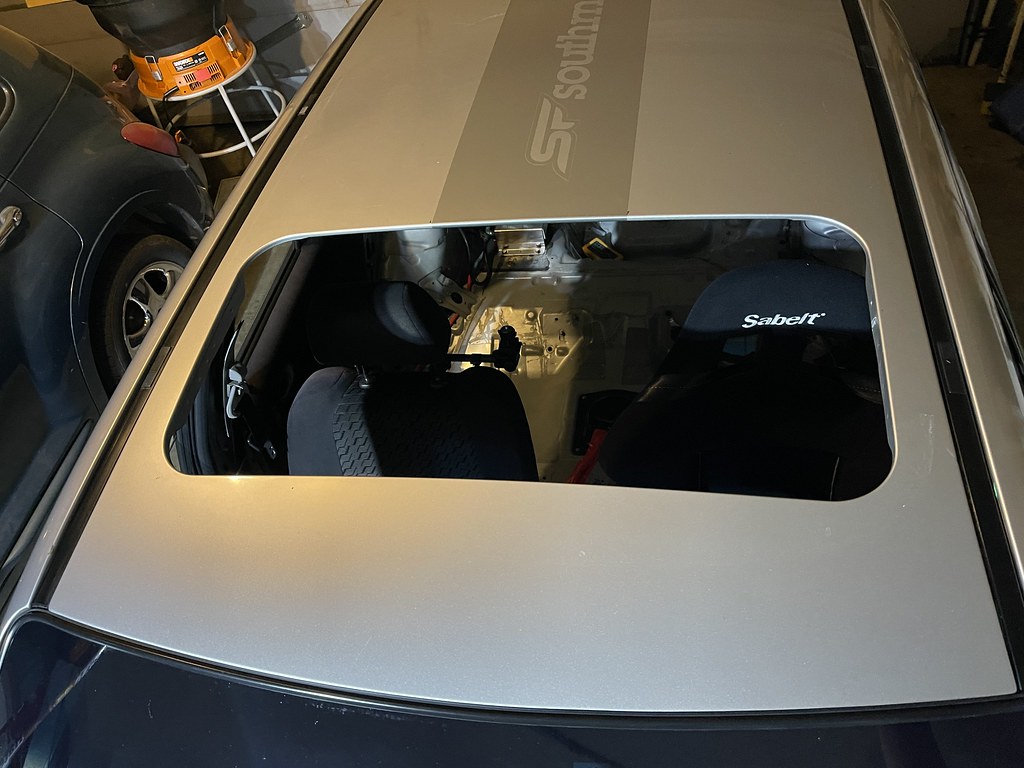
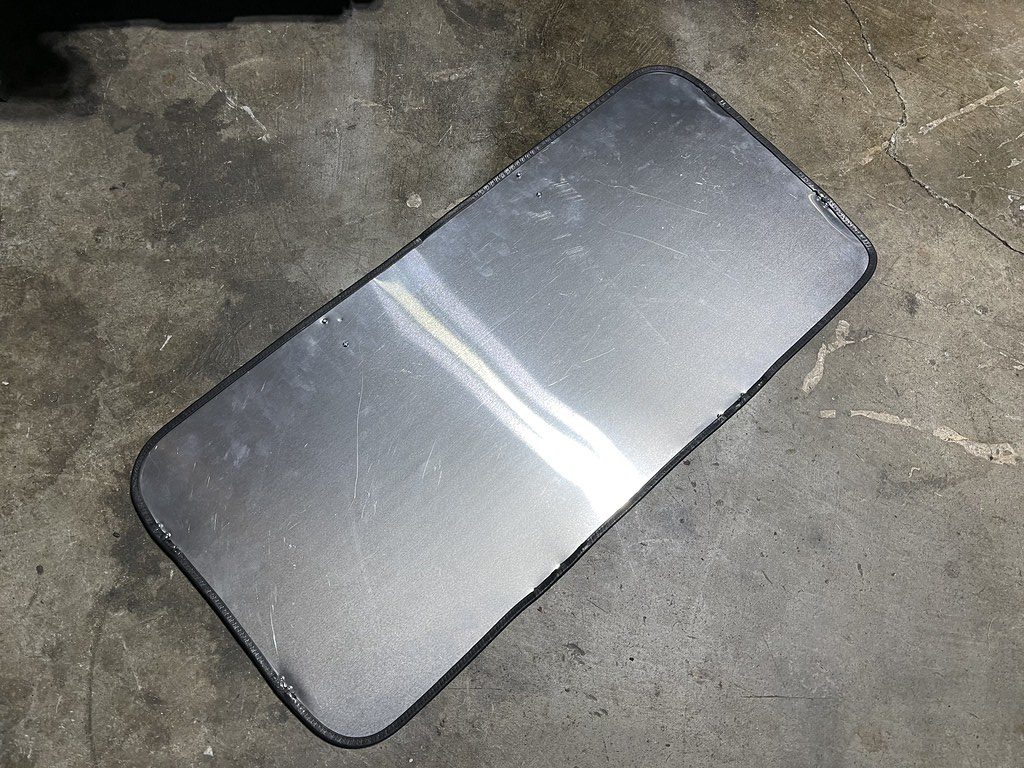
Next project was to finally fill up the hole in my roof from removing the sunroof. I could have bought a standard oversized piece and riveted it to the roof. But I really did not want to put holes in the roof.
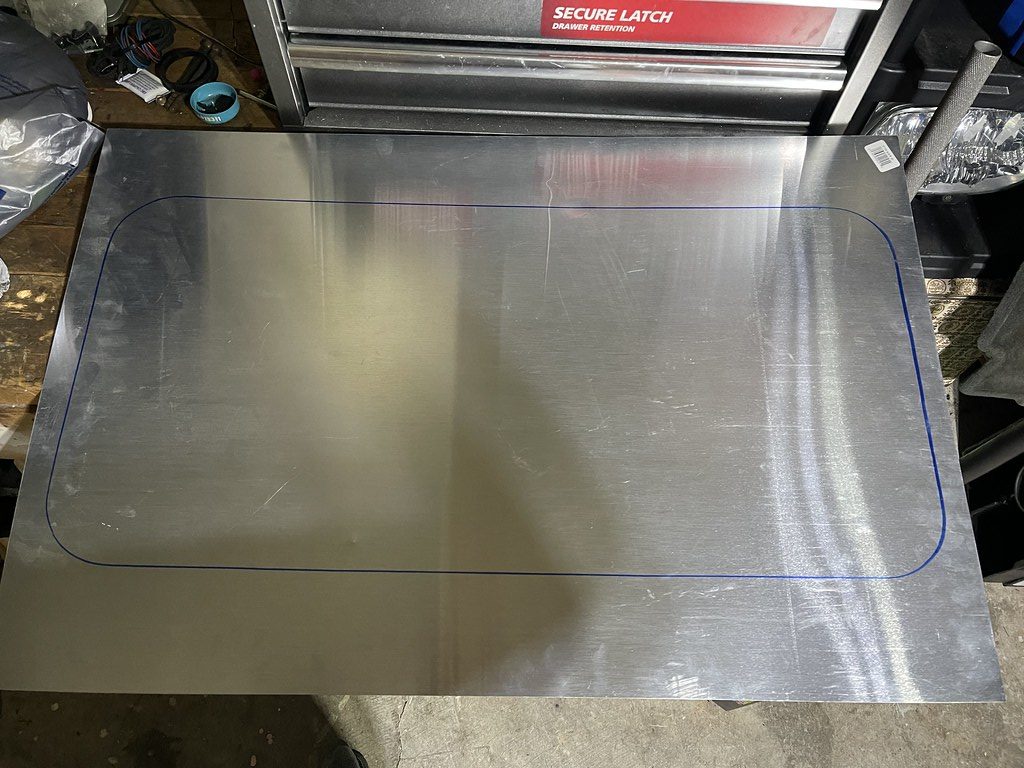
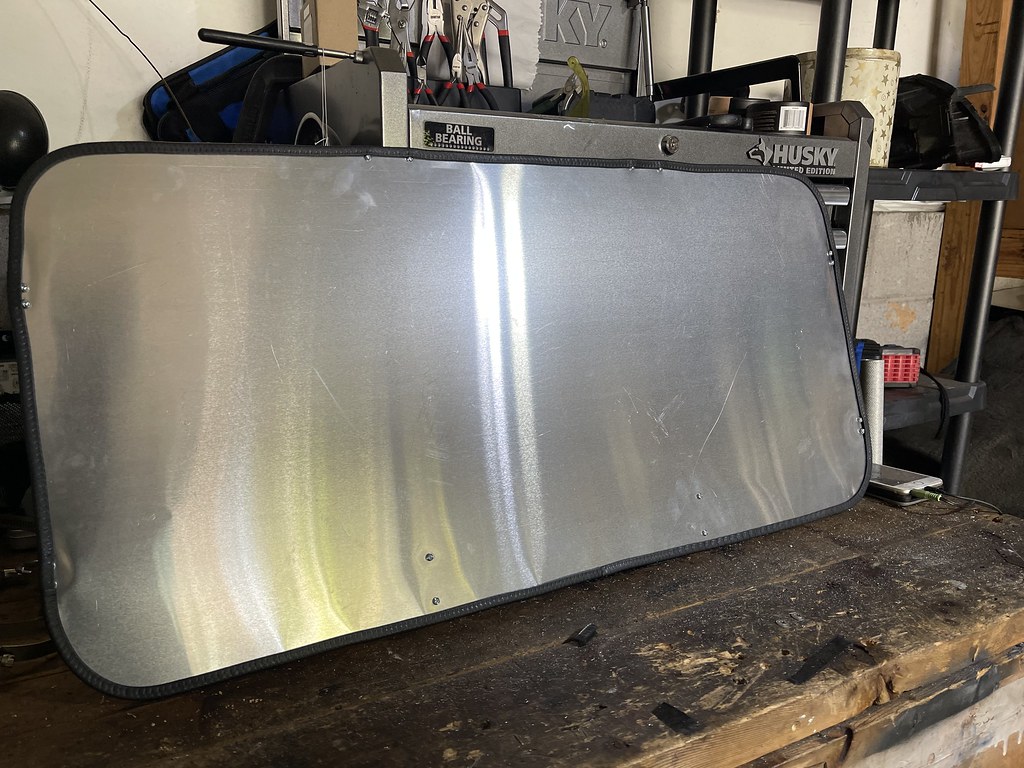
I got a piece of aluminum and traced the sunroof glass ..
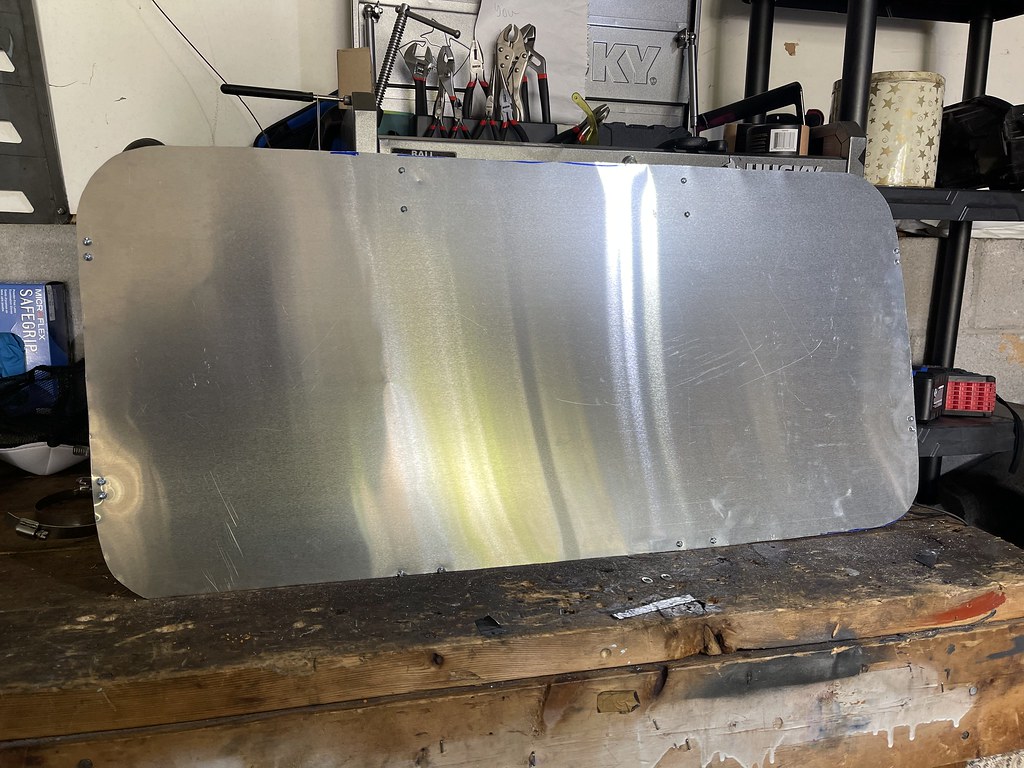
I found some small 2 inch L brackets and self tapped them to the flaps on the sunroof hole in the roof.
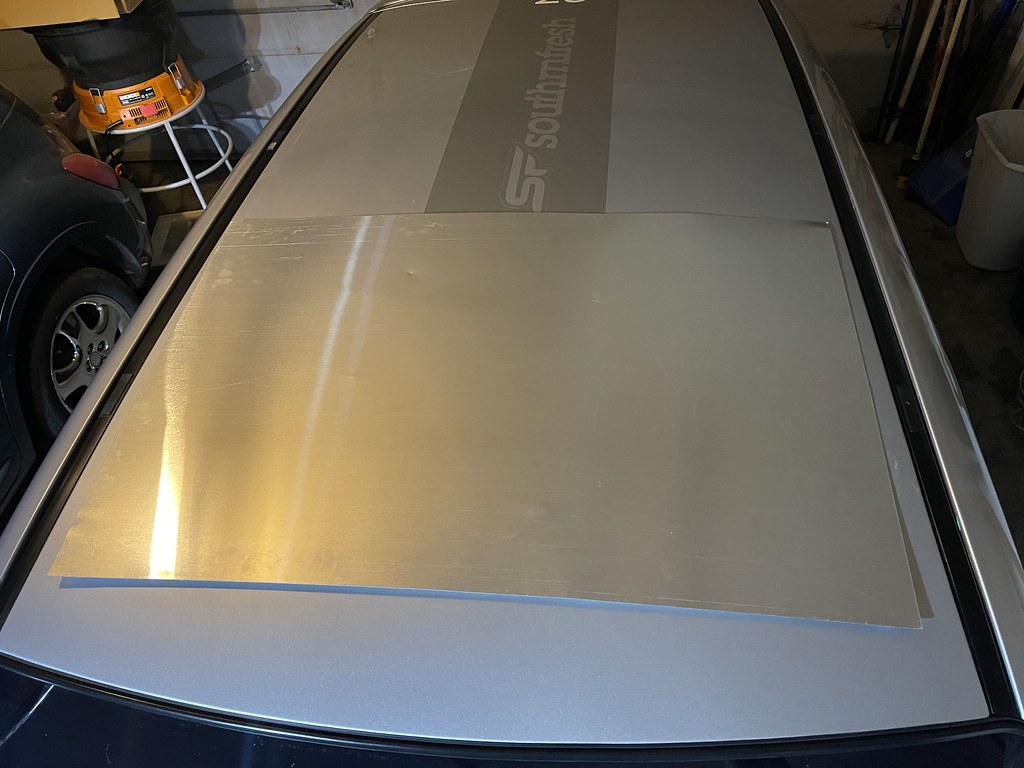
After a few minutes of trimming it sat flush....
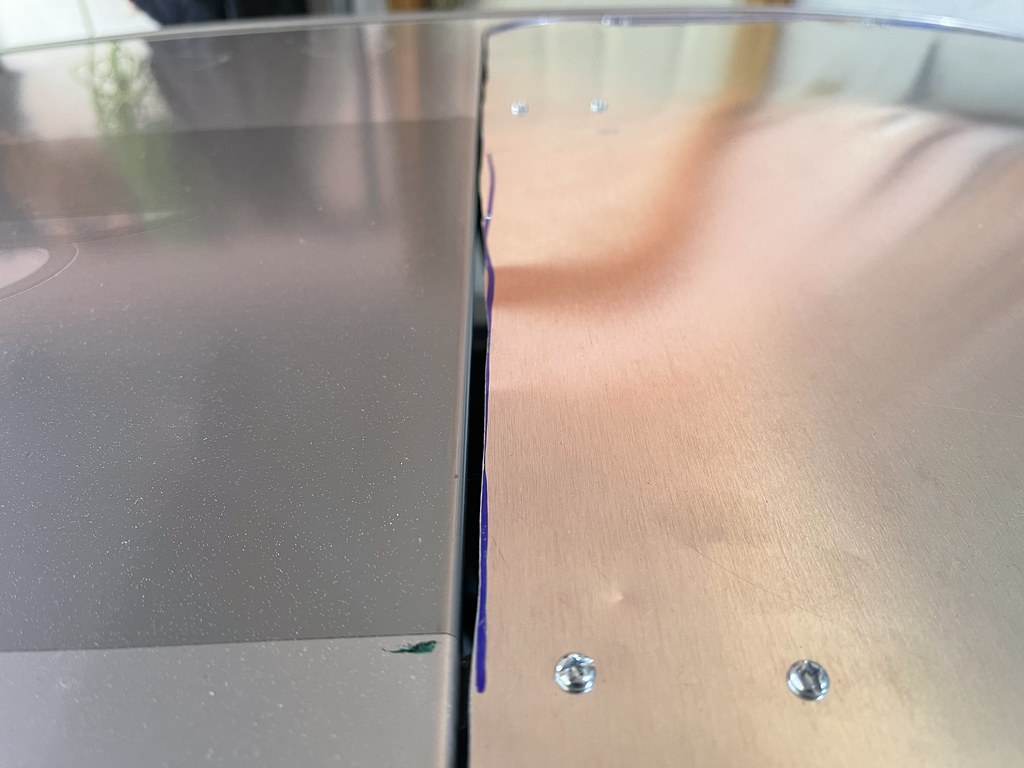
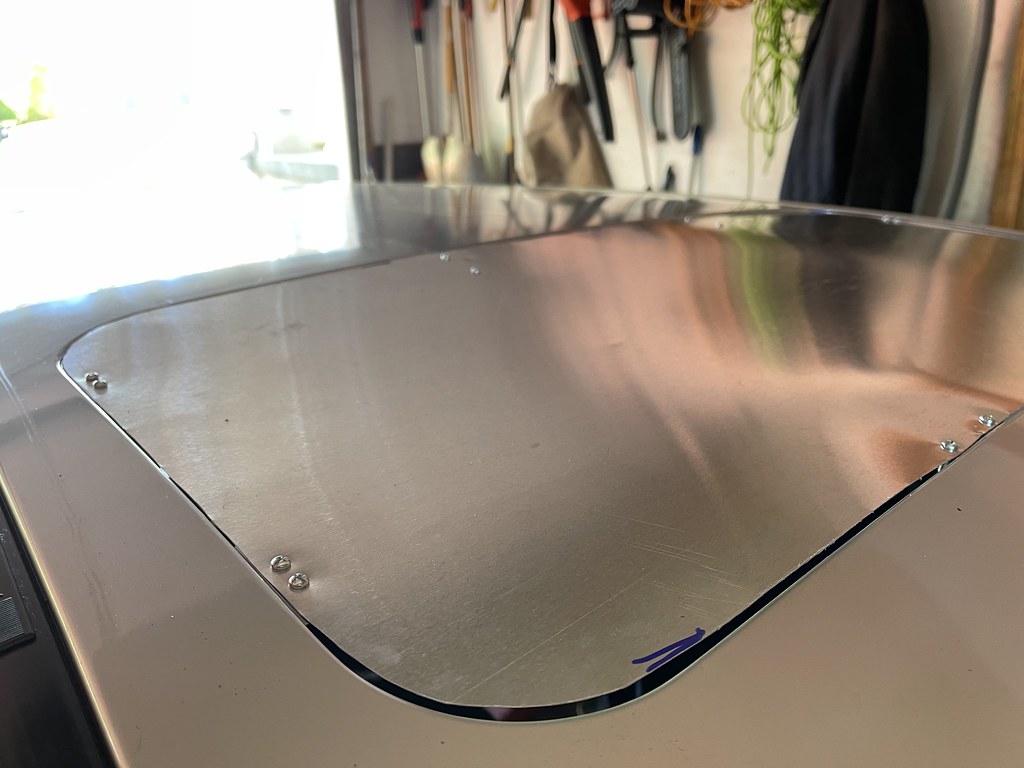
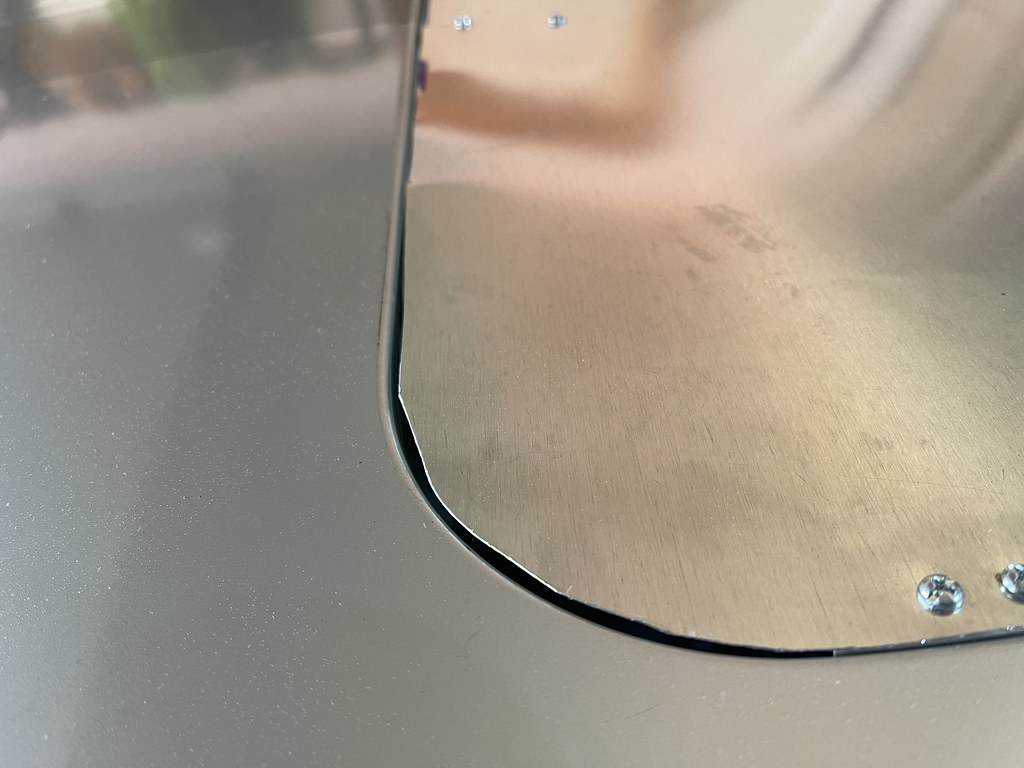
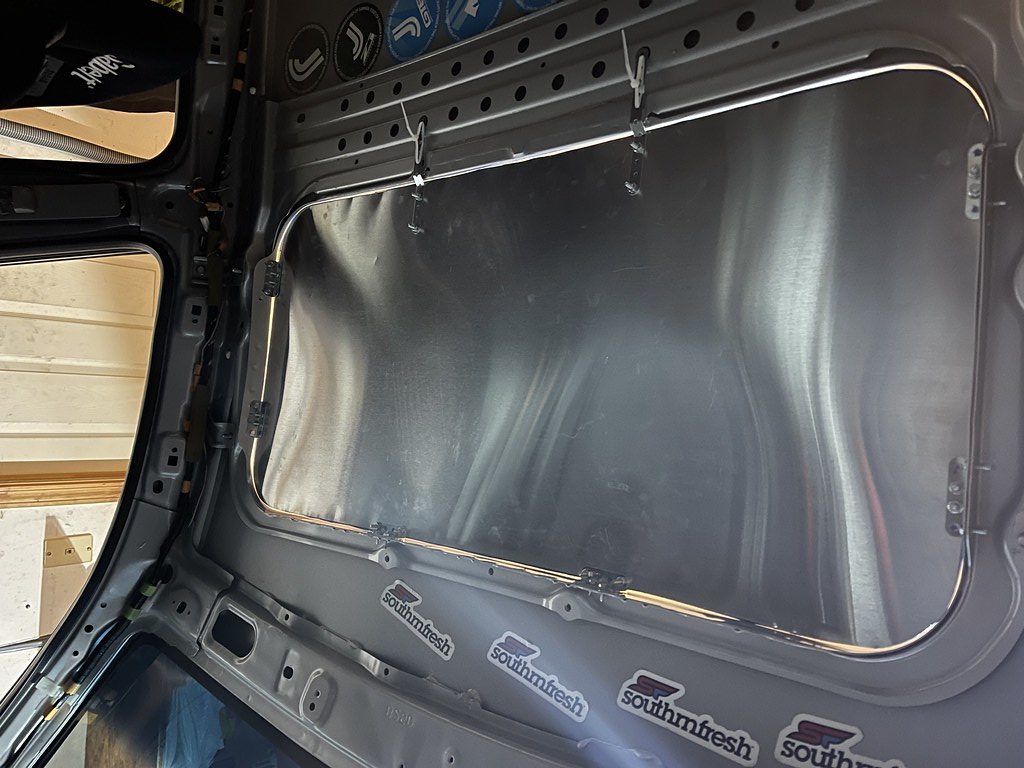
Once it was sitting in the hole properly, the edges were a little rough. While driving like this the roof insert was loud, and vibrated pretty bad at idle.
I got some rubber form trim to go around it, and it acted like a seal and also absorbed alot of the vibration and movement.
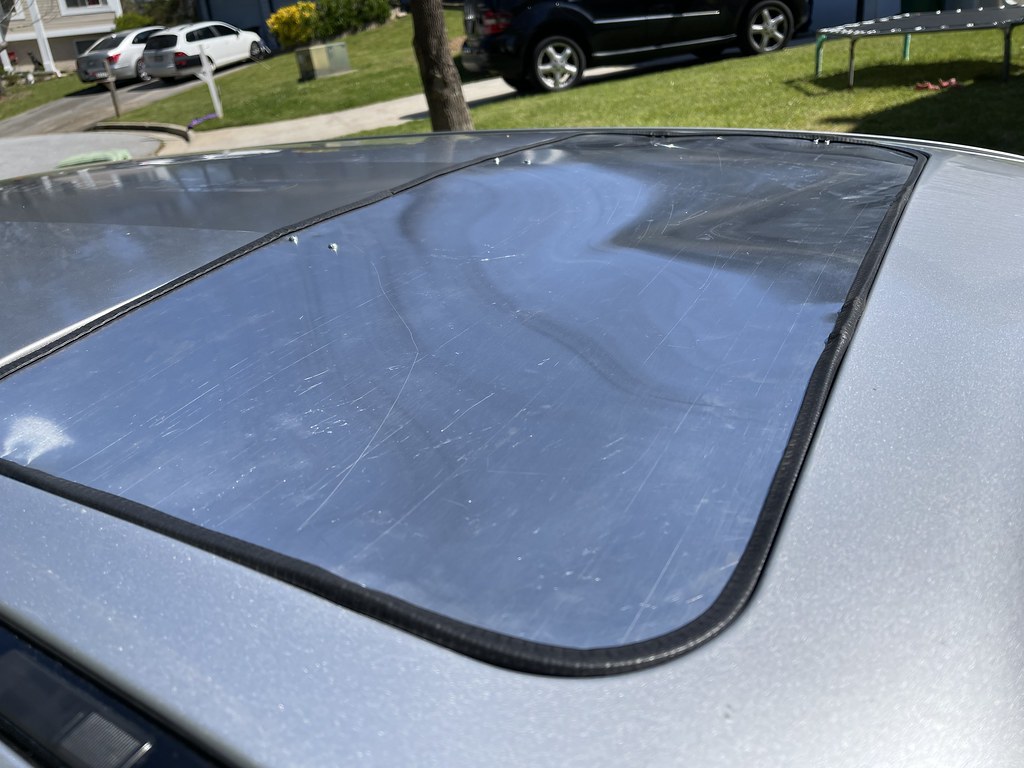
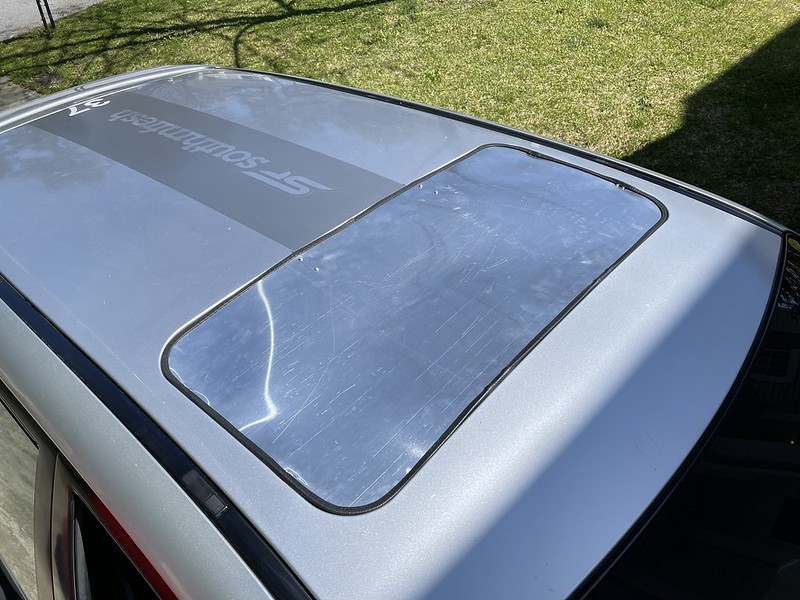
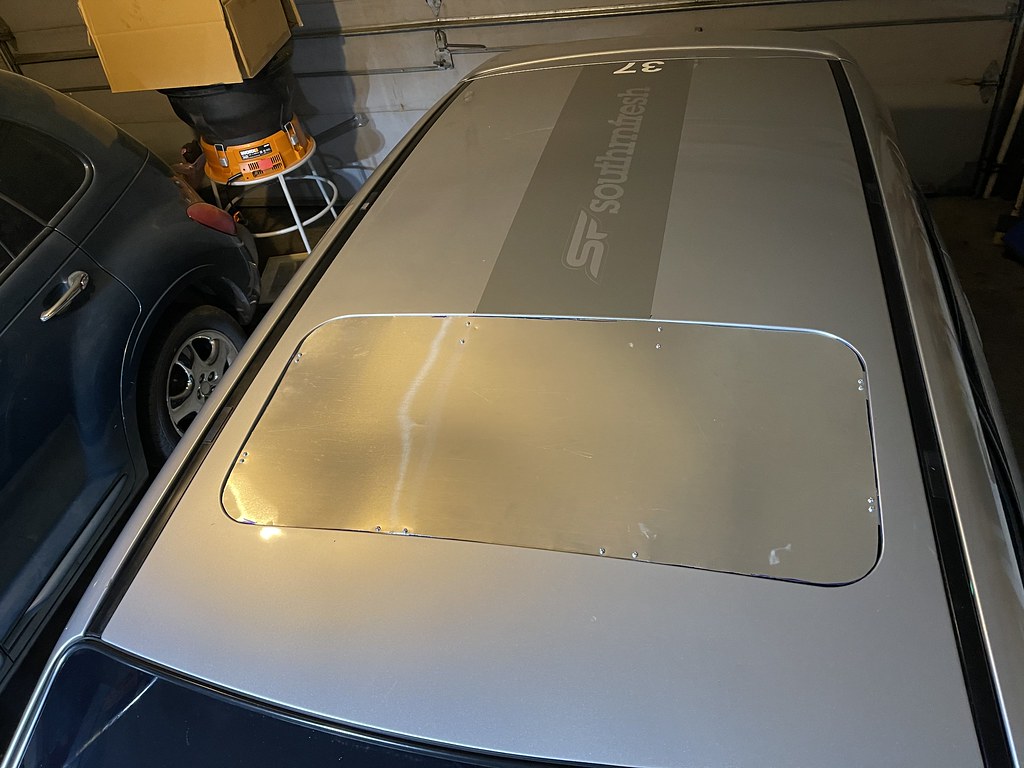
Done for now, its not water tight, but it is much much better than what I had before. In the future I will probably re do it and make it a little smaller so it sits flat, its hard to tell it photos but its a little warped.
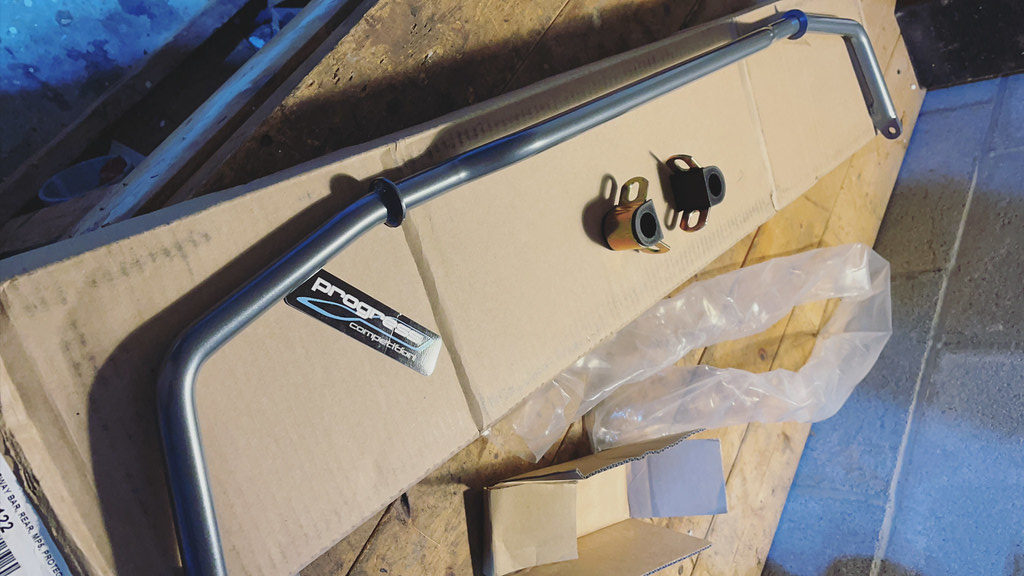
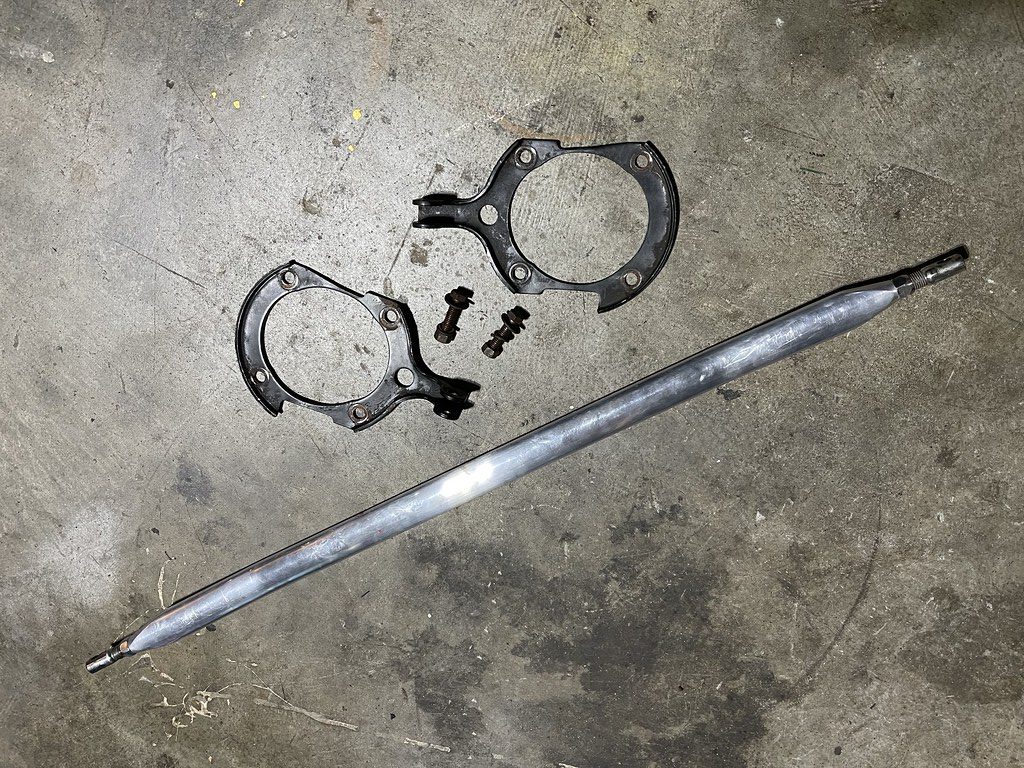
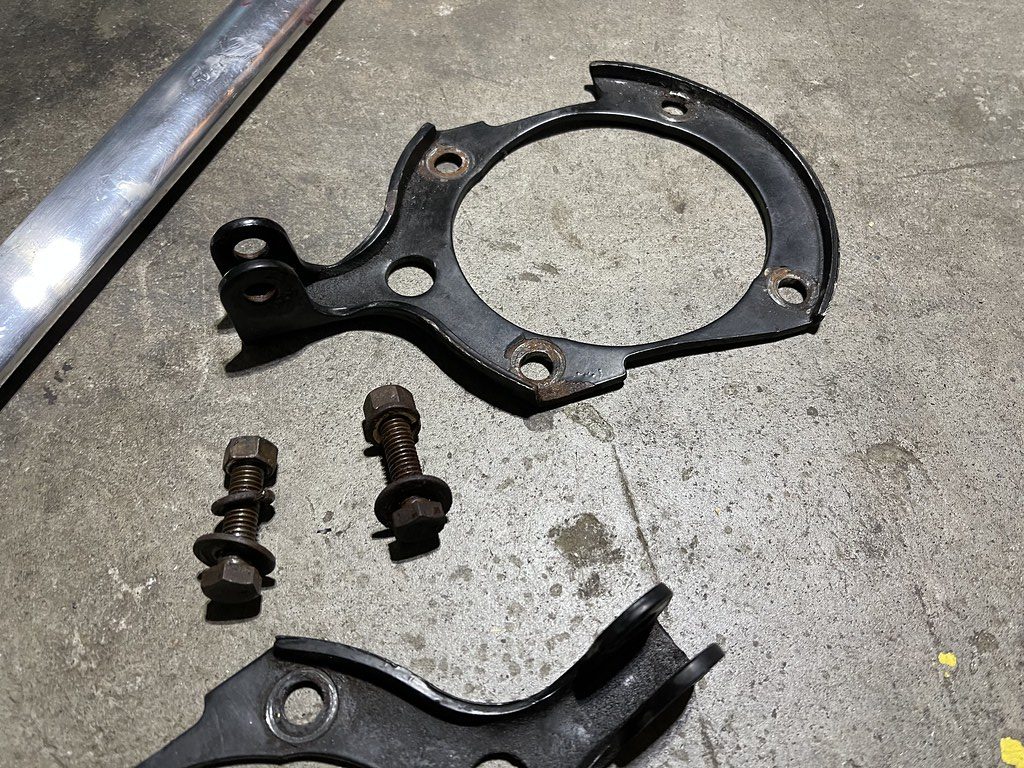
Back in 2019 I installed the Racing Beat Rear Swaybar on the P5. It dramatically increased the amount of rotation the car had in initial turn in. Which lead to me spinning at Road Atlanta at Turn 1. At the time I dont think I was ready to deal with it. Fast forward now, I was advised by someone that " I cant continue to hold the car back " Its been 2 years and I have learned alot about the car on track. So I decided to go with the Progress 23mm rear sway bar.
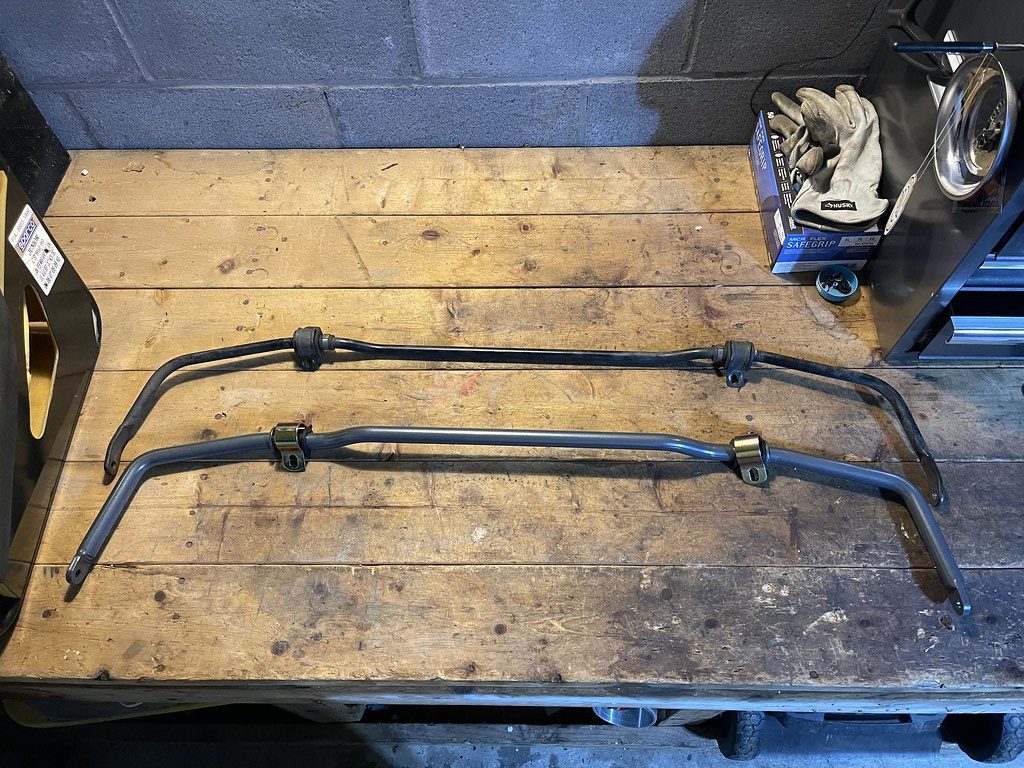
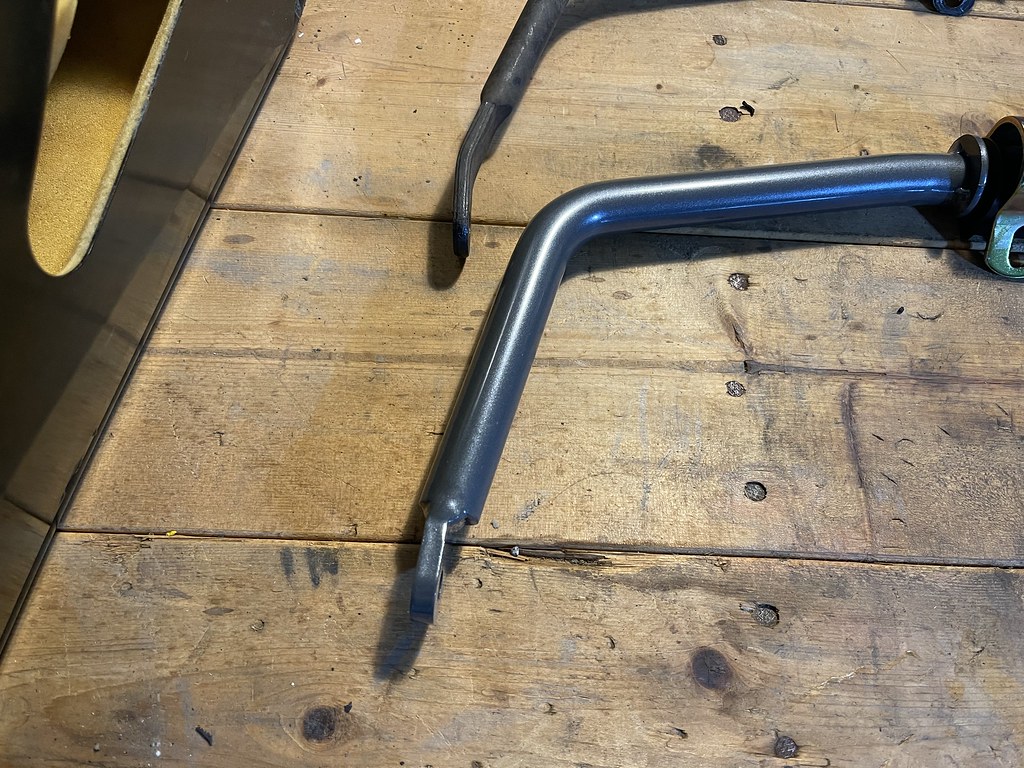
The stock Protege 5 rear sway bar is 21.5MM, so the extra 2mm is a great upgrade.
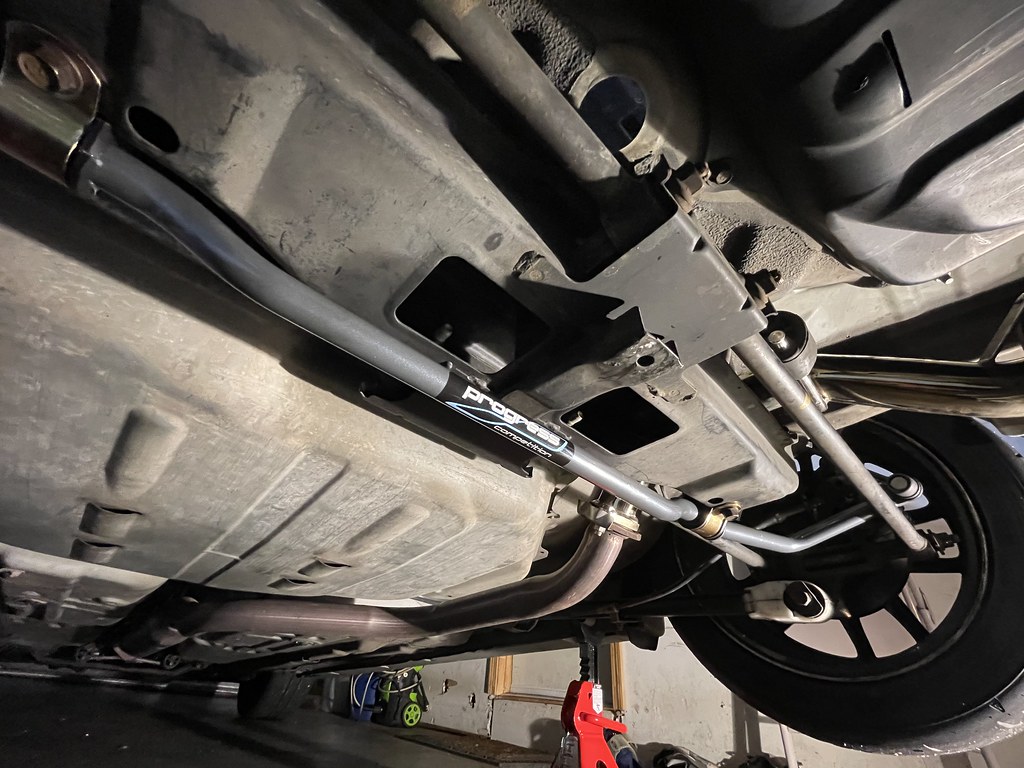
The install is pretty straight forward and simple. It does take a little bit of effort to get the mounts into the subframe. But fitment is perfect..

While installing the rear sway bar, I saw brake fluid leaking from my passenger rear caliper. I tried to reseal it, but it had seized, and would not slide back in place. So I did have to replace my freshly powder coated caliper with a new one. I was just happy that I was able to catch it...
Back out at Atlanta Motorsports Park in the Protege was a much different experience with the Progress rear sway bar. In the first 2 sessions the car rotated much more. After the second session I made some adjustments to the rear coilovers, and reduced my air pressure. The more I threw at the car the better it seemed to behave, and it almost felt like we were dancing at times. The Falken RT660s were consistent all day, in the video you can hear the tires talking, but it was very predictable. I was able to put down a personal best of 1:41.2 this go round. The car was perfect at AMP, and it gave me great confidence to see how the car handles Road Atlanta with the rear swaybar..
NO, they are the standard ones. They have always been a good alternative to the RB ones. But most people have forgotten.Car sounds and looks mint! That track looks like a bunch of fun too.
Rear swaybar looks good too, are these the bars that have the special mounts to avoid clunking?
Also, grrrrr, stuck calipers on these cars are the worst!
Similar Threads and Articles
- Replies
- 15
- Views
- 843
- Replies
- 6
- Views
- 630
- Replies
- 0
- Views
- 337
- Replies
- 71
- Views
- 3K


- Replies
- 0
- Views
- 464
New Posts and Comments

- Replies
- 173
- Views
- 19K
- Replies
- 11
- Views
- 9K
- Replies
- 3K
- Views
- 2M
New Threads and Articles
-

-
14 CX-5 power drivers seat won't go forward, all other directions work
- By rickprins
- Replies: 2