I can now report that I have, indeed swapped out an aftermarket HU on a 4.3" screen, no nav system 2010 CX-9 and retained the factory OEM camera.
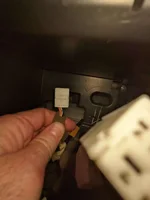
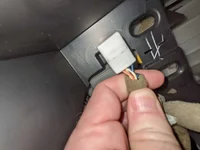
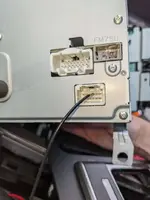
When you remove the HU, there is a connector that includes 5 wires, White (6V), White/Red (Video +), White/Blue (Video -) and two Black/Blue wires (GND). Photos show the connector and where it goes on the factory HU. The connector cannot be used for the swap, so you will need to cut it off to splice the wires.
The White wire puts out a constant 6V signal when the car is powered on. You will need the Axxess AX-MAZCAM-6V Backup Camera Harness for this swap. You will connect the YELLOW MAZCAM power wire to the WHITE wire, the BLACK MAZCAM GND wire to the BLACK/BLUE wires. The male RCA goes into the new HU and I cut the female end of the RCA wire to connect the RED wire (video+) to the WHITE/RED wire and the BLACK wire (video-) to the WHITE/BLUE wire.
For this swap, I also used the PAC RP4-MZ11 Wiring Interface, which retained steering wheel controls and also picks up the REVERSE signal to tell the camera to come on with the above wiring. You will need to splice in the reverse MAZCAM wire into the PAC wiring.
OEM factory camera is functioning with the new HU (Alpine ILX-650).
I have scoured these forums for anyone else that has done this on a 4.3" screen, no nav system and could not find anything. Hopefully this post will give hope to those of you with this type of stereo that want to retain the backup camera.