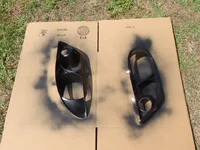
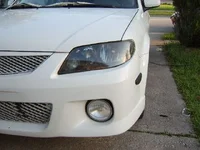
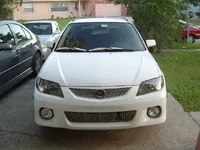
How To: headlight black out for P5!

I was going to do the DDE kit, but, I just can't bring myself to putting little rings in and on my headlights. I like the clean look. Oh well. As to the white headlights, I gotta photoshop it first. Get the wife's approval, then we'll see. It is her car afterall

Tylor
 
You're Mom's expired...
sorry, I had to go there
anyways,
Black outs on a silver 6?
thoughts?
 
I think blackouts look good on anything!! I say DO IT TO IT!!

Tylor
 
ok i just did this, and i found a helpful hint for everybody who hasnt done it yet,
when u take it out of the oven and ur trying to pry it apart; it cools down fast so use a hairdryer or a heatgun, because i used it and the silicon or w/e they used to seal it together just literally spread apart with out any effort at all, really easy with a hairdryer, REALLLLLY EASY

and my headlights looked a little sandblasted so i sanded them down with 1200 grit sand paper and cleared them, looks better then originally but not as good as it did the first day i bought it
 
oh i actually used some stuff from autozone that costs 20 bucks and it came in a kit
it actually worked really good and both of my headlights are actually crystal clear now
 
oh i actually used some stuff from autozone that costs 20 bucks and it came in a kit
it actually worked really good and both of my headlights are actually crystal clear now


i bought me some of the Meguiars Plast X cleaner
and it cleaned out my headlights really goood
i fergot to clean the inside when i did my blackouts but yea bottle was bout 4sumthin and then i bought foam pads for another 3bucks and my headlights were clean as new lights

havent seen the kits from autozone yet but ive seen em and i heard they work too
 
my headlights were way beyond the phase where i could just use that meguirs stuff, i litterally had to sand for around 10 minutes on one light just to make everything smooth because the top part of the light was sandblasted so bad
 
Followed this thread step by step. Thank you!! only trouble i had was after baking the head light being able to open it up. I found the trick was right after 10 min take it out and start prying the top edge with a flat head and do the whole top. Once you see it start to seperate just pry it with your hands and the bottom should come apart as well. GOOD LUCK TO ANYONE WHO ELSE TRYS THIS! PICS!!!
 

Attachments

  • STA60002.webp
    STA60002.webp
    41.4 KB · Views: 291
  • STA60001_3.webp
    STA60001_3.webp
    55.4 KB · Views: 305
  • STA60012.webp
    STA60012.webp
    34.4 KB · Views: 297
  • STA60009.webp
    STA60009.webp
    45.4 KB · Views: 287
  • STA60001_8.webp
    STA60001_8.webp
    57.8 KB · Views: 291
Back