What have you done to your Miata today?

Today I finally followed my own advice and sucked less :D
1st in XP, FTD!

29445698113_4774dfc1b6_z.jpg


Took a shot I've been meaning to then keep forgetting. We run in the NHRA Top Fuel paddock space at Atlanta Dragway :D
I'd have gotten closer to the tree, but they don't want us past the burnout box and screw up the track prep.

29444673783_e73afd77d9_h.jpg


All of the neighborhood kids were out today (including mine) when I got home, so once I got it off the trailer I let them climb around it for a while before tucking it back to bed.

30037890906_9022dacb47_h.jpg


Ok ok ok ok, here's the video. The car was the best it's ever been. The new arms and tires worked a treat, and now I just need to sort out how to drive it. Because bloody hell she moves :D

 
Nothing, haven't driven it in 5 days [emoji30]
It's been in the shop getting a new 7500$ top and windshield

Damn Mark, what happened?

Today I finally followed my own advice and sucked less :D
1st in XP, FTD!

Took a shot I've been meaning to then keep forgetting. We run in the NHRA Top Fuel paddock space at Atlanta Dragway :D
I'd have gotten closer to the tree, but they don't want us past the burnout box and screw up the track prep.

All of the neighborhood kids were out today (including mine) when I got home, so once I got it off the trailer I let them climb around it for a while before tucking it back to bed.

Ok ok ok ok, here's the video. The car was the best it's ever been. The new arms and tires worked a treat, and now I just need to sort out how to drive it. Because bloody hell she moves :D

Way to go Maff. You're my hero.
 
Way to go Maff. You're my hero.

I'm trying to figure out exactly how much sarcasm was dripping off of that post.

I imagine the look on your face to have been something along these lines when you typed that (rlaugh)

1475971_1303043289270.56res_500_325.jpg
 
So ypu fell victim to the ND top issue Mark. Sorry to hear. At least Mazda is picking up the tab.

Gotcha Bruce. I wish they offered more dd options. Only two I could find were Sumitomos and S-Drives. Heard good things about both but more options are better.

Nice Andrew and Congrats!!!! Love the drag queen shot. Lol. And the pic of the next generation of racers is priceless!

Sent from my Galaxy S7 Edge using Tapatalk
 
I'm trying to figure out exactly how much sarcasm was dripping off of that post.

I imagine the look on your face to have been something along these lines when you typed that (rlaugh)

I actually meant it, it is a great accomplishment. In my head I heard the Cameron character from Ferris Bueller saying the line (and yes, I know HE was being sarcastic).

Didn't get quite as much done today as I wanted, but pulled the front bumper and removed the lip (she looks naked without it) and sanded down most of my mistake on it. I picked up some bumper filler epoxy to finish the prep work, that way I will only have myself to blame if it doesn't look right. I still have to remove the double-sided tape residue I used to hold the HD lip on the bottom. Didn't quite get to the rest of the prep to the trunk lid either. I noticed the other day I hadn't put the Rivals/wheels on the correct sides so I fixed that. I know you are supposed to be able to move modern radials from side to side, but I stick with rotating front to back.
 
Damn Mark, what happened?


Way to go Maff. You're my hero.

Ya so top was rubbing in like 5 areas and starting to fray so they replaced it, the windshield to the hit at the track night to big chips.

And yes I wish I was half as good as Andrew on the ones!!! [emoji106][emoji471]


Sent from my iPhone using Tapatalk
 
Took the wife's wheel set up to have the 949 valve stems installed. After I got home I went about getting the rest of the prep work done on the parts I want painted. Removed the remaining foam from the trunk lid brake light area and washed it up along with the spoiler. Brought the front lip inside to remove the double-sided tape residue. I'm not going to use adhesion promoter again for that, I ended up giving myself a blister on one thumb trying to rub it off. On to Plan B, I used a putty knife and gently scraped it away. Then I mixed up the Bondo flex part repair epoxy I got and applied that over the scrapes I put in it. While that was drying I finished up the tape residue removal with some acetone and denatured alcohol and got it all cleaned up. Sanded the epoxy down and have a smooth surface once again. Finally I sanded down the gas lid, my rattle can paint job still looked good but I had ended up with a depressed area which bothered me.

With all that done I loaded up the CX and went to the local paint shop I've used before. I guess they didn't want to do the work because I was quoted a ridiculous amount and given a delivery date of a month and a half. They didn't look all that busy. On to Plan B for this...
 
Just take off your shoes, you're good for up to five on a side. (wiggle)

OT, but:

We were in the car one day w/ the boys and my mom in the back seat, and they were doing addition. When they were having trouble going above ten, someone suggested if they take their shoes off they can count to 20. I go "And if you take off your pants you can count to 21!"

My mom was unamused (rlaugh)

She must be so proud...
 
Asked my friend last night about a body shop he has used, and stopped by there today. Owner was great (he has a Model A truck on a charger sitting in his reception area), he quoted me a price half of the other place and said I would have it back in a week. It's nice not having to wait most of my vacation to install and enjoy my parts.
 
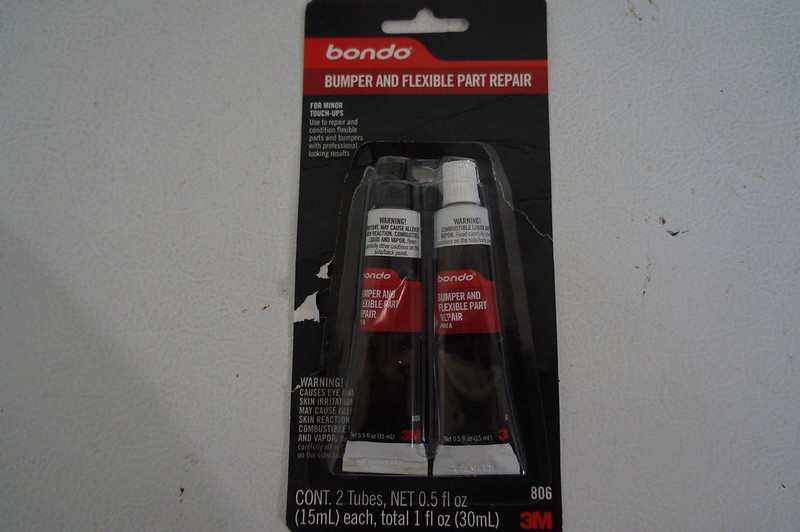
I was asked by someone what it was I used on the front lip to fill the scratches, here it is:

29490182924_8cd1411583_c.jpg


Found it at Vato Zone in the body work section. Adam (revlimiter) posted about using something similar to fill the front emblem holes in his NB bumper cover, I don't remember where he got it from though (maybe Amazon?).
 
Spent this past weekend having fun and getting dirty at the SCCA National Rallycross Championship:
mH1jDnihzqS6UIYcsNS9LBK_Q63Wge3neMxek9S4mo9yrT9CEnJg8g60whYGHyyrSlvFFSt-K7A=w1440-h755-no
 
Spent this past weekend having fun and getting dirty at the SCCA National Rallycross Championship:

You definitely shouldn't mention that Shawn brought home some hardware :D

Congrats again! (drinks)

Found it at Vato Zone in the body work section. Adam (revlimiter) posted about using something similar to fill the front emblem holes in his NB bumper cover, I don't remember where he got it from though (maybe Amazon?).

I've used this to fill small holes, works well.

https://www.amazon.com/dp/ (commissions earned)
 
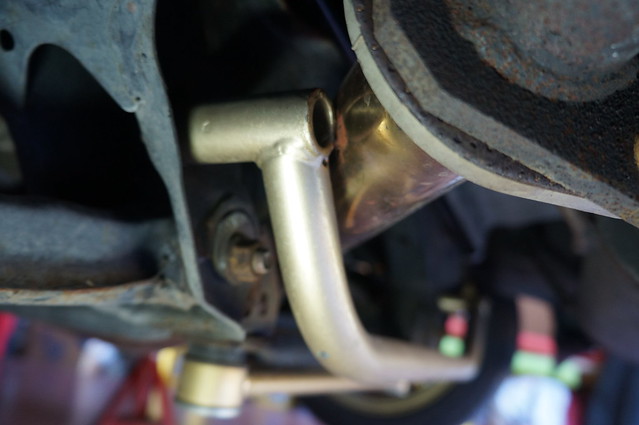
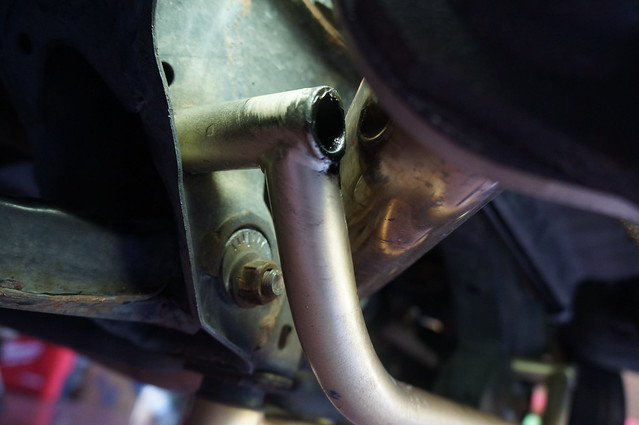
Time for another round. I have been hearing a rattling noise from the exhaust hitting the chassis when things were cold. Hoisted her up in the air, crawled underneath and started hitting the exhaust with my hand. There was some contact with the front of the butterfly brace which I expected, but there was another noise coming from the rear. I moved to the back and saw this:

30176465975_a449c8dc78_z.jpg


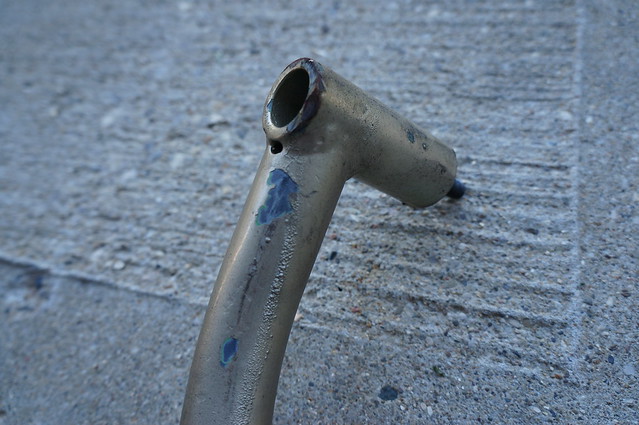
My 949 rear subframe brace was being contacted by the exhaust. I never noticed this before and judging by the amount of wear it is a recent development, possibly due to my changing to the MS header. You can see in the picture where it was hitting (look for the rusty bevel):

29547246203_4ba2c2df5c_z.jpg


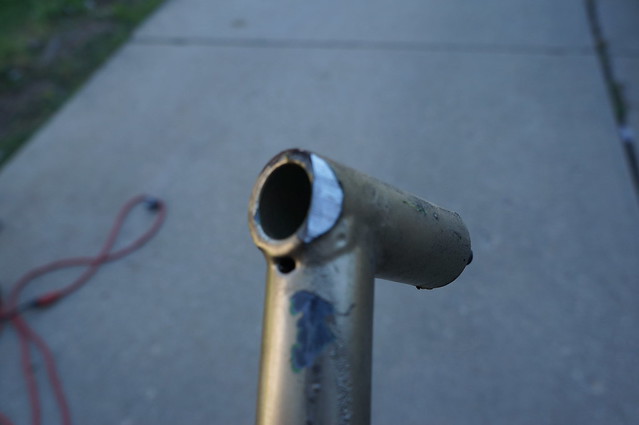
A little exercise with an angle grinder took care of the problem:

29547245203_c276ffda01_z.jpg


Put it back in to check and there was good clearance so tightened it back down:

29547244613_f2a1e4f4f4_z.jpg


I'm going to have to find some gold paint at some point but for now I just shot it with some Rustoleum satin black I had.

While I was under there I decided to calibrate the O2 sensor. It has been occasionally acting up (stays in heater mode) so I wanted to see if that would help. I found the only bad thing (so far) about the MS header is how it restricts access to get the sensor out. I finally got it loose enough to turn by hand, once out I went through the procedure for calibration. I noticed the cable was rubbing slightly on the horizontal edge that runs around the back of the engine compartment. I rerouted the cable when I put everything back together to give clearance there but now I was looking at having the connection touching the heater hose. A little piece of duct tape took care of that.

I picked up a new set of spark plugs yesterday so installed those gapped to 0.035. Old plugs looked good with little apparent wear, but for $10 why not? The new IAT sensor I bought from DIY Autotune came in a couple of days ago so that was installed as well. I checked the resistance of both old and new, they had the same value but that was at one temperature. Remember I am always looking at having it reliable for my wife when I'm gone, so what some might think is not needed I see as cheap insurance.

Finished up by cleaning the double-sided tape residue off the bottom of the front bumper preparatory to getting the lip back from the painter.
 
Back