What have you done to your Mazda5 today?

Finally success for me! I founded instructions/wiring diagram for four relays to use high beam bulbs as DRL's.

With those relays bulbs are in series when DRL, so half the voltage.
And in normal situation they are parallel, so they get normal voltage and are bright.

I installed relay pack near to fuse box, on the airfilter box wall.


Hard to take pics from lights. 😂
Nice mod but why not simplify and use 1 relay to trigger the parking lights or log lights?

Personally, I find DRLs annoying/useless. Stay alert and drive safe.
 
Nice mod but why not simplify and use 1 relay to trigger the parking lights or log lights?

Personally, I find DRLs annoying/useless. Stay alert and drive safe.

I actually had that before, one relay in fusebox to light up fog lights as DRL's..
But I didn't really like it, because it would also light the light in instrument cluster every time.
And I don't like the looks of them.

Here in Finland it's mandatory have driving lights on, so parking lights isn't enough, or dedicated DRL's. Fog lights aren't for that and we can get fined for driving fogs on if the weather isn't bad. :ROFLMAO:

Basically this is as illegal as that fog lights DRL's mod, but i would say that this isn't that noticiable, because it looks OEM'ish.
 
I actually had that before, one relay in fusebox to light up fog lights as DRL's..
But I didn't really like it, because it would also light the light in instrument cluster every time.
And I don't like the looks of them.
Did you use parking light (turns on dashboard) as the trigger wire? If you use a 12v ignition power source to trigger the relay it would not light up the dash -you still have fog light toggle as master switch. I agree the +12 gen has large black covering with anemic sized fog light that looks out of proportion. I like the look of OEM fogs on 1st gen.
Maybe this or DIY? https://www.ebay.com (commissions earned)

Here in Finland it's mandatory have driving lights on, so parking lights isn't enough, or dedicated DRL's. Fog lights aren't for that and we can get fined for driving fogs on if the weather isn't bad. :ROFLMAO:

Basically this is as illegal as that fog lights DRL's mod, but i would say that this isn't that noticiable, because it looks OEM'ish.
Unless your car was imported, since it did not come with DRL is it mandatory to retrofit? I have heard EU is more strict on running fogs so that may not be a good idea. Technically, same fog law exist in US but no one cares. Overall, your approach is very nice to accomplish what you wanted. I'm surprised FORScan doesn't have the ability to enable DRL since I think Canada models have it enabled.
 
Did you use parking light (turns on dashboard) as the trigger wire? If you use a 12v ignition power source to trigger the relay it would not light up the dash -you still have fog light toggle as master switch. I agree the +12 gen has large black covering with anemic sized fog light that looks out of proportion. I like the look of OEM fogs on 1st gen.
Maybe this or DIY? https://www.ebay.com (commissions earned)


Unless your car was imported, since it did not come with DRL is it mandatory to retrofit? I have heard EU is more strict on running fogs so that may not be a good idea. Technically, same fog law exist in US but no one cares. Overall, your approach is very nice to accomplish what you wanted. I'm surprised FORScan doesn't have the ability to enable DRL since I think Canada models have it enabled.
My previous connection was like this:
DRL1.jpg


Power comes from injector fuse and triggers fogs relay.
TNS relay triggers my relay, so it opens when parking lights up.
Simple and works fine, but instrument clusters fog light lights up..

Also one nice feature comes with that, that injector fuse is power about 20sec. after shutting engine, so I have now also coming home -lights. :cool:

My car isn't imported, but had "Scandinavian lights", so driving lights light up after ignition.
And I don't wan't use xenons that much.

Canadiens seems to have Highs as DRL's, but I think they have different wiring, so then it can't be enabled with Forscan.
Same as US-cars have amber corners, but euros don't. USD have different wiring/bulb than EDM.
 
Serpentine belt today at 104k miles. Original was severely cracked. Looked at a bunch of instructions and videos, all of which suggested using a little plastic wedge tool to get the belt to stretch into place because the ‘12 model doesn’t have a tensioner pulley like the 1st gen models. Then I found one video by a mechanic who apparently had to do a bunch of these and decided to find a better way.

Cut the old belt loose, and route the new belt around every pulley except the top forward one. Then loosen the top two bolts holding the top pulley bracket in place. The whole pulley/bracket will rotate towards the right of the car when you loosen the bottom bolt. Pull the belt over the pulley, and then using a pry bar between the frame and the pulley mounting bolt lever it up into position. Stick the top bolts back in and torque them down. Less than 10 minutes including jacking up the front end so my son could help guide the belt around the pulleys from below. No special tools needed. (13mm socket, ratchet, 3” extension, and a 2’ piece of pipe because I can’t find my long pry bar)

I will soon be doing front and rear end links, RSB bushings, tire rotation, transmission mount, rear engine mount, and an oil change. Just not today.

Remove these two bolts
View attachment 303319View attachment 303320

Pry here (I used a 2’ pipe because this pry bar wasn’t long enough)
View attachment 303321
Just did my belt and tensioner. This is the way.
 
Besides the new belt and tensioner, I replaced the stock pos horn after it crapped out. These tasks around 70,000 on a 2012 5 GT.

I had a Stebel compact nautilus dual tone air horn lying around, new in box. Research suggested the additional relay was unnecessary, so wiring tasks were minimal: splice add'l length and a new terminal on the existing wiring, and fab a ground wire. The Stebel has two terminals on the bottom of the unit, while the stock horn grounds through the mounting bolt. Swapped a 20A fuse for the stock 15A per a couple suggestions.

The Stebel is about as tall as a 12oz can, with the mounting point up high. From the stock mounting point, it would have hung down closer to the splash guard than I would like. I drilled a new mounting hole (5/8" iirc) in the stock bracket to accommodate the larger mounting bolt and move the mounting point up about 1.5" toward the frame. Fits real nice!

The air horn sounds fantastic compared to the stock POS. A light tap on the horn is not too obnoxious, but loud enough to get people's attention. A solid honk spools up very quickly, is wonderfully conspicuous, and really grabs attention. Sounds unlike most other horns on the road, and makes me happy to hear it!

Next up: new battery.
 
Need to do the belt as I'm at 111k miles on my 2014 Mz5 Sport with A/T. Tips above are great!

But the other day I replaced the cabin air filter. Still remember the previous time I did it. Not too much fun. :) This time was easier as I knew what to do... but I really left it there for too long. Need to replace it far more frequently. It looked awful.
 
Exhaust work- mid-pipe was leaking in 3 places right where they weld that flat stock on the pipe.

Went to a local custom shop and they bent up a pipe and welded it in.
 
Exhaust work- mid-pipe was leaking in 3 places right where they weld that flat stock on the pipe.

Went to a local custom shop and they bent up a pipe and welded it in.
Good timing. Curios, how much piping did you end up getting fab, what type of pipe material was used, and how much did it cost all together?

I had a split in one of my flanges and have been using a coupling with two clamps. Recently I got under and confirm there are at least 2 leaks in the pipe. I'm debating if I should ghetto seal/patch, get pre-fab pipes from Rockauto (bad experience with aftermarket -they are poor quality- and my other flanges are looking really weak too), hunt for a newer Mz5 in u-pull it, or just have a shop make it.
 
Last edited:
Good timing. Curios, how much piping did you end up getting fab, what type of pipe material was used, and how much did it cost all together?

I had a split in one of my flanges and have been using a coupling with two clamps. Recently I got under and confirm there are at least 2 leaks in the pipe. I'm debating if I should ghetto seal/patch, get pre-fab pipes from Rockauto (bad experience with aftermarket -they are poor quality- and other flanges are looking really weak too), hunt for a newer Mz5 in u-pull it, or just have a shop make it.
Hi Silent,
I didn't mention in my post that there was also a leak where the hanger is welded on the short piece of pipe between the cat and resonator so what they did was cut out that section and weld in a piece of stainless and a hanger, reused the resonator, and welded in a piece of aluminum custom bent pipe from the resonator back to the flange at rear of mid-pipe.

So cut at the red lines and replace the pipe in yellow.

$240
1682549563570.png
 
Hi Silent,
I didn't mention in my post that there was also a leak where the hanger is welded on the short piece of pipe between the cat and resonator so what they did was cut out that section and weld in a piece of stainless and a hanger, reused the resonator, and welded in a piece of aluminum custom bent pipe from the resonator back to the flange at rear of mid-pipe.

So cut at the red lines and replace the pipe in yellow.

$240
View attachment 318875
Thanks! I need to fix/replace this section as well, and patch a leak in the piping that runs to the exhaust. The hanger attached to the short piece is soo rotted, I can bend it easily. Do you know/ask the shop what type of material their pipes are made of? This is my biggest concern that affects cost and durability.

I've only used Walker O2s and they are ok but def not the OEM fit/quality but you can DIY this section for $88. Maybe pretreat it as an extra safety measure..?

confirm part# 54830

buy part# here b/c $88 shipped.

$77 is not cheaper when shipping is $144 :/
 
@Silentnoise713 - I looked at aftermarket parts and all I saw really required some welding to be done right in my mind, and I don't have welding equipment. Another option is to buy the OEM mid section which goes from flange to flange which was about $350 for the part, as seen in my pic above.

I'm not a fan of exhaust work so I enjoyed sitting in the waiting room for 45 minutes watching youtube. Sure beats laying on the floor fighting with a rusty exhaust system!
100% on the waiting on the couch! As a shade tree DIYer, even with goggles, rust and crud falling on your face/hair/body while lying on your back with limited movement -sucks.

But you just gave me a bad idea (in a good way)! I also don't have a welder (metal is hard to work with, wood is so much easier) but have always debated on getting a small TIG welder (there are some decent ones in ~$100 range) to fix small stuff at home. I think I may just do that and patch weld the leaks!
 
This past weekend I finally found that tire busting pothole! I had a decision to make. Buy two new tires, or mount the tires on the new (used) wheels I got over the winter. I just had to put on my new wheels. She looks great. Now I am pondering whether I should leave the ride as is, or lower with H&Rs.

BTW, does anyone know the part number for Speed3 wheel center caps? I bought a set on eBay which claimed it would fit Speed3 wheels, but they did not.

new wheels 05-05-2023.jpg
 
Used my Mazda5 as a truck again, getting lumber for building obstacles for the kids fun-run at school, and hauling around set pieces for the school play. This van really is all I need it to be right now, and I don't think either of these tasks would have ben made easier by a truck.
AJFCJaWoefiASJXDL86MSmQ7eqoEagU1zM4dj4zn5Ne4bEhpevJ7XI56SbwijCmKuUJirxvzSsVZzPvuCcqM4Wue0W2cdI6Z0cF3vsykfftGMH9hCn9wGxNAX4KB_f0Y0ud1zobaiZ6Oeap86NaaPa1V7G31=w1249-h937-s-no


AJFCJaXoBkqDdGuB9HF5_3wh1jLfa2hpcmvQ08-wANUoUvYJRar63TTMYrYNuehx-YSVAzUfP6GzOt785aTSp0fZdd8yBek5rNs-eRdbwWdxDYSP1Z-bZmDXjkaXkjur4AoStfG-HSDl56OqXFmJsEN7bsNx=w1249-h937-s-no


Next up, in a couple weeks hauling all the completed fun run structures to the school
 
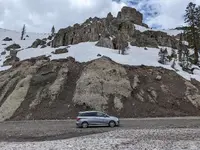
Before a trip to Reno, NV, I replaced the driver's side sliding door hinge (with a part scored from PnP) and replaced the door handle (guess where I got it from?). A small plastic tab was broken and this required a new handle.

After that, I took a road trip over the Sierra Mountains. I must say that the 2.5L 2nd gen engine is marginally better compared to the 1st gen 2.3L. Still struggle uphill sometimes, but all in all acceptable. And the non-existent sound insulation doesn't bother me at all.
 

Attachments

  • PXL_20230526_185246418.jpg
    PXL_20230526_185246418.jpg
    222.8 KB · Views: 61
This past weekend I finally found that tire busting pothole! I had a decision to make. Buy two new tires, or mount the tires on the new (used) wheels I got over the winter. I just had to put on my new wheels. She looks great. Now I am pondering whether I should leave the ride as is, or lower with H&Rs.

BTW, does anyone know the part number for Speed3 wheel center caps? I bought a set on eBay which claimed it would fit Speed3 wheels, but they did not.

View attachment 319148
I like those wheels. What model are they from???
 
Back