Lighter = Faster (RX-7 Build #2)

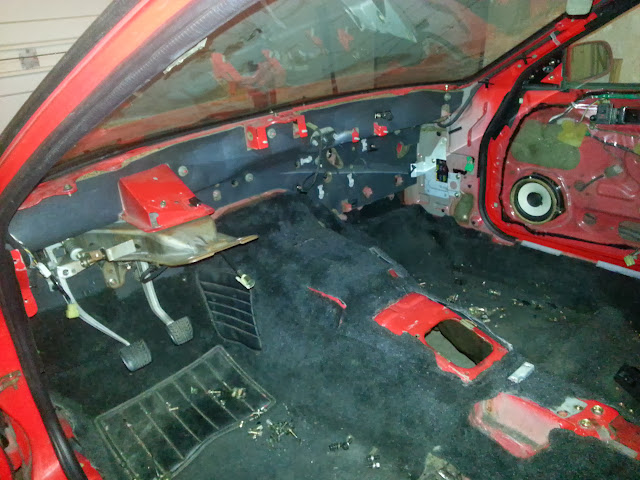
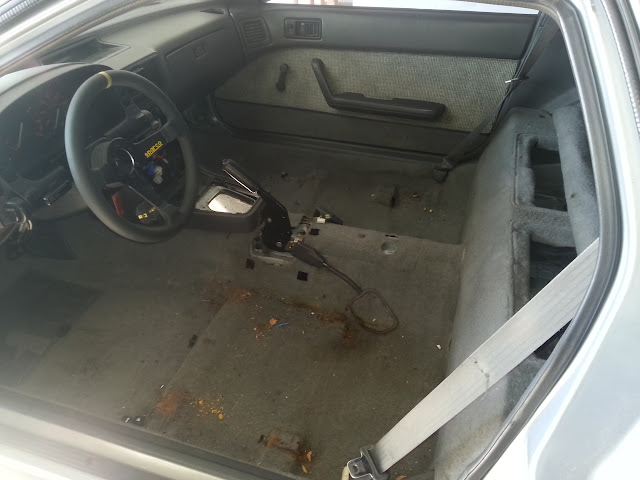
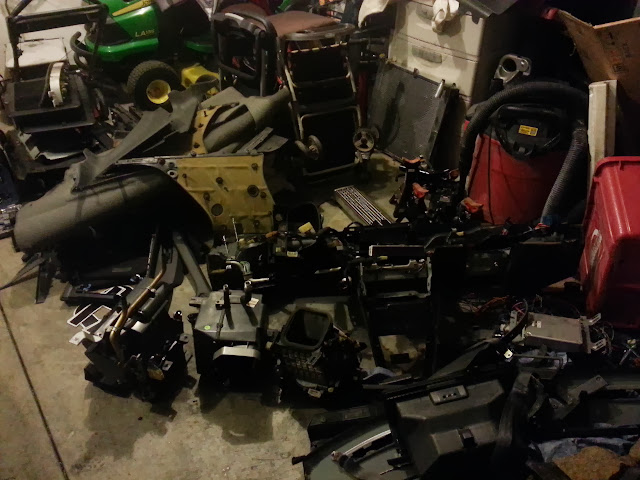
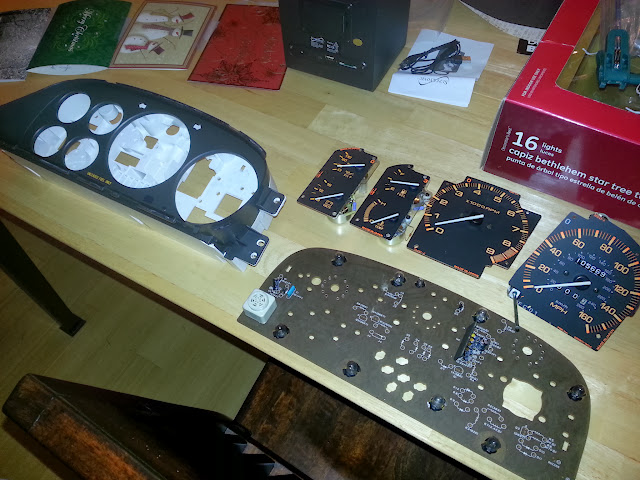
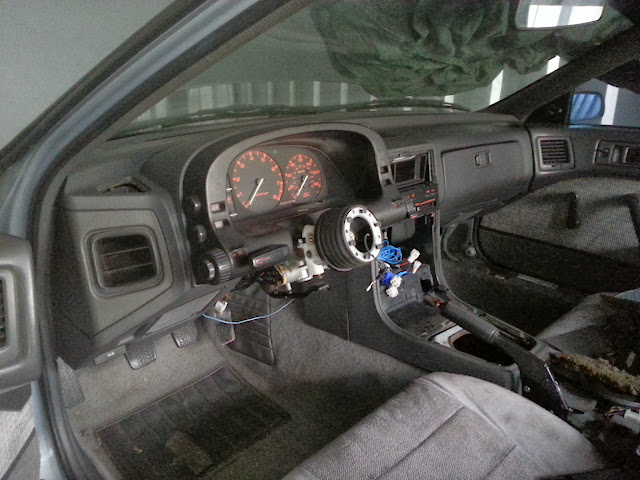
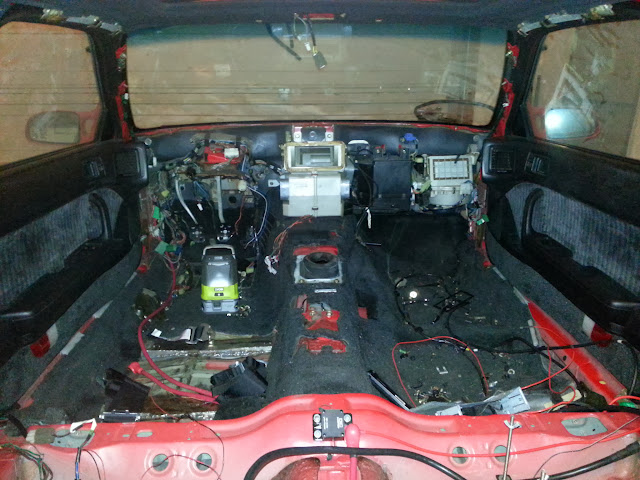
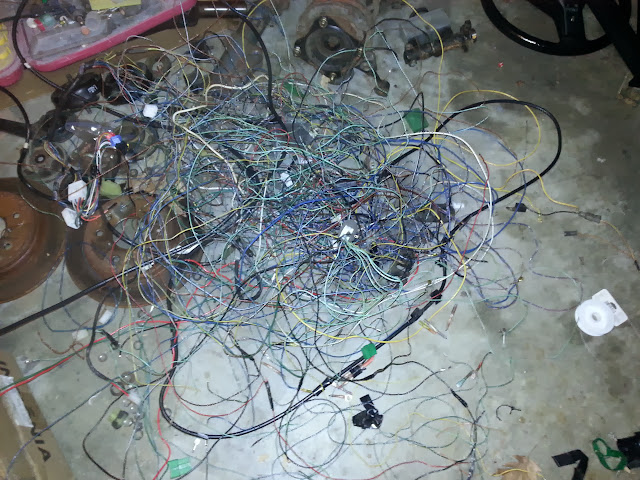
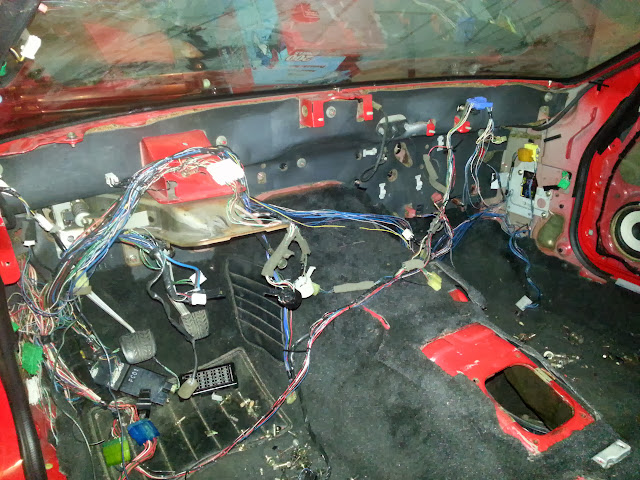
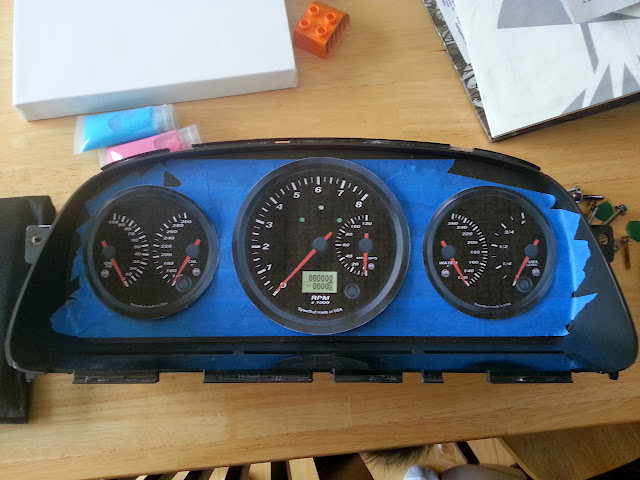
Took a break from tearing apart the red car to play with the instrument cluster. I'm going to be doing a custom setup so I took it all apart:

20131212_203811.jpg


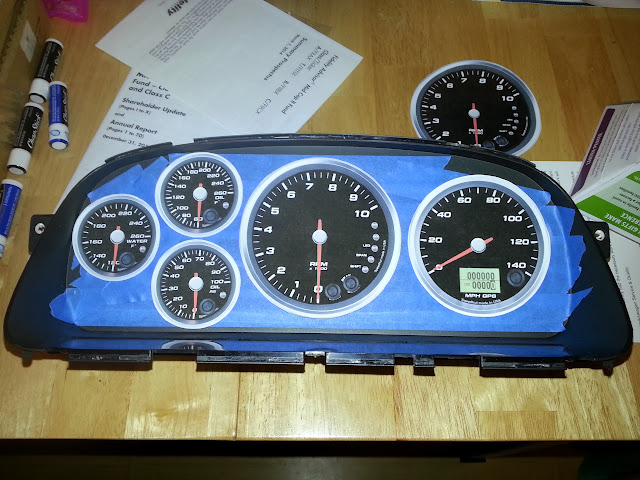
Spent some time last night laying out some ideas. The current leading candidates are #1:
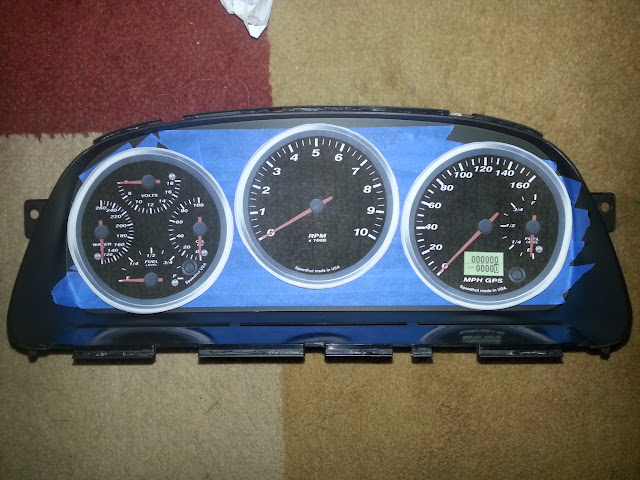
20131213_203852.jpg


and #2:

20131213_205259.jpg


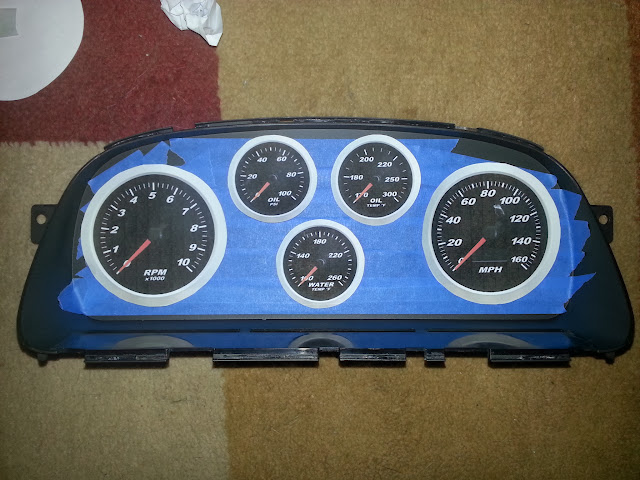
#1 is nice because it puts every gauge except the wideband right in front of me, but it's a little cluttered. #2 is cleaner but I have to relegate fuel level and voltmeter to the center console with the wideband. I can add a 4th gauge in the middle (voltmeter?) for a total of six readings in the cluster. I still need to lay out everything in the car to make sure the steering wheel won't obscure any of the gauges.

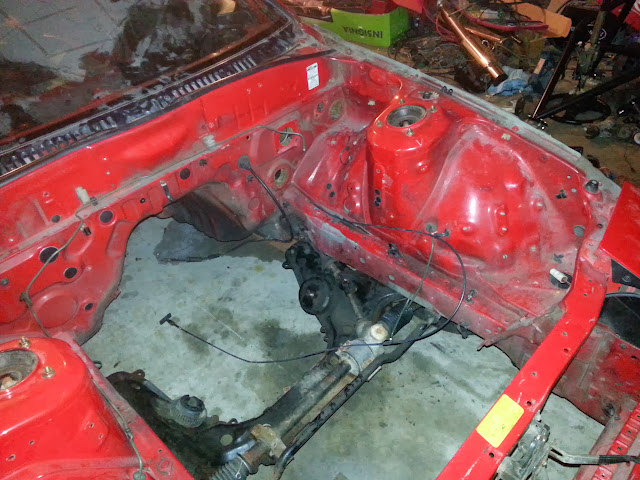
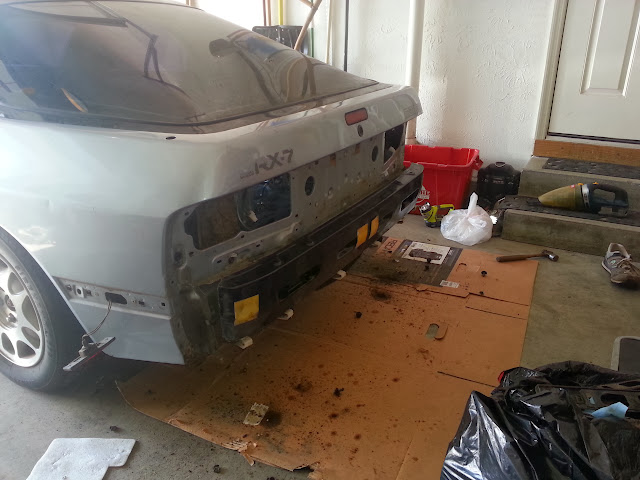
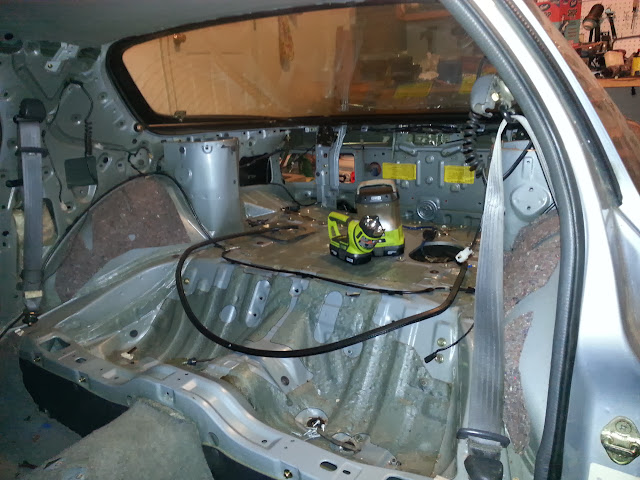
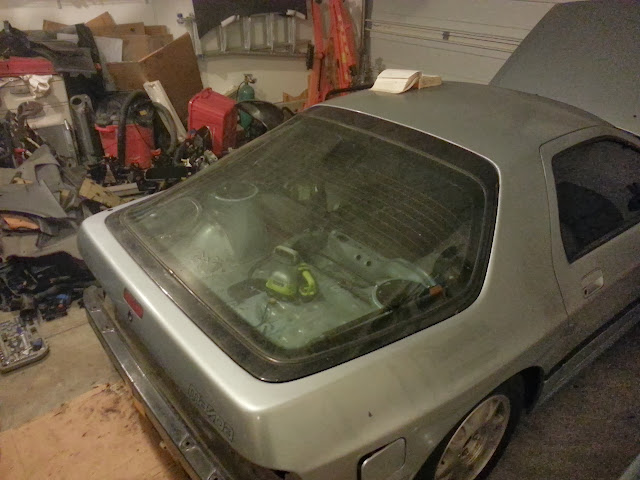
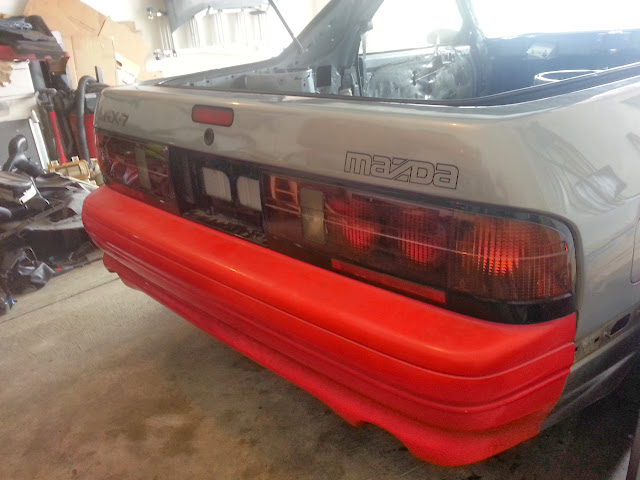
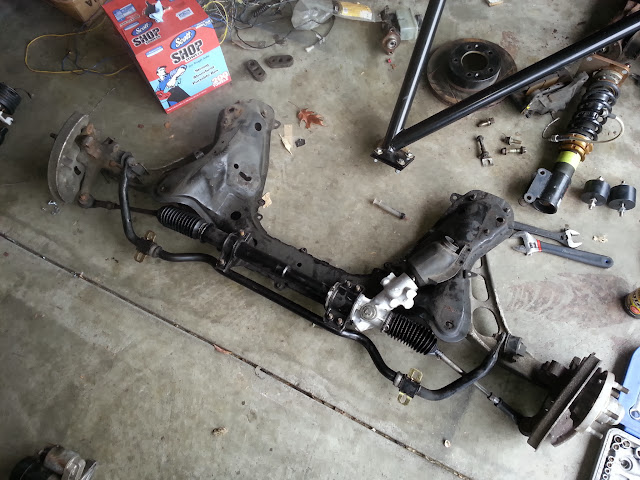
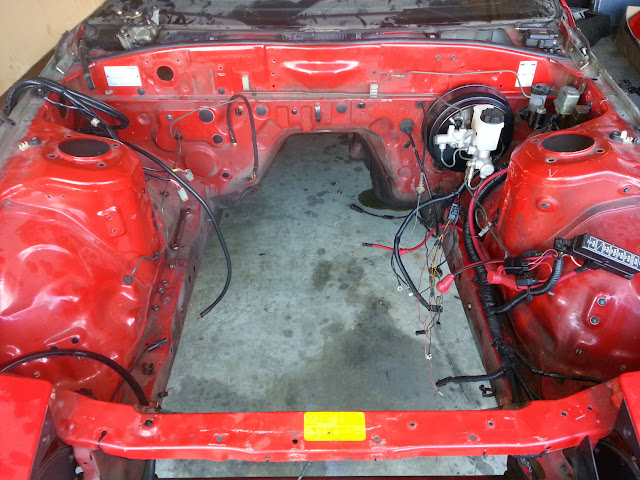
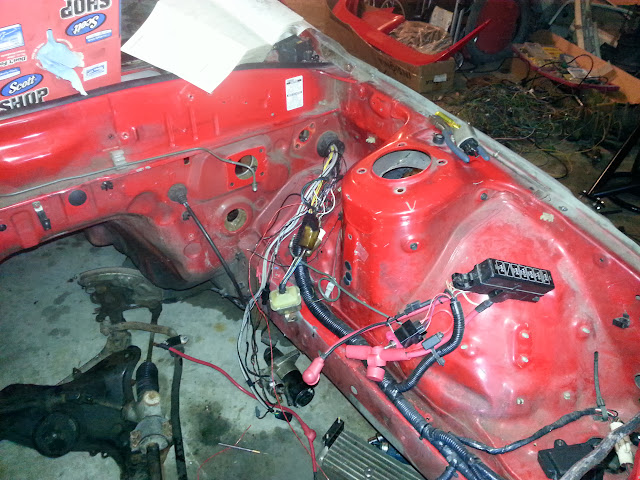
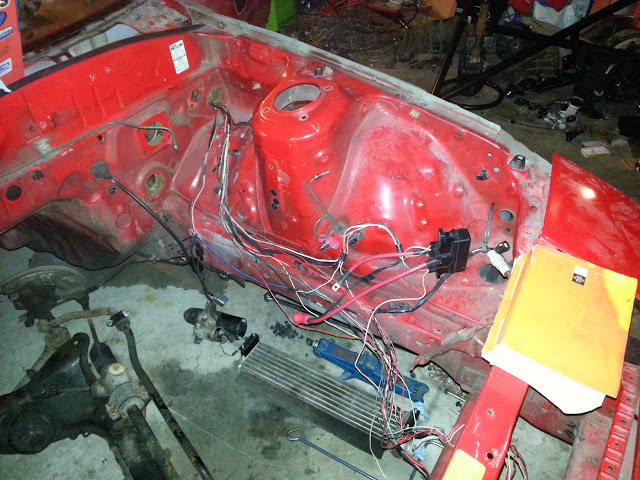
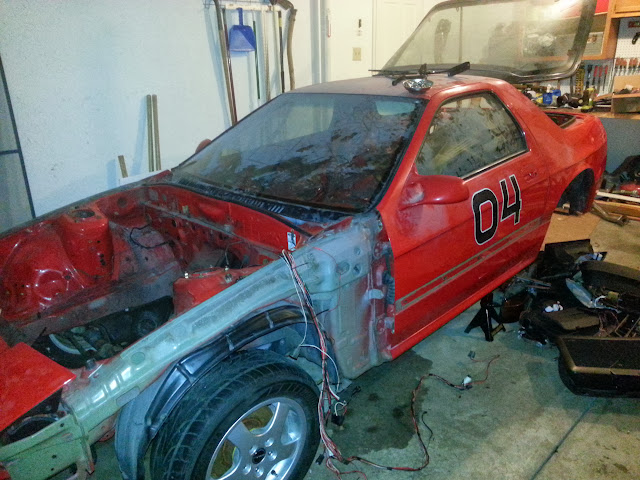
Today I braved the weather to work on the silver car. I got the rear end completely buttoned up and the fuel lines switched around so they're in the right locations. I've been selling a lot of parts from both cars so some of the silver car is slowly beginning to disappear:

20131214_152050.jpg


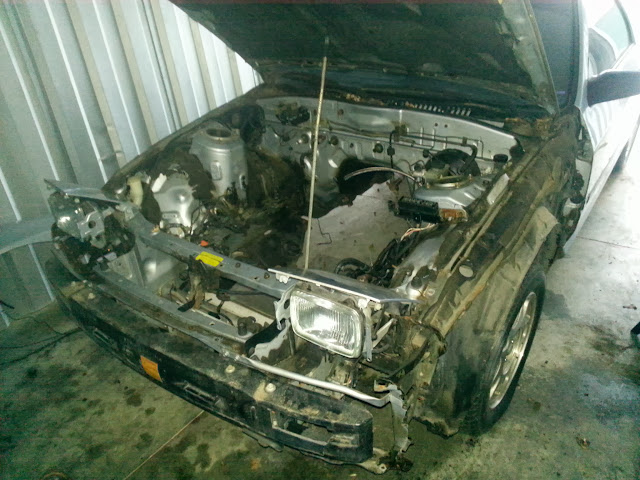
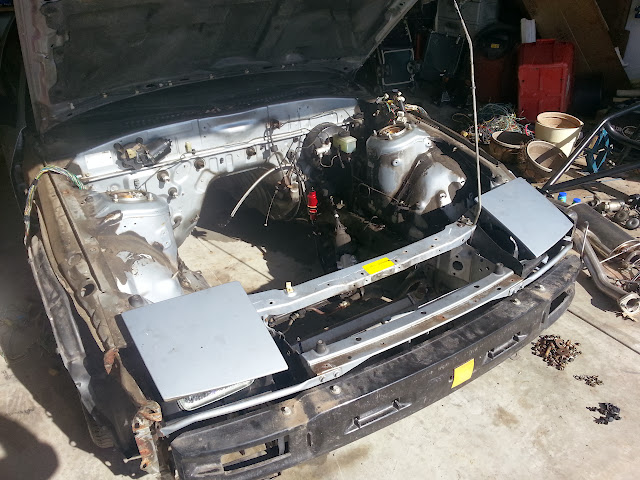
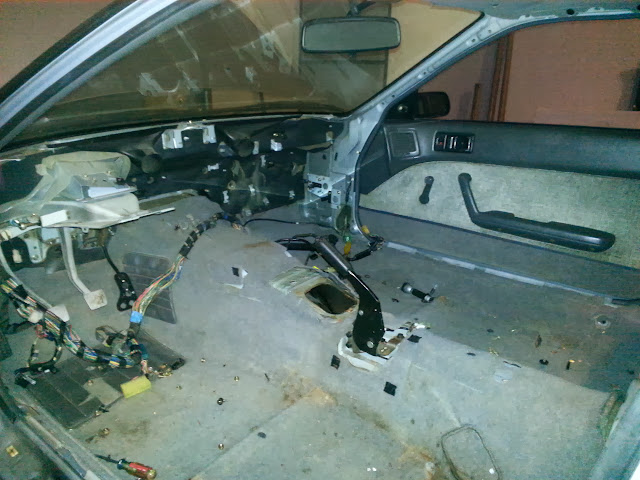
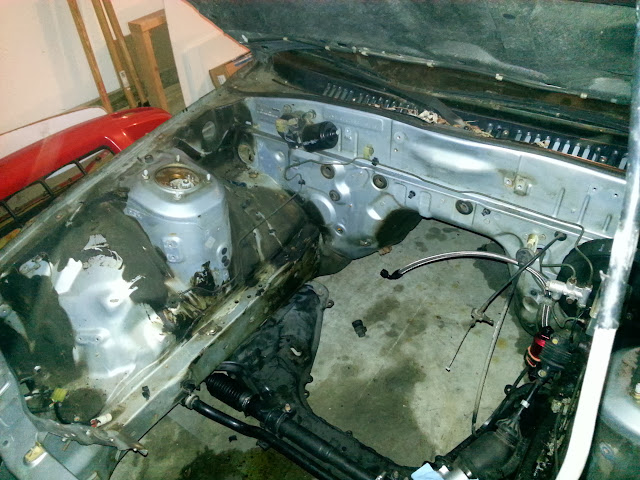
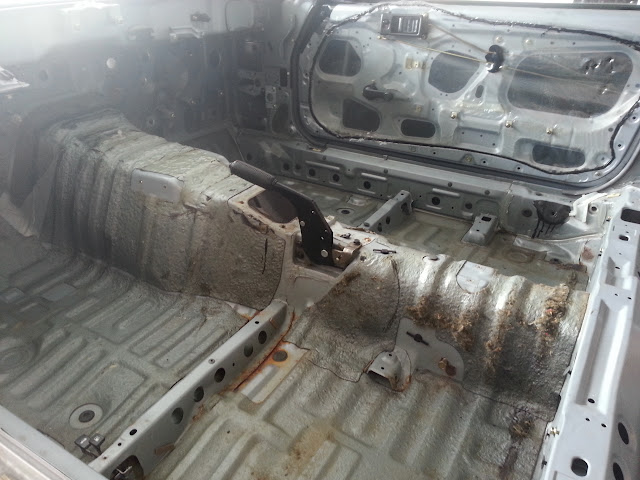
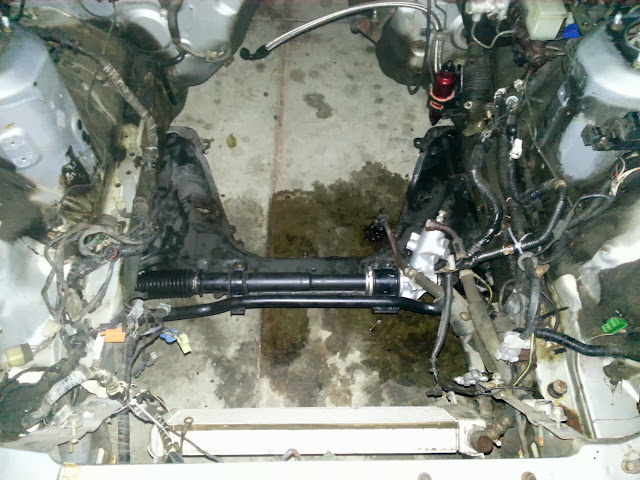
Unfortunately I broke a ton of M6x1.0 bolts on the bottom of the car during this process so there's going to be lots of drilling and tapping in my future. I also had my first unpleasant surprise on the passenger's side:

20131214_152139.jpg


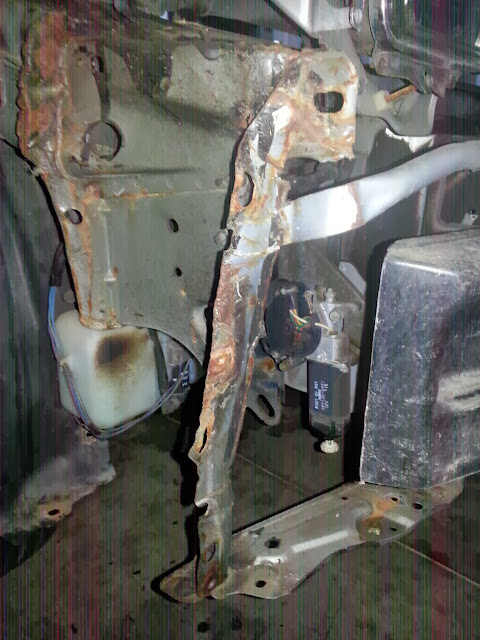
The passenger's fender had about 1/4" of bondo on it and above is what I found underneath. It's clear this car was in a low-speed, offset collision on the passenger's side. I'll like have to replace this entire piece and weld in a new one.
 
Personally, I always prefer the tachometer to be dead center in front of me in the gauge cluster. As far as oil pressure, oil temp, ect. you can wire up an array of warning lights (or wire everything to a single warning light) at the top of the gauge cluster as close to your peripheral vision as possible so that when tracking/driving hard it'll grab your attention without you having to constantly glance down and figure out if those needles are where they're supposed to be.

The way a friend of mine built his track beater, all the gauges were out of his sight line, he had a progressive LED tach light (an array of LED's that lit up as he approached redline, when he saw his peripheral vision turn from green to yellow to red, it was time to grab a gear) and a big red light aimed at the windshield from the dash tied into oil pressure, oil temp, and water temp. If anything critical to the engine's health dropped below/ran above what he set it for, it would light off that big warning light telling him to shut down or at least back off the throttle and look down at his gauges to figure out the problem.

When driving hard, you want only the most relavent information in front of you. Powerband, then immediate engine health. All other information is superficial. If however this will be prodominantly a street car, things like running out of gas become pretty important.
 
Back before the holidays I got the front subframes switched. Front subframe and steering rack out of the red car:

20131217_151511.jpg


The red car is starting to get pretty bare:

20131218_090212.jpg


Getting the subframe out of the silver car wasn't easy but fortunately no bolts or studs were broken. Silver car with the new(er) subframe installed:

20140111_143130.jpg


I got about 1/2 the front suspension installed on the silver car before I left for the holidays. Fast forward to last weekend and I finished up the suspension and got the steering pinion installed:

20140111_154858.jpg


Since the weekend I've been focusing on the red car. Trying to get it stripped down to get it out of the garage.

20140113_205744.jpg
 
(Re)subbing. Awesome build. I'll miss the red car but the silver should definitely work out better for you!
 
(Re)subbing. Awesome build. I'll miss the red car but the silver should definitely work out better for you!

It is sad pulling everything apart but it's amazing what you learn in a year or so. Going back over some of my old mods and wiring definitely makes me feel better about all this. Going even more all out this time and cutting no corners.

Obviously I'm not dead. No updates because I took a week off to go snowboarding in WV, went to Disney World with the family, and then to Daytona for the Rolex 24 Hours. Since then I've been increasingly ripping the red car apart. Pictures of wiring harness stripping aren't too interesting but here's everything as of last night.

The interior:

20140203_213342.jpg


The engine bay:

20140203_213444.jpg


What's been removed so far:

20140203_213356.jpg


That big pile of wires came from the power locks, power windows, power mirrors, power sunroof, audio, auto seatbelt system, anti-theft system, and the remainder of the stock gauges. Most of what remains is the Haltech harness, which I'll be separating for the time being. All that's left is the stock main relays and some lingering items of the anti-theft system (starter cut relay) and then everything can come out.

On a less serious not I got all the lock swapped out. Black interior door handles in a S4!

20140201_133240.jpg
 
Wire-stripping in the red car is done.

20140206_203526.jpg


20140206_203544.jpg


Since those photos were taken I've bundled up the harnesses with zip ties and removed the ECU and rear chassis harnesses.

I determined the fuel sending units are different between cars (tanks are different) so I can't reuse the one from the red car and I'll have to modify the one in the silver car all over again. I had to grind off the heads of all eight screws holding the sending unit to the tank on the silver car so now I have 8 little shanks to somehow remove.

Decided to swap the steering racks (again!). The non-tilting rack originally from the silver car weights 4.4 lbs less than the tilting rack from the red car so I swapped the ignition switches. I never adjust the tilt once it's set and I figure I can shim the entire column as needed to get the location correct. Save weight where ever possible!

Spent most of Saturday night removing the door trim from the red car. I still need to do the passenger's side but it was such a pain I called it quits for the night. I spent Sunday prepping the red car for sale so I reinstalled the front suspension, front cowl and hood latch. Of course the buyer lowballed me and decided he doesn't want the front suspension so that has to come out again. Fortunately the red car will be gone come next Saturday. Red car as it stands now:

20140209_191014.jpg


While on baby-duty I was messing around with gauge arrangements again. I think I finally found a setup I can live with:

20140209_163238.jpg


Left-to-right: 3-3/8" dual oil temperature/pressure gauge, 4-1/2" tachometer (mine will go to 10,000 RPM) with integrated turn and high beam LED's and inset 120 mi/hr GPS speedometer, and 3-3/8" dual water temperature/fuel level gauge. No voltmeter so I'll have to get a separate gauge and put it in the console with the dual wideband.
 
That gauge layout looks the best, easiest to read at a glance and well sorted, imho. Also dig the random Duplo block. :)
 
That gauge layout looks the best, easiest to read at a glance and well sorted, imho. Also dig the random Duplo block. :)

I'm pretty sure Ian was trying to eat it and that's why it's up there.

Snapped some pictures of the red can sans wiring. Interior:

20140210_213346.jpg


Engine compartment:

20140210_213455.jpg


What came out. Left-to-right: front harness, rear harness, and ECU harness:

20140210_213419.jpg


Remaining items:
-Remove passenger's door trim
-Remove remainder of 5-point harness
-Remove front subframe and suspension
-Drain gas tank
-Reinstall passenger's door interior panel
-Reinstall hood latch release and hood
-Get misc. nuts, bolts, brackets, and trash out of the car

It's bittersweet but I'm going to be happy getting back to 1 car to work on.
 
My dream build. I don't think I would have the heart to let the red one go after all that work was put into her, but since the silver one is lighter and in nicer shape I can understand.

Cant wait for more updates!
 
Small update. The red car is gone and the silver car is now in my garage at home. Currently working on stripping out the engine bay.
 
Engine bay wiring harness is stripped of its loom. No pictures because everything was covered in grime and I didn't want to touch the camera. The driver's side was thoroughly covered in brake fluid. Should make some good progress this weekend with the warmer weather.
 
Yay for moar picz coming. :)

I hated working on the wiring looms for my swaps too, electrical tape residue all over the place and all over my tools. Looking forward to the progress though, buddy.
 
Yay for moar picz coming. :)

I hated working on the wiring looms for my swaps too, electrical tape residue all over the place and all over my tools. Looking forward to the progress though, buddy.

I got some work in but not as much as I planned. I spent more time cleaning out the garage and cleaning the people mover. I did manage to snap some pictures of the current state of affairs though.

Front of the car:

20140309_161422.jpg


Wiring harnesses are stripped back to the firewall. That's as far as I can go until I get the dash pulled. Still need to remove the oil cooler and possibly the front bumper support (I'm considering a change to the stock radiator/oil cooler arrangement).

Rear of the car:

20140309_161441.jpg


My ADHD kicking in. Moved to the rear to continue with the "de-S4-ifying" of the car. I want to take off the rear bumper support. Not because it's needed but because I want to clean up behind it (see crap on the floor). The top four bolts played nice; the bottom four not so much. Unfortunately a few of the shanks broke in a manner that's keeping the support in place so it looks like I'll have to drill them out before the support comes off.

Interior:

20140309_161459.jpg


Really, I just took out the seats and moved them, and some other misc. stuff to the storage unit. With the car at home the storage unit's become to repository for stuff I don't need and scrap metal.

And more gauge nonsense:

20140309_210901.jpg


4" tach, 3-3/8" speedo, and 2-1/16" aux. gauges. Since this is becomming less of a pure track car I didn't like the inset speedometer in the tach. in the previous iteration. I also wasn't sold on the double aux. gauges. This setup is as close to stock as I can get and is more "FD-like." I like that the speedo is bigger, there's more fidelity in the other gauges, and the tach has a built-in shift light but things are crowded and I would have preferred the 4-1/2" tach (even more crowded). Still, I think I like this version best. Fuel level and voltmeter gauges would be in the center console. I'm thinking the wideband will either migrate back to the steering column, or more likely up near the a-pillar.
 
Engine/emission wiring harness is out. Dash and HVAC is out along with 90% of the interior. Just need to remove the b-pillar and door trim and I can start working on the front, engine, and rear harnesses. The good news is so far every interior part I kept from the red car will fit properly in the silver car. The bad news is the starter lock-out feature is different. Apparently the earlier cars use some kind of ground-switched, relay circuit whereas the newer cars use a simple switch on the solenoid wire. I looked into getting a newer clutch switch ($33) but it doesn't look like the car has the provisions for it. The easiest path now is to remove the lock-out altogether. I'd like to think I'm smart enough to remember to depress the clutch or put the car in neutral before starting even though it won't be required.
 
Getting the interior stripped down:

20140312_210706.jpg


20140312_210717.jpg


Engine bay:

20140312_210731.jpg


Pile of parts to be taken to the storage unit:

20140312_210756.jpg


Also started to remove crappy purple window tint. Hatch:

20140312_210831.jpg


I'll pull the interior door trim tonight so I can remove the external black trim and the vestigial (always wanted to use that word in context) wiring harness. The goal is to move all the unneeded interior and exterior parts to the storage unit this weekend.
 
Learned some things last night:

1. S4 side moulding is only held on with double sided tape versus tape + clips on the S5. This was a pleasant surprise as getting the trim off the red car was a major PITA.

2. Mazda must have used different plastics in the S4 cars. 95% of the parts I've pulled off the older silver car are in better shape (i.e. they don't shatter) than those I pulled from the red car.

Everything is removed that'll be going to the storage unit tomorrow. Got the wiring harness and window tint removed from the driver's door and I'll get the passenger's tonight. Should be able to get the wiring harness pulled this weekend so I can focus on cleaning and removing the carpet and insulation behind the dash. After that it'll be time to attack the sound-deadening material somehow.
 
to remove sound deadening material you can use dry ice and a plastic dead blow hammer or a heat gun and a puddy knife that will remove most of it then you will need brake cleaner or carb cleaner and lots of rags to remove the left over sound deadening material. I would use the dry ice method its cleaner and doesn't smell as bad. have fun!!
 
to remove sound deadening material you can use dry ice and a plastic dead blow hammer or a heat gun and a puddy knife that will remove most of it then you will need brake cleaner or carb cleaner and lots of rags to remove the left over sound deadening material. I would use the dry ice method its cleaner and doesn't smell as bad. have fun!!

Dry ice seems to be the preferred way. I'm nervous the hammer may damage the floor though. I remember seeing a Youtube video a while back where someone mixed dry ice and isopropyl alcohol or something and spread it on everything like butter. Something about making it easier to cover everything or along that line of thought. I do remember them just pulling the material away from the floor and not needed a hammer. My biggest issue now is finding a dry ice supplier.

Interior is completed stripped:

20140316_161108.jpg


20140316_161118.jpg


The carpet is currently sitting in the basement. Debating about spending time to try to clean and die it black or to just buy an aftermarket black one.

In other news I threw the OMP seat in the car (just sitting on the stock mounts) to check the clearance between my head w/ helmet and the headliner. Good news! There's ~1/2" of clearance so no need to modify the seat mounting setup like last time. Just fab some mounts or buy them outright and be done. I also discovered I can use the stock seatbelt mounting locations for my harness anchor points. This alone makes the hassle of swapping chasses worth it!

Partly because I'm trying to free up space in the garage and partly because I couldn't resist I temporarily installed the S5 rear bumper cover and taillights.

20140316_161153.jpg


The fitment is a little weird (see taillight area), which surprises me. I thought everything was supposed to be a direct swap. Perhaps the rear of the car is tweaked in some way. I think I'll be able to improve this by oval-izing some holes.

If anyone knows of someone looking for RX7 parts I now have nearly an entire storage unit filled with 'em.
 
Back