CX-50 OEM Hitch and Harness Info

:
USA
:
2023 CX-50 PPT
Finally could pick up the Mazda hitch and 7 pin wiring harness today from my dealer (harness took longer than expected).

Glanced over the instructions, and here are some initial notes:

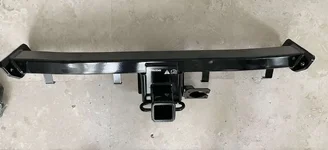
The OEM hitch doesn't require dropping of the muffle (yes!) which the aftermarket hitches on my 2019 CX-5 and my other half's Subaru (both Drawtite) did. It really looks to be a very simple installation--remove a under bumper support piece, bolt the hitch mounting plates to existing holes on the left and right side rails, and then the hitch itself is bolted to those plates. That's pretty much it. The hitch doesn't have the long attachment arms that the aftermarket ones I've dealt with all seem to have. It's a rather horizontal configuration for the most part, which I believe is more typical of pickups and heavy duty SUVs. Probably safe to assume that the eventual aftermarket hitches will follow the same configuration.

Note that there is a correction TSB for the wiring harness installation that I previously found on the Mazda Service site (subscription) with the other bulletins. It has some important changes and advisos, including that the 7 pin connector itself must be mounted to the hitch before the hitch is installed. The wiring harness and modules appear to be manufactured by Curt based upon labeling on them. The wiring steps are mildly complicated (and at times not clearly written), but don't seem too intimidating after previously installing wiring for my 2019 CX-5 and a 2021 Subaru. No need to run a power wire to the battery, but there is a 2 piece jumper wire for the engine compartment which connects on one side to an unused bolt on the + battery cable and the other has a pin to be inserted into an existing wiring harness off the engine fuse box. I assume the associated loom wire then is made constant power and runs to the back of the car to the connection points for the hitch harness.

If this forum permits posting of the OEM instructions, I'm happy to scan and post both if anyone is interested in looking them over.
 
Last edited:
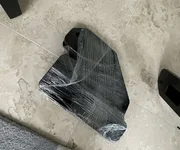
And here are some hitch and mount plates pics--those ugly crooked labels will be removed before installation :p
 

Attachments

  • 2C2DFC86-ED79-43DF-BBB1-1700D8740DDF.jpeg
    2C2DFC86-ED79-43DF-BBB1-1700D8740DDF.jpeg
    66.2 KB · Views: 578
  • 83F76289-65CD-447C-A196-524F3035DFC3.jpeg
    83F76289-65CD-447C-A196-524F3035DFC3.jpeg
    38.8 KB · Views: 568
  • B3A8FC50-1BE9-49E7-A32B-56C661C1AA92.jpeg
    B3A8FC50-1BE9-49E7-A32B-56C661C1AA92.jpeg
    136.3 KB · Views: 597
Last edited:
Completed the hitch and harness installation between yesterday's late start (hitch) and today (wiring). Bloody hot in our non-climate controlled garage here in FL.

Some hints if anyone also wants to try this themselves:
  • Ramps, jacks or lift not necessary, but use them if you can--plenty to adequate room to work under the back of the vehicle without, but definitely awkward for certain steps. Torque wrench length for example was a bit of a problem at times.
  • Instructions and the correction bulletin are unclear for certain steps and sometimes incorrect. For example, in the Hitch installation, Step 1 is showing a 19mm socket when a 10 is required (no biggie). Same step, the instructions do not show that the plastic bumper support piece being removed also has clips next to the screws which need to be pressed to release that piece. Step 2 for removing the small center bumper insert for where the receiver tube will stick out also fails to mention that piece has clips, not just the screws. The first section of the Corrections document is strangely written. It took me a few minutes to realize that the real concern isn't the wiring harness clips that snap into preset holes in the hitch (even though it is written that way) but simply how loose the wiring tube those are holding might be--you just don't want any slack so the min distance to the muffler and exhaust system is maintained. Add extra cable ties as needed. You will need longer ones than provided to fit around those sections of the hitch and the wiring harness.
  • For the wiring inside the car, you will also need to remove the second right passenger side cargo hook and remove the foam insert around the back of the spare with the jack, etc (be sure to disconnect the subwoofer wiring harness) even if the instructions don't state to do so. Otherwise, the right side trim cannot be pulled away enough to provide adequate working space (and I don't have huge hands).
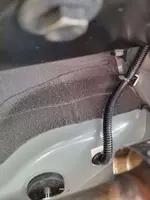
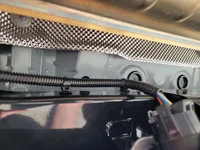
  • If you are confused on where the grommet hole is located and where you will need to drill, look directly above the passenger side exhaust tip around where it attaches to the exhaust pipe. You should see a whitish-tan piece of tape covering an oval hole. I didn't have an extension that would work with my 20mm hole drill bit, so I had to drill that out from above (directions say to drill from under). It was awkward holding back the trim piece myself and because I was using cordless drill (battery pack added bulk in a limited space and made it difficult to drill straight down). Besides the black silicone sealant provided and used later on, I used some enamel primer on the bare metal edge of the drilled hole and let that partially dry before proceeding.
  • When feeding the wiring harness from under the car up into the cargo area, just put the grommet directly on that and pull it down the length before placing it in the drilled hole once you have the wiring adequately pulled into the interior. Otherwise, pulling the wiring harness plastic ribbed cover pulls the grommet out repeatedly.
  • Step 7 in the harness installation for the ground connection. You want to look at the second drawing for the actual bolt where the ground ring will be placed. The arrow they have pointing in the first drawing to the upper bolt on that bracket is confusing, unless they are just giving a visual reference point where to start looking.
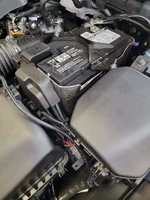
  • Step 8 Battery jumper installation. The two jumper rings and their wiring that will be attached to the unused positive cable screw are best positioned parallel to the shorter battery side. The drawing shows them perpendicular, but then the positive battery cable cover will not fit properly back in place.
Tested first with a plug in LED 7 pin trailer tester, but got some weird results (not unusual, apparently, for LED testers). At one point, my helper in the driver's seat reported that a towing mode message came up on the center gauge, so I guess the tester attached to all the pins triggered that mode. I then used a simple 12v light probe and everything seems to be working but got some weirdness on the brake controller response. Does anyone know if the CX-50 has a built in brake controller, or is just prewired to add one?
 
Last edited:
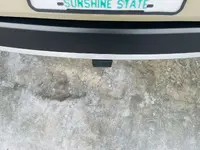
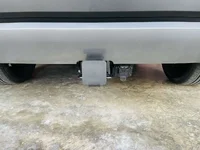
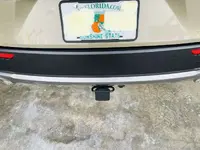
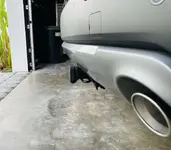
Some photos to show positioning--it doesn't stick out terribly far. The plain tube cover I purchased separately, as the one provided with the hitch with the Mazda logo is nice but there's no collar to prevent it being lost (just snaps in).
 

Attachments

  • IMG_8997.JPG
    IMG_8997.JPG
    137.2 KB · Views: 577
  • IMG_8995.JPG
    IMG_8995.JPG
    101.9 KB · Views: 584
  • IMG_8994.JPG
    IMG_8994.JPG
    114.8 KB · Views: 574
  • IMG_8998.JPG
    IMG_8998.JPG
    107.6 KB · Views: 573
Someone on another CX-50 forum was kind enough to post that Curt has now released a CX-50 specific hitch:

Curt CX-50 Hitch

Appears to mount to the same spot on the vehicle. Unlike OEM, it is a single piece so less bolt points to potentially loosen. Doesn't seem to have places for the rear bumper to attach (OEM does) so assume that the factory reinforcement bracket gets put back into place after hitch installation. No built-in harness connector mount, but plenty aftermarket choices there.
 
Finished my hitch install, did the wiring harness today. Things I learned:

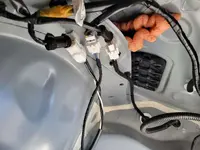
LeeShadow's post was super helpful, especially the grommet advice. That was the thing that took the longest. Sliding the grommet down the corrugated plastic takes some effort - and I had to do it twice because I didn't initially routed the wire through the notch in the passenger hitch bracket (against the body). Finessing the grommet in place once the wire was through was a blind finger effort, but I got it done.

LeeShadow is right that it's not possible to work in the rear passenger cargo corner with only one anchor removed. Removing two gave me much more room. No issues on driver side.

Make sure you install the OEM hitch connection receptacle before you install hitch. And remove the 5mm of the bumper cover as described in the TSB. I didn't do that, took some finesse and a creative tool to get connector in. And cutting away the bumper tab with a box knife was tougher than it needed to be. It needs to be cut to allow connector/wire to fit into housing.

Drilling from inside car was way easier.

Battery wires need to be routing d parallel to battery as LeeShadow described.

Otherwise, easy DIY. 3-4 hours, easily an hour less of I did it again.
 

Attachments

  • 20220709_173901.jpg
    20220709_173901.jpg
    125.1 KB · Views: 591
  • 20220709_164755.jpg
    20220709_164755.jpg
    82.5 KB · Views: 607
  • 20220709_164609.jpg
    20220709_164609.jpg
    101.8 KB · Views: 559
  • 20220709_164539.jpg
    20220709_164539.jpg
    95.3 KB · Views: 543
  • 20220709_164535.jpg
    20220709_164535.jpg
    73.4 KB · Views: 613
And remove the 5mm of the bumper cover as described in the TSB. I didn't do that, took some finesse and a creative tool to get connector in. And cutting away the bumper tab with a box knife was tougher than it needed to be. It needs to be cut to allow connector/wire to fit into housing.
I forgot to mention in my post that I did exactly the same thing, and indeed it was a pain to then score it repeatedly with a utility knife and eventually get it cut after the installation. I was paranoid about slipping and slicing the bumper itself. AND I had to take off more after the first try as the harness connector still wouldn't fully seat from the edge of that bumper tab touching the neck of the 7 pin connector.
 
Last edited:
Finished my hitch install, did the wiring harness today. Things I learned:

LeeShadow's post was super helpful, especially the grommet advice. That was the thing that took the longest. Sliding the grommet down the corrugated plastic takes some effort - and I had to do it twice because I didn't initially routed the wire through the notch in the passenger hitch bracket (against the body). Finessing the grommet in place once the wire was through was a blind finger effort, but I got it done.

LeeShadow is right that it's not possible to work in the rear passenger cargo corner with only one anchor removed. Removing two gave me much more room. No issues on driver side.

Make sure you install the OEM hitch connection receptacle before you install hitch. And remove the 5mm of the bumper cover as described in the TSB. I didn't do that, took some finesse and a creative tool to get connector in. And cutting away the bumper tab with a box knife was tougher than it needed to be. It needs to be cut to allow connector/wire to fit into housing.

Drilling from inside car was way easier.

Battery wires need to be routing d parallel to battery as LeeShadow described.

Otherwise, easy DIY. 3-4 hours, easily an hour less of I did it again.
is that a toyota battery in your car? lol
 
Lots of great info here. I have the 2.5 S Premium plus version, NOT the turbo. I'm wondering if I can install the 7-pin harness instead of the 4-pin that is the norm for this vehicle. If so, what advantage would there be? Obviously not going to increase the towing capacity! It doesn't seem to be much more difficult to do and although the current trailer I will be towing has a 4-pin set up I wonder if it would give me other options for the future. All advice and wisdom would be appreciated.
 
Lots of great info here. I have the 2.5 S Premium plus version, NOT the turbo. I'm wondering if I can install the 7-pin harness instead of the 4-pin that is the norm for this vehicle. If so, what advantage would there be? Obviously not going to increase the towing capacity! It doesn't seem to be much more difficult to do and although the current trailer I will be towing has a 4-pin set up I wonder if it would give me other options for the future. All advice and wisdom would be appreciated.
I see no reason for you to install a 7-pin. You can find more detailed descriptions online of the differences, but mainly it provides voltage for an electric trailer brake (which would require a controller on the car) and aux. 12-volt power (for a trailer battery for example). Trailer brakes are typically not found on smaller trailers that your car can tow. Plus, you'd likely need to use a 7-pin to 4-pin adapter to connect any trailer small enough for you to tow. Go with the 4-pin IMO.
 
I see no reason for you to install a 7-pin. You can find more detailed descriptions online of the differences, but mainly it provides voltage for an electric trailer brake (which would require a controller on the car) and aux. 12-volt power (for a trailer battery for example). Trailer brakes are typically not found on smaller trailers that your car can tow. Plus, you'd likely need to use a 7-pin to 4-pin adapter to connect any trailer small enough for you to tow. Go with the 4-pin IMO.
Yes, I tend to over think things but would hate to put in the work then discover some reason that the added features might be useful. Thanks for the input and I'm leaning that way.
 
The 7-pin harness matters for the Turbo CX-50's because it overrides the Off-Road mode with the Towing mode (which of course is not available for the N/A CX50). Get the 4-pin.
 
I guess the only advantage may be for the auxillary power which I believe the 7-pin has for a winch or something like that. Thanks
 
Finally could pick up the Mazda hitch and 7 pin wiring harness today from my dealer (harness took longer than expected).

Glanced over the instructions, and here are some initial notes:

The OEM hitch doesn't require dropping of the muffle (yes!) which the aftermarket hitches on my 2019 CX-5 and my other half's Subaru (both Drawtite) did. It really looks to be a very simple installation--remove a under bumper support piece, bolt the hitch mounting plates to existing holes on the left and right side rails, and then the hitch itself is bolted to those plates. That's pretty much it. The hitch doesn't have the long attachment arms that the aftermarket ones I've dealt with all seem to have. It's a rather horizontal configuration for the most part, which I believe is more typical of pickups and heavy duty SUVs. Probably safe to assume that the eventual aftermarket hitches will follow the same configuration.

Note that there is a correction TSB for the wiring harness installation that I previously found on the Mazda Service site (subscription) with the other bulletins. It has some important changes and advisos, including that the 7 pin connector itself must be mounted to the hitch before the hitch is installed. The wiring harness and modules appear to be manufactured by Curt based upon labeling on them. The wiring steps are mildly complicated (and at times not clearly written), but don't seem too intimidating after previously installing wiring for my 2019 CX-5 and a 2021 Subaru. No need to run a power wire to the battery, but there is a 2 piece jumper wire for the engine compartment which connects on one side to an unused bolt on the + battery cable and the other has a pin to be inserted into an existing wiring harness off the engine fuse box. I assume the associated loom wire then is made constant power and runs to the back of the car to the connection points for the hitch harness.

If this forum permits posting of the OEM instructions, I'm happy to scan and post both if anyone is interested in looking them over.
Lee, I glanced over all of the information you posted on installing the OEM hitch with harness. Incredible and thank you. I'm not interested in trailering anything. I want the hitch to add a bike rack or a flat cargo carrier. I'm thinking of saving some money and time and not adding the harness wiring. it really doesn't mean anything to me and I can't see dealing with it when I'm not going to use it. However, when I go to sell, it may mean something to the buyer. Is it going to be that much of a hassle to deal with afterwards? Also, did u have to trim the underbody where the hitch sticks out? thanks.
 
Last edited:
Just to note here, the wiring harness has been subject to a recall and a new harness released. New installation docs have also been released and do NOT follow the same install instructions as posted above.
 
Just to note here, the wiring harness has been subject to a recall and a new harness released. New installation docs have also been released and do NOT follow the same install instructions as posted above.
thank you. I've seen that noted. My dealership said the new harness should be out in July. But as I said, I'm not interested in the 7 pin harness. cheers,
 
Just picked up the new version of the 4-pin harness yesterday. I believe that the 7-pin version will be similar in it's installation process. That 20 mm hole saw I bought is not needed! There are 2 "drain plugs" in the well just behind the spare tire. You pop out the cover on the hole on the right side and lace it up through that. The wiring has a built in grommet that seals it. The wiring no longer has to travel over the muffler before entering car. Have not installed it yet, but looks straight forward. The one thing I haven't figured out is that the battery jumper has an in-line fuse. I see where to insert the wire on the 22-pin connector and where to attach the ring on the battery terminal. The housing for the fuse has a hole as if it should be screwed somewhere but it is not even mentioned in the instructions. I guess I can just ziptie it to something.
 
Back