- :
- USA
- :
- 2023 CX-50 PPT
Finally could pick up the Mazda hitch and 7 pin wiring harness today from my dealer (harness took longer than expected).
Glanced over the instructions, and here are some initial notes:
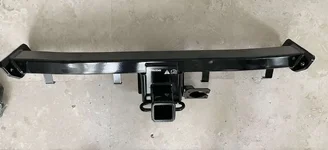
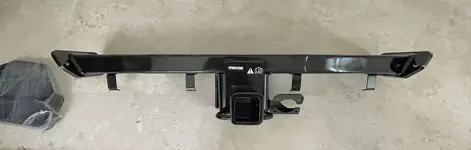
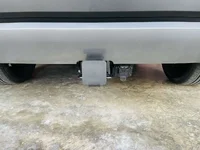
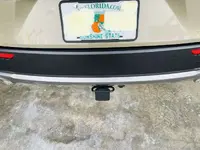
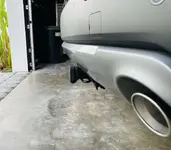
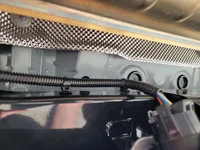
The OEM hitch doesn't require dropping of the muffle (yes!) which the aftermarket hitches on my 2019 CX-5 and my other half's Subaru (both Drawtite) did. It really looks to be a very simple installation--remove a under bumper support piece, bolt the hitch mounting plates to existing holes on the left and right side rails, and then the hitch itself is bolted to those plates. That's pretty much it. The hitch doesn't have the long attachment arms that the aftermarket ones I've dealt with all seem to have. It's a rather horizontal configuration for the most part, which I believe is more typical of pickups and heavy duty SUVs. Probably safe to assume that the eventual aftermarket hitches will follow the same configuration.
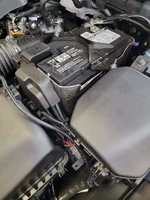
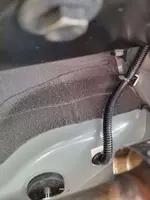
Note that there is a correction TSB for the wiring harness installation that I previously found on the Mazda Service site (subscription) with the other bulletins. It has some important changes and advisos, including that the 7 pin connector itself must be mounted to the hitch before the hitch is installed. The wiring harness and modules appear to be manufactured by Curt based upon labeling on them. The wiring steps are mildly complicated (and at times not clearly written), but don't seem too intimidating after previously installing wiring for my 2019 CX-5 and a 2021 Subaru. No need to run a power wire to the battery, but there is a 2 piece jumper wire for the engine compartment which connects on one side to an unused bolt on the + battery cable and the other has a pin to be inserted into an existing wiring harness off the engine fuse box. I assume the associated loom wire then is made constant power and runs to the back of the car to the connection points for the hitch harness.
If this forum permits posting of the OEM instructions, I'm happy to scan and post both if anyone is interested in looking them over.
Glanced over the instructions, and here are some initial notes:
The OEM hitch doesn't require dropping of the muffle (yes!) which the aftermarket hitches on my 2019 CX-5 and my other half's Subaru (both Drawtite) did. It really looks to be a very simple installation--remove a under bumper support piece, bolt the hitch mounting plates to existing holes on the left and right side rails, and then the hitch itself is bolted to those plates. That's pretty much it. The hitch doesn't have the long attachment arms that the aftermarket ones I've dealt with all seem to have. It's a rather horizontal configuration for the most part, which I believe is more typical of pickups and heavy duty SUVs. Probably safe to assume that the eventual aftermarket hitches will follow the same configuration.
Note that there is a correction TSB for the wiring harness installation that I previously found on the Mazda Service site (subscription) with the other bulletins. It has some important changes and advisos, including that the 7 pin connector itself must be mounted to the hitch before the hitch is installed. The wiring harness and modules appear to be manufactured by Curt based upon labeling on them. The wiring steps are mildly complicated (and at times not clearly written), but don't seem too intimidating after previously installing wiring for my 2019 CX-5 and a 2021 Subaru. No need to run a power wire to the battery, but there is a 2 piece jumper wire for the engine compartment which connects on one side to an unused bolt on the + battery cable and the other has a pin to be inserted into an existing wiring harness off the engine fuse box. I assume the associated loom wire then is made constant power and runs to the back of the car to the connection points for the hitch harness.
If this forum permits posting of the OEM instructions, I'm happy to scan and post both if anyone is interested in looking them over.
Last edited: