2013~2016: CX-5 Rear Diff and Transfer Case Fluid Change: Tools, Parts and Links

Part showed up for rear diff water intrusion issue I posted in a few back here



Sorry... terrible pics... probably won't get to this until January though.

Not sure if everyone has read that TSB but the issue is

"The breather pipe grommet (A), located in the trunk, may be submerged in water that penetrated through the rear ABS wheel-speed sensor harness grommet (B) during a high pressure car wash. The water then enters the coupling unit (C) through the breather pipe (D). This creates rust inside the coupling unit, which causes internal wiring harness damage, setting the DTC and/or the coupling unit noise due to increased rotational resistance."

2013-2016 CX-5 AWD vehicles with VINs lower than JM3KE******837718 (produced before July 1, 2016)

IMG_3795.jpg
IMG_3798.jpg
IMG_3800.jpg
IMG_3801.jpg
 
Part showed up for rear diff water intrusion issue I posted in a few back here


Sorry... terrible pics... probably won't get to this until January though.

Not sure if everyone has read that TSB but the issue is

"The breather pipe grommet (A), located in the trunk, may be submerged in water that penetrated through the rear ABS wheel-speed sensor harness grommet (B) during a high pressure car wash. The water then enters the coupling unit (C) through the breather pipe (D). This creates rust inside the coupling unit, which causes internal wiring harness damage, setting the DTC and/or the coupling unit noise due to increased rotational resistance."

2013-2016 CX-5 AWD vehicles with VINs lower than JM3KE******837718 (produced before July 1, 2016)

View attachment 305515View attachment 305516View attachment 305517View attachment 305518
Based on parts list from the TSB, there’re more parts needed for the vent hose replacement. Hopefully those parts are only needed for rear differential replacement when it has got damaged.

15487C56-855E-44F8-9E53-A96B35A39EFA.jpeg
 
The rest of those parts appear related to replacing the diff. IE: Exhaust gaskets and hub nuts. Hoping I can somehow get the current breather pipe out with out too much interior trim removal. Might be using long extended pliers and my borescope.
 
The rest of those parts appear related to replacing the diff. IE: Exhaust gaskets and hub nuts. Hoping I can somehow get the current breather pipe out with out too much interior trim removal. Might be using long extended pliers and my borescope.
Just hope lowering the differential is not needed to get to the vent. Or I may just skip those high pressure car wash and not drive into any standing water all together!
 
Doubtful dropping would be needed.. I will be putting the rear on ramps though. There is decent access once you lift it up.
 
I might tackle this later this morning. I was looking under there with my borescope and seems to be accessible fine with back on ramps on passenger side of diff. You just replace the line to the red arrow point. I pulled back the tire cover and think I can get some long handled forceps in to disconnect the cargo area piece. If not I will pull trim out enough to get my hand in there. You can look in with a flashlight and see it in there.

[Diff End]
PHO00022.JPG


1.png
 
I might tackle this later this morning. I was looking under there with my borescope and seems to be accessible fine with back on ramps on passenger side of diff. You just replace the line to the red arrow point. I pulled back the tire cover and think I can get some long handled forceps in to disconnect the cargo area piece. If not I will pull trim out enough to get my hand in there. You can look in with a flashlight and see it in there.

[Diff End] View attachment 305647

View attachment 305646
Thanks! May be you can consider to post a write-up here if you’re willing. ;)
 
Just some thoughts here.

I just put the rear end up on ramps and spent less than an hour replacing with the TSB part.


- Harness has all the necessary clips so just push/pull/snap to get the old hose off
- Used a screwdriver to slowly push the line off the diff end. It didn't take much effort to remove
- The cargo area piece. About the time I was starting to pinch it with the forceps I realized the plastic was not that strong and just crushed it with some long handled pliers. I know this sounds brutish but extracted the remnants through hole in bottom and with forceps on tops side.
- There is room to get your hand in there to easily push the new grommet in place, snap in line in all the different places along the way to rear diff. Room to get your hand in there to push line on. It pushed back on without any extra oil/lubricant but there is always that option if you struggle with that part.

I would encourage anyone who has a '13-'16 to do this to just help ensure water intrusion into rear diff does not occur via the vent from off-road adventures, high water, pressured car washes, backing boat to far into the water, floods, etc.

New one in place
IMG_3833.jpg


Broken stock one.. didn't take a prior pic so here it is on the ground.. you can kinda see the longer tube. To be honest.. one could glue on a longer straw for $0.10 and it would probably work just as well.
IMG_3820.jpg

New one in place
IMG_3821.jpg


IMG_3825.jpg


New one attached to rear diff... it just slides onto metal piece here.

IMG_3826.jpg
 
Just some thoughts here.

I just put the rear end up on ramps and spent less than an hour replacing with the TSB part.


- Harness has all the necessary clips so just push/pull/snap to get the old hose off
- Used a screwdriver to slowly push the line off the diff end. It didn't take much effort to remove
- The cargo area piece. About the time I was starting to pinch it with the forceps I realized the plastic was not that strong and just crushed it with some long handled pliers. I know this sounds brutish but extracted the remnants through hole in bottom and with forceps on tops side.
- There is room to get your hand in there to easily push the new grommet in place, snap in line in all the different places along the way to rear diff. Room to get your hand in there to push line on. It pushed back on without any extra oil/lubricant but there is always that option if you struggle with that part.

I would encourage anyone who has a '13-'16 to do this to just help ensure water intrusion into rear diff does not occur via the vent from off-road adventures, high water, pressured car washes, backing boat to far into the water, floods, etc.

New one in place
View attachment 305672

Broken stock one.. didn't take a prior pic so here it is on the ground.. you can kinda see the longer tube. To be honest.. one could glue on a longer straw for $0.10 and it would probably work just as well.
View attachment 305673
New one in place
View attachment 305674


View attachment 305675

New one attached to rear diff... it just slides onto metal piece here.
Thanks for the write-up. Looks like KE02-27-090 cones with the entire vent hose in addition to the updated vent valve. Routing the whole hose all the way to the bumper area seems to be easy?


9B99F793-9DA8-42F1-928B-4C8631871E04.jpeg


I’m getting the updated valve whenever I need other Mazda parts. Not in a hurry.
 
It really is fairly easy... if you are ok being on the ground and under your CX-5 while on ramps you can do this.

Just take your time... take pictures if it helps.

KE02-27-090 does have everything you need.

Like I said before... I know it sounds brutish and crude... but instead of taking the interior all off... remove the exterior hose at cargo area point... and with whatever tool... just crush existing vent connector internally. Extract remnants as needed. With a flashlight you can see existing vent without removing anything other than spare tire cover and tools(foam piece).

This stock piece is made of fairly brittle plastic.

If you forget where the vent hose grommets were maybe put a mark there with with an indelible marker... you can do this...
 
Last edited:
It really is fairly easy... if you are ok being on the ground and under your CX-5 while on ramps you can do this.
I definitely will do it with your helpful info.

One more question though, is it really necessary to have the rear wheels on a ramp? I thought there’s plenty of space to be lying on the ground under the rear differential?
 
This is a bit of a bump, picked up some sg1 to put in my 2014 since they likely didn't change anything for 2016, but I did notice on the sg1 bottle it's gl4 vs the gl5 spec in the earlier cars. The sg1 is also a slightly lighter weight @ 75w85. Still going to run it but found those few things interesting.
 
I'm changing the front transfer and rear diff on 25-30k mile intervals... easy to do and pretty cheap on the material cost side.
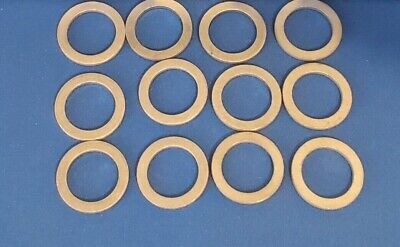
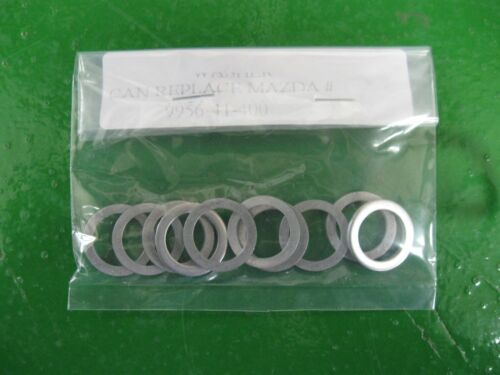
Question to an old thread. The drain/filler plug gaskets for the rear diff., are they just 18mm crush washers? I see them on a Mazda parts site but they're $3 with $10 shipping. Seems I could get a whole bag of generic crush washers for that price.
 
Question to an old thread. The drain/filler plug gaskets for the rear diff., are they just 18mm crush washers? I see them on a Mazda parts site but they're $3 with $10 shipping. Seems I could get a whole bag of generic crush washers for that price.
For those drain plug aluminum washers I always get them directly from my car dealers. A couple of dollars tops without shipping cost and usually the engine oil drain plug washer is free with OEM oil filter purchase.

I know the current price will be much higher than in old days though. You can bring a tape measure to dealer’s parts department asking for the washer to look at, then measure the washer diameters.
 
Question to an old thread. The drain/filler plug gaskets for the rear diff., are they just 18mm crush washers? I see them on a Mazda parts site but they're $3 with $10 shipping. Seems I could get a whole bag of generic crush washers for that price.

I bought a bag of 20 on Amazon for just a few dollars.

engine oil drain plug and transmission ATF drain plug = Mazda Part# 9956-41-400​


drain plug and fill plug aluminum washer on rear differential and front transfer case is = 9956-41-800

My bad, I fixed it.
 
Last edited:
I bought a bag of 20 on Amazon for just a few dollars.

Mazda Part# 9956-41-400​

No, the Mazda part number for drain plug and fill plug aluminum washer on rear differential and front transfer case is:

9956-41-800

See post #1 by the OP. Looks like this 9956-41-800 aluminum washer is also in short supply and I checked several online Mazda parts sellers they all are in back order!

The smaller 9956-41-400 aluminum washer is for engine oil drain plug and transmission ATF drain plug.
 

New Posts

Back