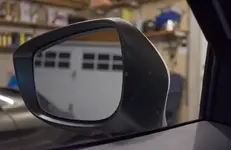
My first post--just picked up a 2016 touring model. Has anyone removed the chrome trim around the A/C vents? The passenger side vent trim reflects in the outside rear view mirror so I'd like to paint it matte black. If so, how did you remove it and is metal or plastic?

You are using an out of date browser. It may not display this or other websites correctly.
You should upgrade or use an alternative browser.
You should upgrade or use an alternative browser.
A/C Vent Trim Removal
- Thread starter ronpax
- Start date
Trim pieces not removable
I got an answer to my question from the parts department of my local dealer. The chrome plastic trim is an integral part of the A/C vents. Mazda does sell a version with black trim, but they cost $117 each, and the dash must be removed to install them. I'll try brushing on Plasti-dip.My first post--just picked up a 2016 touring model. Has anyone removed the chrome trim around the A/C vents? The passenger side vent trim reflects in the outside rear view mirror so I'd like to paint it matte black. If so, how did you remove it and is metal or plastic?
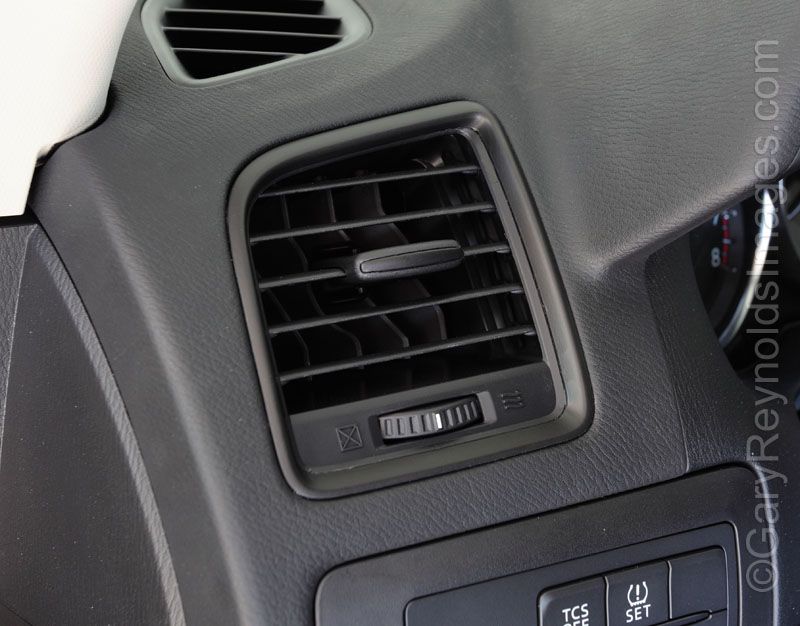
Seeing that plasti-dipping the vent trim is probably too hard, I'm trying the easiest option first: electrical tape. Just cut the tape into half along its length and slowly lined it up the trim, it's good that the inner part is also black plastic so a little overlapping on the inside is fine. I'm just trying only the driver side and see how it will work the next few days, also to see how it'll hold up as the weather get warmer.
If it does eliminate reflection on the window glass, I'll peel it out and redo it better for both trims. I didn't put much effort into lining up the four corners, but did learn a few things on how to make it look better. The only thing that might concern me is the glue might melt and cause a mess when it's too hot, but Goo Gone probably can handle that.
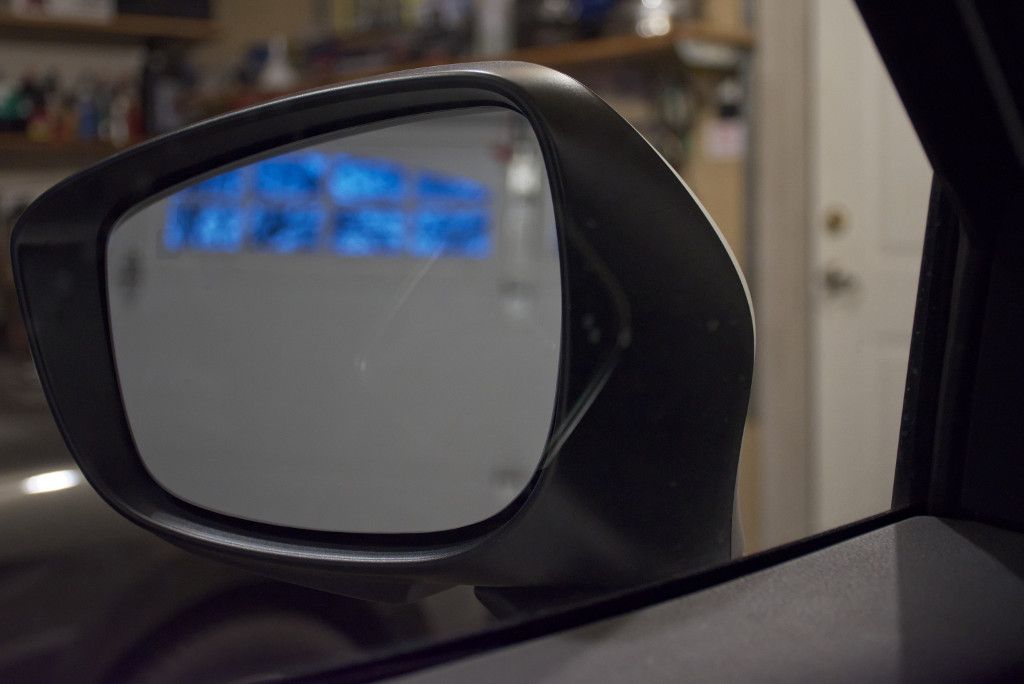
The original reflection:
Covered up 3 edges:
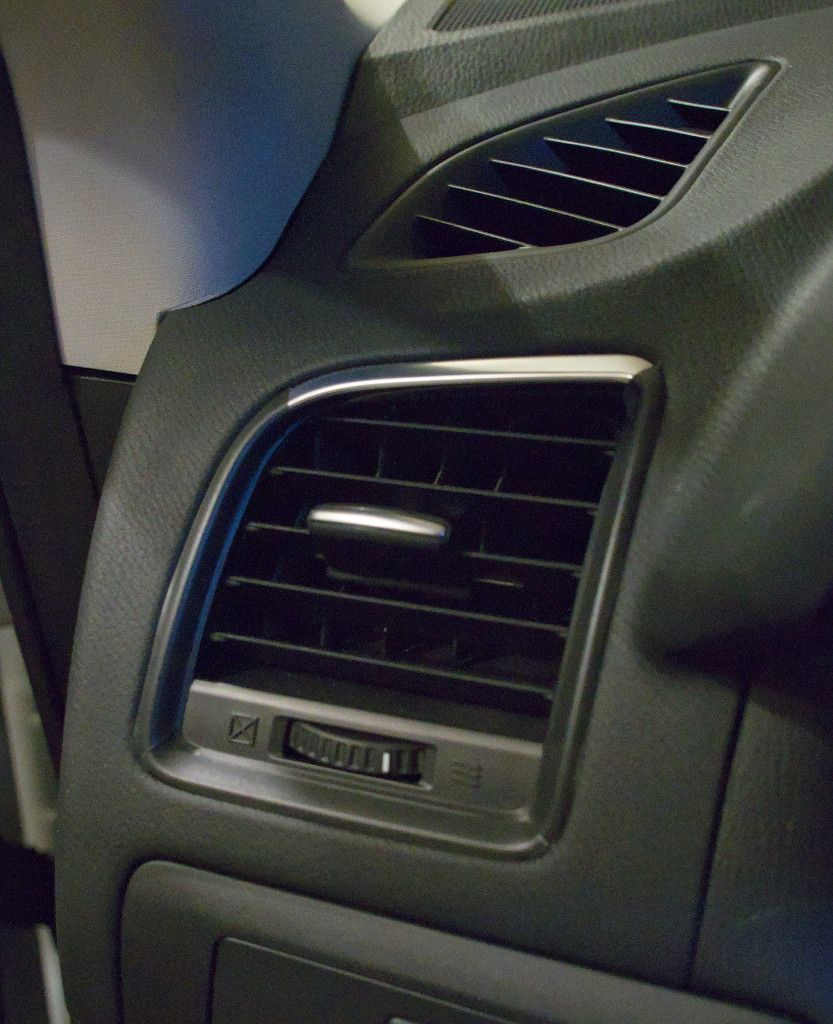
Reflection after covered all 4 edges and the tab in the middle:
The look after covered. I have to admit that the chrome trim adds a nice touch to the dash, but safety has to take priority.
If it does eliminate reflection on the window glass, I'll peel it out and redo it better for both trims. I didn't put much effort into lining up the four corners, but did learn a few things on how to make it look better. The only thing that might concern me is the glue might melt and cause a mess when it's too hot, but Goo Gone probably can handle that.
The original reflection:
Covered up 3 edges:
Reflection after covered all 4 edges and the tab in the middle:
The look after covered. I have to admit that the chrome trim adds a nice touch to the dash, but safety has to take priority.
Attachments


B-ham Gary
Member
- :
- 2016 CX-5 Touring AWD
Ha ha, that is funny. We, with the older cars would like to have the chrome bits and who has them, wants them to be black.
So true... except in this case the bright work is an annoyingly distracting reflection, not a fashion choice. I just ordered a small bit of flat black vinyl wrap to cover mine up. I can't wait to fix this.
")
So true... except in this case the bright work is an annoyingly distracting reflection, not a fashion choice. I just ordered a small bit of flat black vinyl wrap to cover mine up. I can't wait to fix this.
Can you post a pic of yours once you're done with the vinyl wrap? I've tested mine yesterday in bright sunlight, the reflection is significantly less comparing to the passenger side that hasn't got covered up. However, the electric tape is still shiny vinyl/plastic, thus the edge is still quite reflective. I'm looking into either sanding the tape with fine-grain sandpaper, or finding a less reflective/shiny material.
I had installed the chrome bits on every vent, than the top ones on the dash were so visible on the windshield, that I had to remove hem. I have also replaced the other ones, with the much thinner chrome bezel ones. Initially I had the ones, that the adjusting knob surrounding it was chromed as well.
B-ham Gary
Member
- :
- 2016 CX-5 Touring AWD
I finally got around to playing with some 3M matte black vinyl wrap. It was very easy to work with -- thinner than electrical tape. At first, I just cut some strips and went around the bezel in four sections. I was surprised how good it looked and left it that way for a bit. I even covered the trim in the middle of the vent lever. I was curious if I could do it in one piece, so with a bit of heat from a hair dryer, the strips came right off without leaving any residue.
I overlapped the entire vent with one piece of vinyl and worked it around the edges of the bright-work with my fingernail (and a little heat from a hair dryer). Came out pretty well for my first time using this stuff. It's not perfect, but I needed tinier fingers to work the corners better. Good enough for 15-min of work... and I like that it's reversible.
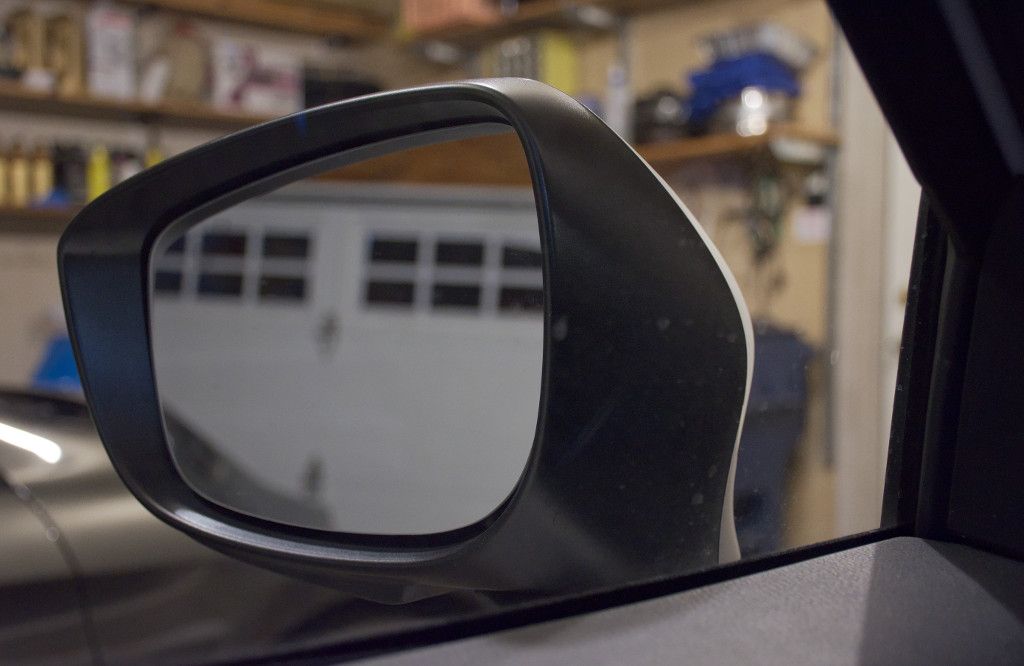
Annoying window reflections is GONE!

Cheers,
Gary
I overlapped the entire vent with one piece of vinyl and worked it around the edges of the bright-work with my fingernail (and a little heat from a hair dryer). Came out pretty well for my first time using this stuff. It's not perfect, but I needed tinier fingers to work the corners better. Good enough for 15-min of work... and I like that it's reversible.
Annoying window reflections is GONE!
Cheers,
Gary
Last edited:
- :
- Plano, Texas, USA
I think you photoshopped your picture as I can't see any evidence of using 3M matte black vinyl wrap from the picture.I finally got around to playing with some 3M matte black vinyl wrap. It was very easy to work with -- thinner than electrical tape. At first, I just cut some strips and went around the bezel in four sections. I was surprised how good it looked and left it that way for a bit. I even covered the trim in the middle of the vent lever. I was curious if I could do it in one piece, so with a bit of heat from a hair dryer, the strips came right off without leaving any residue.
I overlapped the entire vent with one piece of vinyl and worked it around the edges of the bright-work with my fingernail (and a little heat from a hair dryer). Came out pretty well for my first time using this stuff. It's not perfect, but I needed tinier fingers to work the corners better. Good enough for 15-min of work... and I like that it's reversible.
Annoying window reflections is GONE!
")
Great job!
I think you photoshopped your picture as I can't see any evidence of using 3M matte black vinyl wrap from the picture.
Great job!
I couldn't see any overlap or ends neither, great job! One thing about the electrical tape I used is after parking the car frequently in 10F weather, the taps shrunk and showed gaps between them :-( I was just trying it on so no big deal, probably will copy your technique next. Thanks.
B-ham Gary
Member
- :
- 2016 CX-5 Touring AWD
I couldn't see any overlap or ends neither, great job! One thing about the electrical tape I used is after parking the car frequently in 10F weather, the taps shrunk and showed gaps between them :-( I was just trying it on so no big deal, probably will copy your technique next. Thanks.
Just to clarify, this was my second experiment. The first time I used four pieces with a bit of overlap; the second, a single piece as shown in the photo. I was surprised how easy it was to work with -- and since I had to buy a minimum of 5 sq ft, I have plenty on hand in case I need to do it over (or make some door sill scuff "plates").
C
CX5_Pete
I experience glare too, but for me its the center chrome trim that surrounds the vent that reflects the sunlight into my face. This happens when the sun is directly overhead.
The look after covered. I have to admit that the chrome trim adds a nice touch to the dash, but safety has to take priority.
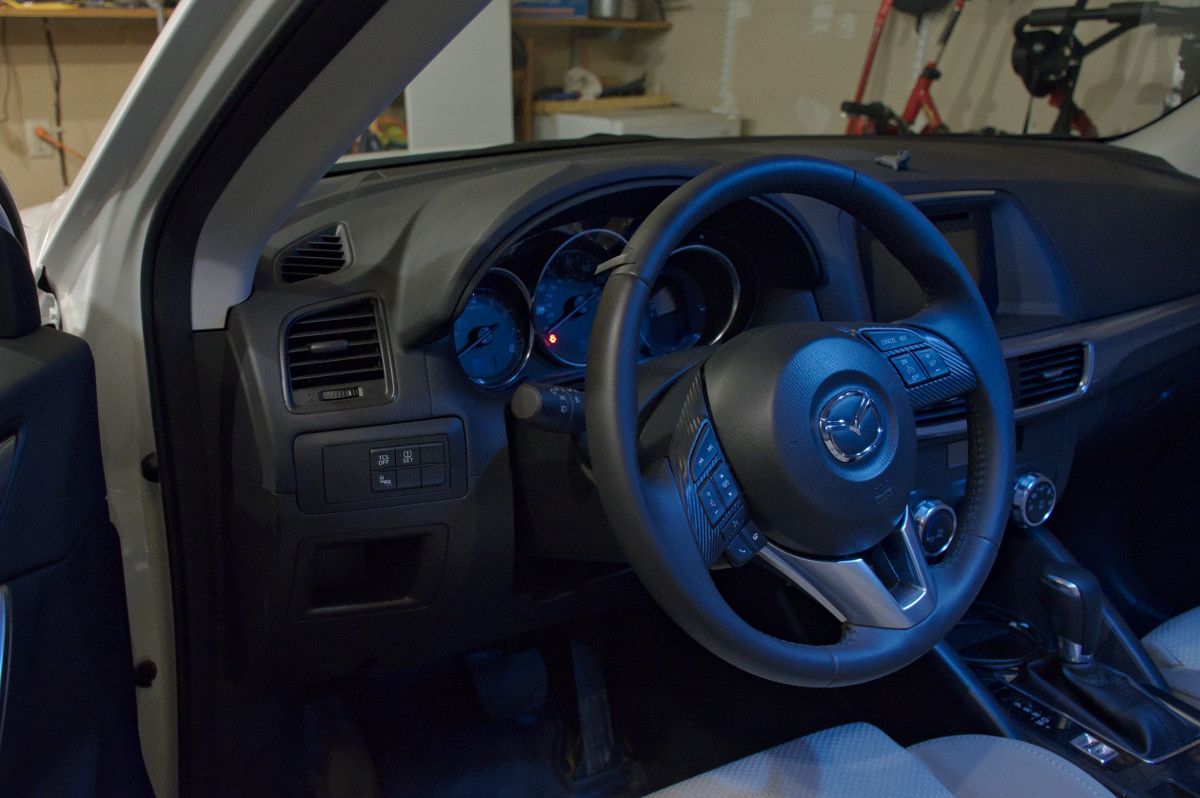
Where did you get the carbon fiber for the steering wheel? does the stock piece pop off? or does this go over it?
Where did you get the carbon fiber for the steering wheel? does the stock piece pop off? or does this go over it?
It's the stock of 2016 Touring. You can also see it in a stock photo here:
http://shopping.jeffhaasmazda.com/s...016-mazda-cx-5-fwd-4dr-auto-touring-interior/
It's the stock of 2016 Touring. You can also see it in a stock photo here:
http://shopping.jeffhaasmazda.com/s...016-mazda-cx-5-fwd-4dr-auto-touring-interior/
ah ok. Wonder why they made the GT chrome instead. I rather have the carbon fiber look.
New Posts and Comments

- Replies
- 3
- Views
- 395
- Replies
- 6
- Views
- 505
- Replies
- 5
- Views
- 284