purplengold
Member
- :
- 2016.5 Mazda CX-5 GT AWD w/Tech and I-ACTIV
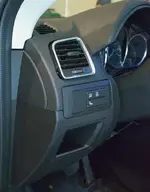
I'm thinking about masking everything on my dash except the chrome and spray painting it. The little chrome strip above the touchscreen also bugs...wth

I'm thinking about masking everything on my dash except the chrome and spray painting it. The little chrome strip above the touchscreen also bugs...wth
I'm thinking about masking everything on my dash except the chrome and spray painting it. The little chrome strip above the touchscreen also bugs...wth
Vinyl wrap material would probably be a better choice.
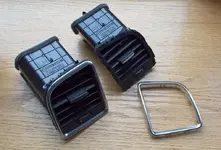
Pre-2016 CX-5's vents are not chromed. I'm more than willing to trade.
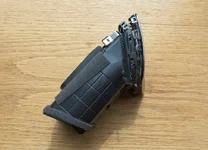
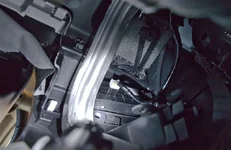
FYI guys, the vents themselves are easily removed from the dash, they press fit into the heating/ventilation ducting, they are not part of the actual ducting itself. They are secured in place with 4 claw-type tabs and you can pop them out from behind the dash. Remove the glove compartment to access the passenger side, I removed the small open storage panel under the switches to get reach access to the driver's side.
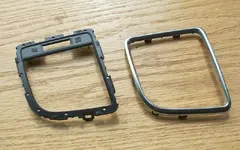
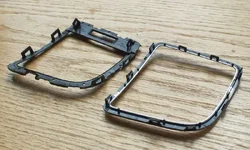
Once out, you will find that the chrome trim is also just clipped in place ... but the vents have to be out to see this. I didn't remove mine (never noticed this issue tbh - I was hunting an annoying rattle) but that should make it easier to vinyl wrap/paint/discard or whatever.
Pardon my asking but how do you know this if you've never done it?

Never done what?
I did remove the vent quite easily to get access to the the dash mount bracket behind (which turned out to be a waste of time BTW). While I had it out, I noticed that that the chrome trim is clipped in place and remembered people asking about it on this thread. I didn't remove the chrome trim myself as this is not an issue for me.
I took a photo on my phone, see below. You push out the 2 metal tabs on the bottom of the vent from behind and rotate up to unhook the 2 top tabs from the dash. In the bottom left corner, you can see 1 of the many small tabs securing the the chrome trim in place, most are hidden under the felt tape applied.
View attachment 213941
")