- :
- Canada
This is a DIY How-To for a rear turn signal bulb replacement/upgrade for the 2nd Generation Mazda CX-9. I decided to document this process as it seems nobody has done it yet. Hopefully this helps someone who wants to upgrade their lighting or save a trip to the dealership.
This process was documented/photographed by myself, using my crappy cellphone camera and my 2018 Mazda CX-9 Signature as the "demo" vehicle. This DIY is provided as a learning aid and reference guide. I assume no responsibility for any damages you may inflict on yourself or your vehicle.
What you'll need:
- Flathead screwdriver
- Phillips screwdriver (+)
- Replacement bulbs (halogen or LED)
- Microfiber cloth (optional)
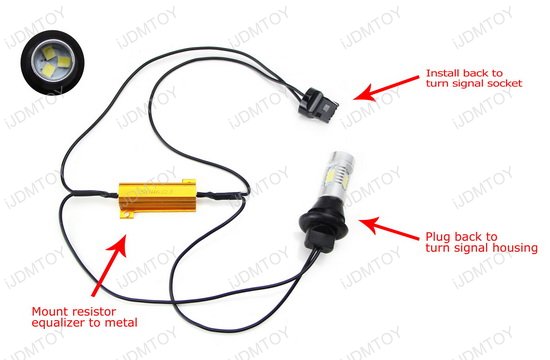
Note: If the replacement bulbs are LED bulbs, ensure that they either have resistors built into them, or that they came with separate resistors. If they are installed without resistors, the change in voltage will cause all of your turn signals to hyperblink.
1. Make sure the vehicle is off! Disconnecting the battery is not necessary, but you can if you'd like.
2. Open the liftgate, then pry open the screw cover on the tail lamp. Use a flathead to pry it out.


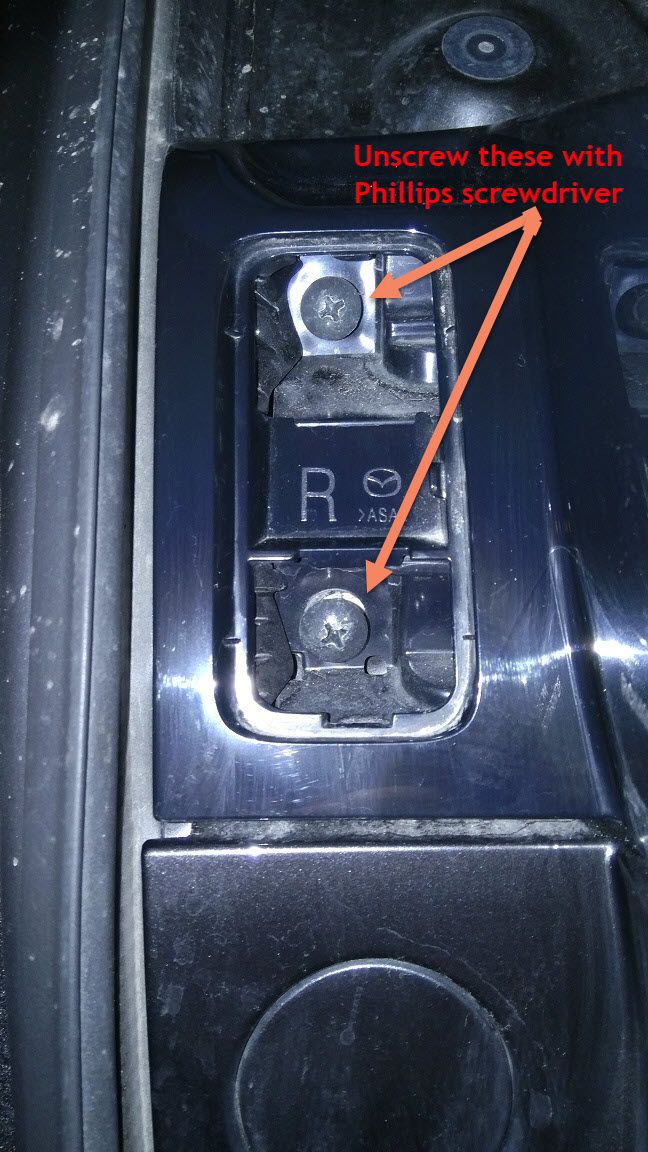
3. With the Phillips screwdriver, unscrew the two screws and set them aside.

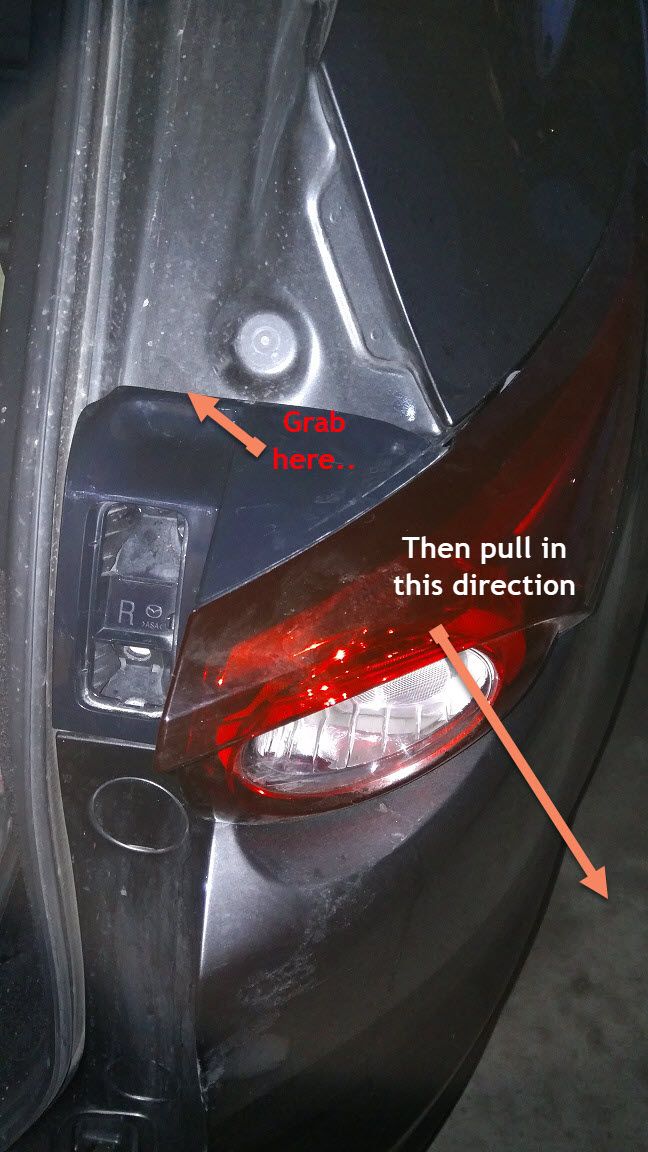
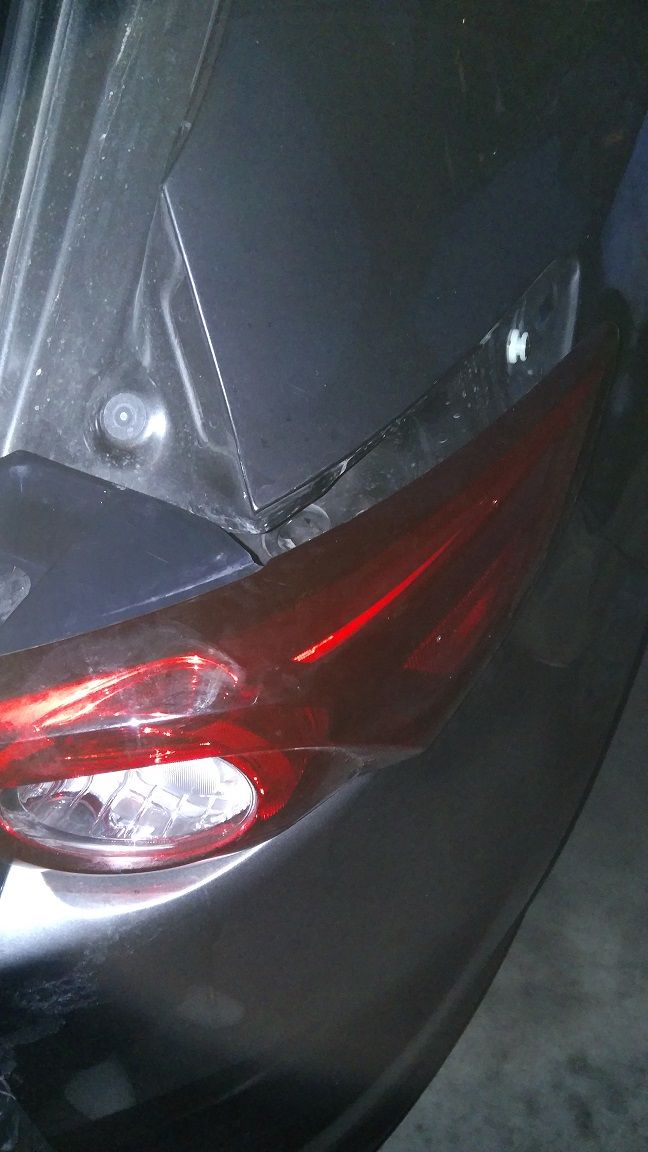
4. This is the hardest part. Grasp the lamp housing at the top, and pull "back and out". You'll want to apply force gradually rather than trying to muscle it out forcefully. It should look like the second picture when it is loosened.

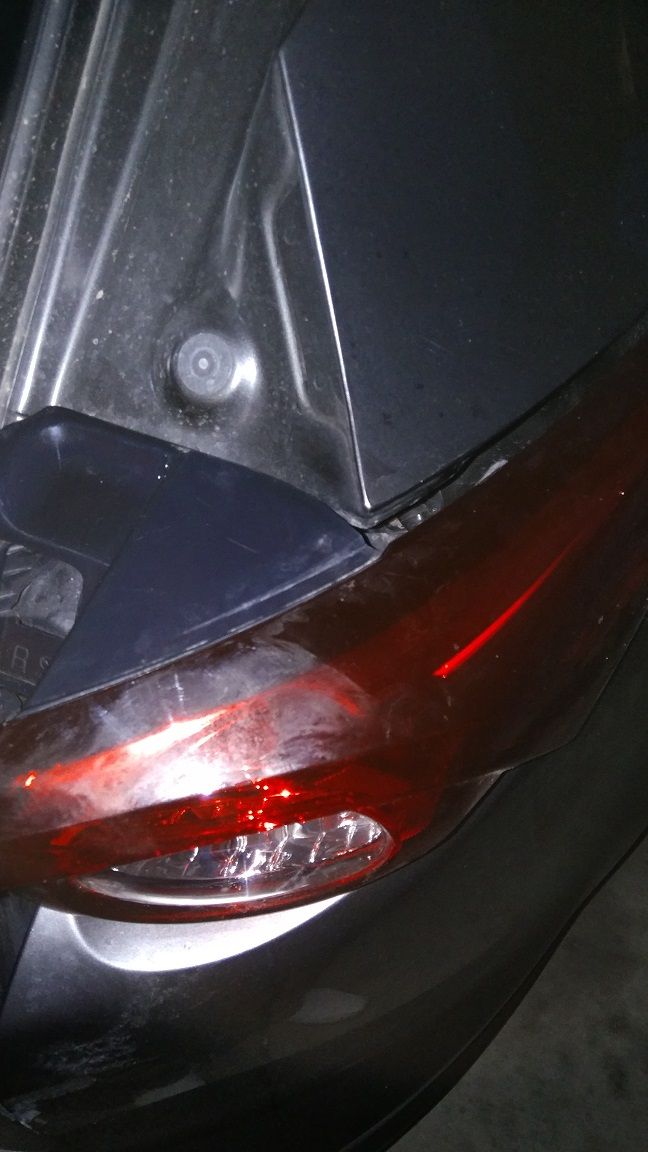

5. If you can, wedge your fingers in the space created, and continue applying gradual force "back and out", but this time, more "back" than "out" to get the lamp loose. I took my time with this step, and I'm not sure how delicate you need to be with these housings. When it's free, it'll look like this.

Continued in next post.
This process was documented/photographed by myself, using my crappy cellphone camera and my 2018 Mazda CX-9 Signature as the "demo" vehicle. This DIY is provided as a learning aid and reference guide. I assume no responsibility for any damages you may inflict on yourself or your vehicle.
What you'll need:
- Flathead screwdriver
- Phillips screwdriver (+)
- Replacement bulbs (halogen or LED)
- Microfiber cloth (optional)
Note: If the replacement bulbs are LED bulbs, ensure that they either have resistors built into them, or that they came with separate resistors. If they are installed without resistors, the change in voltage will cause all of your turn signals to hyperblink.
1. Make sure the vehicle is off! Disconnecting the battery is not necessary, but you can if you'd like.
2. Open the liftgate, then pry open the screw cover on the tail lamp. Use a flathead to pry it out.
3. With the Phillips screwdriver, unscrew the two screws and set them aside.
4. This is the hardest part. Grasp the lamp housing at the top, and pull "back and out". You'll want to apply force gradually rather than trying to muscle it out forcefully. It should look like the second picture when it is loosened.
5. If you can, wedge your fingers in the space created, and continue applying gradual force "back and out", but this time, more "back" than "out" to get the lamp loose. I took my time with this step, and I'm not sure how delicate you need to be with these housings. When it's free, it'll look like this.
Continued in next post.
Last edited: