Running out of time, but not things to do.
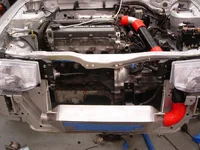
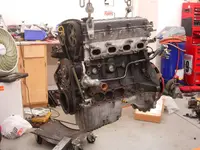
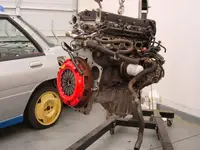
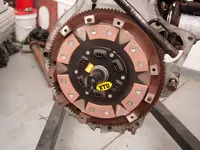
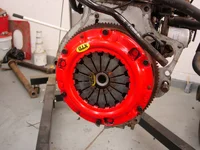
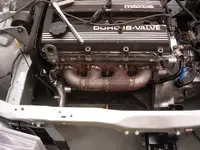
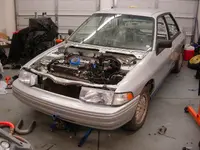
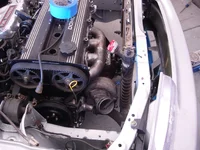
I'm still making headway and really haven't hit any snags. Everything is going back together. Most importantly, the engine and transmission as well as the axles are installed. The suspension is finalized, short of an alignment, the engine has been cleaned (for the most part), a pimpy eBay special 6-puck clutch is installed, the brakes and clutch hydraulics are filled are bled, the shifter housing is painted and installed, the shifter cabling is finished, and the hand brake is installed and working. The car currently sits on 4 wheel and is looking pretty good, I might say.
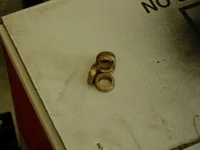
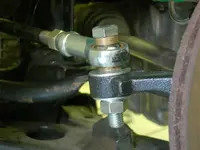
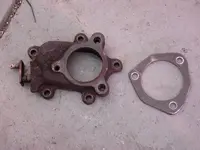
Once the engine was in and the suspension buttoned up, a critical area of focus was the tie rod ends. With using the Capri knuckles, the BG tie rod ball joint assemblies happened to be too long resulting in about 2 of toe-in with the tie rod ends adjusted all the way in (wow, long sentence). After much searching, I finally found a spherical rod end with the proper thread diameter and pitch (it seems female M12x1.25 ends are hard to come by). The rod ends are about an inch and a half shorter overall than the stockers allowing the full range of adjustment. I fabricated spacers for each side of the ball to prevent binding. The end result worked perfectly.
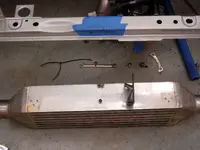
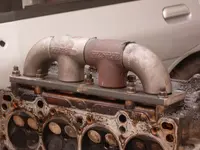
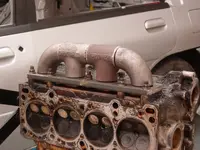
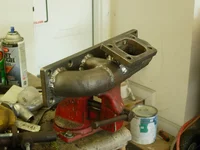
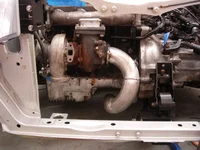
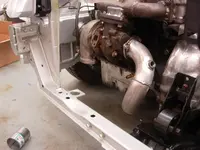
Moving onward to new material, I've finally started constructing the turbo manifold. I originally wanted to build a manifold with equal length runners, but with 3 weeks remaining, that just isn't going to happen. I fabricated the head-side flange back in January before the project even really started. I'm glad to have that part out of the way considering the amount of time that took alone. Using weldable gas fittings, I constructed a log type manifold on to it. I used a wrecked head I had lying around to weld the assembly. I still have yet to place the flange...that'll happen tomorrow. Fitting a T3-series turbo between the engine and the radiator on the BG is more difficult than I thought. It's pretty tight in there!
I'm still making headway and really haven't hit any snags. Everything is going back together. Most importantly, the engine and transmission as well as the axles are installed. The suspension is finalized, short of an alignment, the engine has been cleaned (for the most part), a pimpy eBay special 6-puck clutch is installed, the brakes and clutch hydraulics are filled are bled, the shifter housing is painted and installed, the shifter cabling is finished, and the hand brake is installed and working. The car currently sits on 4 wheel and is looking pretty good, I might say.
Once the engine was in and the suspension buttoned up, a critical area of focus was the tie rod ends. With using the Capri knuckles, the BG tie rod ball joint assemblies happened to be too long resulting in about 2 of toe-in with the tie rod ends adjusted all the way in (wow, long sentence). After much searching, I finally found a spherical rod end with the proper thread diameter and pitch (it seems female M12x1.25 ends are hard to come by). The rod ends are about an inch and a half shorter overall than the stockers allowing the full range of adjustment. I fabricated spacers for each side of the ball to prevent binding. The end result worked perfectly.
Moving onward to new material, I've finally started constructing the turbo manifold. I originally wanted to build a manifold with equal length runners, but with 3 weeks remaining, that just isn't going to happen. I fabricated the head-side flange back in January before the project even really started. I'm glad to have that part out of the way considering the amount of time that took alone. Using weldable gas fittings, I constructed a log type manifold on to it. I used a wrecked head I had lying around to weld the assembly. I still have yet to place the flange...that'll happen tomorrow. Fitting a T3-series turbo between the engine and the radiator on the BG is more difficult than I thought. It's pretty tight in there!
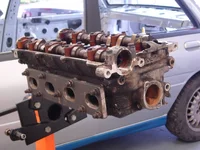
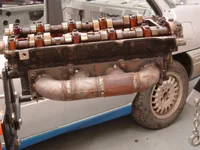


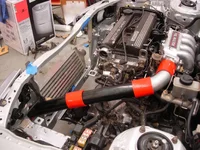
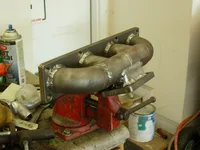
") . The turbo doesn't weigh much, but when holding and positioning it to get just the right angle while bending over will where you out. After much tweeking and swapping the water pump inlet pipe with one from the GTX engine, I got everything positioned just as I wanted it. I had to use the GTX's inlet as it was quite a bit shorter and allows just enough clearance for the turbo inlet. This Thunderbird T3 seems to have become much larger when fitting it into this car. It sits about an inch from the engine block and about a half inch from the radiator. Whew! I used a mock turbo with the mock head to do most of the welding. Expendable parts are always cool to have.
. The turbo doesn't weigh much, but when holding and positioning it to get just the right angle while bending over will where you out. After much tweeking and swapping the water pump inlet pipe with one from the GTX engine, I got everything positioned just as I wanted it. I had to use the GTX's inlet as it was quite a bit shorter and allows just enough clearance for the turbo inlet. This Thunderbird T3 seems to have become much larger when fitting it into this car. It sits about an inch from the engine block and about a half inch from the radiator. Whew! I used a mock turbo with the mock head to do most of the welding. Expendable parts are always cool to have.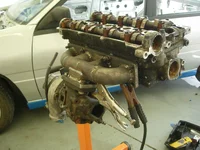


") I really do appreciate the compliments though!
I really do appreciate the compliments though!