Sub integration into New Bose system

RaVE_Noodles

Member
:
2009 Mazda 6 I Touring
I just got this car and would like to install my amp and sub without removing the Bose system. I jest need to know if anyone knows where to install the (LOC) for the RCA pre-outs that go to the aftermarket amp. Dose it need to be installed before or after the factory amp? if after, can I tie into the factory sub, or would it have to be one of the rear speakers? any help would be greatly appreciated. I know that this worked in my 2004 Mitsubishi Eclipse GTS with an Infinity factory upgraded stereo. I also got the lit Mazda 6 door sills, if anyone has instructions one how to install them, I would really appreciate that too.

Thanks
 
ooo im not sure, i would think so. The only difference i can imagine is the wires may be colored differently.
 
no problem good luck, that write-up uses extra speaker wire, but i spliced the rca 2 female to male cable directly into the stock sub, taped up the negaative and let it hang. it worked just fine
 
if you read the last few posts, Koenig and I talked about using the other cable. I believe the negative from the RCA goes to Brown. Try that and see if it sounds any better. Made a huge difference with my Infinity amp and Sub.
 
I have the sub and amp installed and working perfectly. when I get home Ill add some photos and instructions on how I did it, for those with the new Bose system.

Thank you guys for your help. A lot of the information was very helpful that you provided me, there were a few differences but nothing that I couldn't figure out.

Thanks again!

~A
 
Last edited:
Alright, sorry its been so long. Lets get to it: installing aftermarket sub to 10 sprk Bose system without removing stereo.

here's what In stalled 10" infinity with 1000 watt pioneer amp. 0 Gauge power and ground cables and monster cable RCAs. (LOC) and 12 gauge Rmt power cord.

1.webp

Step 1: Running the Power to the amp.

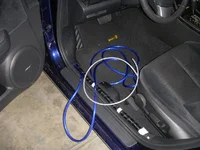
This is always the most time consuming thing. trying to figure out where you should come through the firewall. In this case it wasn't to bad, there is a rubber grommet to the left of the brake that is easily accessible. Move the carpet covering and drill a hole a little bit smaller than you power cable, on the right side of it away from the rest of the wires coming through it. When done drilling apply some WD-40 to make your cable go through it easier. Pull all our cable through until you have it all except what you need to hook it to the battery. After you have that finished proceed to run the cable behind the fuse box cove and blow the plastic kick plates which pop off. Then through the middle plastic cover.

2.webp,3.webp,4.webp,5.webp
 
Step 2: Continuation of power installation

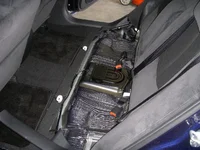
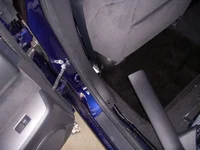
After step one, it's a lot easier to do the rest in the back if you remove the rear seat, there are two plastic levers in the middle of the seats once you have released the levers the seat is free to com out (pull up on the front and slid to the front of the car). Once the rear seat is removed pop off passenger kick plate be careful because there is a little button lock that keeps this one in place by the back of the seat you don't have to take it all the way off just pop it up so you can run the cable under it like the front and continue. Once you've run the cable this far, you have a couple of options. 1. you can run the power cable right across where the back seat goes or 2. across the back where the backs fold down. this all depends on where you install the amp (driver or passenger side). once the power is run, before you put everything back together go ahead and run your Rmt power cord for the amp, same as you ran the power cable but only to the fuse box give yourself plenty of room. you're probable thinking fuse box WTF! right, well with the new bose system there is no switch wire and its a huge pain in the ass to pull the radio out for nothing. I don't have a picture of where I installed the Rmt power cord at this time. I have to take off the fuse box cover to get the picture.

7.webp,8.webp
 
Step 3: Ground cable

This is pretty easy wherever you're installing the amp, in a nearby place under the carpet in a place where you can't see, use a dremel tool and grind the paint away and screw your ground cable to the ground away area.

10.webp
 
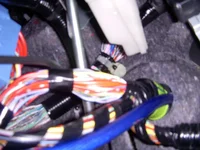
Step 4: Installing the (LOC)

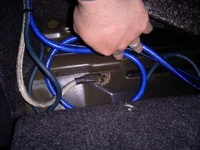
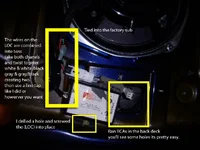
This is easy too, in the rear deck there is a factory sub. take your (LOC) and install it there. and run your RCAs in an inconspicuous way. the picture below will help you

9.webp
 
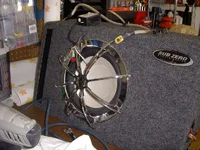
Step 5: Installing the sub and hooking up the amp

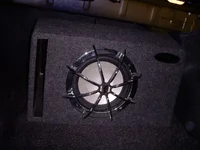
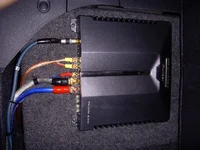
I think this is pretty self explanatory, here are a couple of pics.

11.webp,12.webp
 
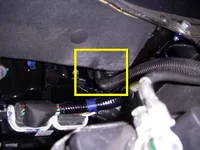
Last but not least: Connecting to the Battery

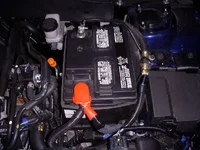
Remove the bolt that holds the cable on the battery, to do this you'll see a couple tabs that keep the bolt from coming out all the way out. There pretty easy to break off. take the bolt all the way out and and run it through both your power cable connector and the battery cable connector, and tighten back down. I made a little slit in the cover for my power cable so it looks professional.

If you have any question please fell free to ask I'll help you to the best of my knowledge. and I'll have a few more pics to add along with the Rmt power cord. I hope this helps you all in the venture of installing a aftermarket subs.

to contact me if you need immediate help my number is 816-651-8687 I'll try to help over the phone and send any pictures to help clarify to solve your problem.
13.webp
 

Was your battery still connected when you tried to put the ground on? If so, you shorted it to ground and that's why you saw sparks. Check your fuses now too. Connecting your battery terminals should be the LAST thing you do when installing a stereo.
 
Back