CX_MCHNE
Thread Necromancer
- :
- CA
- :
- 2019 GTR
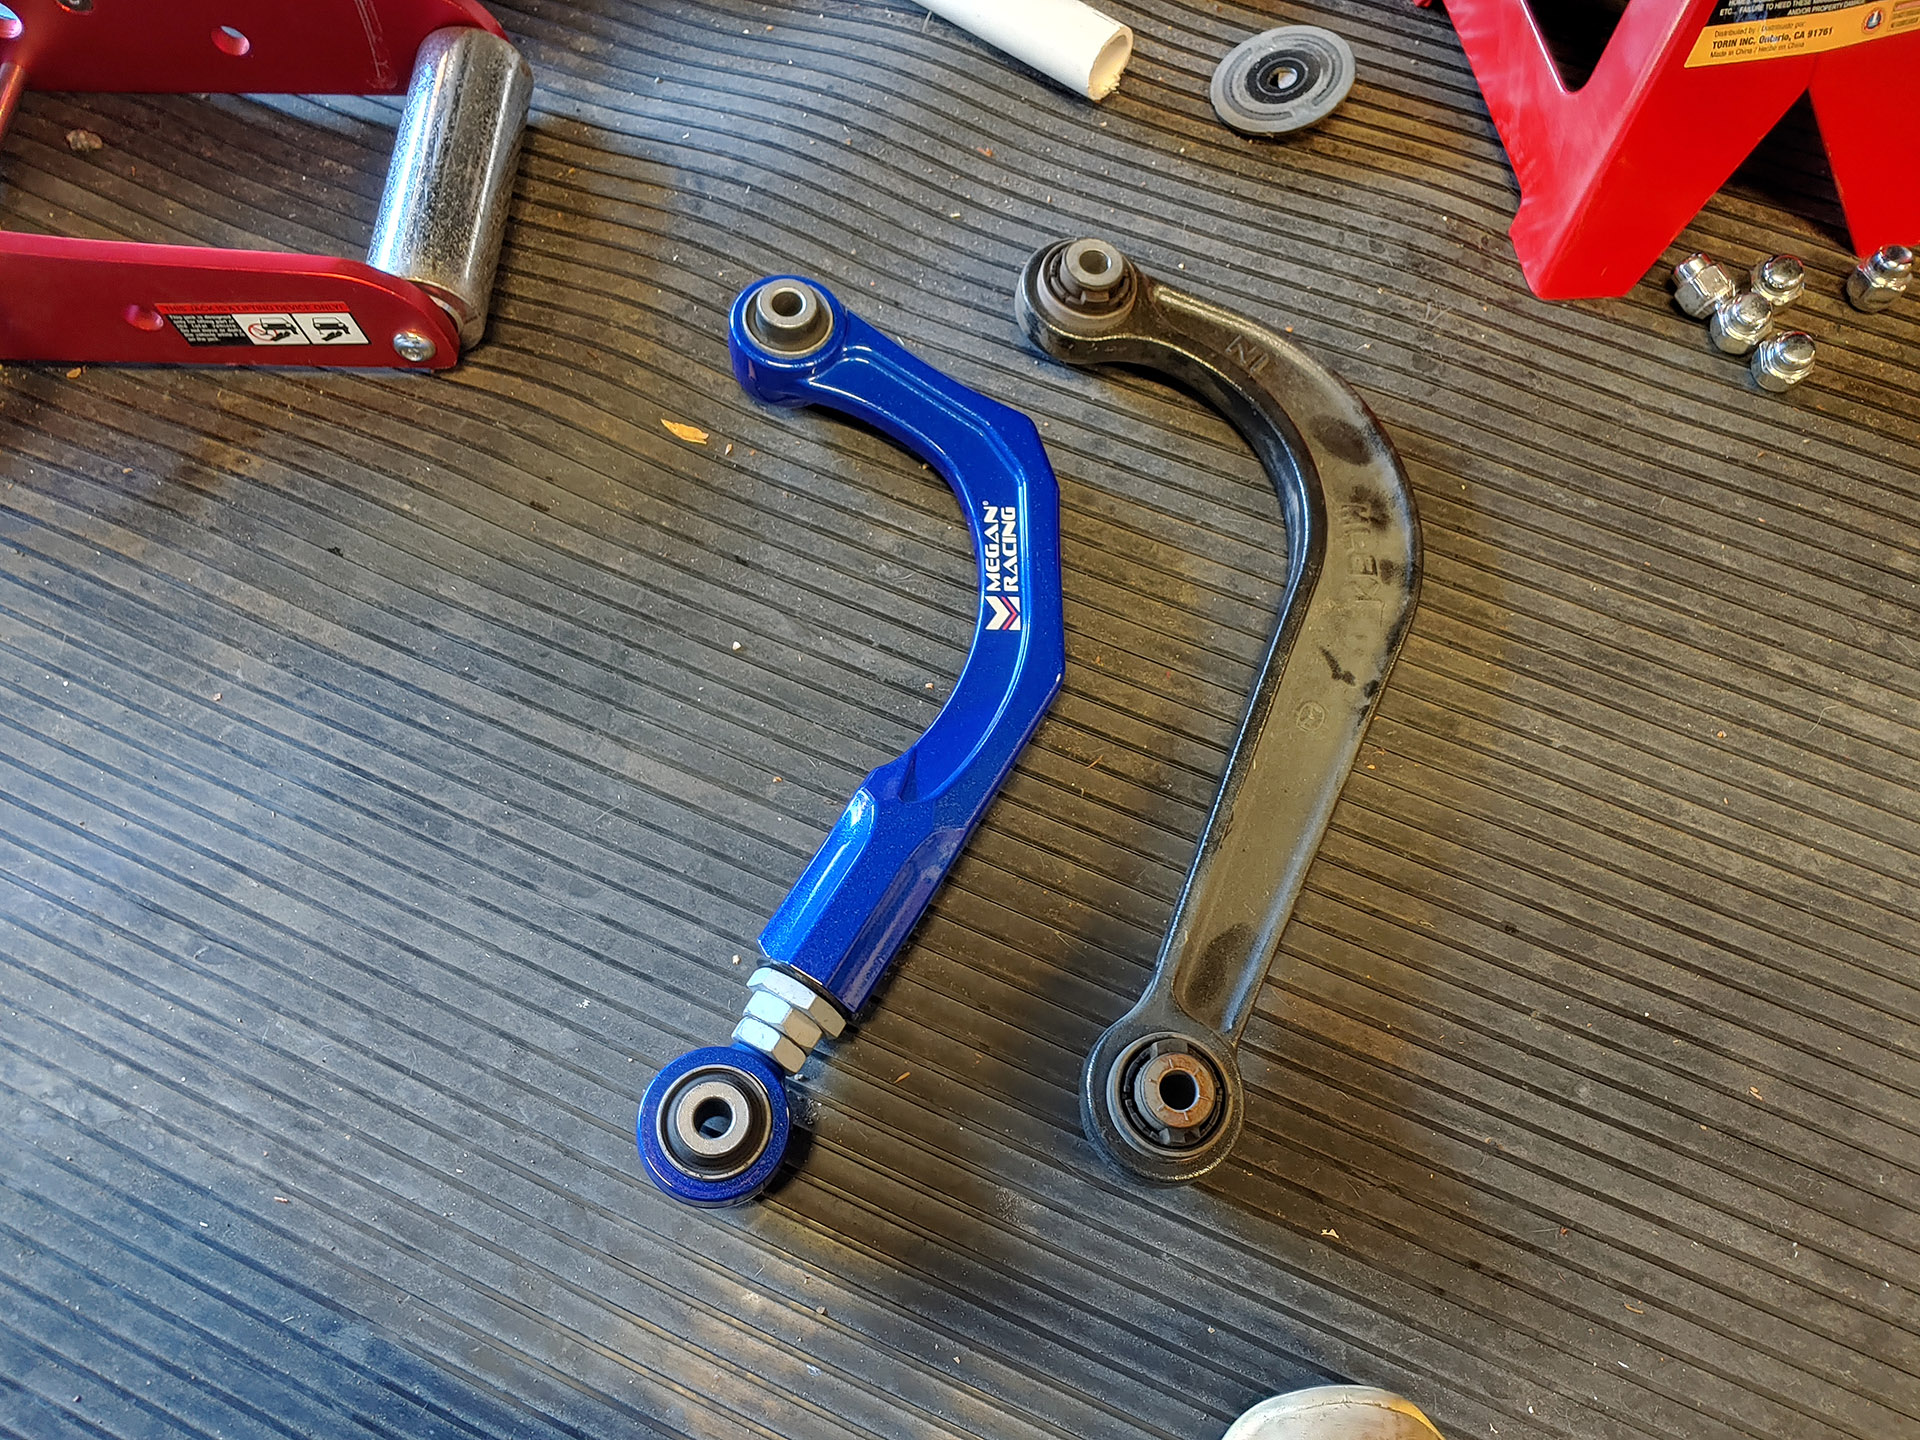
Installed a 22mm hardrace rear sway bar (7028) and megan racing rear camber arms (MRS-MZ-1689) this weekend. Had trouble finding a good guide for it, so I'm writing up my experience.
I was thinking my AWD would complicate things, because:
Procedure:
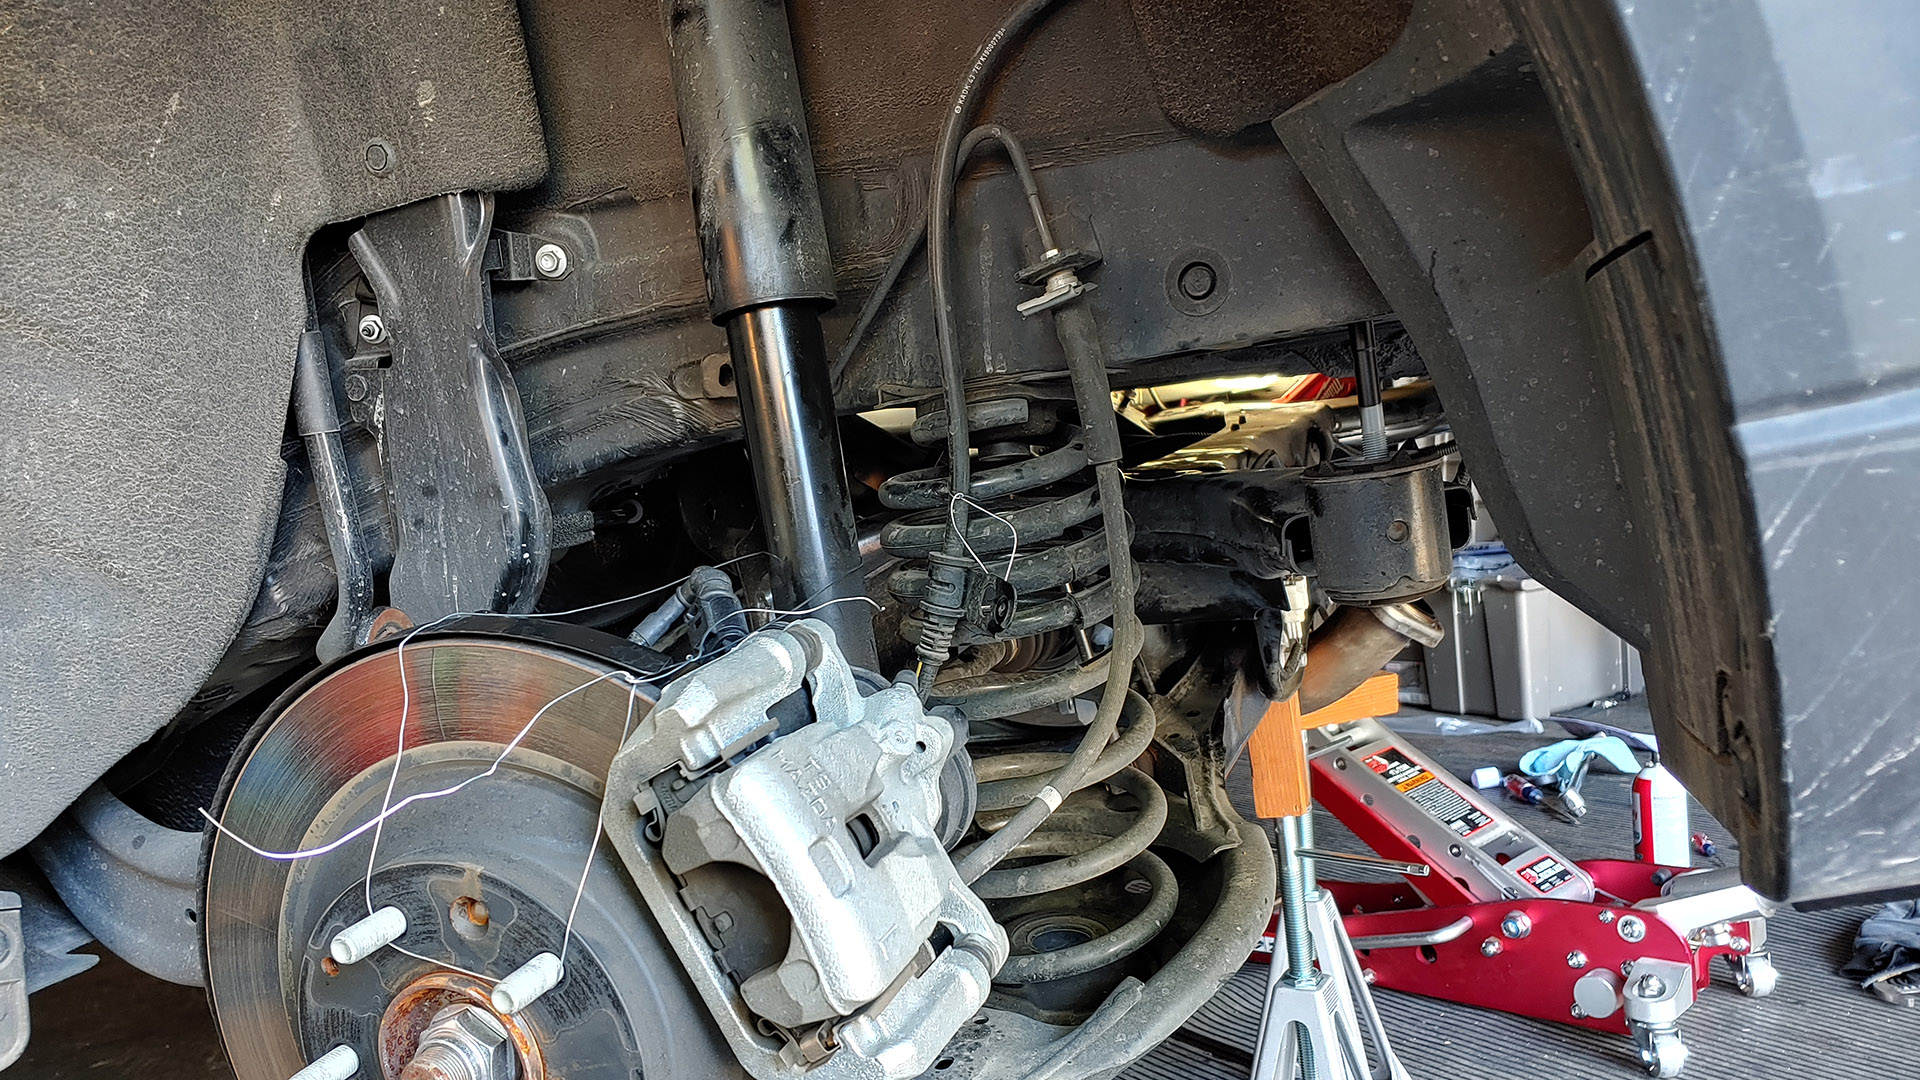
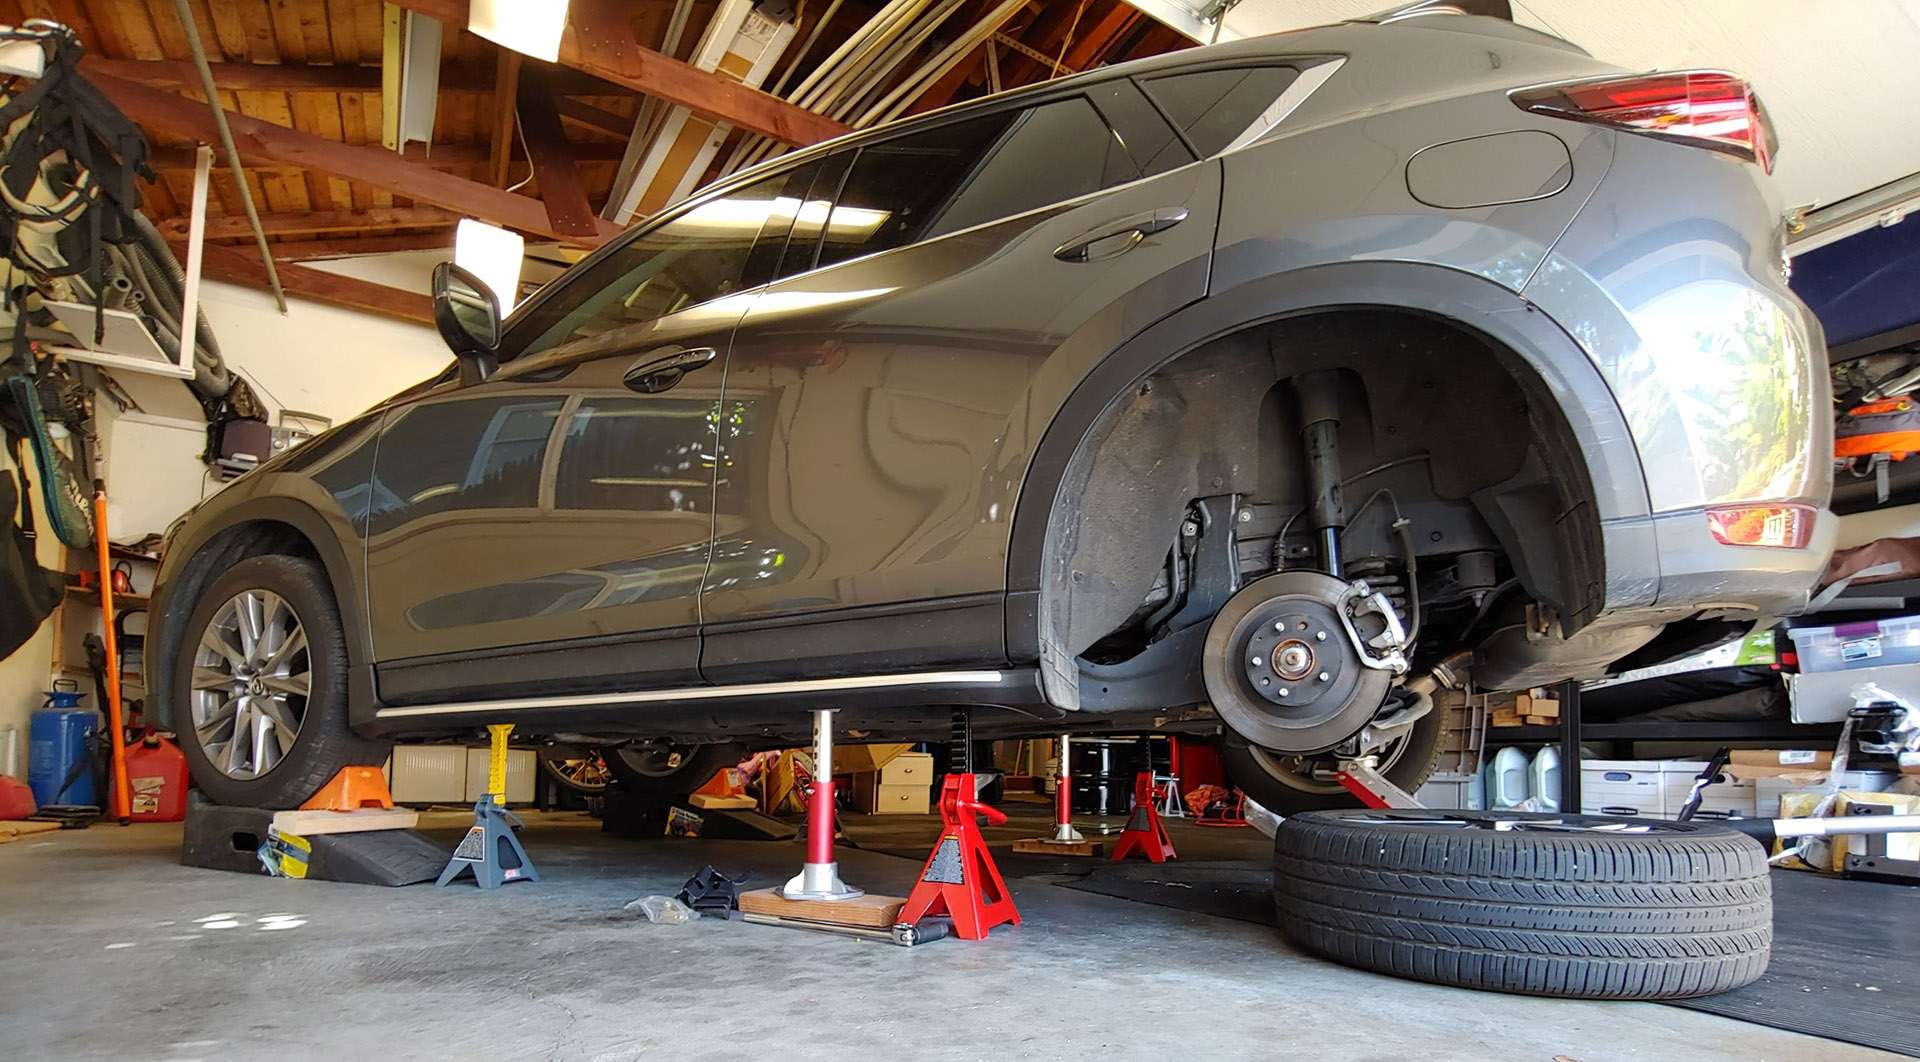
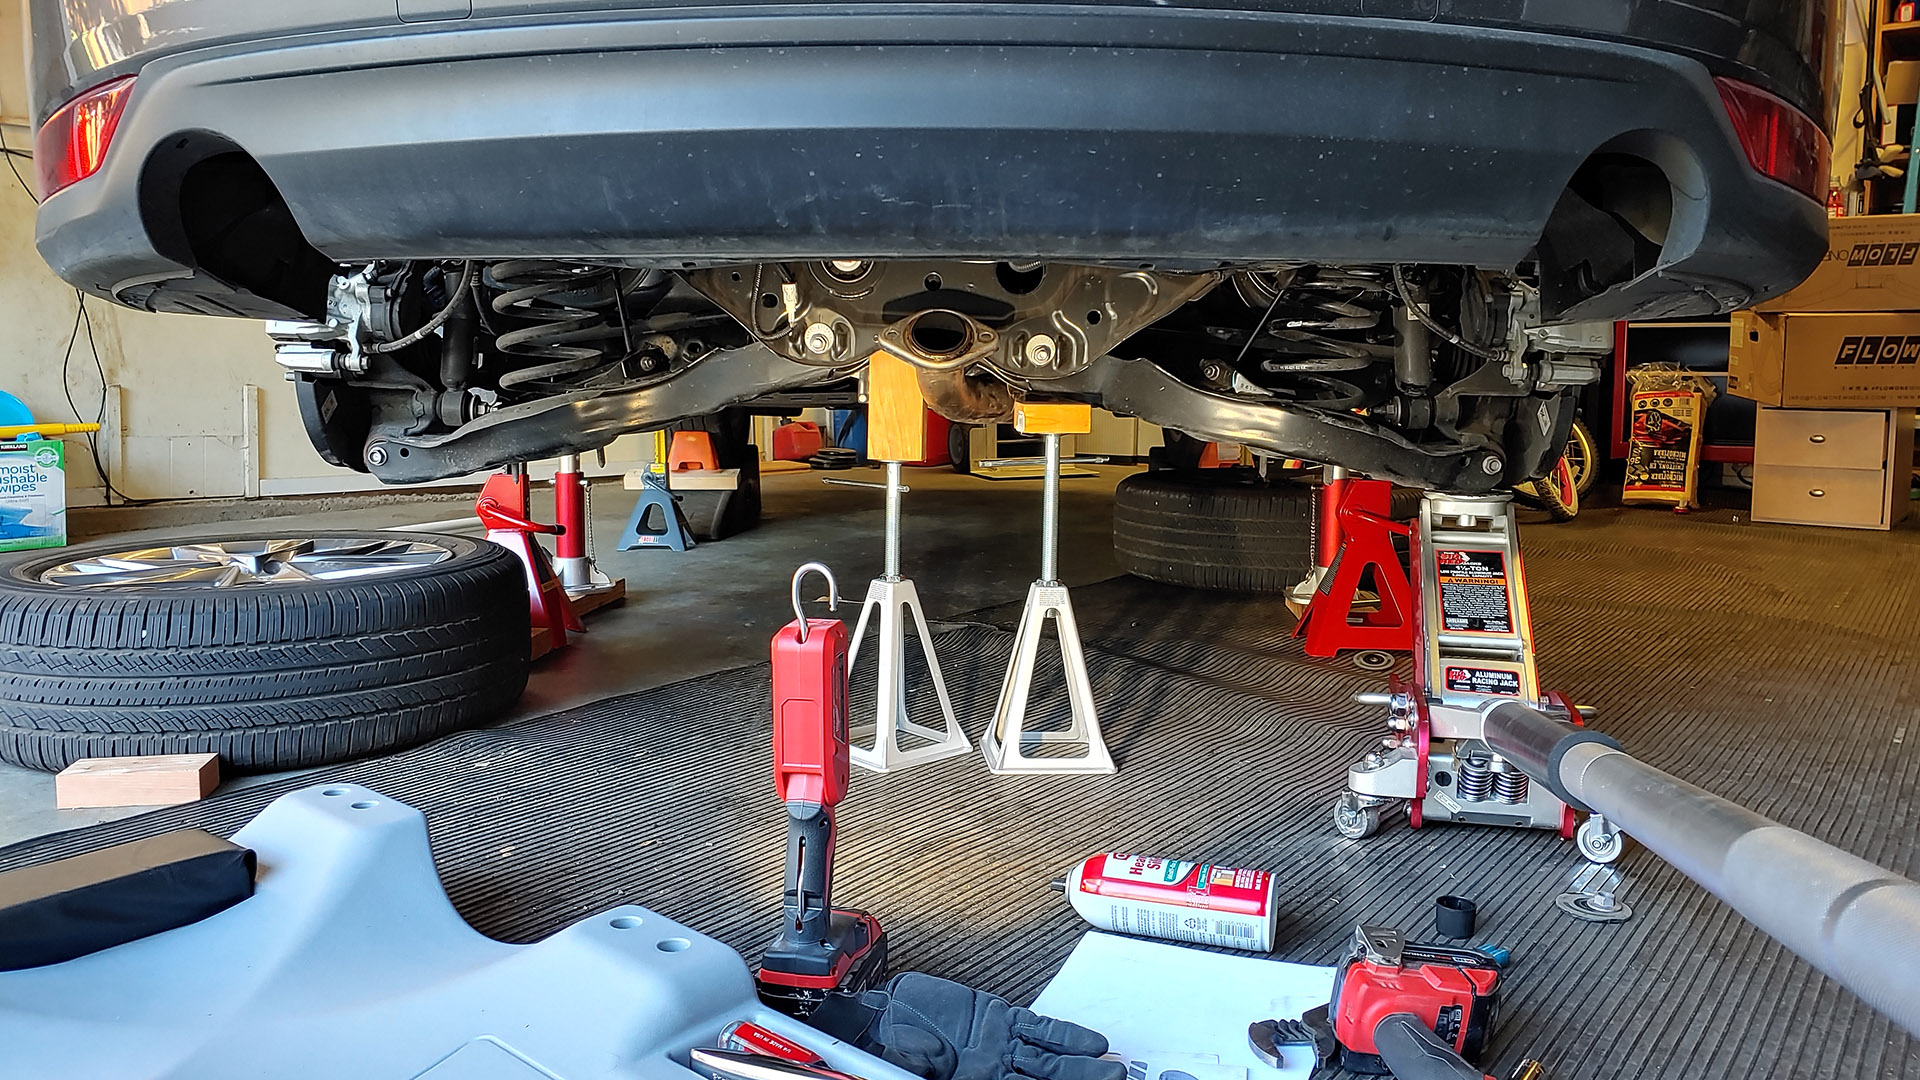
loosen lugs, lift and safely support, remove rear wheels
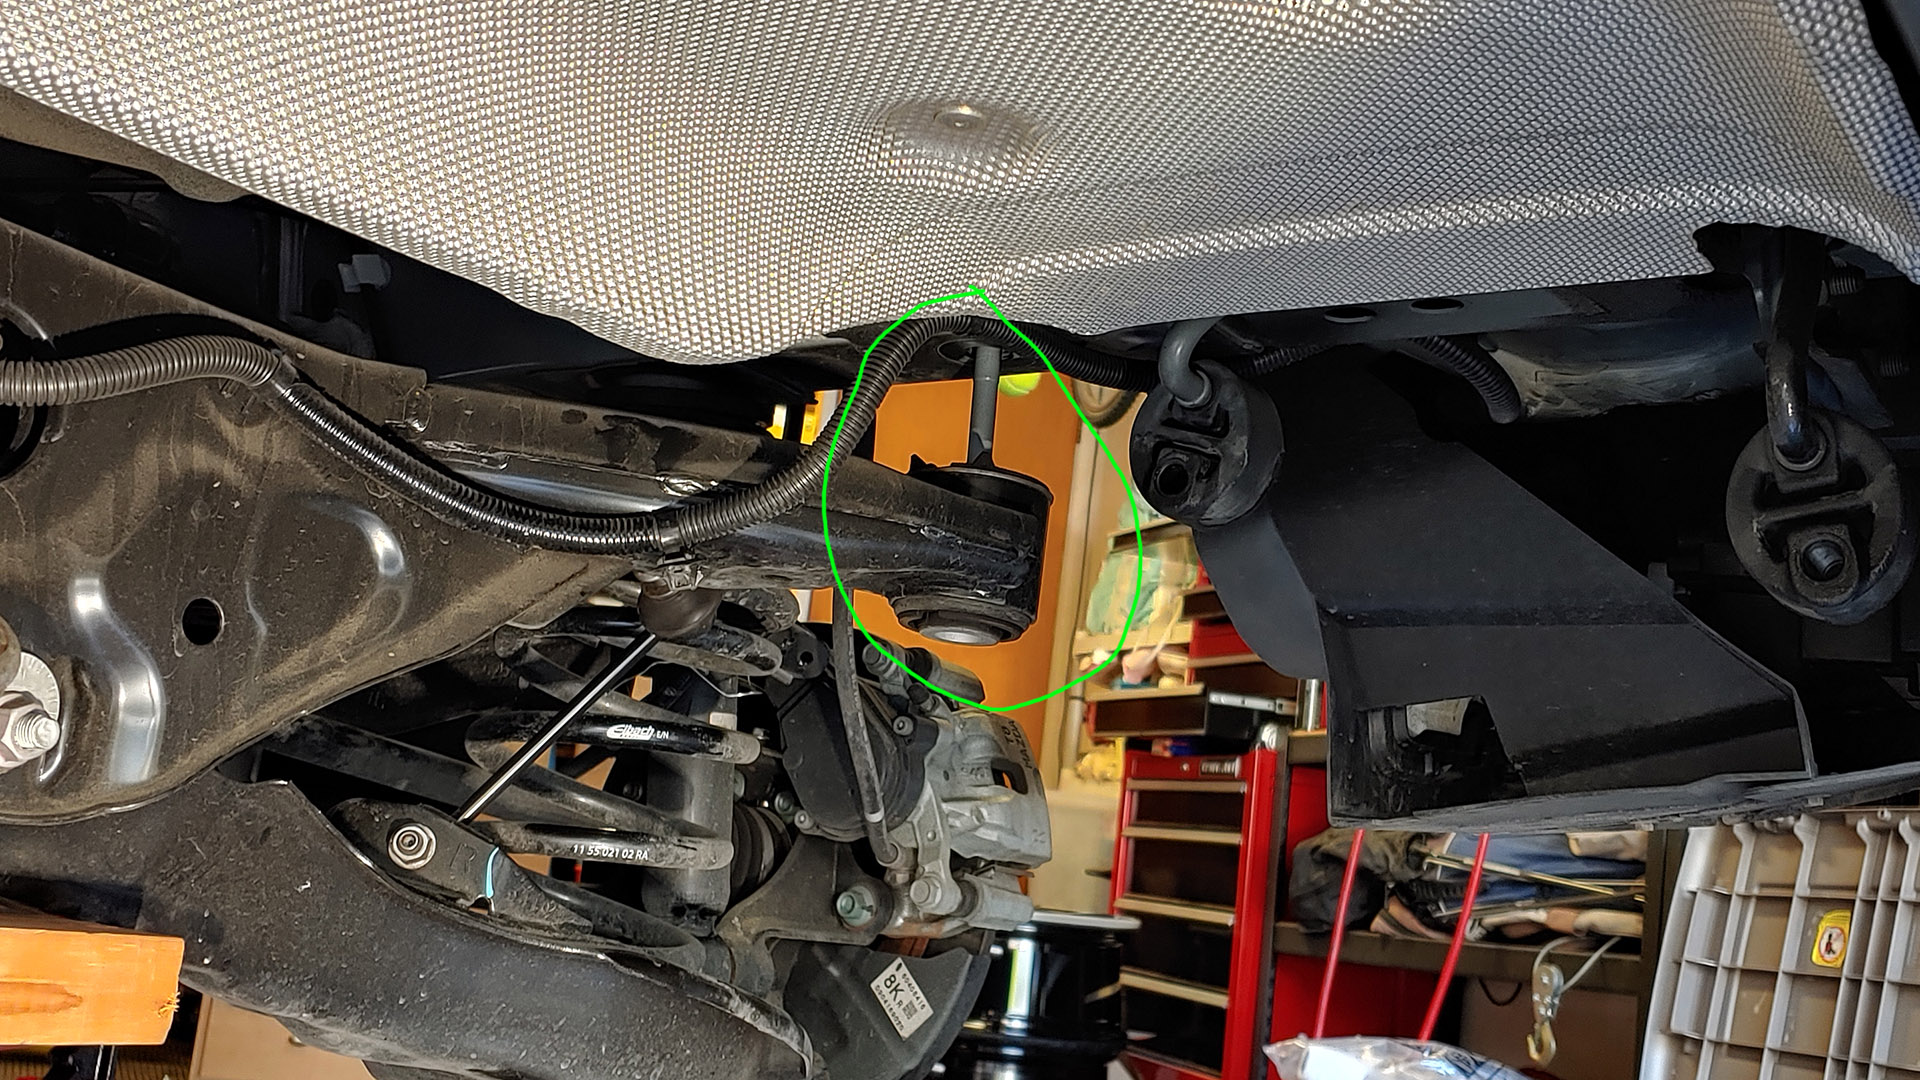
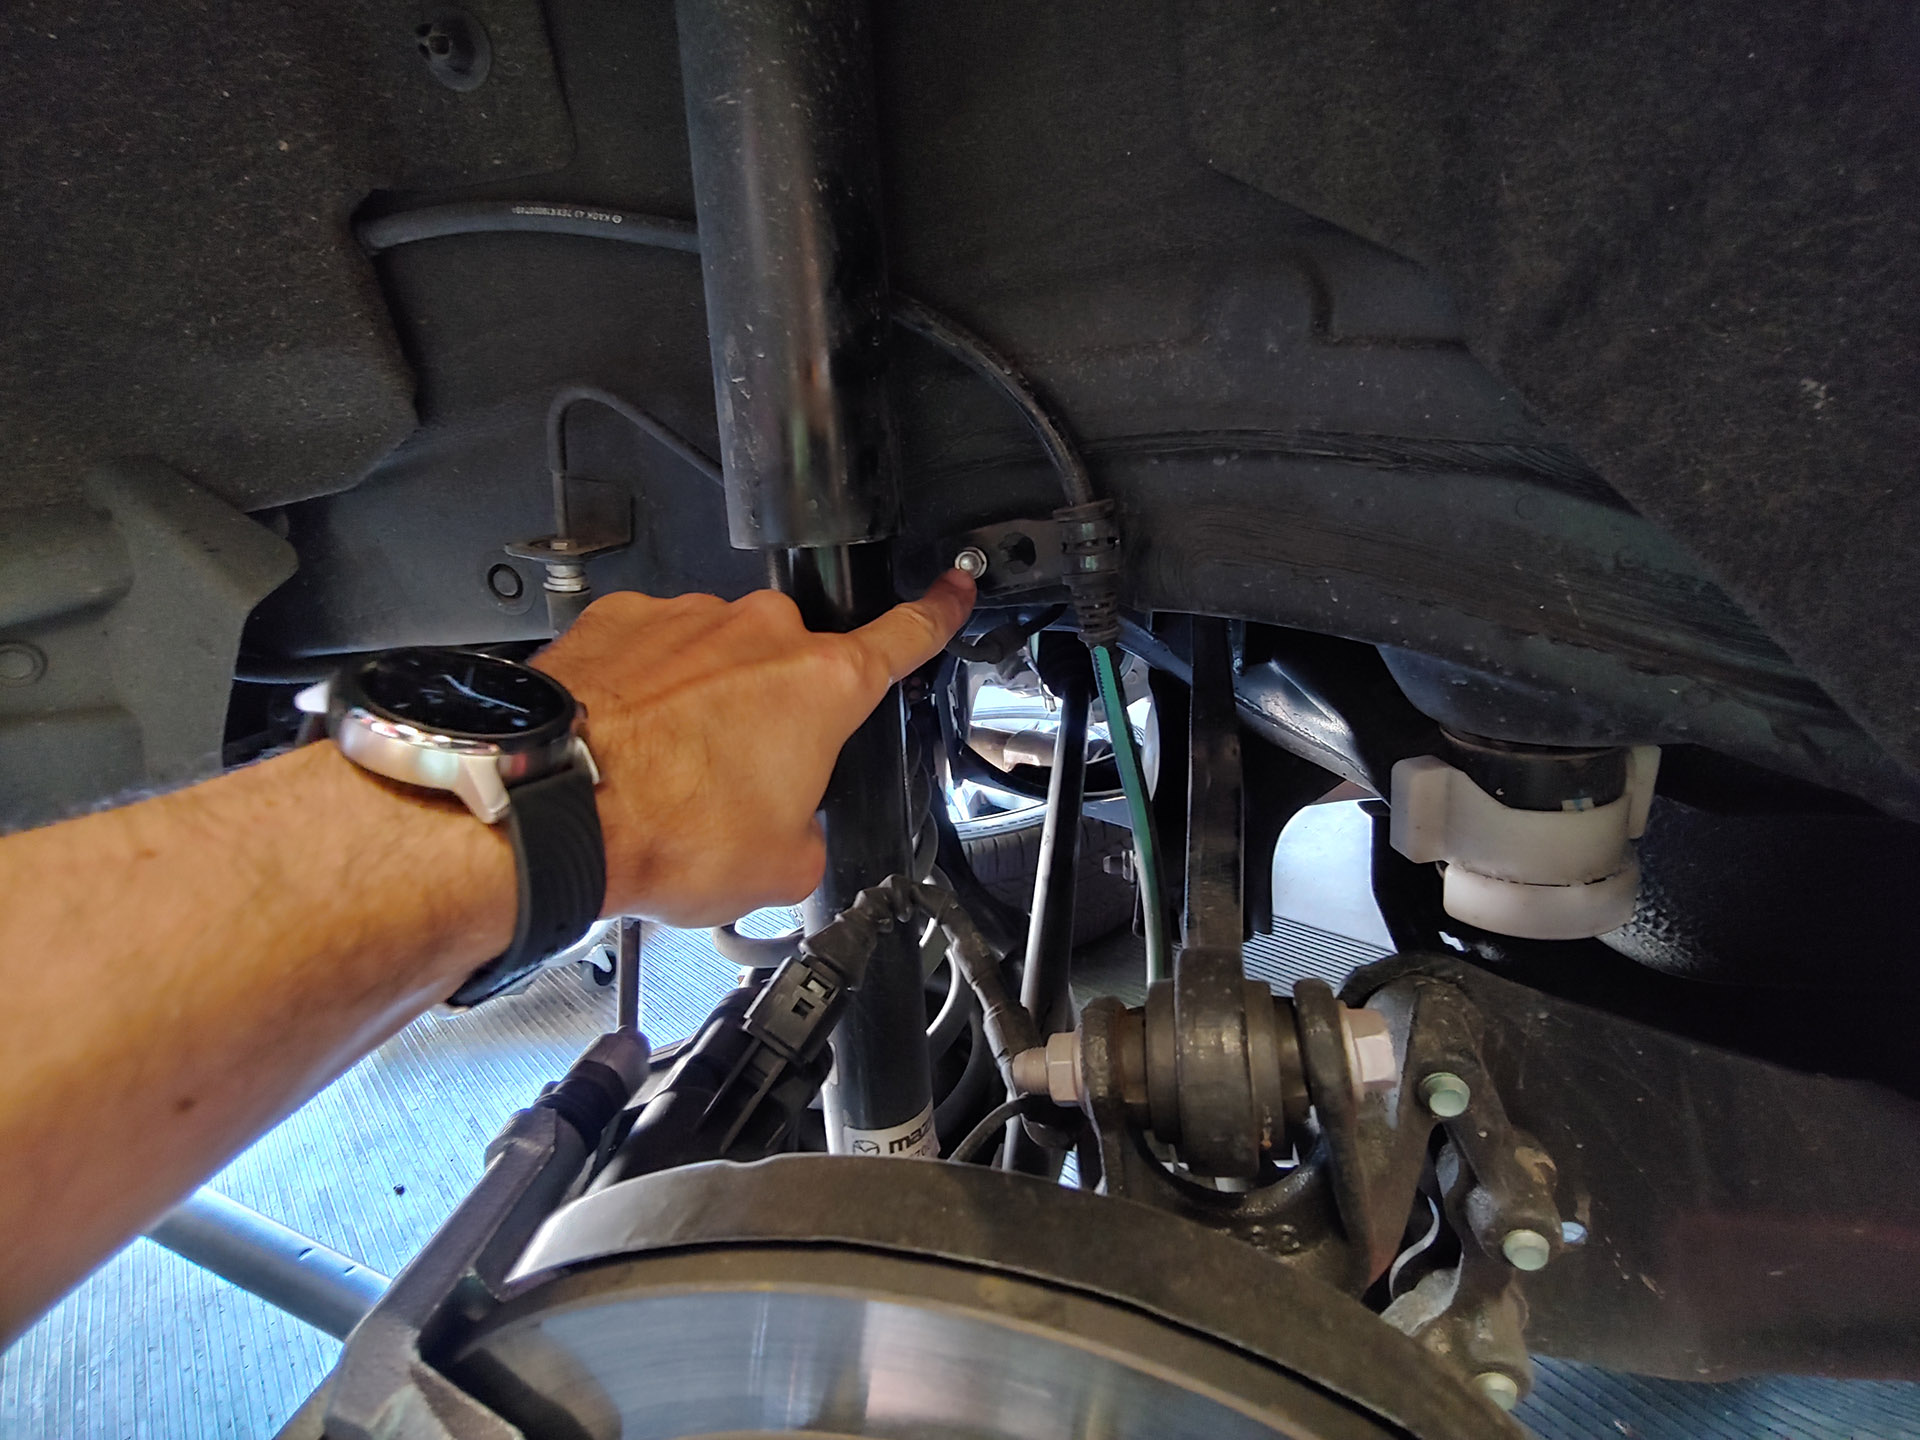
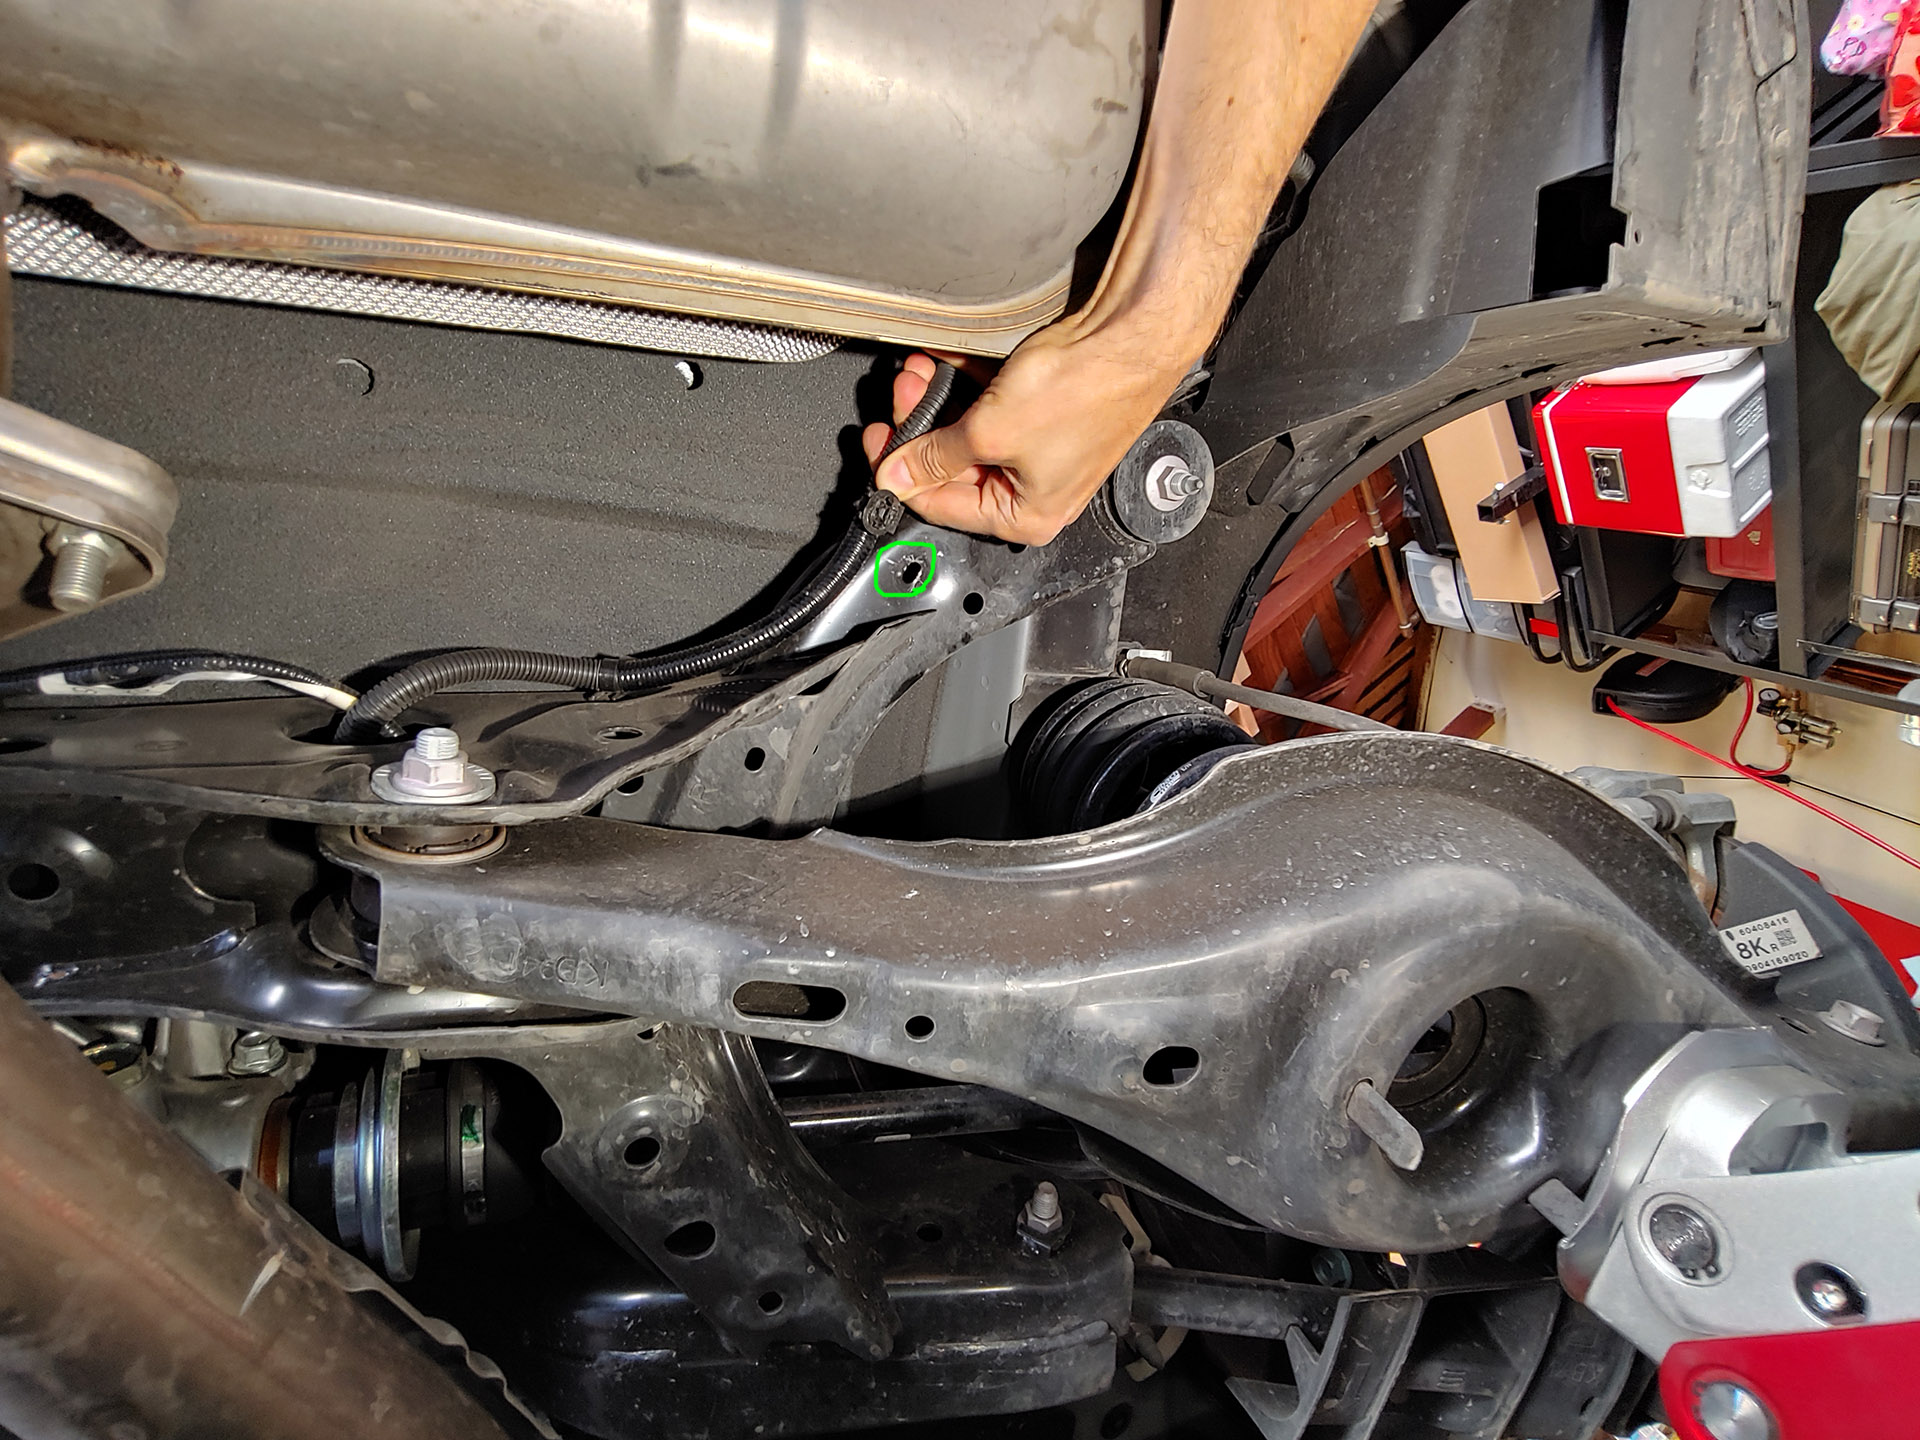
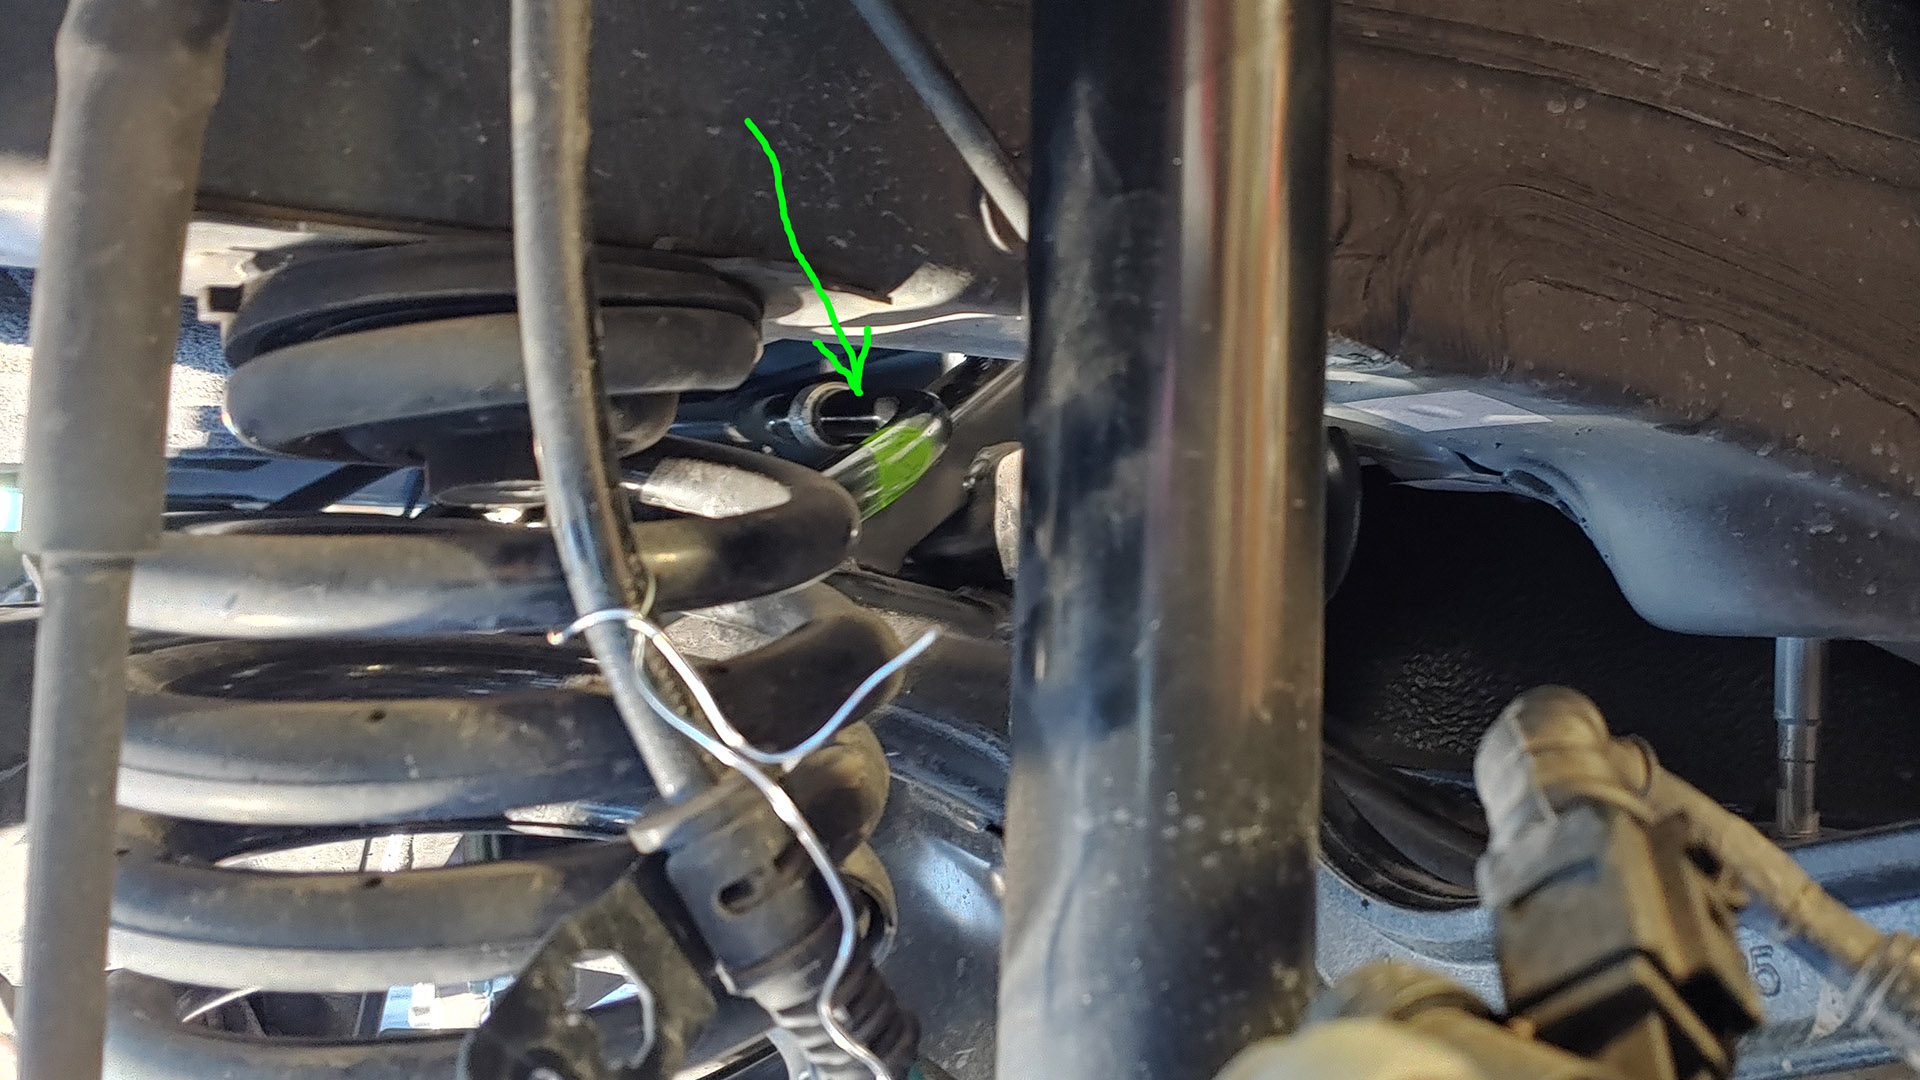
I removed this clip (10mm) and bailing wired the line (ABS sensor and parking brake?) out of the way
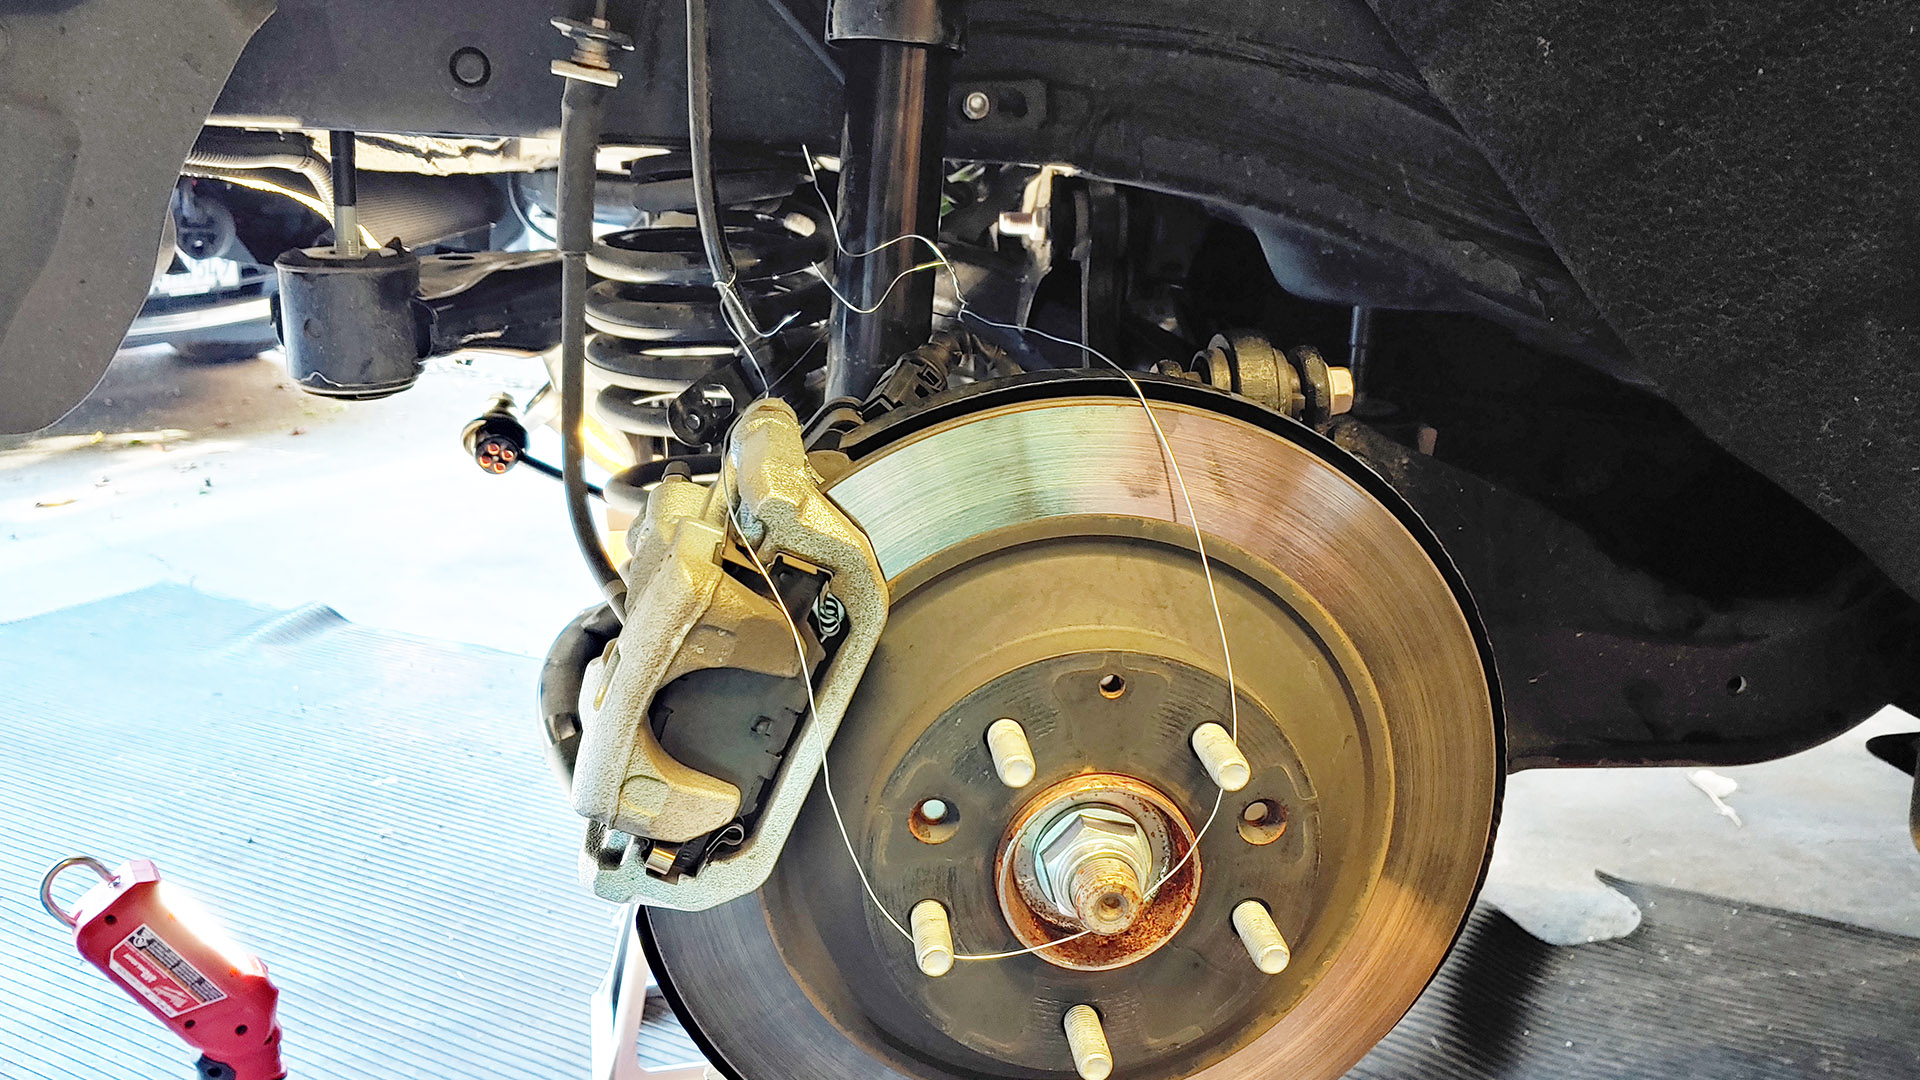
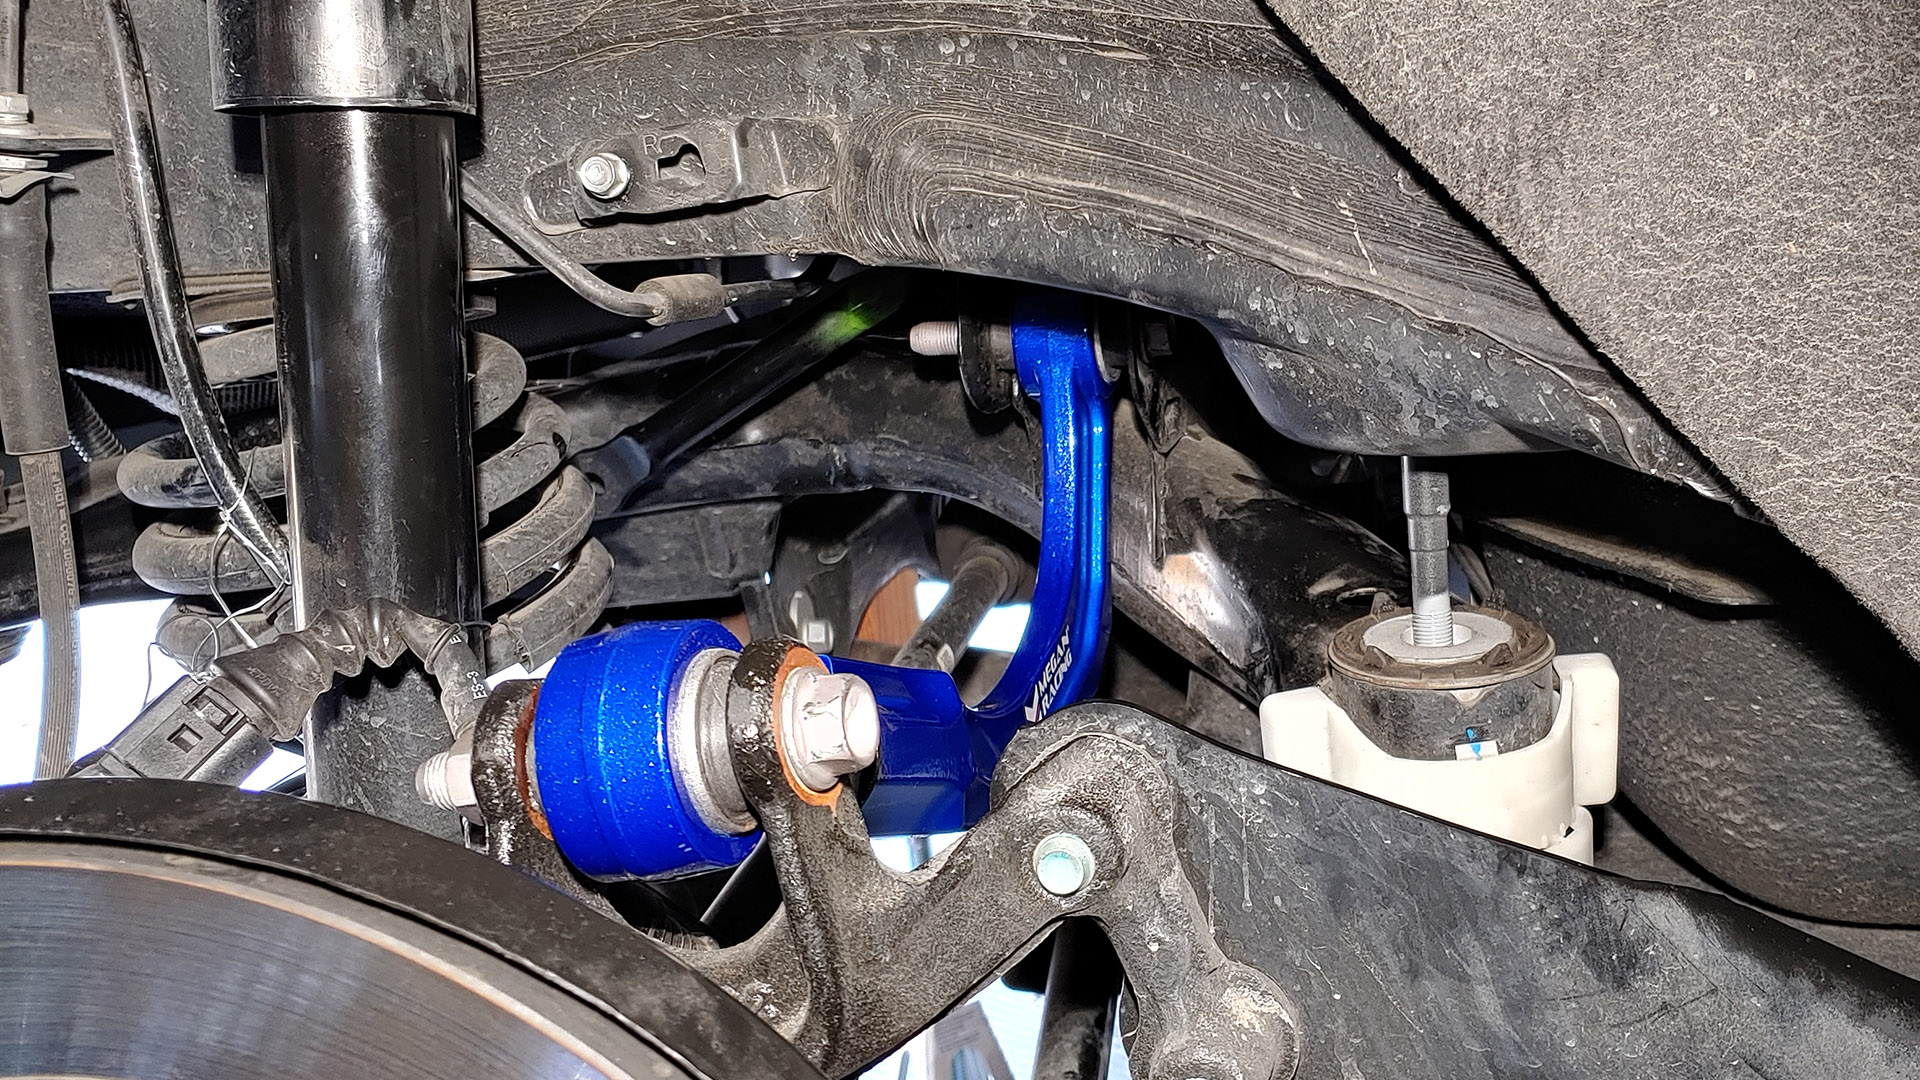
Loosen the 17mm outboard upper control arm nuts (if doing the camber arms).
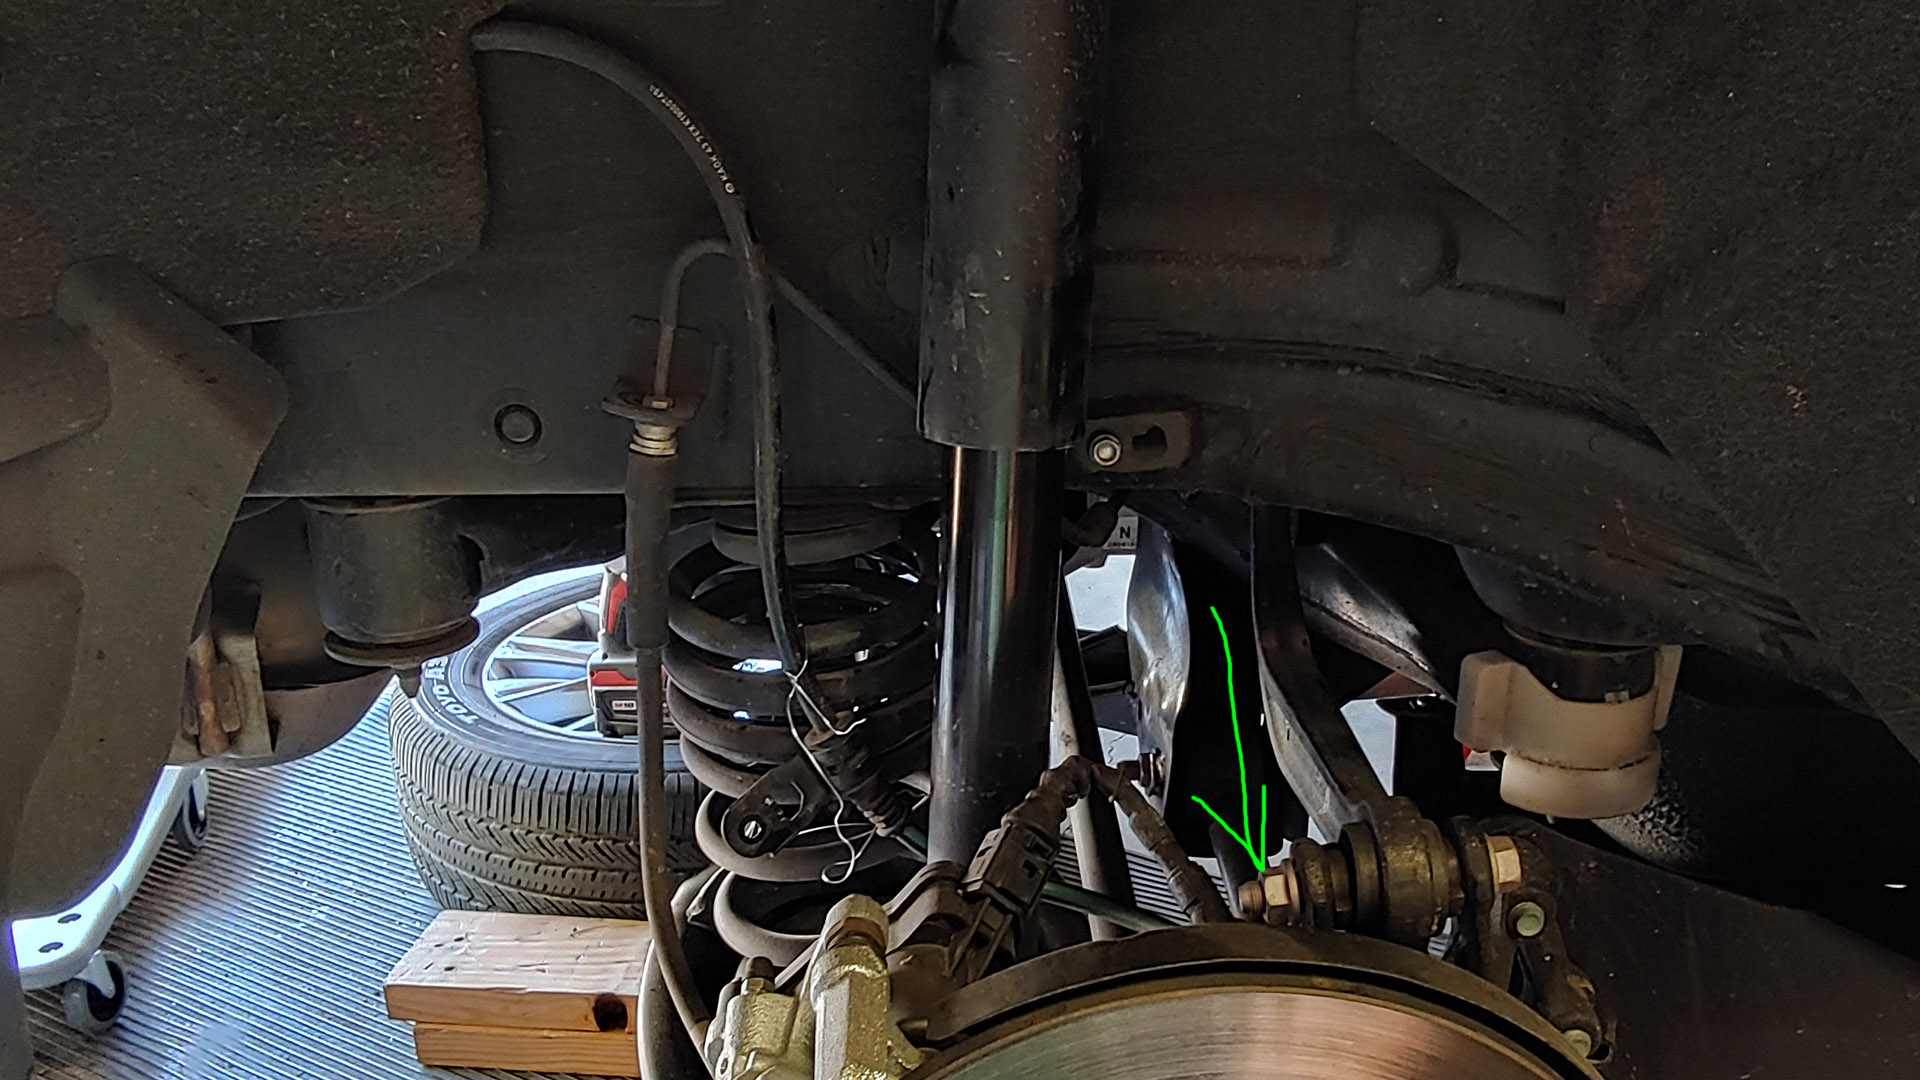
I removed a couple wire harness clips to free up slack so the subframe can drop away from the body
Pop off the muffler (14mm)

Disconnect the end links from the sway bars (14mm + 5mm allen)
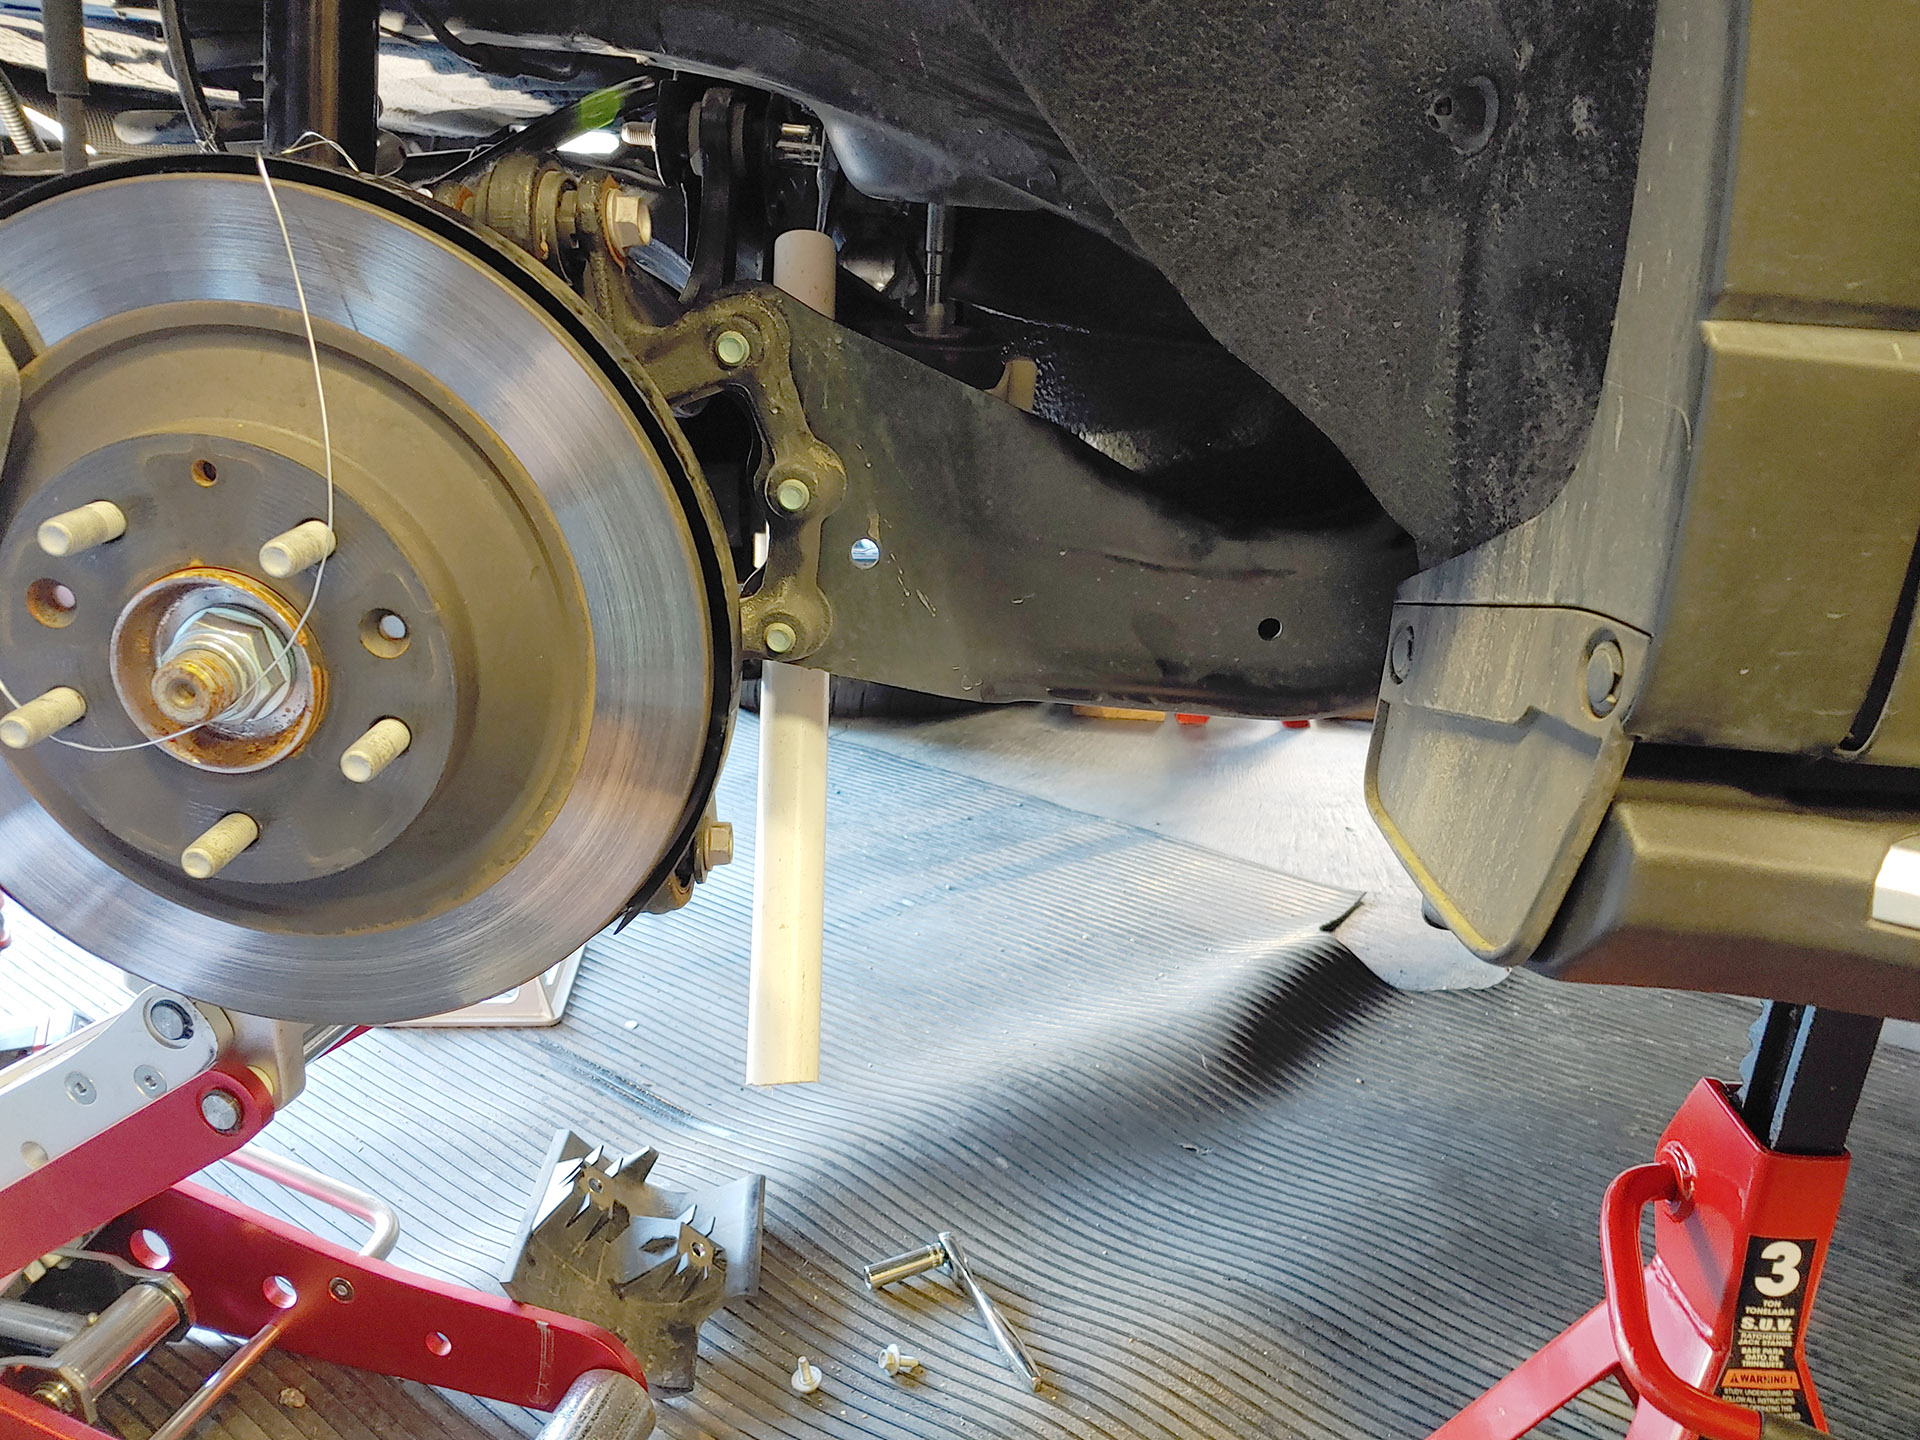
Now we lower the subframe, one side at a time. Use something to support the subframe near the middle. Make sure you have it well supported, you don't want the subframe to accidentally fall.
To drop the passenger side, I first loosened two 17mm subframe nuts on the driver side, taking the nuts down to the bottom of the threads. Then remove the two nuts from the passenger side.
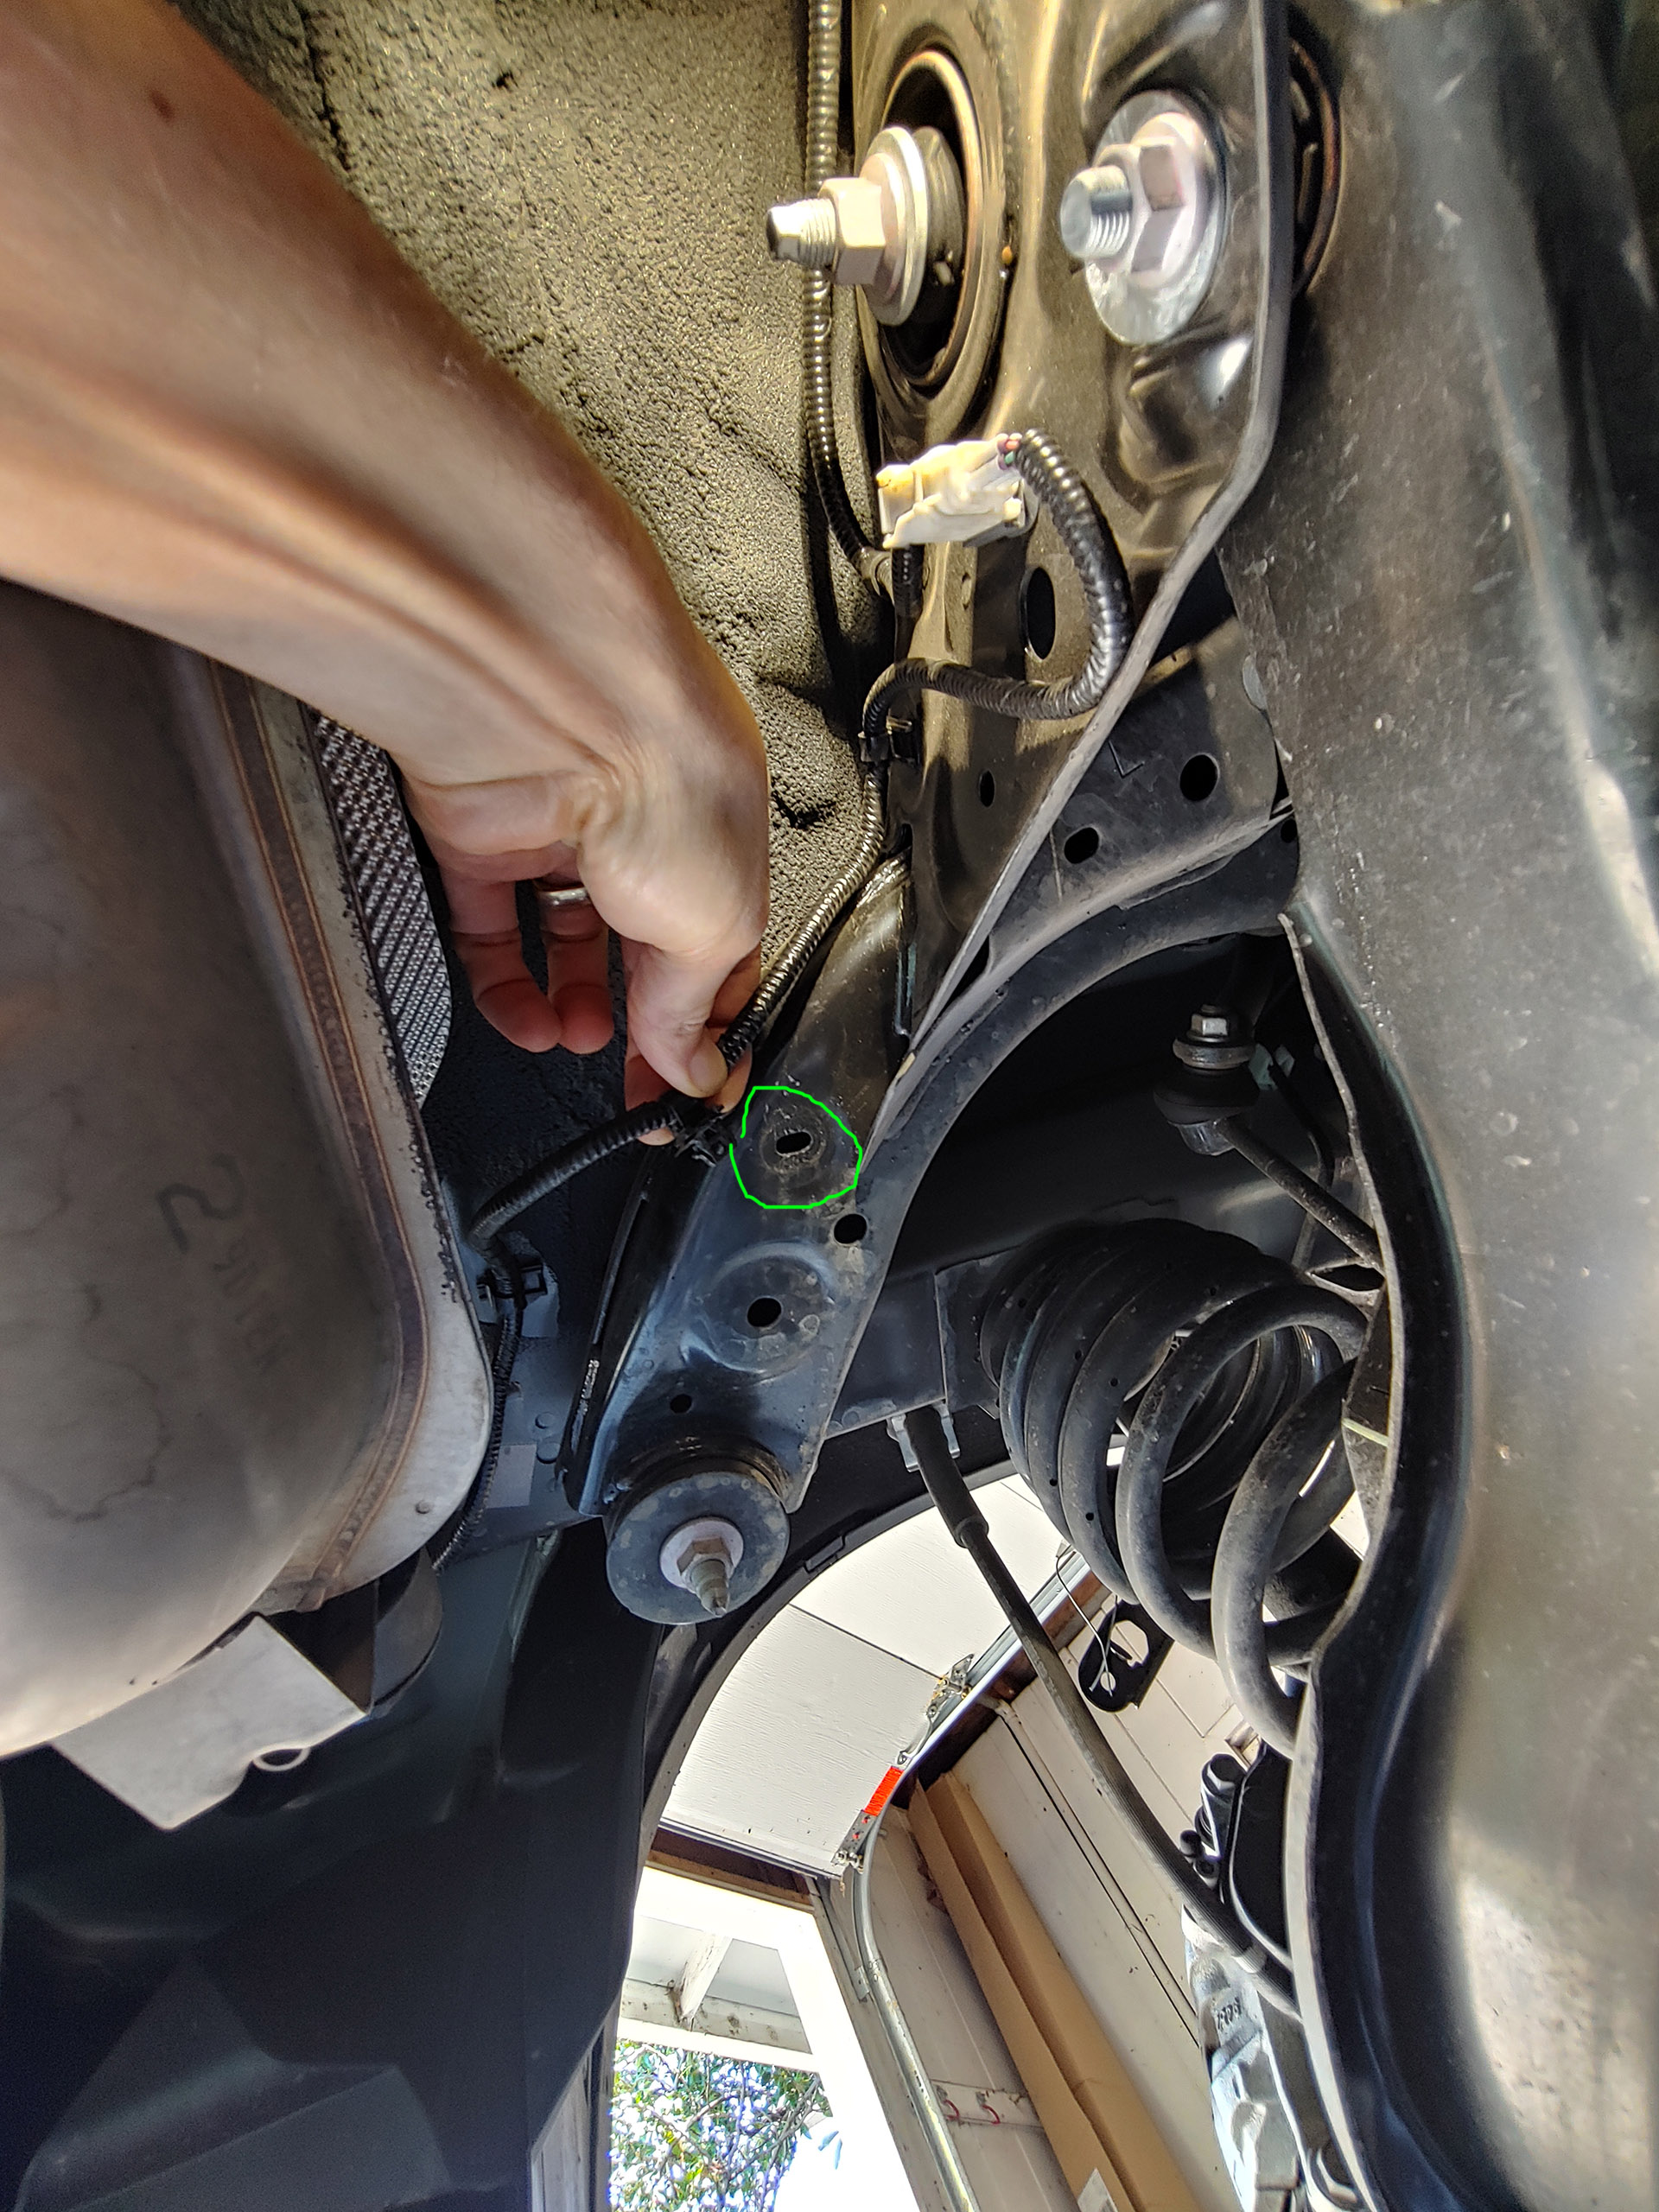
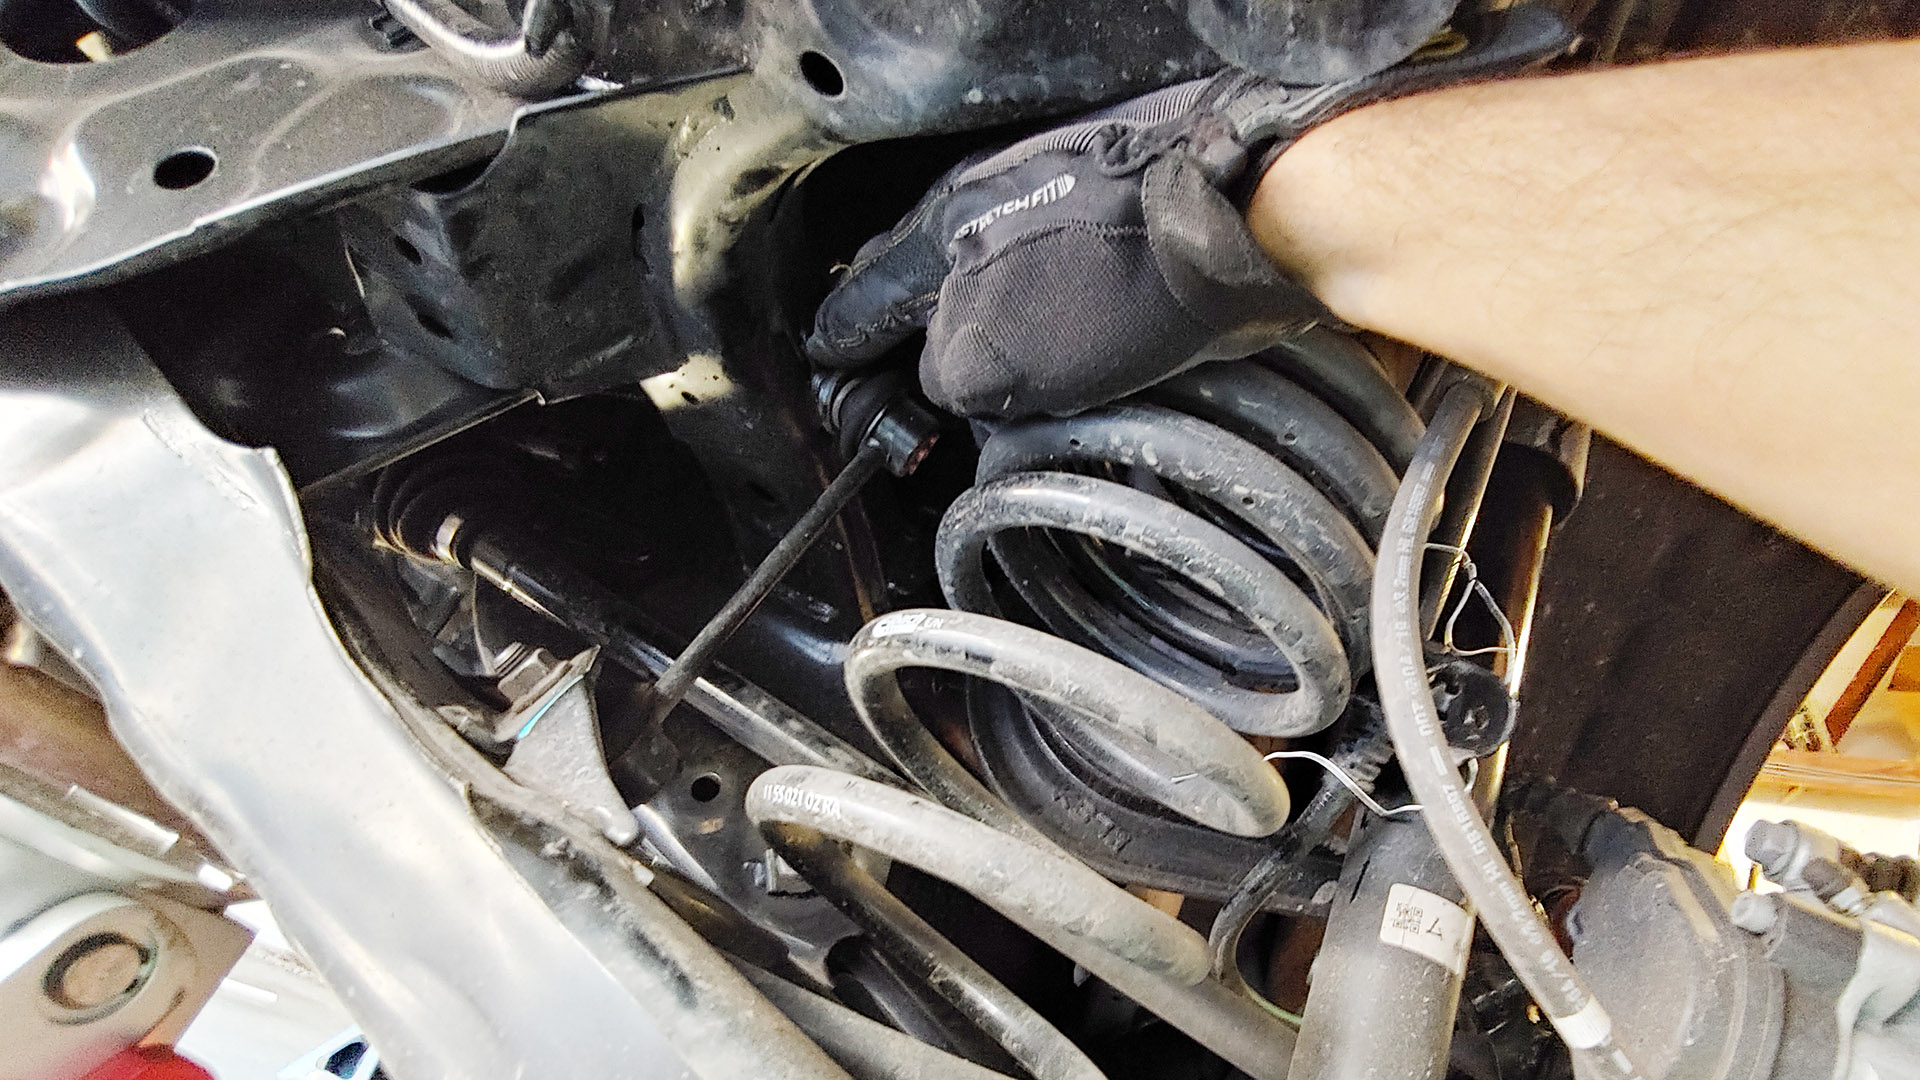
Slowly lower your support to drop the subframe passenger side until the inboard control arm bolt is no longer pointing right into the body.
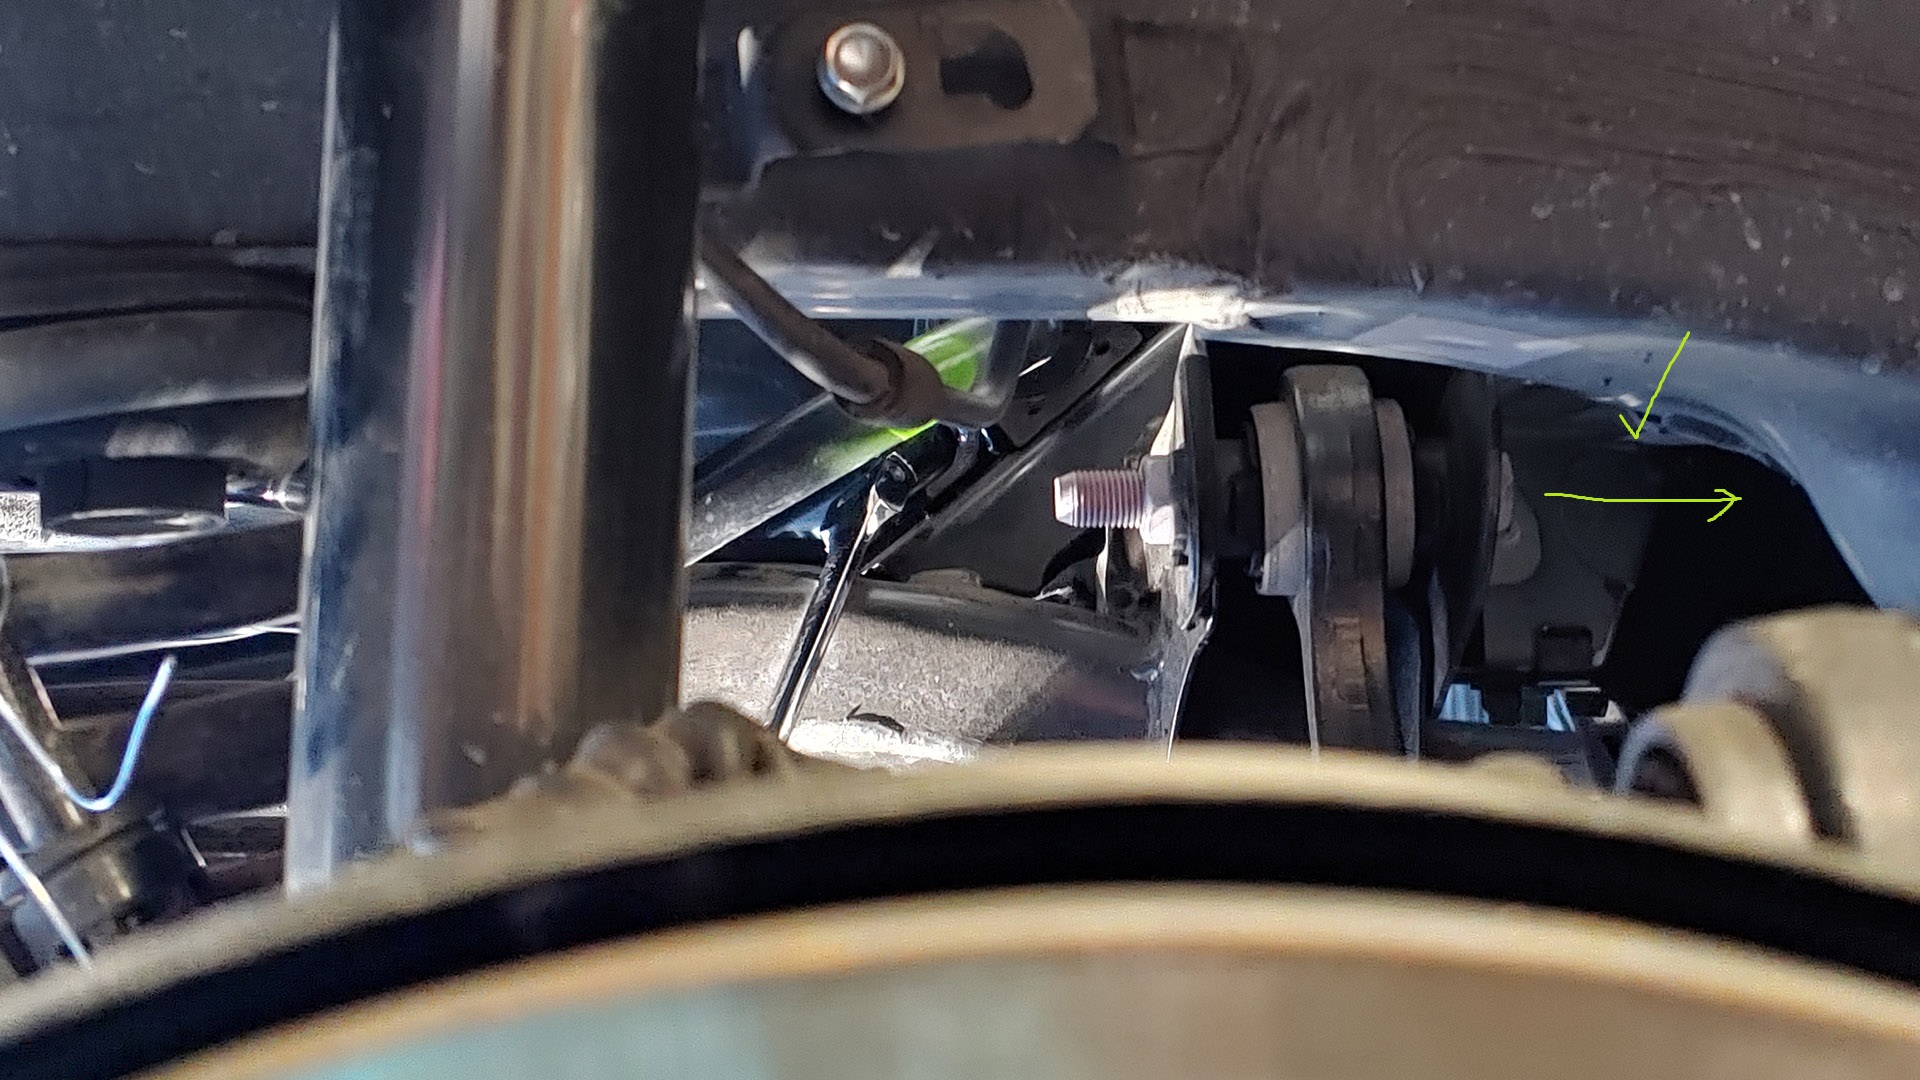
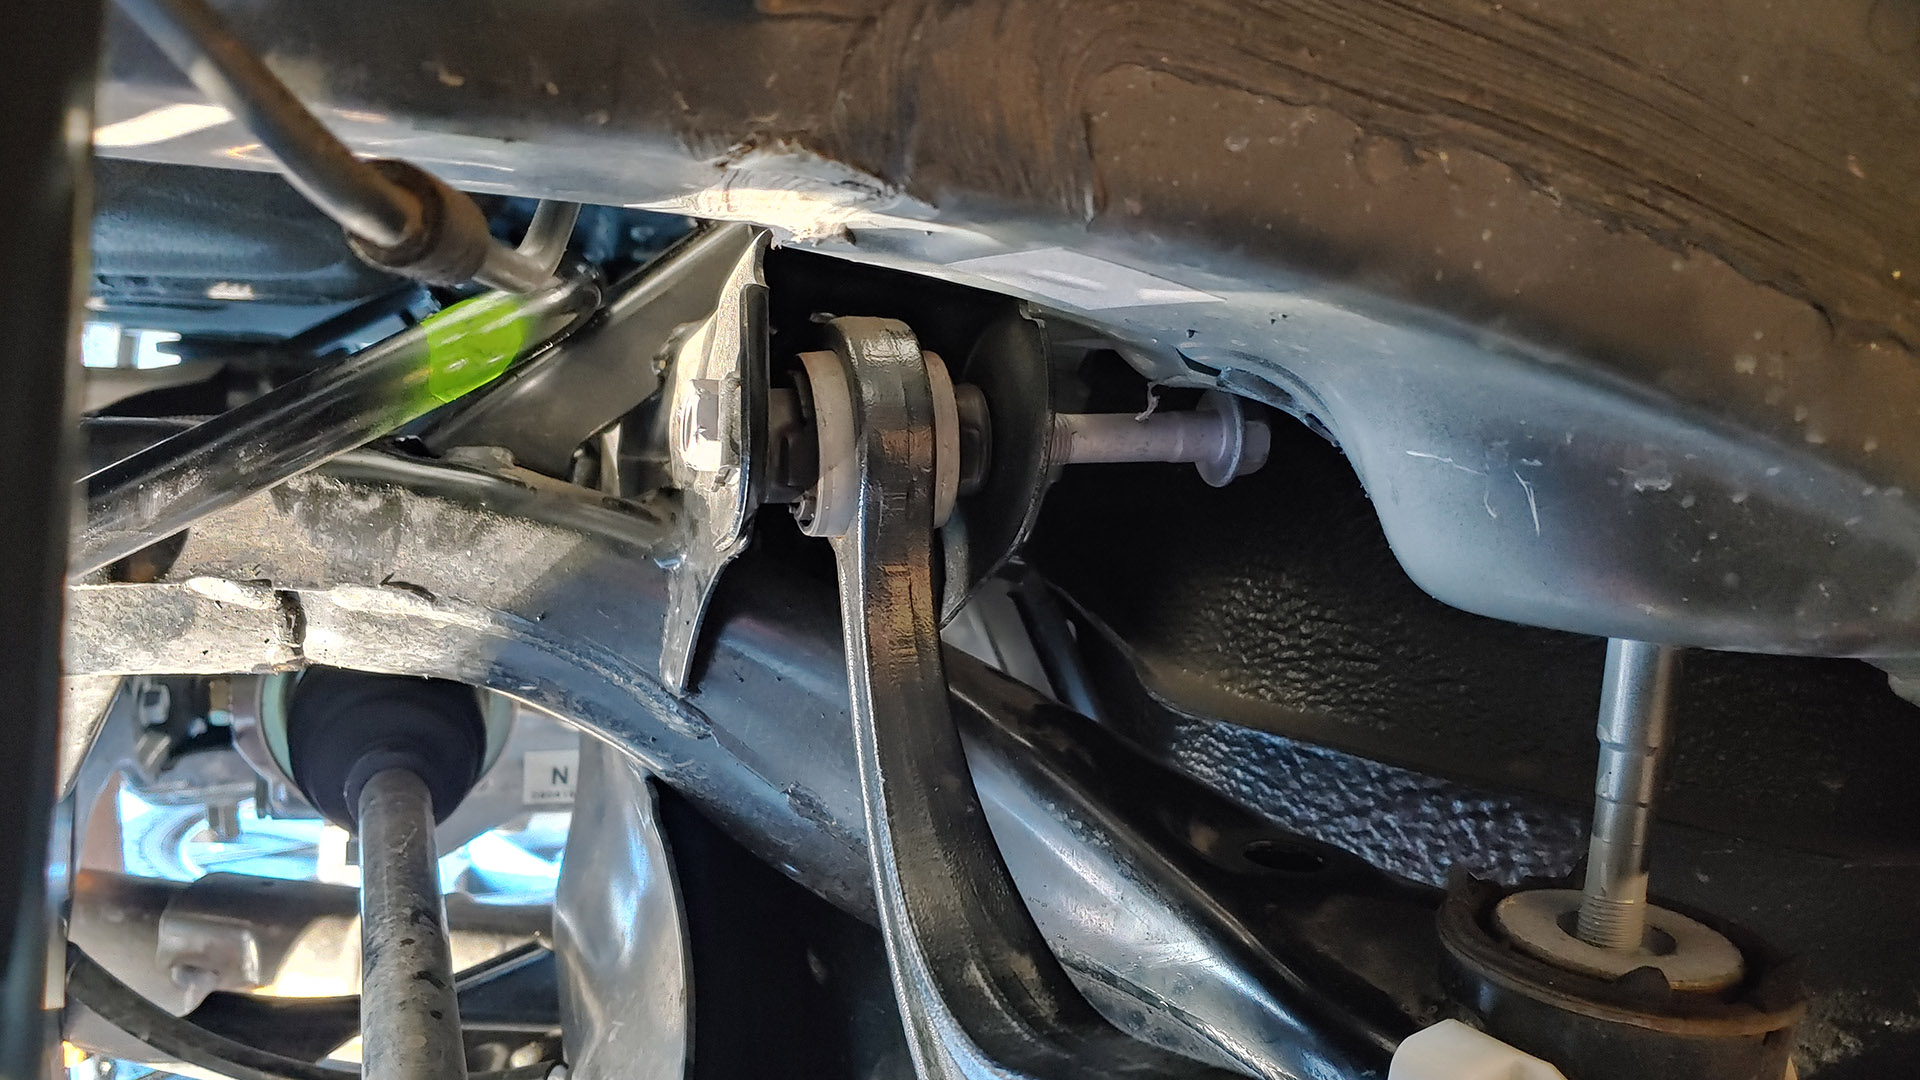
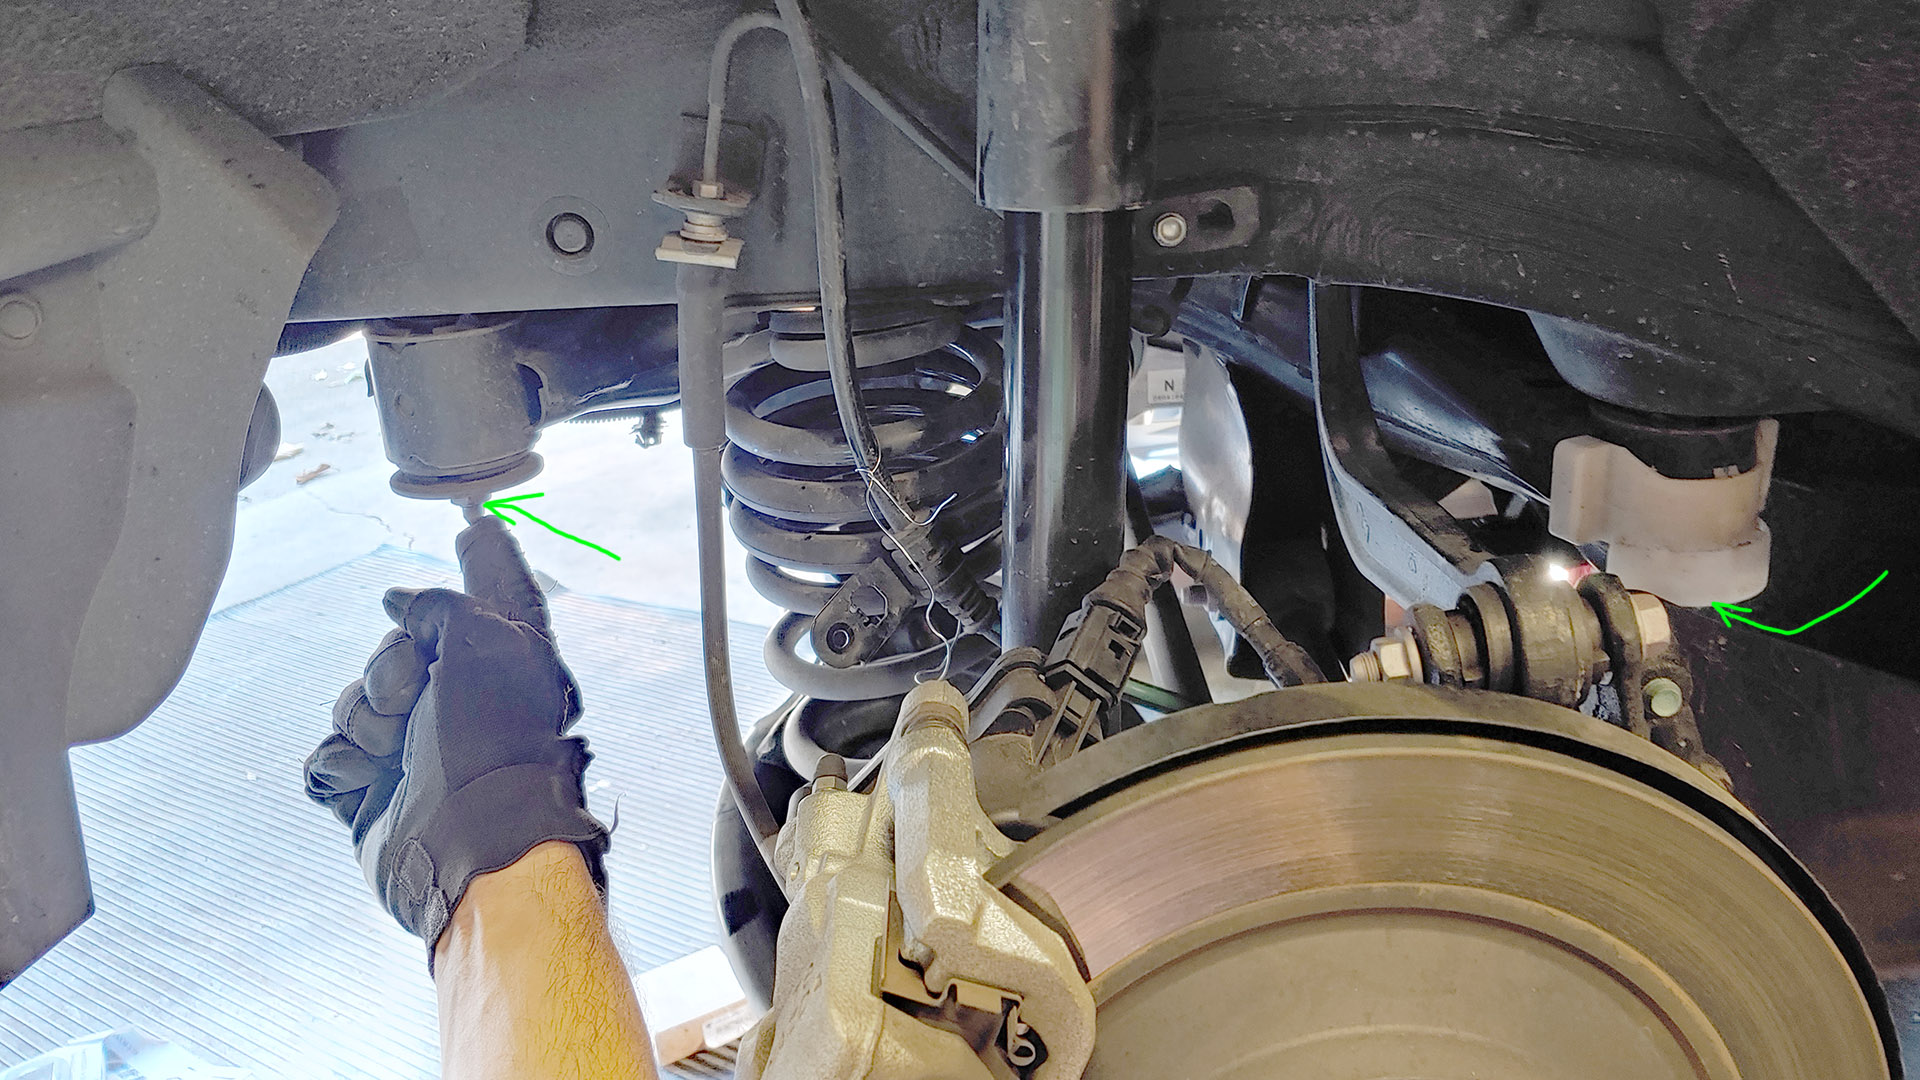
This also makes the forward sway bar bracket bolt accessible. Remove the passenger side sway bar bracket (14mm) and bushing.
I was thinking my AWD would complicate things, because:
- Only hardrace sells (that I found [thanks, Chris]) a rear sway bar compatible with AWD, and they don't provide any installation instructions.
- The service manuals I found say to replace the rear sway bar on AWD, the propeller shaft should be disconnected, which cascades into taking apart half the car.
Procedure:
loosen lugs, lift and safely support, remove rear wheels
I removed this clip (10mm) and bailing wired the line (ABS sensor and parking brake?) out of the way
Loosen the 17mm outboard upper control arm nuts (if doing the camber arms).
I removed a couple wire harness clips to free up slack so the subframe can drop away from the body
Pop off the muffler (14mm)
Disconnect the end links from the sway bars (14mm + 5mm allen)
Now we lower the subframe, one side at a time. Use something to support the subframe near the middle. Make sure you have it well supported, you don't want the subframe to accidentally fall.
To drop the passenger side, I first loosened two 17mm subframe nuts on the driver side, taking the nuts down to the bottom of the threads. Then remove the two nuts from the passenger side.
Slowly lower your support to drop the subframe passenger side until the inboard control arm bolt is no longer pointing right into the body.
This also makes the forward sway bar bracket bolt accessible. Remove the passenger side sway bar bracket (14mm) and bushing.
Last edited: