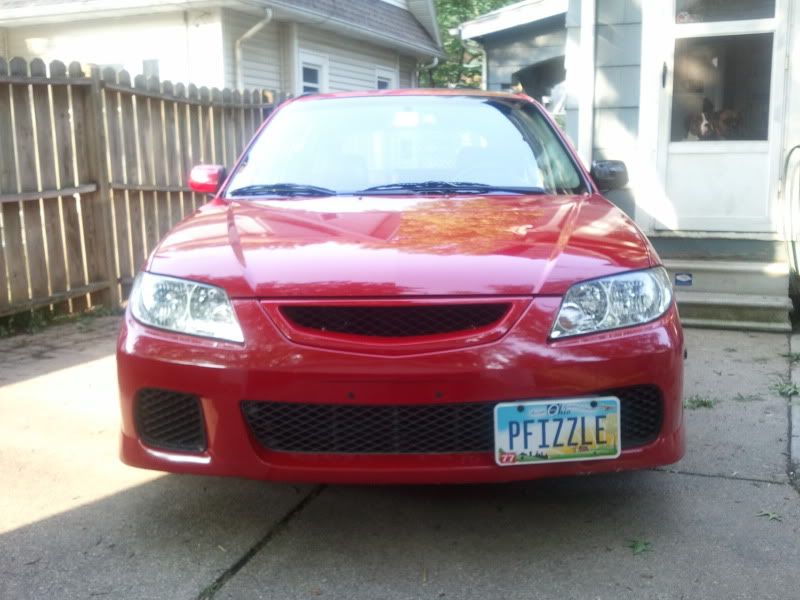
JosueP5's '03 Protege5 Build Thread.

I've ran a bypass valve before. It's always good to have a safeguard for that kind of thing. If it was me, I'd cut the pipe at the air temp sensor and relocate the sensor to farther down the intake tube. It's just a simple hole to cut.
 
I think it would help even if the filter got a little wet... if it's just a piece of foam, air will be going through it all the time, and if the filter has any blockage, it will compensate and do its job.
 
It's not just foam. There is a rubber like sleave (for lack of better term) behind the foam. So if the filter is submerged, the rubber "gills" open up and air can still get pulled in and bypass the submerged filter. The foam is just there to filter the air coming in if the bypass valve opens.

Here's a cool article about it from Sport Compact Car (RIP, great mag)

I would mount it up higher after the bend closer near your air intake temp sensor. If you have to move the sensor a little bit before the MAF sensor I don't think it wil effect anything. But that's just me. :)
 
Had a night of intake win, but gauge install and gauge ordering FAIL.

Decided to make one cut on the intake, and then shorten it by the MAF sensor to bring it back away from the upper radiator hose. Had to shorten the rubber coupler right there too, but it worked like a charm.

2011-05-20194304.jpg

2011-05-20201153.jpg

2011-05-20201233.jpg


Tried hooking up my gauges tonight as well, but couldn't get them going right. I'm not even going to go through all the scenarios I tried...I just couldn't get it right. I'll try again some other time...lol

I DID however notice that I have 2 different gauges....EFF!

2011-05-20203407.jpg


Oddly enough, there is the matching gauge inside the Prosport box he gave me in the spare parts bin. Not sure why he had 2 water temp gauges, but it doesn't have the harness to it, so I don't think I could hook it up.
 
My OCD thanks you for having the hose clamps lined up. Nice work on the bypass valve.
 
My OCD thanks you for having the hose clamps lined up. Nice work on the bypass valve.

Oh Evan, you really do have it bad don't you. I must admit it though that looks good to me. Does that mean I have it too? Haha!
 
Umm.....no, not yet. lol

Took the dogs to this big ass park by us with a beach/lake inside. Needless to say, they trashed the car! So I cleaned it up this afternoon. Had the extension cord out for the vacuum anyway, so I decided to hit the top of the bumper where they've been scratching the s*** out of it jumping in and out of the back. Not sure what I'm going to do to prevent this, short of the 3M clear protector. I'll probably end up just letting them scratch it up, and buff it out again. haha

2011-05-21171527.jpg

2011-05-21171536.jpg

2011-05-21172502.jpg


Ordered my new plate too....lolololol

2011-05-21172511.jpg
 
lolz.

Or just take the TBizzle. People are going to be so confused because you have 323 emblems. Suckas.
 
Haha....naw, she wrote down "323" as my model because she saw it on the back. So, there was a bit of confusion for the lady I dealt with to get the title. It was too much for her to take in when I told her it's actually a Protege5, and the 323 was simply a different emblem.
 
I was going to say something about IAT sensor location, but I realize that it's not your doing... just my background in instrumentation. You probably did the IAT a favor by putting it farther downstream of the intake bend. Temperature measurements aren't affected as much by it, but if it was a MAF sensor, it'd be giving you super ****** up readings that close to a bend. Like I said, it's not your doing... just intake design... but looking at it now, I think that it's a bit crap.


Just rambling. Don't mind me.
 
Couple few updates...again, one win, one fail. lol

Got my ebay license plate bracket.

2011-06-07185606.jpg


And TRIED to install my VVME HID's, but ran into a snag right out of the box...eff.

I put the bulb into the housing, and the clip wouldn't hold it in properly. There was about a quarter inch of slack! All flopping around and whatnot. Looking at my stock bulb, there's an adapter that acts as both a spacer so the bulb is tight in the housing, and it plugs into the stock headlight plug. The kit didn't come with any kind of spacer for this problem (Evan said his DDM Tuning HID kit came with a spacer for this) so I don't know what I'm gonna do yet...

2011-06-07181927.jpg

2011-06-07182027.jpg

2011-06-07183359.jpg


As of now, I think I might try to cut up the stock adapter. I just want to make sure I can buy another one should I decide or need to go back to stock someday. I've never seen these on a bulb, so I don't know how readily available they are??
 
^ Those are H7 adapters that plug into the main harness... lazy Mazda. Those are needed to run regular H7 bulbs. My set of H7 HIDs from DDM fit no problem, maybe even a little tight... you should not need that adapter for HIDs to fit. If you feel the need to hack it up, I think they cost about $15 at the dealer. I had to buy one since my car was missing one when I bought it.
 
As of now, I think hacking them up to make spacers would be the easiest way to go about this. As long as I can get new ones, then I don't mind going this route. Maybe I can find some in a junkyard.
 
What I did was just use quiksteel and put on a thick layer of it on the back of the HID bulb until it was the exact right thickness. Really easy to do and it holds the bulb in place perfectly.
 
If you have patience could you simply bend the metal wire clip a bit more to angle it to sit flush against the bulb housing?
 
Back