How to....TurboXS Bov

snooky

Member
:
Mazdaspeed6 GT
Okay I know there is already a "everything about BOV's " thread but i looked at it and could really find an actually "How to" on putting it on. So don't kill me for posting a new one.

im going to do it myself because i hear its an easy instal... but since i don't know anything about BOV's and Turbos, I have a couple of Q's?

I haven't received it yet but in the auction it doesn't mention instruction manual included, it also states it comes with washer discs?

I also read somewhere that the BOV needs to be adjusted to avoid back-fire...?

how do i know if it back fires? and what is the best adjustment degree?

HELP me out guys, thanks!
 
Very easy mod to do on the scale of 1-10 with 1 being easy n 10 being unpossable this rates a 2.
Tools needed are :10mm socket/rachet,zip ties,razor blade,needle nose pliers, wire snips

1) Remove intercooler protective plastic cover to allow access to stock BOV

2) Remove vac hose from stock BOV

3) Unbolt 2 10mm bolts from stock BOV and remove recirq hose then stock BOV from car

4) Istall TXS BOV including recirq hose and reuse stock bolts to attach

5) Attach supplied hose coupler to stock vac hose

6) Route and attach ttach supplied extension vac hose to other end of hose coupler

7) Zip tie end of vac hose to TXS BOV so as to lesson chance of it becoming unattached

8) Start car and ensure no leaks

9) If at idle the visable piston in the TXS BOV rattles/vibrates add shims 1 at a time till no rattle/vibration is observed

Note this is for a TXS Hybrid BOV. Non hybrid/non TXS BOV install should be similar to this.
As for backfires it occures when you run rich as you let up on the gas pedal the unburned gas ignites in the exhaust and you hear the pop and possably see a fireball from your muffler... Looks cool but not good for your cats....

Note this is from memory so I may have missed a step or 2...
 
Last edited:
FYI I had to add 4 shims to mine.
Its a very tight fit with the stock airbox but it doesnt hit it while driving
Enjoy your phish noise
you will loose 5-10hp with this mod... Dyno proven on my car...thats the price you pay to have the cool sound...
 
Yes exact same install between the 2....

BTW split off the discussion on BOV power loss to keep this one on topic for How-To..
 
FYI I had to add 4 shims to mine.
Its a very tight fit with the stock airbox but it doesnt hit it while driving
Enjoy your phish noise
you will loose 5-10hp with this mod... Dyno proven on my car...thats the price you pay to have the cool sound...

Do you have the short 80 mm spring? If so, you need more than 4 washers to prevent boost leak. You should call/email TXS for the longer spring then 4 washers will be correct. Did you lube the piston prior to install and again periodically? The TXS BPV needs periodic lube where the OEM diaphram version does not. Your power loss due to BPV makes no sense at all unless you have a problem with it or your dyno runs were not done correctly. I'm not disputing your dyno results, but in either case your results don't make it universally true...
 
Last edited:
Do you have the short 80 mm spring? If so, you need more than 4 washers to prevent boost leak. You should call/email TXS for the longer spring then 4 washers will be correct. Did you lube the piston prior to install and again periodically? The TXS BPV needs periodic lube where the OEM diaphram version does not. Your power loss due to BPV makes no sense at all unless you have a problem with it or your dyno runs were not done correctly. I'm not disputing your dyno results, but in either case your results don't make it universally true...

Wowowowowowow, "washers", "lube"... i dont know how to do n e of that. i thought it was just an easy bolt on mod...no?
 
Wowowowowowow, "washers", "lube"... i dont know how to do n e of that. i thought it was just an easy bolt on mod...no?

Hmmm, the actual installation is two bolts and a vacuum line, but the aftermarket valves require set-up and lubrication for troublefree performance. The aftermarket valves I'm familiar with are piston type which are not simply install and forget like the OEM valve.
 
Hmmm, the actual installation is two bolts and a vacuum line, but the aftermarket valves require set-up and lubrication for troublefree performance. The aftermarket valves I'm familiar with are piston type which are not simply install and forget like the OEM valve.

GREAT im screwed lol thanks a n ways
 
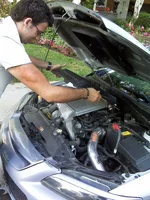
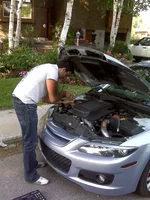
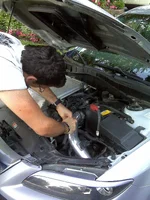
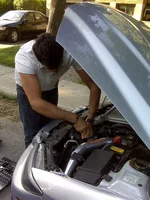
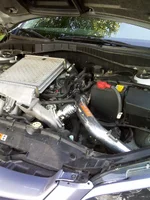
okay took me like 5mins to do but i took pics as i went along. thanks for all ur help guys!
 

Attachments

  • IMG00265.webp
    IMG00265.webp
    342.9 KB · Views: 264
  • IMG00225.webp
    IMG00225.webp
    395.3 KB · Views: 249
  • IMG00266.webp
    IMG00266.webp
    301.1 KB · Views: 254
  • IMG00267.webp
    IMG00267.webp
    301.9 KB · Views: 244
  • IMG00268.webp
    IMG00268.webp
    312.9 KB · Views: 275
Back