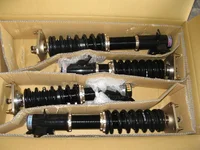
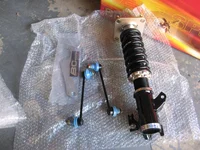
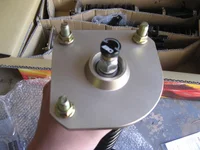
Well, my new BC Suspension came in today. So far, they look sexy. I just took them out of the box, but won't be installing them 'til Friday night.
I'll be doing a whole write-up on the install. The current suspension is TEIN SS, but they're tired and need to be rebuilt here shortly.
-*-*-*-*-*-*-*-*-*-*-*-*-*-*-*-*-*-*-*-*-*-*-
TEIN SS Suspension Specs
Front Spring rate: 6 kg/mm = 336 lb/in
Rear Spring rate: 5 kg/mm = 280 lb/in
16 levels of damping adjustment (clicks for each level)
Pillow ball upper for front only
K-Sport Suspension Specs
Front Spring rate: 9 kg/mm = 504 lb/in
Rear Spring rate: 5/kg/mm = 280 lb/in
36 levels of damping adjustment (no clicks for each level)
Pillow ball upper for front & rear
Camber adjustably for front only
BC Suspension Specs
Front Spring rate: 8kg/mm = 448lb/in
Rear Spring rate: 10kg/mm = 560lb/in
30 levels of damping adjustment (clicks for each level)
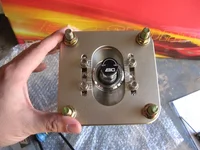
Pillow ball upper for front & rear
Camber adjustably for front only
March 22 - Install and Street Review
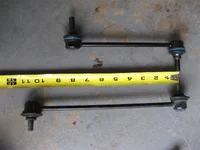
Finished installing the suspension this afternoon. I'm not sure how much of it was this being the 4th time I've done my suspension or it being the BC Coilovers, but this has to have been the easiest install I've done. It was literally 6 or 7 bolts/nuts and the strut was out. All you need is 17mm deeps socket and wrench; 14mm deep socket, shallow socket, and wrench. Having an impact wrench made it much easier. I didn't use the supplied endlinks because I have AWR adjustables for both front and rear. One did rub against the fender wall, but i think that was fixed when some of the camber was taken out at the shop.
After installing the suspension, i dropped the car down to see how much it needed to be lowered. I needed anywhere from 1in. to 2in. depending on the corner. I was told you can do it by loosening the locking nut at the bottom, the spinning the strut body. That ended up being easier said than done. I ended up just disconnecting the strut from the hub (2 17mm bolts) and spinning the lower assembly.
I drove nearly 100 miles today; mixed city and highway. The ride quality was firm, but smooth. Never bouncy. You couldn't tell that I increased the spring rates in the front by over 100lbs/in and doubled the spring rates in the rear. It never felt harsh. Don't get me wrong, it wasn't cushy. When you hit a bump, you felt it, it just wasn't a punch to the kidneys.
When I set the camber plates all the way in, I had -4.2* on the driver side, and -3.2* on the passenger. I had the alignment shop set them both to -3.2* and toe to 0* on all four corners. Everything was going well until they tried to roll the car off the machine. The MSP lip got caught, and ripped the bumper off on the passenger side. The damage was minor, but they may have to replace the bumper if the body shop can't fix it.
A cool fact - When you order the suspension, the struts will be valved so that you can adjust your spring rates +/- 2kg/mm. Meaning if you order a set that come with 6kg springs, you can swap to a 4kg or 8kg w/o having to get the strut re-valved.
Pros:
Ease of install
Quality of parts
Customization of suspension (ie: spring rates, camber, damping)
Ride comfort
Ride height is independent to spring perch
Pillow ball upper mounts for front & rear
Quick turn around in customer service
Making minor adjustments to right height can be done quickly
Cons:
At full camber, there are gaps in the camber plates where water and other debris could potentially come through
Making major adjustments to ride height can be difficult to do quickly
March 30- Autocross Review
Wow. I knew the car would be different, but had no idea. I'm having to relearn how to drive the car fast again. I thought it was twitchy before, but now it can get hairy quick. It's mostly driver error. The car is smooth as long as the driver is smooth. I was use to tossing the car around. With the new setup if you toss it, the car will throw it back at you. Three-wheeling is pretty much eliminated unless you get really out of sorts.
Is this suspension better than what I had before? Yes! It's going to be a learning process for me, though.
April 5 - Street Review
During the autocross I set the rear dampers to 10 (0=soft, 30=hard). During street driving I could really tell a difference in the stiffness of the dampers. Since then, I've set them back to 0. I'm still very happy with the suspension. I plan on raising the front a bit, moving camber to 2.8*, and putting the stock P5 front sway bar back on. I also need to lube where the sway bars attach to the car...they squeak alot right now.
May 23-25 - Autocross Review
AWR Rear Sway Bar:1" from full soft
Tire Pressures: 44F 40R
Camber: -2.7F -1.5R
Toe Out: 1/8F 0R
Dampers: 30F 25R
WOW! After adjusting the tire pressures we started stiffening up the dampers. Using the Kumho 225/50/15 V710 I have the pressures set to 44F/40R to stiffen them up for better turn in, then set the dampers to full stiff in the front and 5 clicks from full stiff in the rear. The car was so neutral. Not once did the car feel pushy or like it was going to snap around, so much different from the last time i race it. The only time the car felt unsettled was when I tried to brake hard with the wheel turned a bit...oops. Again, I'm really happy with the new setup.
Now it's time for the fine tuning. I'm going to have to raise the left rear a smidgen because it's rubbing since the front was raised. I'm also going to look for some more front camber. Even with -2.7 the outer edge was still warmer than the inner edge because of camber lost during cornering (macstrut suspension FTL).
May 25 - Street Review
Driving home with the dampers set to 30F/25R, yes the car was stiff, but not really uncomfortable. I'll probably leave it there and see if it's unbearable.
As far as the strength of the parts: I hit a large hole in the pavement not too long ago and the suspension was undamaged.
May 27 - Street Review
I ended putting the dampers back to full soft. It's not unbearable, but there's no point in having it that stiff for daily driving. Some of the roads I take to work aren't the smoothest.
June 15 - Autocross Review
All settings were the same except for the rear tire pressures. I couldn't remember where we had them set so we ran them at 37. The car sill rotates well. I think the car is pretty well setup as far as suspension tuning. I may try to tighten the rear sway bar a little to help with the rotation. It seems like I'm can't induce the oversteer like I use to (throttle-lift, trail braking). I'm not saying I'm looking for anything snappy, but just be able to call on it when needed.
At the next event I'll be running a staggered setup: 245/45/17 V710 in the front & 225/50/15 V710 in the rear. I'm hoping to gain more front grip with the wider tires. We'll see how the taller gearing affects things.
June 21- Autocross Review
AWR Rear Sway Bar:1" from full soft
Tires: 245/45/17F 225/50/15R
Tire Pressures: 45F 35R
Camber: -2.7F -1.5R
Toe Out: 1/8F 0R
Dampers: 0F 0R
I tried a different tire setup at this event. The staggered setup felt great. I could flat-foot it through some of the slaloms. The only issue I ran into was some rubbing of the tire on the spring perch, but it was only on the driver side. Odd. So I'll be getting some 3mm spacers.
On the way home I realized that I never adjusted the dampers. Thinking back, i did notice that the rears did feel "softer" that I remembered, but the car still handled greatly! I also need to raise the rear another quarter inch and make sure it's even this time. The driver/rear rubs alot, and both were rubbing over the big bump/jump this weekend.
July 9 - Street Review
Tip: Make sure strut threads are clean before trying to raise/lower the car.
I needed to raise the rear about 1/4" to stop the tires from rubbing. The first one was fairly simple. Disconnect the swaybar, loosen the bottom collar bolt, then use the two that are hold the spring to rotate the whole strut. That'll move the lower strut housing. A few turns with the span wrenches and I was done. Move to the other side and repeat. The problem I ran into was I didn't think about the threads that were hanging out below the lower strut body. When i started to spin the strut, dirt got into the threads causing the whole thing to seize up. It wouldn't move up or down! I ended up having to disconnect it from the knuckle, and use a 10" 3/8 extension to get enough leverage to spin the lower strut body down to the height I needed. Good thing I'm getting an alignment today (Thursday) because I just lost all my camber in the rear...
June 13 - Annual Review
So it's been over a year since the install of the suspension. I have made any changes to the ride height, but have set the damper to 5 F/R for street use. I'm not sure of the cause, but I am getting tire wear patterns indicating the rear struts are no long damping the springs. I've contacted BC Racing about this, and they are working with me to get it resolved. The customer service is great!! I will actually be going to a softer rear spring rate. These 10k springs are rough over speed bumps. My plan is to go with the 8k strut insert and run 6k springs. That will give me the option to use the 10k springs if I autocross the car again. That being said, I think 2008 is going to be the last season that Betty will have been autocrossed. She's been a real trooper, but I think she deserves some time to relax.
I'll be doing a whole write-up on the install. The current suspension is TEIN SS, but they're tired and need to be rebuilt here shortly.
-*-*-*-*-*-*-*-*-*-*-*-*-*-*-*-*-*-*-*-*-*-*-
TEIN SS Suspension Specs
Front Spring rate: 6 kg/mm = 336 lb/in
Rear Spring rate: 5 kg/mm = 280 lb/in
16 levels of damping adjustment (clicks for each level)
Pillow ball upper for front only
K-Sport Suspension Specs
Front Spring rate: 9 kg/mm = 504 lb/in
Rear Spring rate: 5/kg/mm = 280 lb/in
36 levels of damping adjustment (no clicks for each level)
Pillow ball upper for front & rear
Camber adjustably for front only
BC Suspension Specs
Front Spring rate: 8kg/mm = 448lb/in
Rear Spring rate: 10kg/mm = 560lb/in
30 levels of damping adjustment (clicks for each level)
Pillow ball upper for front & rear
Camber adjustably for front only
March 22 - Install and Street Review
Finished installing the suspension this afternoon. I'm not sure how much of it was this being the 4th time I've done my suspension or it being the BC Coilovers, but this has to have been the easiest install I've done. It was literally 6 or 7 bolts/nuts and the strut was out. All you need is 17mm deeps socket and wrench; 14mm deep socket, shallow socket, and wrench. Having an impact wrench made it much easier. I didn't use the supplied endlinks because I have AWR adjustables for both front and rear. One did rub against the fender wall, but i think that was fixed when some of the camber was taken out at the shop.
After installing the suspension, i dropped the car down to see how much it needed to be lowered. I needed anywhere from 1in. to 2in. depending on the corner. I was told you can do it by loosening the locking nut at the bottom, the spinning the strut body. That ended up being easier said than done. I ended up just disconnecting the strut from the hub (2 17mm bolts) and spinning the lower assembly.
I drove nearly 100 miles today; mixed city and highway. The ride quality was firm, but smooth. Never bouncy. You couldn't tell that I increased the spring rates in the front by over 100lbs/in and doubled the spring rates in the rear. It never felt harsh. Don't get me wrong, it wasn't cushy. When you hit a bump, you felt it, it just wasn't a punch to the kidneys.
When I set the camber plates all the way in, I had -4.2* on the driver side, and -3.2* on the passenger. I had the alignment shop set them both to -3.2* and toe to 0* on all four corners. Everything was going well until they tried to roll the car off the machine. The MSP lip got caught, and ripped the bumper off on the passenger side. The damage was minor, but they may have to replace the bumper if the body shop can't fix it.
A cool fact - When you order the suspension, the struts will be valved so that you can adjust your spring rates +/- 2kg/mm. Meaning if you order a set that come with 6kg springs, you can swap to a 4kg or 8kg w/o having to get the strut re-valved.
Pros:
Ease of install
Quality of parts
Customization of suspension (ie: spring rates, camber, damping)
Ride comfort
Ride height is independent to spring perch
Pillow ball upper mounts for front & rear
Quick turn around in customer service
Making minor adjustments to right height can be done quickly
Cons:
At full camber, there are gaps in the camber plates where water and other debris could potentially come through
Making major adjustments to ride height can be difficult to do quickly
March 30- Autocross Review
Wow. I knew the car would be different, but had no idea. I'm having to relearn how to drive the car fast again. I thought it was twitchy before, but now it can get hairy quick. It's mostly driver error. The car is smooth as long as the driver is smooth. I was use to tossing the car around. With the new setup if you toss it, the car will throw it back at you. Three-wheeling is pretty much eliminated unless you get really out of sorts.
Is this suspension better than what I had before? Yes! It's going to be a learning process for me, though.
April 5 - Street Review
During the autocross I set the rear dampers to 10 (0=soft, 30=hard). During street driving I could really tell a difference in the stiffness of the dampers. Since then, I've set them back to 0. I'm still very happy with the suspension. I plan on raising the front a bit, moving camber to 2.8*, and putting the stock P5 front sway bar back on. I also need to lube where the sway bars attach to the car...they squeak alot right now.
May 23-25 - Autocross Review
AWR Rear Sway Bar:1" from full soft
Tire Pressures: 44F 40R
Camber: -2.7F -1.5R
Toe Out: 1/8F 0R
Dampers: 30F 25R
WOW! After adjusting the tire pressures we started stiffening up the dampers. Using the Kumho 225/50/15 V710 I have the pressures set to 44F/40R to stiffen them up for better turn in, then set the dampers to full stiff in the front and 5 clicks from full stiff in the rear. The car was so neutral. Not once did the car feel pushy or like it was going to snap around, so much different from the last time i race it. The only time the car felt unsettled was when I tried to brake hard with the wheel turned a bit...oops. Again, I'm really happy with the new setup.
Now it's time for the fine tuning. I'm going to have to raise the left rear a smidgen because it's rubbing since the front was raised. I'm also going to look for some more front camber. Even with -2.7 the outer edge was still warmer than the inner edge because of camber lost during cornering (macstrut suspension FTL).
May 25 - Street Review
Driving home with the dampers set to 30F/25R, yes the car was stiff, but not really uncomfortable. I'll probably leave it there and see if it's unbearable.
As far as the strength of the parts: I hit a large hole in the pavement not too long ago and the suspension was undamaged.
May 27 - Street Review
I ended putting the dampers back to full soft. It's not unbearable, but there's no point in having it that stiff for daily driving. Some of the roads I take to work aren't the smoothest.
June 15 - Autocross Review
All settings were the same except for the rear tire pressures. I couldn't remember where we had them set so we ran them at 37. The car sill rotates well. I think the car is pretty well setup as far as suspension tuning. I may try to tighten the rear sway bar a little to help with the rotation. It seems like I'm can't induce the oversteer like I use to (throttle-lift, trail braking). I'm not saying I'm looking for anything snappy, but just be able to call on it when needed.
At the next event I'll be running a staggered setup: 245/45/17 V710 in the front & 225/50/15 V710 in the rear. I'm hoping to gain more front grip with the wider tires. We'll see how the taller gearing affects things.
June 21- Autocross Review
AWR Rear Sway Bar:1" from full soft
Tires: 245/45/17F 225/50/15R
Tire Pressures: 45F 35R
Camber: -2.7F -1.5R
Toe Out: 1/8F 0R
Dampers: 0F 0R
I tried a different tire setup at this event. The staggered setup felt great. I could flat-foot it through some of the slaloms. The only issue I ran into was some rubbing of the tire on the spring perch, but it was only on the driver side. Odd. So I'll be getting some 3mm spacers.
On the way home I realized that I never adjusted the dampers. Thinking back, i did notice that the rears did feel "softer" that I remembered, but the car still handled greatly! I also need to raise the rear another quarter inch and make sure it's even this time. The driver/rear rubs alot, and both were rubbing over the big bump/jump this weekend.
July 9 - Street Review
Tip: Make sure strut threads are clean before trying to raise/lower the car.
I needed to raise the rear about 1/4" to stop the tires from rubbing. The first one was fairly simple. Disconnect the swaybar, loosen the bottom collar bolt, then use the two that are hold the spring to rotate the whole strut. That'll move the lower strut housing. A few turns with the span wrenches and I was done. Move to the other side and repeat. The problem I ran into was I didn't think about the threads that were hanging out below the lower strut body. When i started to spin the strut, dirt got into the threads causing the whole thing to seize up. It wouldn't move up or down! I ended up having to disconnect it from the knuckle, and use a 10" 3/8 extension to get enough leverage to spin the lower strut body down to the height I needed. Good thing I'm getting an alignment today (Thursday) because I just lost all my camber in the rear...
June 13 - Annual Review
So it's been over a year since the install of the suspension. I have made any changes to the ride height, but have set the damper to 5 F/R for street use. I'm not sure of the cause, but I am getting tire wear patterns indicating the rear struts are no long damping the springs. I've contacted BC Racing about this, and they are working with me to get it resolved. The customer service is great!! I will actually be going to a softer rear spring rate. These 10k springs are rough over speed bumps. My plan is to go with the 8k strut insert and run 6k springs. That will give me the option to use the 10k springs if I autocross the car again. That being said, I think 2008 is going to be the last season that Betty will have been autocrossed. She's been a real trooper, but I think she deserves some time to relax.
Last edited:


")
")