update: i went in to try and see if i could remove my broken bolt, NO CHANCE. it's stuck and another one of my bolts is stripped just pass the nut, so trying to take that other bolt off would mean completely ruining that nut and bolt as well. so going to just buy 3 replacements and take to a professional. same question, anyone no FOR SURE what replacement bolts i need, prefferable allen head????
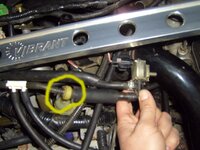
also, since my efforts were stuck there, i went to clean my EGR, that sucked. took about any hour, just had a hard time getting enough space to turn my wrench, went under the car to get one of the bolts out. BUT, it did turn out to be worth it. car idles very smooth, throttle response even feels better. So i think all i need to do now is convert my CAI to SRI, and replace my primary 02 sensor.
thanks for listening.
")
I went down the same road, new upper O2 sensor, new EGR, etc..
If you are getting a P0171 (Bank 1 lean), don't discount a weak or worn out fuel pump or fuel pump assembly.
I had been dealing with that code (and a P0300 - Random multiple misfire) for over a year. Turned out the pump and a gasket on the output side of the pump were toast. Replaced pump and gasket - CEL vanished in 50 miles. And the car is running 100% better.
It's the first time in over a year I've gone more than a week without a CEL.
If you decide to check the pump...
Pump access is under the back seat. Remove the back seat with a quick "yank" upwards from the middle front of the seat. It's only held in with clips. If it's never been removed, it might be a hard yank.
Removing the pump can be a simple 30 minute or less job if you take a few precautions. Once the seat is out remove the cover over the pump and disconnect the electrical connections. You might also want to clear most of the pressure on the fuel lines by cranking the car over for just a few seconds. After that, remove the gas cap to relieve any pressure in the fuel tank.
The 9 phillips head screws holding the pump in are crap. (Many posts here about that) They will likely be rusted in place. Soak each one in a dab of WD-40 overnight before trying to remove them. Have a impact driver handy along with a rubber mallet. The screws will come lose with one gentle-to-moderate "whack". I tossed mine and picked up some nice stainless hex head bolts to replace them.
Before you unscrew the pump...remove the fuel lines!
Removing the fuel lines from the pump is very easy if you have two small jewelers flathead screwdrivers. Come in from the "open" end of the lines and
gently pry back (about 1/8" or less of "pry" is required) the two little greenish/yellow tabs that keep the lines secured to the pump, while at the same time pushing back away from the pump to slide the lines off. The prying back of tabs allows the line to slide over the locking ring on the pump line when you push back. A little grace is required for this operation.
Once the lines are off, proceed with removing the screws. You should cover the lines with a sandwich baggie or something to prevent any debris from accidently getting in the lines while you are working around them. You might also take a shop vac to the area around the pump before working. Mine was very sandy and dirty. Also, old newspaper or a sheet spread out around the work area will keep dripping gas off your carpet.
Carefully lift the pump out of the tank! Be sure to not hang up or break the float arm for the tank level sending unit, otherwise a $100 repair will turn into a $400 repair.
On the bottom of the pump assembly there is a large white clip which holds the pump and fuel strainer in place. Carefully pry off this clip and the pump will slide right out. Disconnect the electrical connector from the top of the pump. On the output side of the pump there is a "tall" rubber gasket. Examine the condition. Mine fell into bits..
Installing a new pump is the reverse of removal. Make careful note of the gaskets. Make sure you install a new strainer, some pump kits don't come with one. When I put the pump back in, I had to top off the tank to get the float to "wake up". (Gas gauge will read E if it's hung up).
Note: I was going to do a nice post about this with pics, but I didn't want my gas covered hands all over my nice new camera. :/
-Lyserjic
SpicyO #1291