Darth Vader
Member
Those of you looking to shorten shift throw without cutting into anything stock, or adding a midget short shifter, I got a plan.
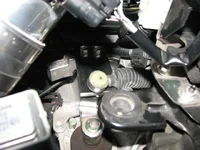
Following on the obscenely expensive Jazzy shift plate, hovering around $105 for a cut out of aluminum with some holes punched in it, I decided to make my own. I've even improved on the idea by incorporating a shift throw length adjustment! (we'll see how that works)
I'm making it out of old 1/4 steel plate, because I have some scraps and, here's the kicker: After my production run of...one... is concluded and I have determined success or failure, I'll provide dimensions and specs to anyone who wants them, free.
How this works is the old fulcrum crap you learned in Grade school. If you shorten the distance between the pivot point and the end of the lever, you shorten the throw, at the expense of added effort. Any short shifter is using the same principle, as is the Jazzy plate.
Technology involved for me? A 4-1/2 inch grinder with a cut-off wheel, a drill press, a vise, a few drill bits and a tap but, at a pinch, a hand drill and a hacksaw is all you really need.
I'm not looking for another business opportunity, I got plenty to do but, I can't stand seeing people get bent over for something so stupid easy to make.
")