
Just in case it helps anyone else...
Very easy job for anyone who manages to puncture their bumper and put a hole or crack into the reservoir, which sits just ahead of the RF wheel. Not counting getting tools together and cleaning up, should be less than an hour.
Vehicle was a 2012 Mz5 GT 6-speed.
Tools required are 8mm and 10mm sockets, a flathead screwdriver, something to support the bumper cover, and the means to jack and remove the RF wheel.
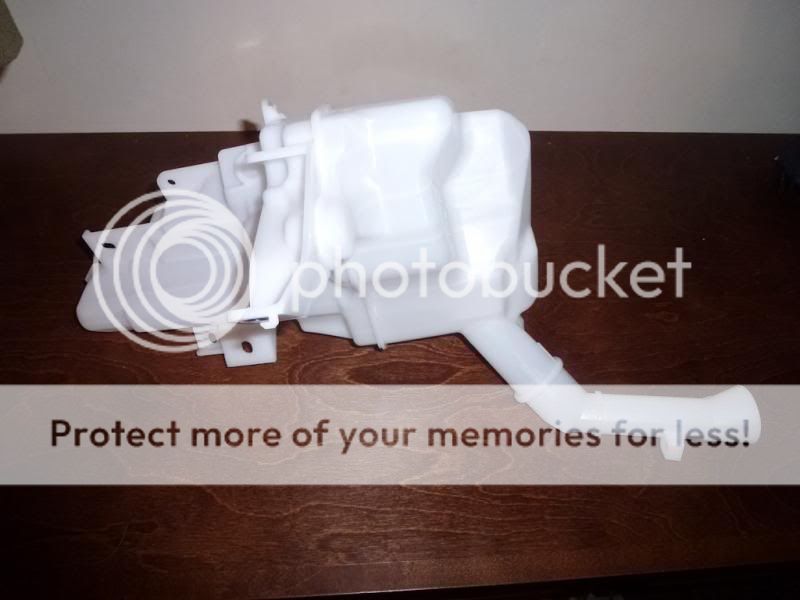
Part number on the invoice for the new tank was: BBM5-67-481A; unfortunately, I didn't check against the number on the tank itself. Number on my old tank is BBM5-67-480. Here's a part reference FWIW:
http://www.oemmazdaparts.com/parts-...gas/body-hardware/wiper-and-washer-components
List price was CDN$49.42, though I was able to get shop cost at $38.05.
TLDR: Remove wheel and move wheel liner out of the way; loosen but don't remove bumper cover; disconnect ancillaries on reservoir and remove; transfer ancillaries to new tank and reinstall.
Details:
I'll add some pics when I get a chance.
Very easy job for anyone who manages to puncture their bumper and put a hole or crack into the reservoir, which sits just ahead of the RF wheel. Not counting getting tools together and cleaning up, should be less than an hour.
Vehicle was a 2012 Mz5 GT 6-speed.
Tools required are 8mm and 10mm sockets, a flathead screwdriver, something to support the bumper cover, and the means to jack and remove the RF wheel.
Part number on the invoice for the new tank was: BBM5-67-481A; unfortunately, I didn't check against the number on the tank itself. Number on my old tank is BBM5-67-480. Here's a part reference FWIW:
http://www.oemmazdaparts.com/parts-...gas/body-hardware/wiper-and-washer-components

List price was CDN$49.42, though I was able to get shop cost at $38.05.
TLDR: Remove wheel and move wheel liner out of the way; loosen but don't remove bumper cover; disconnect ancillaries on reservoir and remove; transfer ancillaries to new tank and reinstall.
Details:
- Jack up the RF and remove the wheel
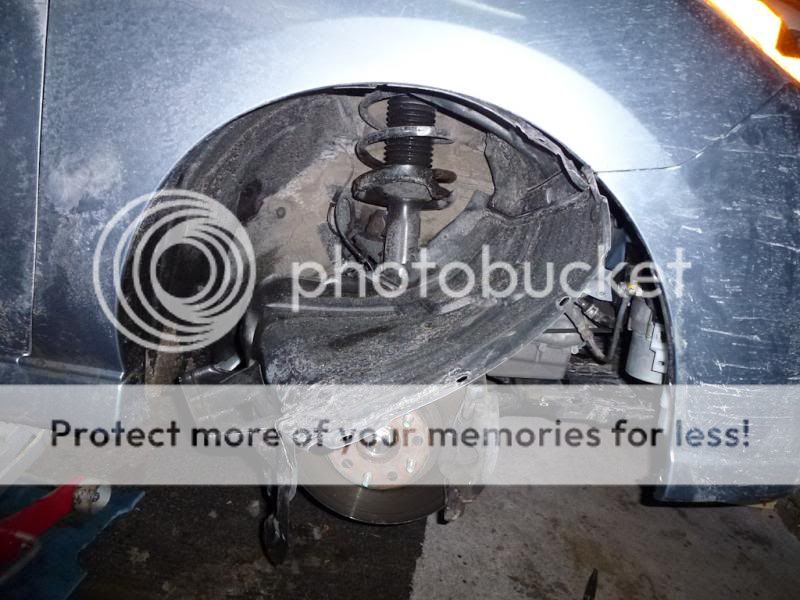
- Remove all wheel liner push clips located in front of the suspension (it's not necessary to completely remove the liner, just undo it enough to bend it out of the way, around the brake disc; don't worry, you won't crease or break the liner, even at cold temps); see image below. Remove the push clips by using a small flat head and popping out the center "stud"; they come off very easily.
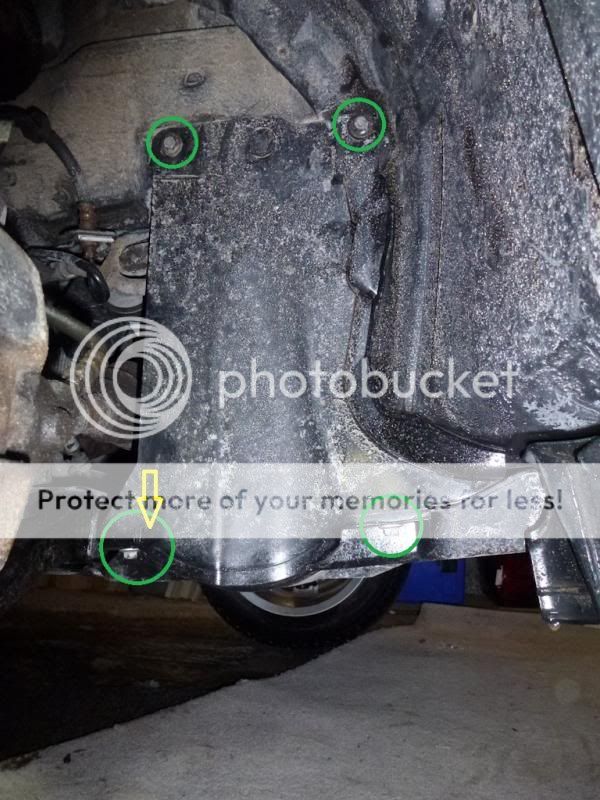
- Remove the 4 bolts (10mm; 2 on top, 2 underneath; green circles in image below) that hold the small vertical splash shield on the back side of the wheel well. There is a small plastic tab in the bottom left of this shield (yellow arrow in image); wiggle it around a bit to get it out.
- Remove the bumper retaining screw (8mm or Philips) at the fender edge, where the bumper cover meets the sheet metal.
- Remove all skid plate screws (8mm or Philips) along the bottom of the bumper cover. To be safe, remove the all, though you probably don't need to take out the last 3 on the driver side, which hold a separate piece of the skidplate. At this point you should now be able to bend the wheel liner out of the way as well.
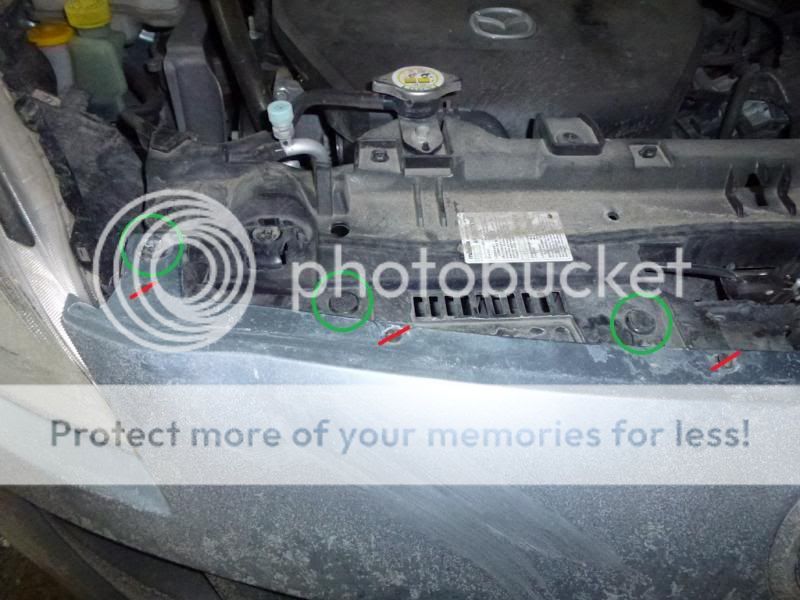
- Remove the 2 large-flanged bolts (10mm) that anchor the bumper cover under the hood (just to the inside of each headlight).
- Remove the 4 large-ish push clips located just *behind* the bumper cover, not the tiny little ones that are actually in the bumper cover. There are 2 on each side of the hood latch. You do not need to remove the small push clips (red lines in the image).
- Place something that will support the front bumper as you pull it off the RF corner; you are not removing the bumper, just moving it out of the way a bit.
- Gently pull the bumper cover away from the body at wheel well and continue to pull (or push a bit from the inside) along under the light. It will "unclip" and move very easily. Just move it enough that you'll be able to get an arm down between the cover and the washer fluid reservoir.
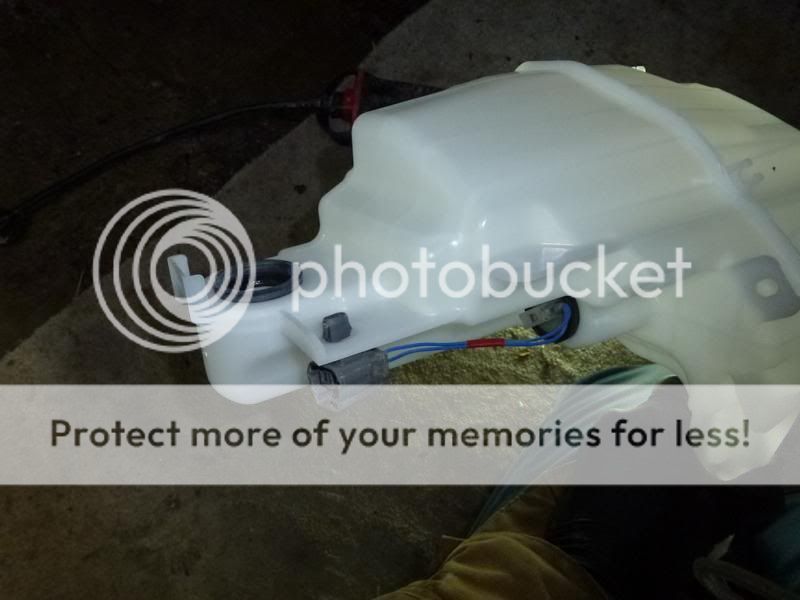
- There are 2 electrical connectors on the washer tank (pump, level sensor); disconnect them first (squeeze the plug and connector together while pressing the small tab, then pull apart).
- There are 2 bolts and 1 nut (all 10mm) holding on the tank; two can be had from the wheel well, the third from above or below on the front side of the tank.
- Unclip whatever fluid tubes you can reach, making a mental note of how they are routed (for the most part they fall naturally to where the clips are when you put the new tank in).
- Unclip the wiring harness from the tank - squeeze the clip tabs together wih a pair of pliers and push through the mounting hole. I used a pair of 45^ long-handled needlenose pliers. There are 2 clips for the harness. Unclip the connector for the level sensor when you have the tank out of the car.
I'm presuming your reservoir is empty at this point... if not, empty it... since you're replacing it anyway, just drill a hole in the bottom and drain into a bucket, or be prepared to catch the fluid when you pop out the pump, or suction out from the top.
- Gently pry out the pump from its rubber bung; use a flat head screwdriver to gently pry/pull against the two tabs you'll see at the bottom of the pump. You should be able to get it started with the screwdriver and finish pulling it out by hand. Just be careful of the bung - don't try to pry aginst the bung, as you could puncture or crimp it. The new tank is nude; you'll need to reuse the bungs. The level sensor can be pried out when you have the tank out of the car.

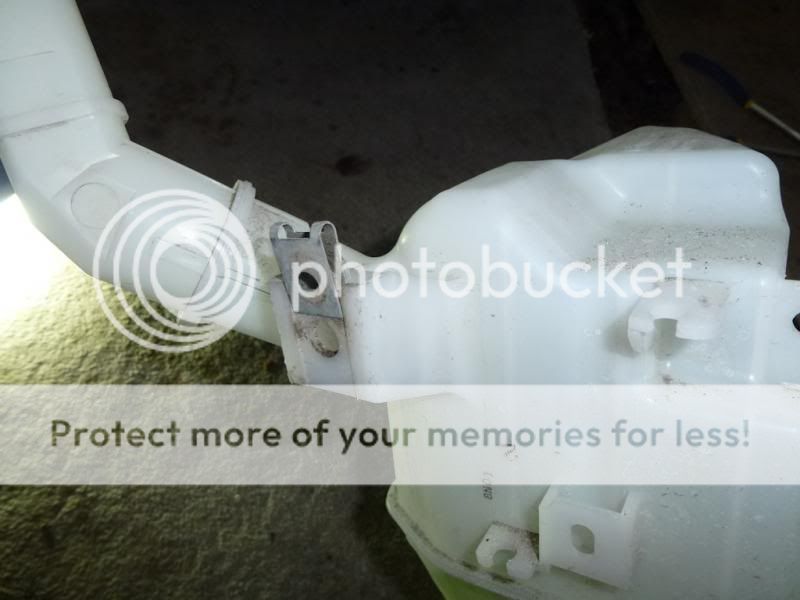
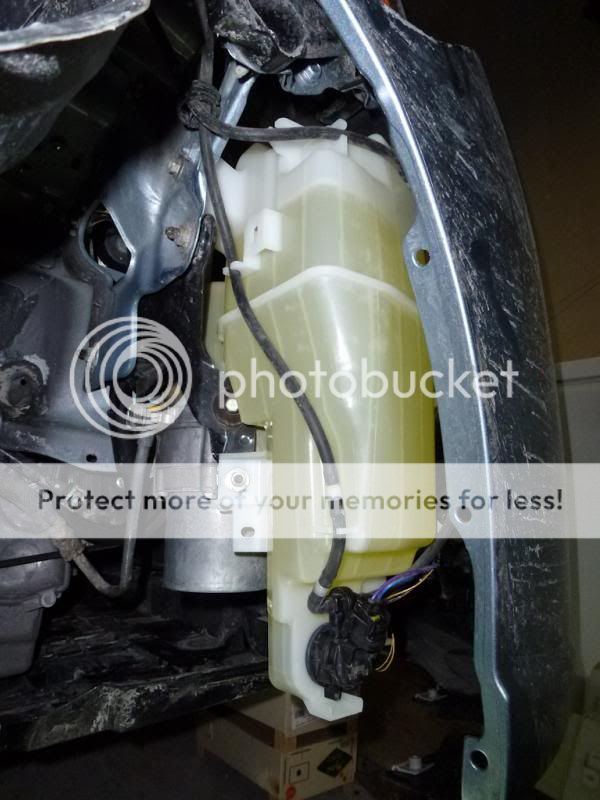
- With nothing else connected to the tank, you can lower and wiggle it out of the car. Note that it is clipped to the power steering fluid reservoir near the filler.
- With the old tank out of the car, transfer parts onto the new tank: clipped connector and level sensor with bung (see first image below), the bung for the pump, and the top speed clip (note orientation; see second image below).
- Position new tank in car, insert pump, clip on hoses and electrical connectors and wiggle into position, being sure to line up with the clip for the power steering reservoir.
- Reassemble.


I'll add some pics when I get a chance.
Last edited:


