You are using an out of date browser. It may not display this or other websites correctly.
You should upgrade or use an alternative browser.
You should upgrade or use an alternative browser.
COBB turbo inlet install..
- Thread starter R3B
- Start date
mazdaspeed32007
Member
- :
- Mazdaspeed3
it was easy with the proper tools. remove your battery box and battery, remove your stock inlet and tubes attached, install new one. i thought it was super easy. the only part i had a "problem" with was getting the recirc hose to fit over the metal piece. other than that total install with a s*** break was about 45 minutes for me. good luck! oh, long screw drivers helped get the clamps that were in wierd spots.
AutoEuphoria
Member
- :
- '08 CPW Mazdaspeed 3
I thought the turbo inlet install was pretty straight forward and easy. Hardest part is making sure the coupler that attaches to the turbo is on all the way and secured tightly.
other than that total install with a s*** break was about 45 minutes for me.
Question: was the s*** one of those oh-****-I'm-turtling-bad ones that only takes five minutes, or was it a oh-****-I'm-giving-birth-to-twin-woolly-mammoths-honey-give-me-a-pillow-and-blanket-I'll-be-here-all-night? This is important, I need to know how much time to set aside for the install.
The install isn't bad. Get long screw drivers or ratchet extensions. Also for those inlets that require you to swap boost control solenoid hoses, I used a vacuum hose connector from the new inlet to the exhisting solenoid hose. I did this to avoid accidentally breaking the plastic nipple off of the solenoid as many people reported doing.
mazdaspeed32007
Member
- :
- Mazdaspeed3
...nipple...
(boobs)
you could have left it as "plastic nipple" too!!!!
Wheres the fun in that ?
Question: was the s*** one of those oh-****-I'm-turtling-bad ones that only takes five minutes, or was it a oh-****-I'm-giving-birth-to-twin-woolly-mammoths-honey-give-me-a-pillow-and-blanket-I'll-be-here-all-night? This is important, I need to know how much time to set aside for the install.
GREAT question although the pillow and blanket are normally substituted for a newspaper. Not for reading... but rather for something to roll up and bite.
mazdaspeed32007
Member
- :
- Mazdaspeed3
it started ok...then got out of hand and turned into my s*** as the main agenda.
Always seems to come down to that, doesn't it?
I'll make sure to remember to add some mention of a dump or something if I ever post an install write-up here. Maybe we can start a trend that defines the community at mazdas247.
Other mazda forums take note, we don't just talk tech over here, we talk tech AND poopy and pee pee.... at the same time no less.
On second thought.
mazdaspeed32007
Member
- :
- Mazdaspeed3
the new slogan.
MAZDA24/7.....when you say mazda, youve got it all.....except for poop.
budweirser may have a problem with that. idk.
MAZDA24/7.....when you say mazda, youve got it all.....except for poop.
budweirser may have a problem with that. idk.
MS3JamOnIt
Member
- :
- 2007 Mazdaspeed3
Code:
i heard it was a pain to get in, does it come with directions like the sri? and does anyone have any tips to make the process easier?I installed my Cobb intake last weekend. It took me 30 minutes to take everything out and one and half hours to install the Cobb and to make sure everything is fine. I have only done a few simple mods on cars and I found this one not difficult. I just went slow. The only problem I had is when I went to take out the OEM intake I forgot to take out the little tube near the turbo that connects to the top of the inlet before I started to pull on the intake and luckily I saw it and disconnected it from the intake. I have heard that they break where it connects to the other side. I also took the tube off at the OEM BOV, I had to do it because I could not get the other side of the tube on the Cobb intake, the steel pipe on the Cobb intake is larger than the inside of the tube, so I took it off at the BOV to get it on the Cobb first. I also lightly oiled the inside of the Cobb intake to get it on the turbo and lightly oiled the inside of the CAI tubes to get them on the intake.
I like the intake, not sure if I gained any HP. It's not as loud as the OEM intake, but it seems and sounds like it belongs there. I'm glad I did it. Some people have had a problem with the Cobb intake being loose because it's not connected to the bracket, but mine so far is nice and tight and not rattling and it's connected to my Mazdaspeed CAI.
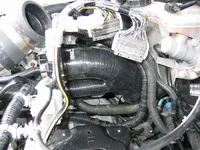
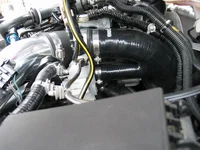
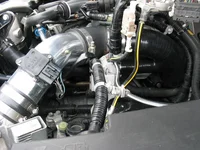
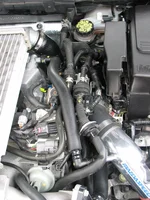
While I had the battery tray out I checked the transmission mount and bolt and it's fine, the bolt is tight and nothing is loose or cracked on the mount. I attached some photos of the install.
Attachments
New Posts and Comments
- Replies
- 5
- Views
- 283
- Replies
- 257
- Views
- 149K
- Replies
- 48
- Views
- 8K
- Replies
- 178
- Views
- 15K


