I made a short video showing the sound my car was making. After doing the steering test, I was 95% sure that it was my bearing that was bad. (note the speedometer is in km/hr)
Just click on the picture below.

I read about bearing replacement on these two threads:
http://www.mazdas247.com/forum/show...tege-Front-Wheel-Bearing-Service-LOTS-OF-PICS
http://www.mazdas247.com/forum/showthread.php?123746487-How-To-Wheel-Bearing-Replacement
I decided to go ahead and try to do the job myself. I didn't know which bearing was bad so I lifted up the front end of my car to spin the wheels and hubs and check for wobble and grind but I couldn't detect any. I decided to start the car with the wheels in the air, put it in 5th and let it idle. It was then very apparent that the noise was coming from the drivers side.
I fully expected a nightmare of a job so I only ordered one new bearing (free shipping anyway). I ordered it off E-Bay on Tues. and got it on Fri.
I figured I was going to have to take the knuckle to a machine shop to have the bearings pressed (after seeing all the problems in the how-to's) but thought I'd give it a try anyway. (I don't have a press)
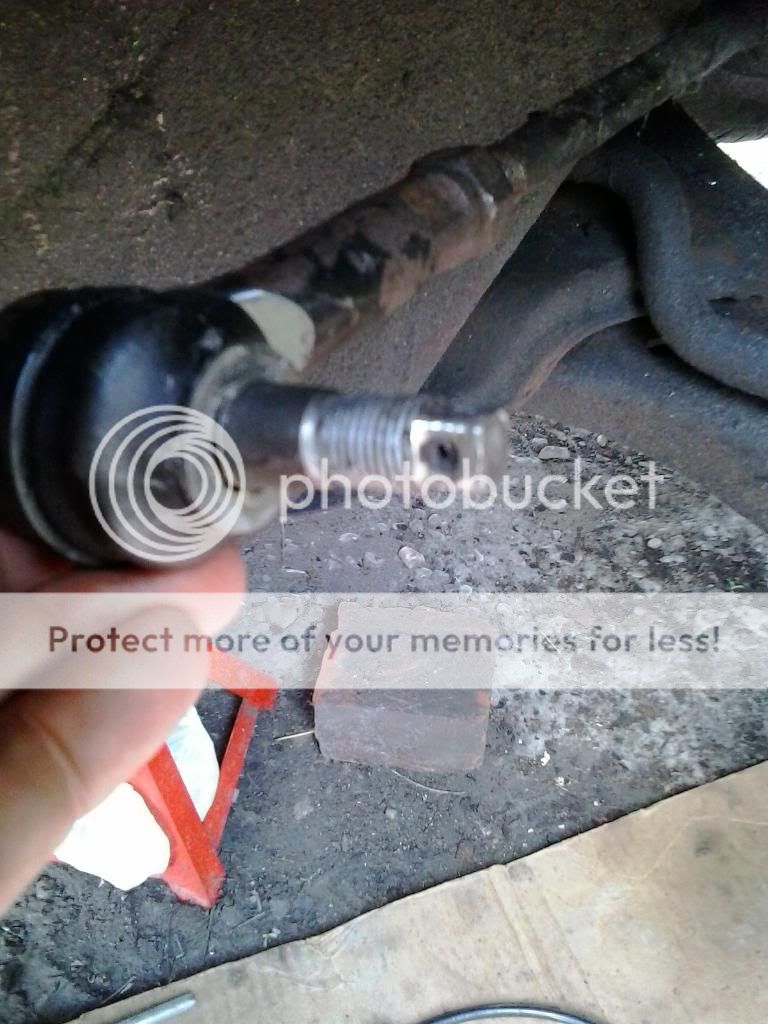
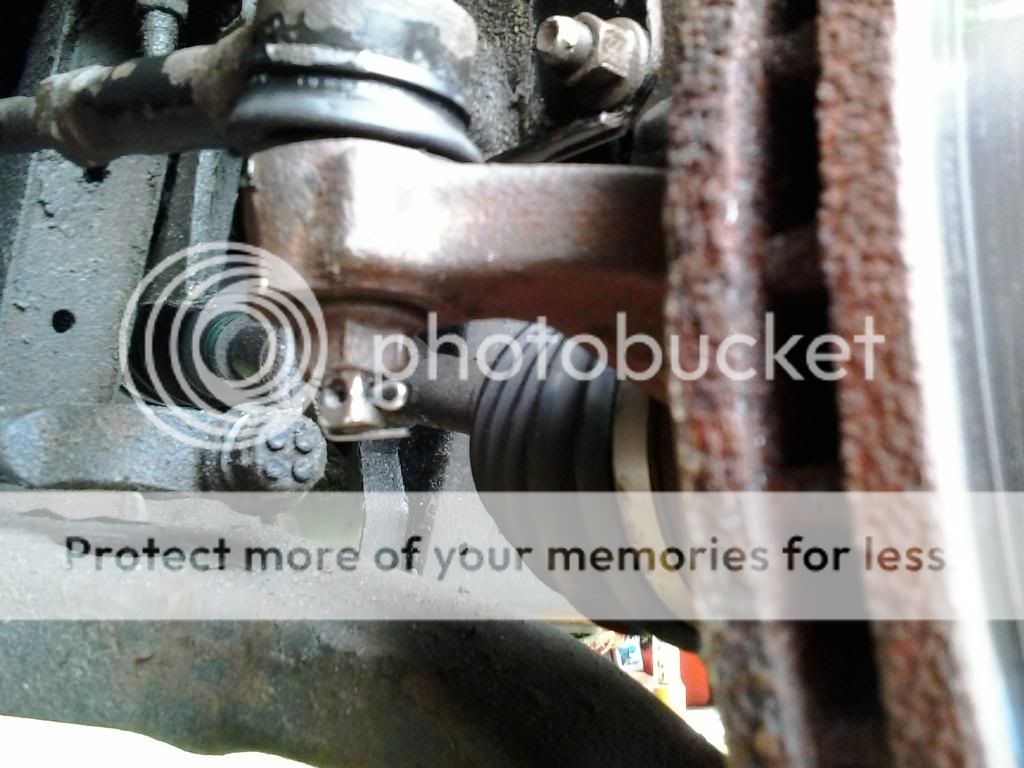
My first problem was rounding off the 14mm nut on the ball joint bolt but managed to hammer on a 13mm and get it removed but after that everything went extremely smooth. I removed the nut on the tie rod end and reversed it so I could more safely pound on it and the tie rod popped right off.
My axle nut came off with my 3/4" drive ratchet with a 6 foot bar on it but I didn't need to jump on it like other guys in the how-to's. My axle came out of the hub with just a few hits from the sledge hammer. I found the sledge hammer worked better with it's extra weight,.. you don't have to wind up as much as with a regular hammer and it didn't seem to damage things as much.
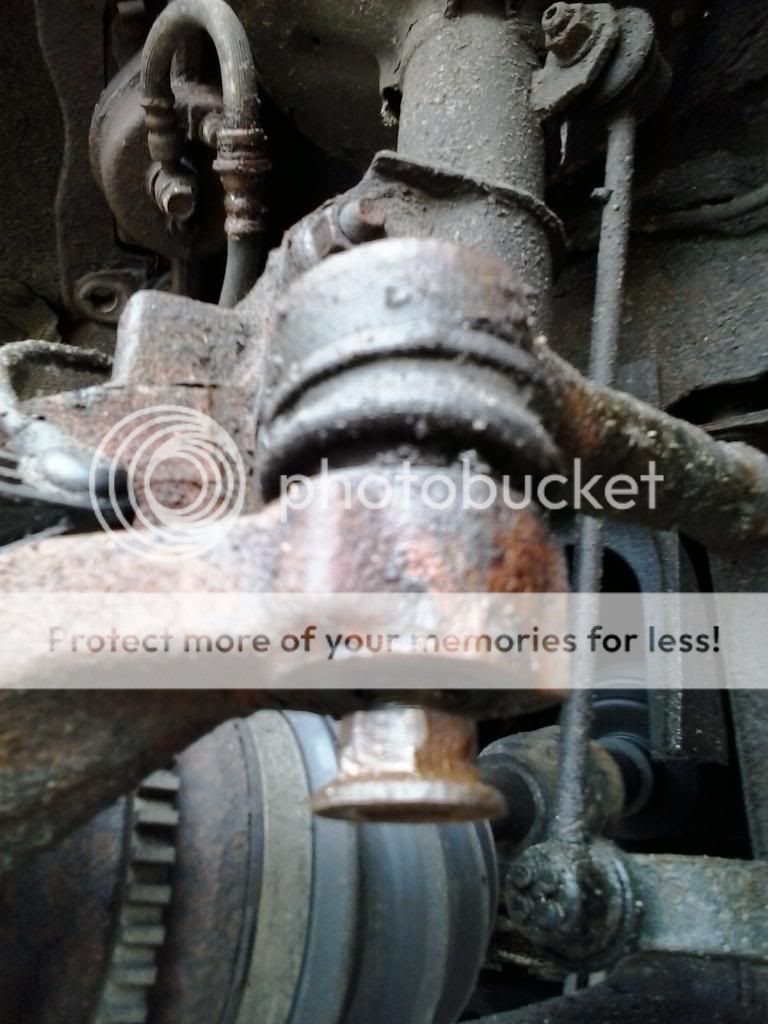
Then there was the ball joint stud but a chisel hammered in the crack opened it up enough to get it off.
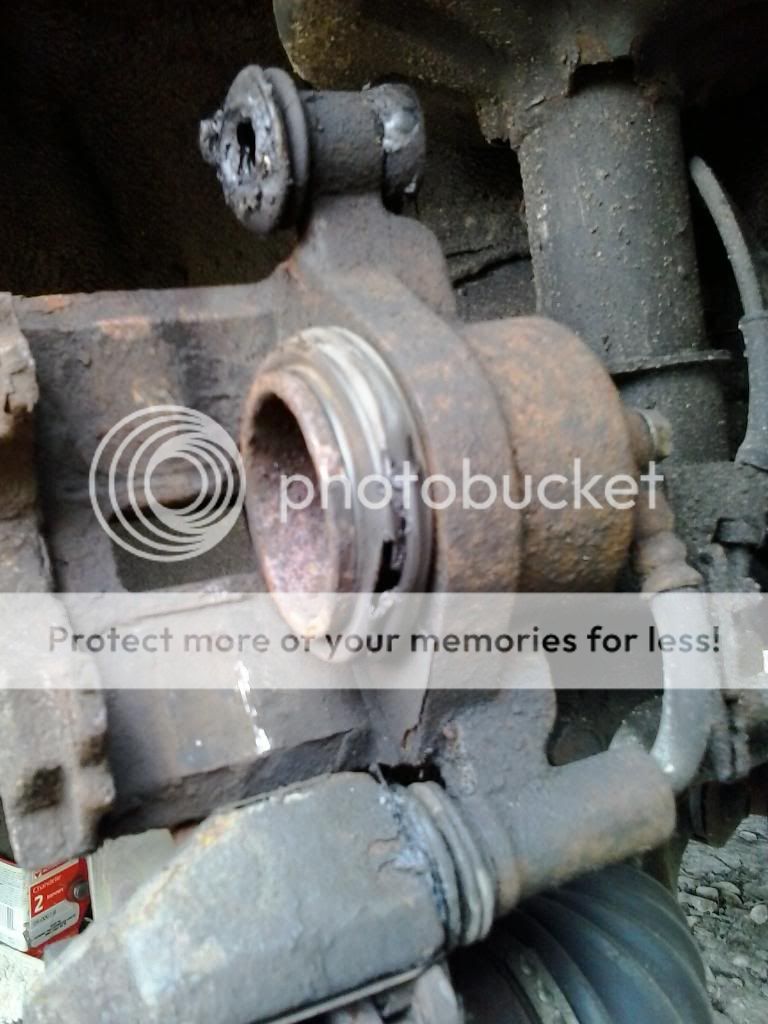
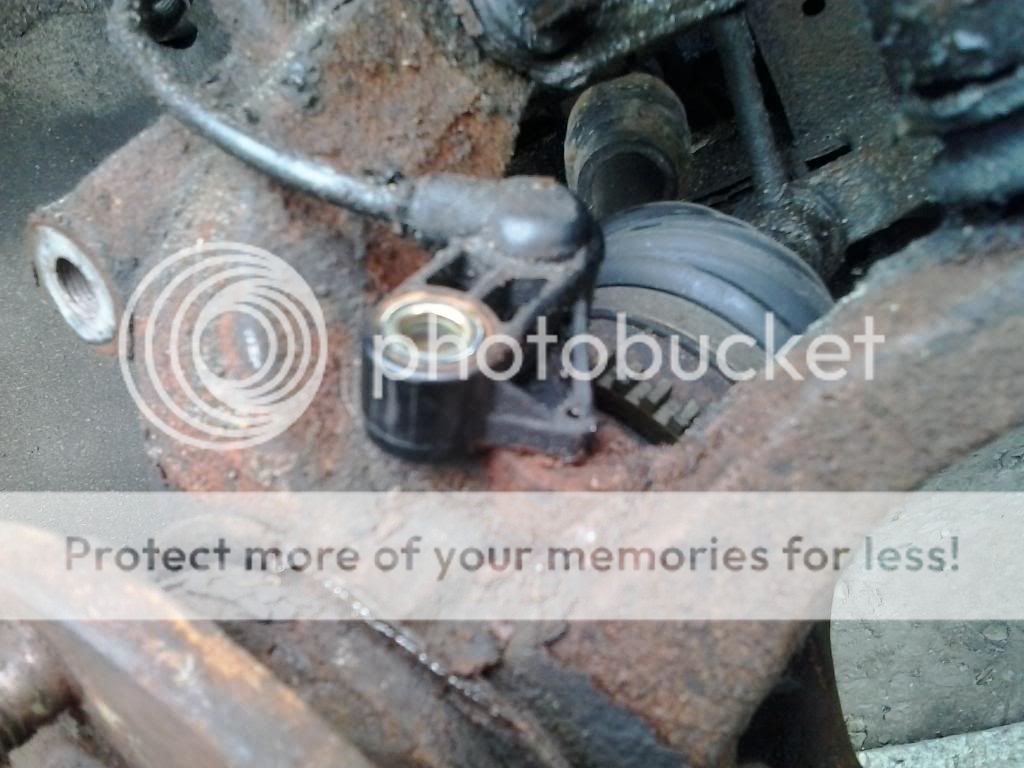
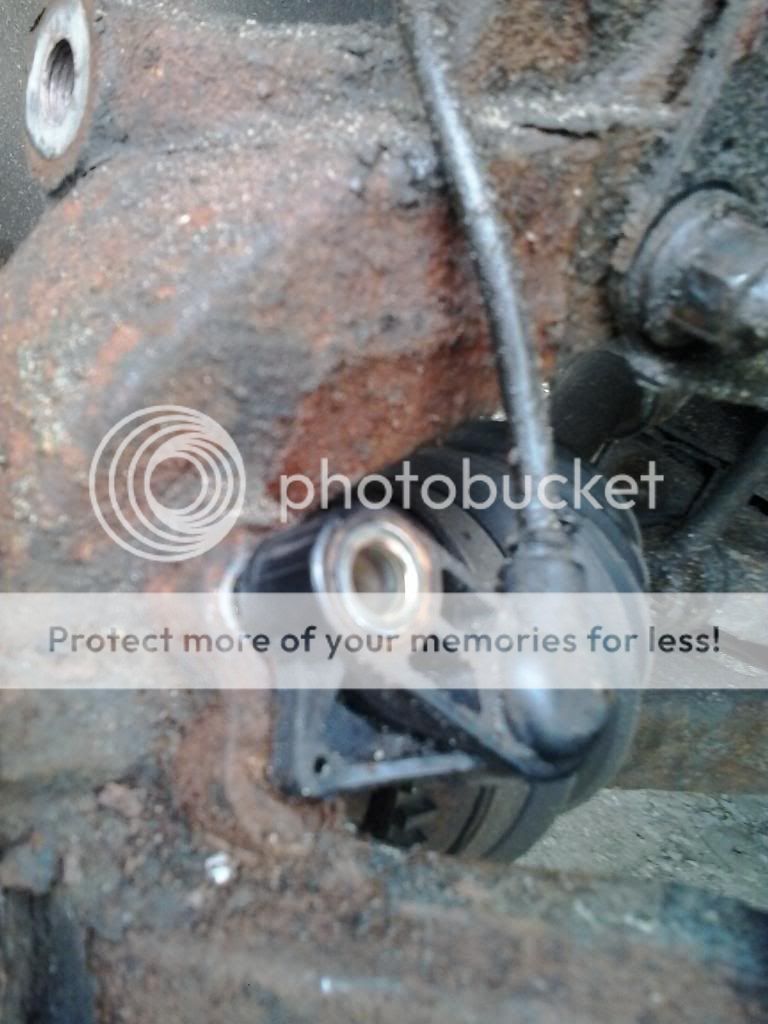
There was also the issue with the wheel speed sensor,... it has a bolt and a plastic alignment pin and the pin was rusted in pretty good. I removed the bolt and wobbled the sensor back and forth to loosen it without breaking the tab.
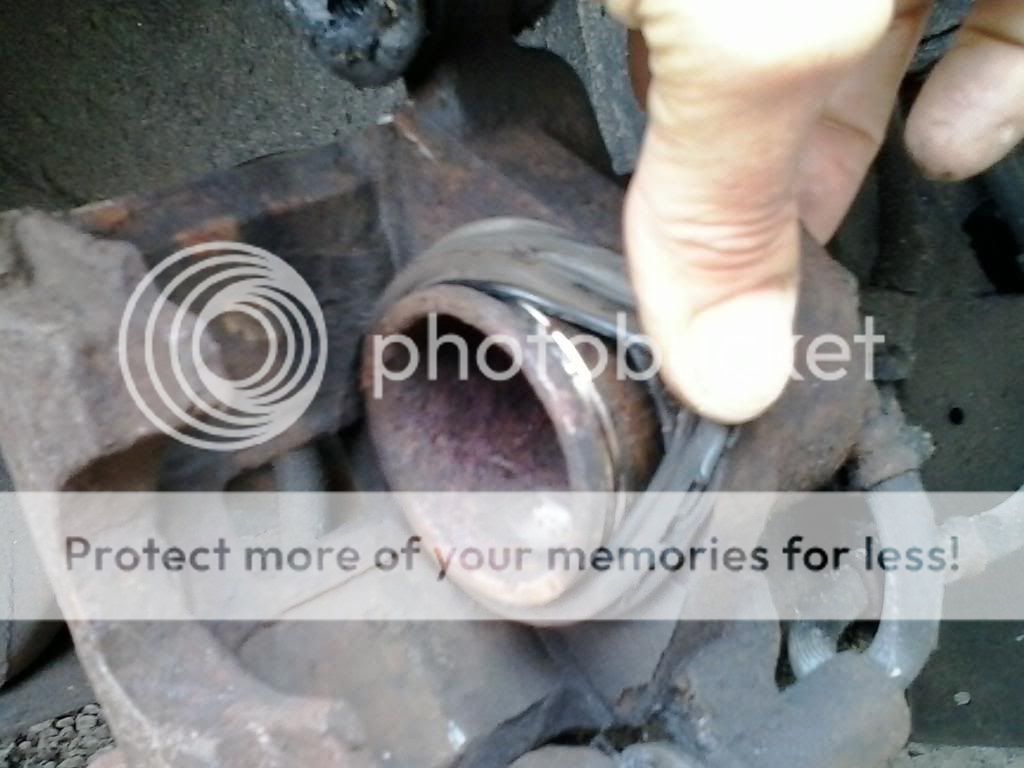
So my knuckle was off and I managed to support it on three cinder blocks and a brick (I deleted the dust shield because it was rusted and hanging by a thread so that wasn't in the way) and with my 3/4 socket set, I fit a socket to the inner hub and pounded it off with little effort (no heat or lubricant). Then I removed the big c-clip and with a bigger socket, pounded off the outer bearing race. Piece of cake.
I then had my hub to deal with and decided to go with the grinder instead of the rotary tool. I slipped off the race a couple of times and nicked the hub but didn't do too much damage.
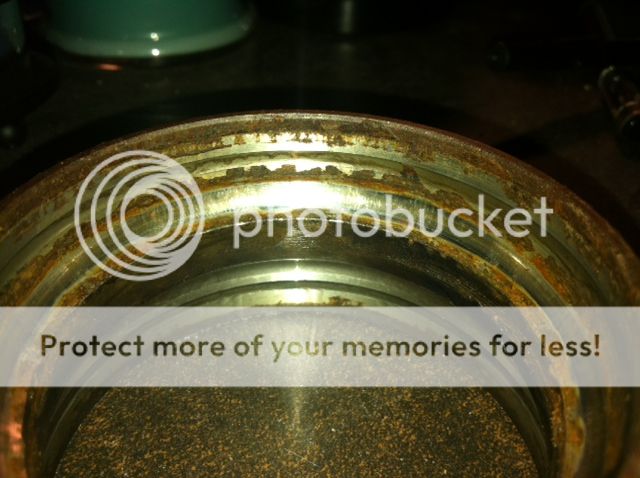
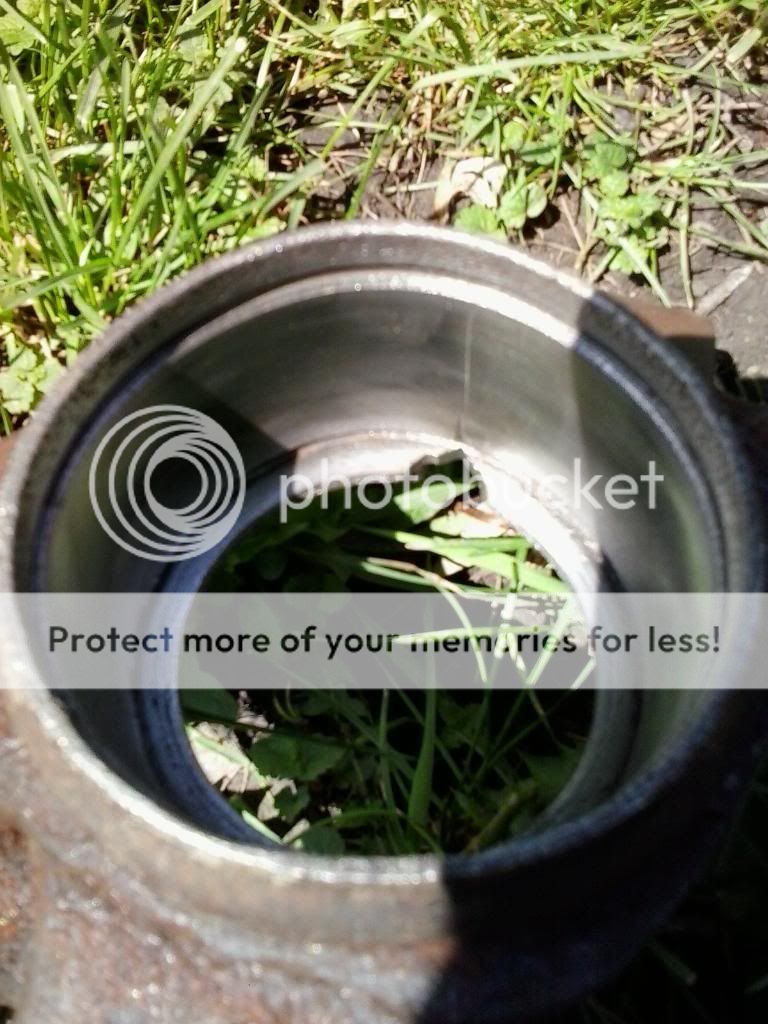
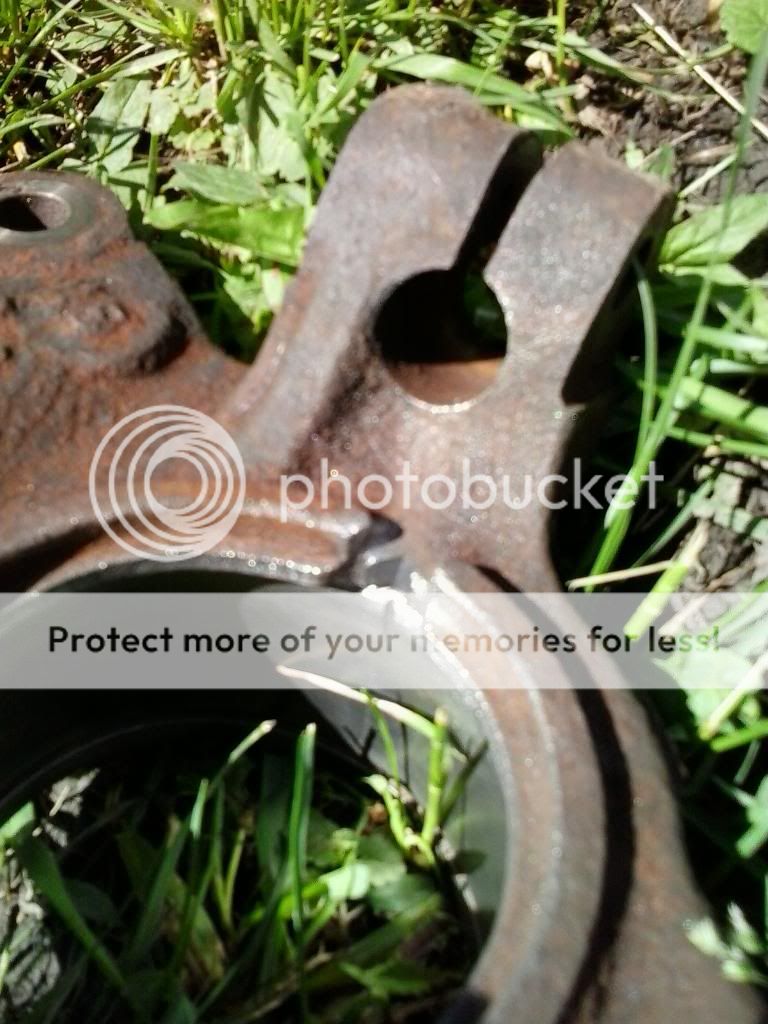
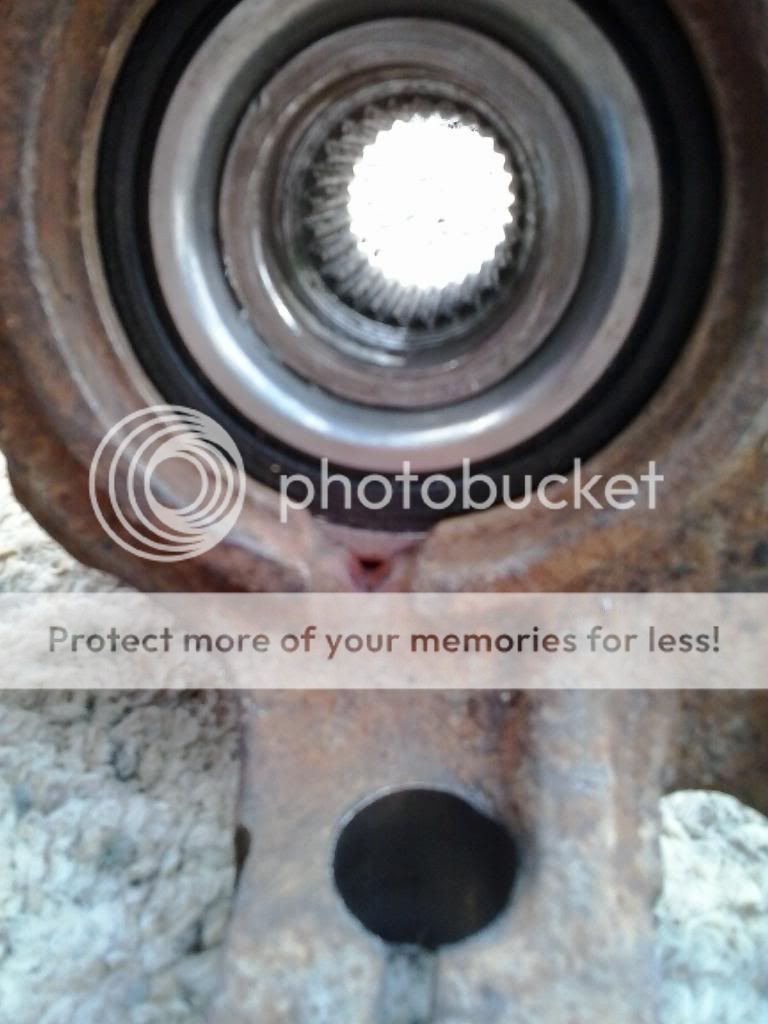
Then I got to the knuckle and noticed there was a ring of rust around the bottom and that the drain notch didn't completely drain the knuckle so I decided to enhance the notch with a file after cleaning the rust out of the notch. (I missed a little with that too)
I then cleaned the knuckle, bearing and hub with acetone, put the knuckle in the oven on broil (over 500*) and the bearing and hub in the freezer for half an hour or so. (I knew it was ready when the smoke alarm went off)


I then put on my oven mit and pulled the oven rack forward then quickly got the bearing out of the freezer (before the 1/4 inch of frost had time to build up on it),... lined it up with the hot knuckle and it fell right in and hit bottom with that solid sound of steel on steel. AWESOME !! I then put the whole thing in the sink and sprayed a bit of water on it because I didn't want to cook my new bearing. (there's grease, two plastic bearing cages and seals inside).
Then I let the bearing warm up but realized I cooled things off too much so I put the knuckle back in the oven at 225* for about 20 minutes till the inner race was just about too hot to touch. (I figured that wasn't too hot for the new bearing).
I then pulled the hub out of the freezer and tried to slide it right in but didn't have as much luck. It only went in about half an inch, so I took it back to the cinder blocks before everything reached the same temperature and managed to easily hammer (lightly) the hub into the bearing and I was good to go.
(note my enhanced drain notch):
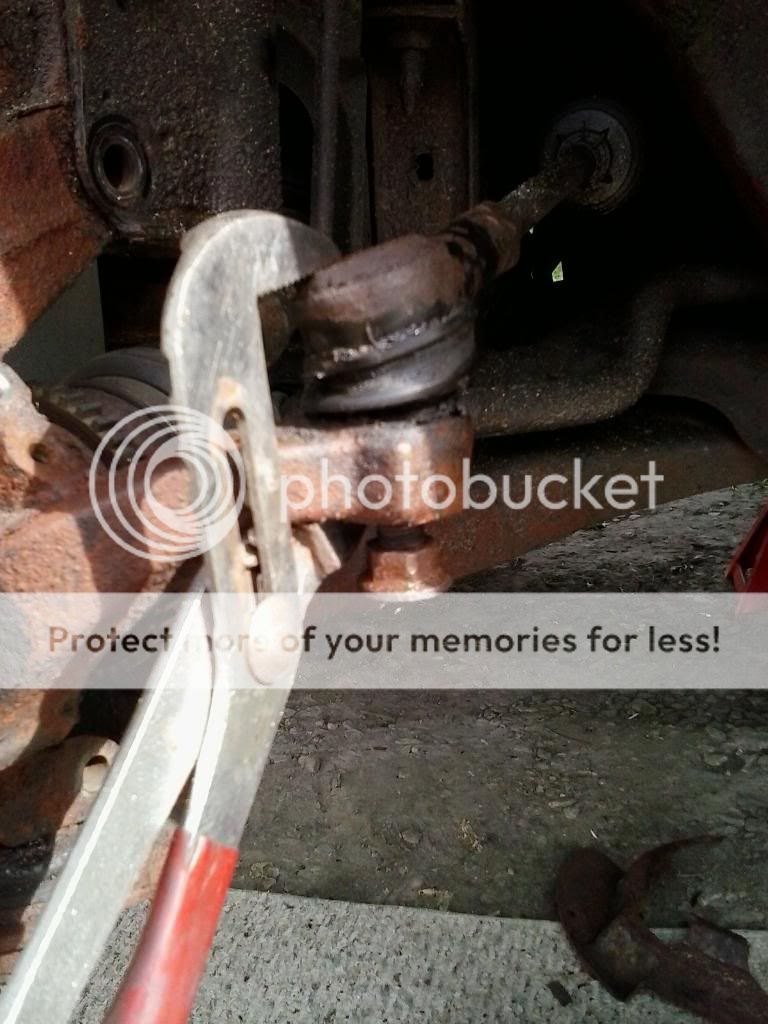
Being as everything went so smoothly I decided to get fussy and popped the boots off the ball joint and tie rod and removed the old grease, kinda wash them out a few times with oil then wiped it dry and repacked the boots with new grease. I wire wheeled everything then I caked anti-seize on every nut, bolt and mating surface before I put it all back together.
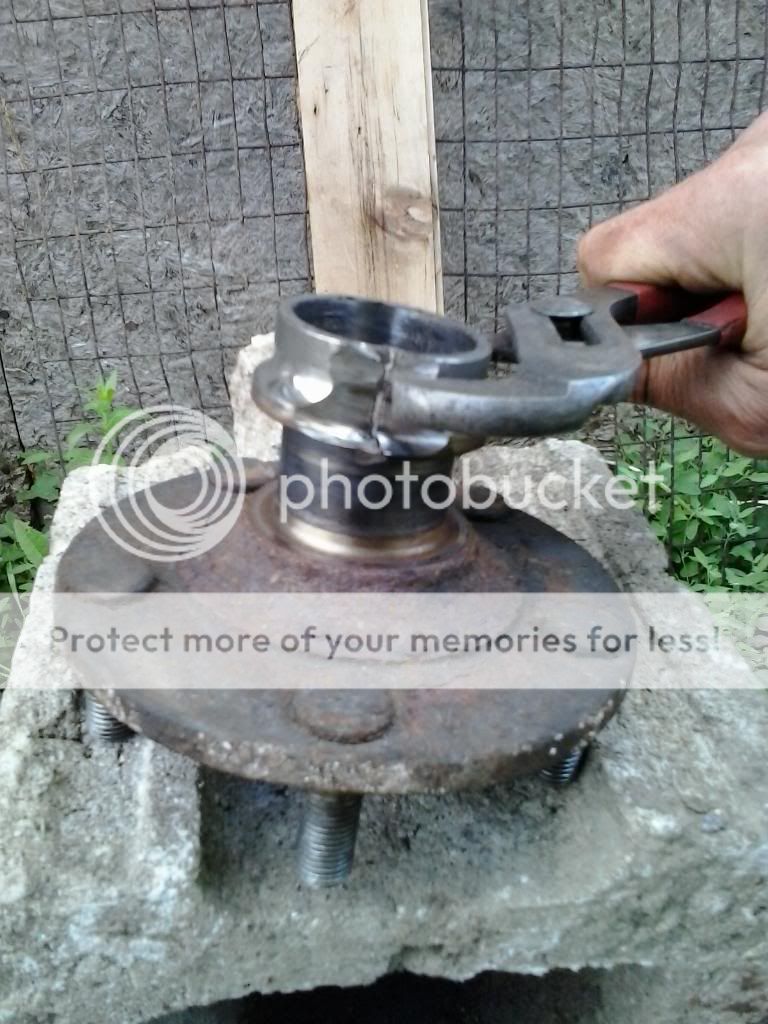
The tie rod end had a bit of thread damage from my pounding so the ball was just spinning when I turned the nut. My big crescent wrench was enough to stop the spinning.
I managed to do this without using a press, torch, air tools or penetrating oil on a 2002 P5 (built Sept. 2001) that's covered in rust and lives in the Northeast salt belt ??? I don't get it.
I have been taking my car to Krown rust control every year since I've had it (4 years now) and maybe that has a lot to do with it. I also agree with the guy in the thread who suggested that the longer you wait after hearing the tell tale sounds, the harder it is to remove. I got to mine within a week of the noise.
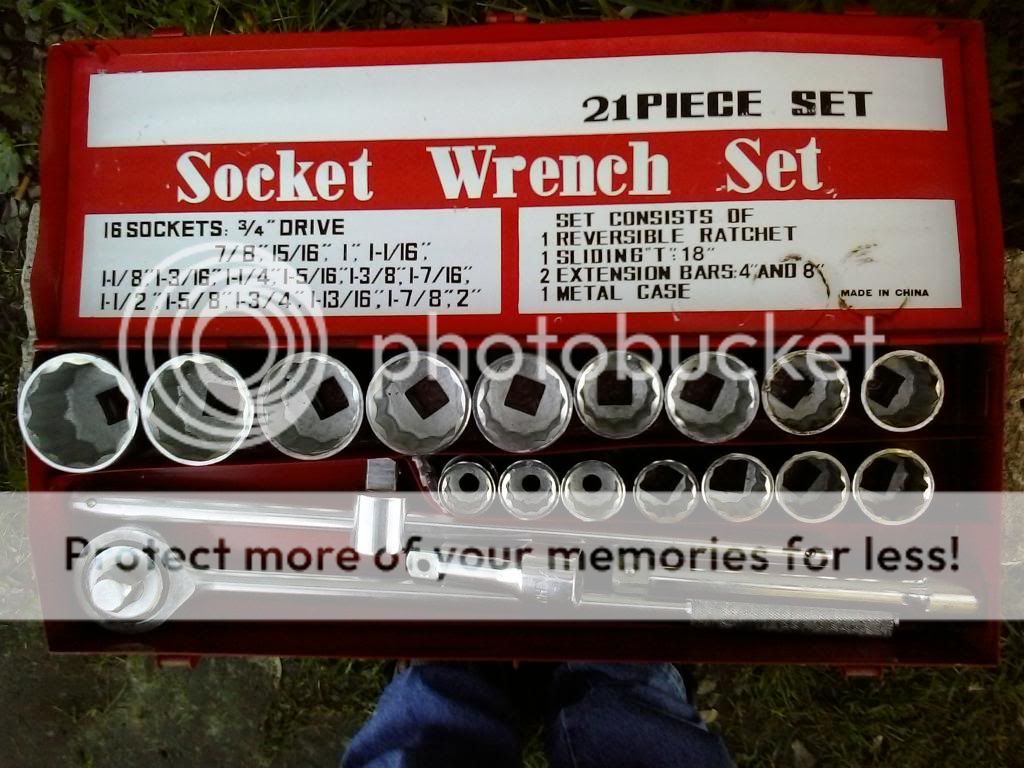
I did find the 3/4" socket set invaluable both as a ratchet and as a "die press" assortment. It was only $79 on sale at Princess Auto. (I've had it for years and got the SAE version for a different car.)
I'm sure there's similar prices in the US.
http://www.princessauto.com/pal/en/3-4-In-Socket-Sets/20-pc-3-4-in-dr-SAE-Socket-Set/2917110.p
By the time I got everything back together, I was too drunk to test drive it and back and forth in the driveway wasn't gonna cut it, so I had to wait till morning.
I woke up at 6am and took it for a multi-speed test drive and everything is rumble free.
I'm gonna order another bearing now for the other side for good measure,... Let's see if it goes as smoothly.
My only safety related issues were when I got the wire wheel caught in my t-shirt and made a dozen wraps before it stalled out on my stomach,... Then I did the same thing with my boot laces. (the beer may have been a contributing factor in that)
One thing I forgot to mention (and to do myself) is mark the position of the tie rod and ball joint studs so you can get them back in the same position if they spin. That should help with maintaining alignment and wear on the balls and cups. (the ball joint stud had a rust mark where the pinch bolt was so I could line that one back up.)
Just click on the picture below.
I read about bearing replacement on these two threads:
http://www.mazdas247.com/forum/show...tege-Front-Wheel-Bearing-Service-LOTS-OF-PICS
http://www.mazdas247.com/forum/showthread.php?123746487-How-To-Wheel-Bearing-Replacement
I decided to go ahead and try to do the job myself. I didn't know which bearing was bad so I lifted up the front end of my car to spin the wheels and hubs and check for wobble and grind but I couldn't detect any. I decided to start the car with the wheels in the air, put it in 5th and let it idle. It was then very apparent that the noise was coming from the drivers side.
I fully expected a nightmare of a job so I only ordered one new bearing (free shipping anyway). I ordered it off E-Bay on Tues. and got it on Fri.
I figured I was going to have to take the knuckle to a machine shop to have the bearings pressed (after seeing all the problems in the how-to's) but thought I'd give it a try anyway. (I don't have a press)
My first problem was rounding off the 14mm nut on the ball joint bolt but managed to hammer on a 13mm and get it removed but after that everything went extremely smooth. I removed the nut on the tie rod end and reversed it so I could more safely pound on it and the tie rod popped right off.
My axle nut came off with my 3/4" drive ratchet with a 6 foot bar on it but I didn't need to jump on it like other guys in the how-to's. My axle came out of the hub with just a few hits from the sledge hammer. I found the sledge hammer worked better with it's extra weight,.. you don't have to wind up as much as with a regular hammer and it didn't seem to damage things as much.
Then there was the ball joint stud but a chisel hammered in the crack opened it up enough to get it off.
There was also the issue with the wheel speed sensor,... it has a bolt and a plastic alignment pin and the pin was rusted in pretty good. I removed the bolt and wobbled the sensor back and forth to loosen it without breaking the tab.
So my knuckle was off and I managed to support it on three cinder blocks and a brick (I deleted the dust shield because it was rusted and hanging by a thread so that wasn't in the way) and with my 3/4 socket set, I fit a socket to the inner hub and pounded it off with little effort (no heat or lubricant). Then I removed the big c-clip and with a bigger socket, pounded off the outer bearing race. Piece of cake.
I then had my hub to deal with and decided to go with the grinder instead of the rotary tool. I slipped off the race a couple of times and nicked the hub but didn't do too much damage.
Then I got to the knuckle and noticed there was a ring of rust around the bottom and that the drain notch didn't completely drain the knuckle so I decided to enhance the notch with a file after cleaning the rust out of the notch. (I missed a little with that too)
I then cleaned the knuckle, bearing and hub with acetone, put the knuckle in the oven on broil (over 500*) and the bearing and hub in the freezer for half an hour or so. (I knew it was ready when the smoke alarm went off)
I then put on my oven mit and pulled the oven rack forward then quickly got the bearing out of the freezer (before the 1/4 inch of frost had time to build up on it),... lined it up with the hot knuckle and it fell right in and hit bottom with that solid sound of steel on steel. AWESOME !! I then put the whole thing in the sink and sprayed a bit of water on it because I didn't want to cook my new bearing. (there's grease, two plastic bearing cages and seals inside).
Then I let the bearing warm up but realized I cooled things off too much so I put the knuckle back in the oven at 225* for about 20 minutes till the inner race was just about too hot to touch. (I figured that wasn't too hot for the new bearing).
I then pulled the hub out of the freezer and tried to slide it right in but didn't have as much luck. It only went in about half an inch, so I took it back to the cinder blocks before everything reached the same temperature and managed to easily hammer (lightly) the hub into the bearing and I was good to go.
(note my enhanced drain notch):
Being as everything went so smoothly I decided to get fussy and popped the boots off the ball joint and tie rod and removed the old grease, kinda wash them out a few times with oil then wiped it dry and repacked the boots with new grease. I wire wheeled everything then I caked anti-seize on every nut, bolt and mating surface before I put it all back together.
The tie rod end had a bit of thread damage from my pounding so the ball was just spinning when I turned the nut. My big crescent wrench was enough to stop the spinning.
I managed to do this without using a press, torch, air tools or penetrating oil on a 2002 P5 (built Sept. 2001) that's covered in rust and lives in the Northeast salt belt ??? I don't get it.
I have been taking my car to Krown rust control every year since I've had it (4 years now) and maybe that has a lot to do with it. I also agree with the guy in the thread who suggested that the longer you wait after hearing the tell tale sounds, the harder it is to remove. I got to mine within a week of the noise.
I did find the 3/4" socket set invaluable both as a ratchet and as a "die press" assortment. It was only $79 on sale at Princess Auto. (I've had it for years and got the SAE version for a different car.)
I'm sure there's similar prices in the US.
http://www.princessauto.com/pal/en/3-4-In-Socket-Sets/20-pc-3-4-in-dr-SAE-Socket-Set/2917110.p
By the time I got everything back together, I was too drunk to test drive it and back and forth in the driveway wasn't gonna cut it, so I had to wait till morning.
I woke up at 6am and took it for a multi-speed test drive and everything is rumble free.
I'm gonna order another bearing now for the other side for good measure,... Let's see if it goes as smoothly.
My only safety related issues were when I got the wire wheel caught in my t-shirt and made a dozen wraps before it stalled out on my stomach,... Then I did the same thing with my boot laces. (the beer may have been a contributing factor in that)
One thing I forgot to mention (and to do myself) is mark the position of the tie rod and ball joint studs so you can get them back in the same position if they spin. That should help with maintaining alignment and wear on the balls and cups. (the ball joint stud had a rust mark where the pinch bolt was so I could line that one back up.)
Last edited: