- :
- 92 & 16 Meyatas
Washed it for the last time this year, in the garage for some major work, tranny, diff bushings and new control arms!

 Yes, I've washed mine for the last time in the driveway as well for the season. Put my hoses away a couple of weeks ago.


nice work!it's been a busy few weeks, but been doing more work to fix and finish a few things with my bumper and fenders.
1. After putting the flares on, they pretty much covered the dzus fasteners for the bumper that take the place of the bracket that bolts the fender to the bumper, which had to get cut for wheel clearance when moving to the 15x10s. So the dzus fasteners on the bumper got moved forward exactly 1 dzus length lol. Essentially, the forward most rivet hole from each was retained to use as the now-rearmost hole, then drilled a new forward hole and a new hole for the dzus fastener to fit through. After that, the bracket on the fender needed to be moved forward the same amount, and then welded to the fender.
The result is that i can now access these without completely removing the flares.

2. I've started welding out the rear fenders, which is a massive pain in the ass, because the sheet metal is like friggin tin foil. What that means is that even on its lowest power setting, even being super careful, it'll often time just burn through instead of welding the sheet metal. All that means is that it's really finicky and takes way more time than running the same amount of weld on thicker steel would take, as there's a lot of time spent just waiting for it to cool.
Here's the starting point, with weld-thru primer that i sprayed on when i originally cut them to prevent rust from building between then and now, with a cleco clamp to hold them together. The fitup's not super great because it was done with angle grinders and cutoff wheels, and that didn't help matters, but i worked through it.

about half way done or so. There's basically no "running a bead" on metal this thin. More a series of tack welds that eventually you get to fill in all the space.

fully welded out. Pretty ugly, but effective for the most part. The fenders are so much stronger now that they're bonded back together.

and finished up with a flap disk, which puts a really nice finish on things. The final grinding revealed a few pin-holes that needed to be filled, but that was expected with stacking tack-welds like that.

and of course, the bad part of welding in awkward positions is that there ain't no avoiding getting some molten spatter where it hurts.

the next steps will be to do the exact same thing on the other side, then hit them with a couple coats of rust inhibiting primer, and then running a bead of 3m seam sealer around the rim, and to fill in the larger gaps where i cut the inner-fender to get them to meet the outer.
Hope it wasn't too painful.
Which "that"? Well, I guess I've got both covered. Great wife, plenty of scars.Just remember chicks dig scars.Oh wait, you have that covered.
Great job with the welding.


Love to learn to do some welding
Sent from my iPhone using Tapatalk
It's looking good and you have a lot more patience than I.
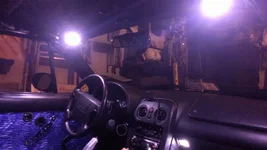
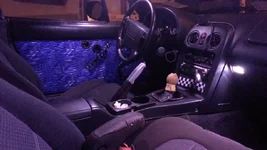
also got around to building my own LED Blanking Plates, wired them up to the map lights to make the car alot nicer to get into (excuse the potato quality photos)


Maff I meant the wife part. It's looking good and you have a lot more patience than I.
Nice Levi! How bad was that wing window install? When I had my NB I had contemplated getting them. The LEDs look great too.
Nice Levi! How bad was that wing window install? When I had my NB I had contemplated getting them. The LEDs look great too.
What did you install the LEDs into? Did you use the old visor plates, or fab up something new?
I used something like these for the lights, then covered them with translucent white plastic, cut to fit the holes and held with the original screws. They're honestly a bit too bright!
I'll have to get some pictures of them turned off. I admit, they're not the prettiest things, but since you can't look directly at them when they're on anyway, I guess it doesn't matter! The second pic doesn't even have the lights in it, but you can see how well they light up the interior in a mostly dark garage!
The vent windows aren't bad to install as long as you can keep from getting the black spooge on the moisture barrier in the doors from getting all over. I just don't understand why the ones Levi has are mounted so high, I have the ones from Project G and they are much lower down in the triangle.


")