P5 Injen Install finished

eepr5

Member
:
00 Black S2K
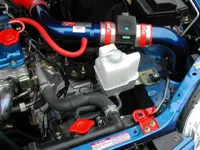
after two hours and lots of frustration, I finally managed to get my injen installed. Getting the main unit in place wasn't very difficult (aside from the nut on the pcv valve, that was a b*tch) but I spent nearly an hour getting the filter on. when the second pipe is connected to the maf, the end with the filter practically touches the chassis. the resulting tight space meant that every time I managed to squeeze the filter on, it would just pop off. Finally after much wiggling, the end at the maf came off, allowing me to change the angle enough to force the filter on there. it actually went on sort of easy then, but I may have it too far up the pipe. had to readjust everything up top to connect, only to find that the second pipe came in contact with the pass through hole. could not move it out of the way, so I left it. oh well. had to force the wheel well panel closed, since it bumped up against the filter. slight bulge, but filter stayed put and it stayed close. hope it stays the same in the morning. started her up, no cel, nice purr, everything stayed in place. going to get longer pipe clamps tomorrow, ones included in kit are barely big enough. practically stripped on already, need to replace before it really gives out.

provided it isn't raining tomorrow, I'll try and post pics. It was very dark and had started to rain by the time I finished, and the hurricane is coming soon.

later,
eepr5
 
i know hindsight is always 20/20, but what you shouldve done is did what i did - take off the bumper...i spent 20 minutes maybe removing the bumper and viola! the intake is completely exposed takinga bout 5 minutes to hook it up.
 
i just did my black injen tonight and it gave me alittle trouble at first until i threw their bad instructions in the garbage. those two pieses of s*** wern't worth the paper they were printed on. the way they tell you to relocate the over flow container is retarded. the first thing they should have said is take off the metal bracket, it comes off! ne way, the hard part for me was just mentioned. after that it went smooth as silk. i raised my car and took off the front wheel. then i removed the four or five screws holding the wheel well panel and had easy access to the filter location. the injen sound better than my SRI did which surprises me. overall im happy with it. kinda worried about the filter sitting down there but o well. maybe ill get the AEM bypass valve for piece of mind.

word to the wise, don't bother with the instructions supplied by injen unless you absolutely have no clue. they don't help much!
 
i couldnt **** with those directions so i just relocated the catch can myself...

ill be completely replacing it as soon as pirana gives me directions for the catch can i bought off him.
 

Attachments

  • reservoir_placement.webp
    reservoir_placement.webp
    50.5 KB · Views: 344
I agree I wasn't too impressed with the instructions.
Here are some of the pics I took before work
100_0558.jpg

Full Install

100_0560.jpg

The catch tank in the instructed location. It seems a little flimsy and prone to vibration to me.

100_0567.jpg

Any idea where to tie this up? not mentioned in the "instructions"

Also, I drove to work with all the windows down, just to hear it. I was expecting a sort of loud sucking sound. Instead, it was real quiet, until I open the throttle up. Then it gives off sort of a throaty growl. I like.
 
Last edited:
mine is still hangin there, long as hell...but i got a new catch can so im not concerened
 
Humm... Yeah, their instructions weren't that great, but with those and some extra tips from www.protege5online.com I managed everything fine.

Anyway, there is no need to take off the bumper, next time you need to get to it just jack up the front left side of the car (or use ramps), cock the wheel to the side and unscrew the wheel well panelling. I believe I took off 4 screws from the bottom (real screws) and 4 or 5 more from the wheel well area (plastic screws). That gave me plenty of space for putting the filter in there.

I also had a problem with the filter rubbing on the bottom of that area, so I just got some washers and added them to the area where you mount the filter with the rubber bushing. It's great now, the filter has all the play that it needs and with vigorous shaking doesn't rub anything.
 
slcp5 said:
Is it gonna be a pain in the butt to remove your filter to clean it.
No, just like I described above. Jack up or ramp up, cock wheel, unscrew 8 screws, pull wheel well cover back, direct access to filter.
 
yeah, I took all the screws out, just didn't jack it up. still wasn't hard to get hands in there, just hard to get the filter on due to the position of the end of the pipe
 
Try adding an 'L' bracket like I did to the overflow bottle.

/members/crashed/cai 2.jpg
 
Back