
hedlesschkn
Member
- :
- 2002 Mazda Protege5
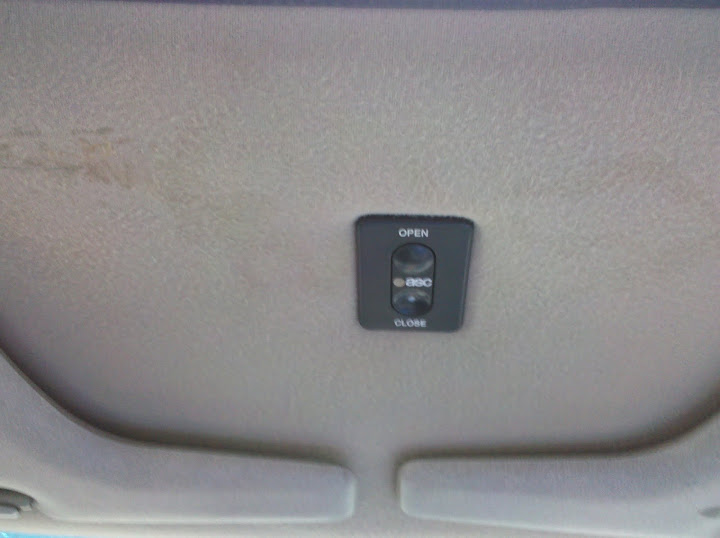
I bought my car used and the previous owner had an aftermarket sunroof put in (remind me to never do this to a car a i buy new...) well this sunroof control button sits where the normal sunroof/reading lamps panel goes up on the headliner. As you can see below, I don't have that panel ie. I don't have any lights up front. So if I ever need to read something in the dark, I have to use the lights on the dome behind me and it only works so well.
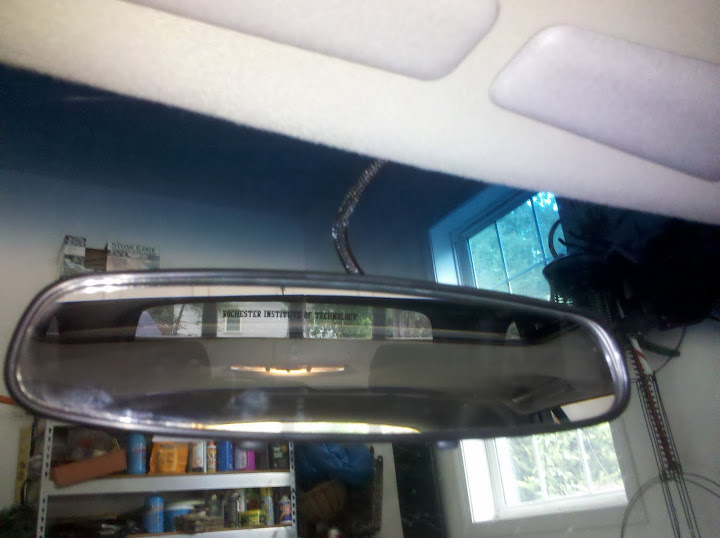
So, I went to a pick-and-pull and grabbed a rearview mirror out of a late model dodge neon. The mirror itself is pretty similar in size to our car's and the shape is only a touch different. The reason I picked this mirror was because it has maplights built into the bottom. So I grabbed the mirror and snipped a length of wire enough to get up into the headliner. Total cost: 10 bucks.
I read online that normally the maplights run off the 10amp ROOM fuse in the fuse box by the driver's side kick panel. So I grabbed my trusty multimeter:
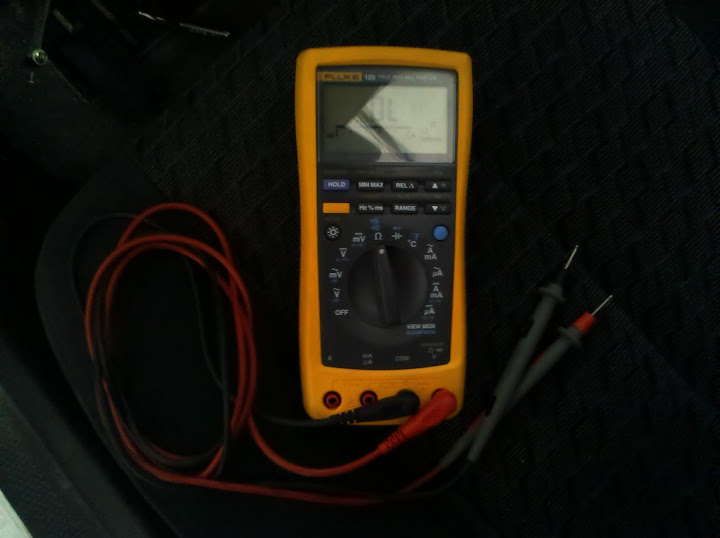
mmm, I love my fluke (if you are ever hesitant about buying one, don't be, the thing is a life saver and can measure anything)
and pinned out first, which side of the fuse is the battery side and which side is the protected side.
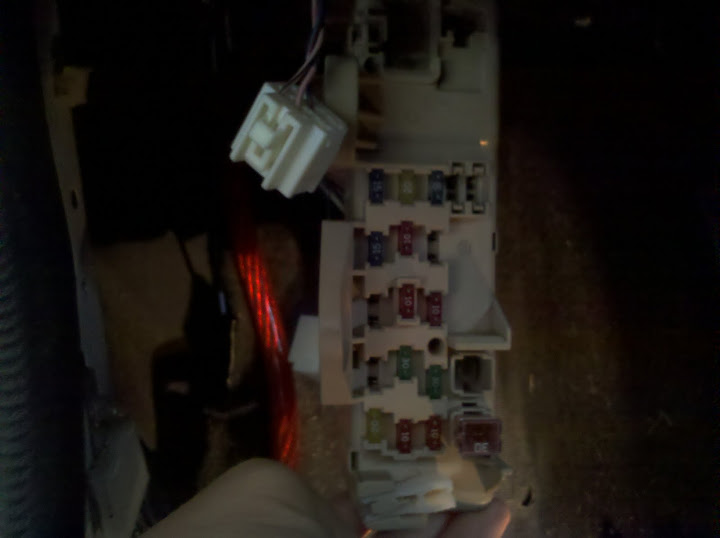
the ROOM fuse is the 10amp red one in the middle there that is slightly raised up from the rest, the back of the fusebox door will show you where it is.
Then I checked the pins on the back for continuity to the protected side and found out that there are 4 pins connected to it, only two of which actually have wires going to them (there's lots of things that run off the ROOM fuse: dome light, power locks, some of the dash lights, etc)
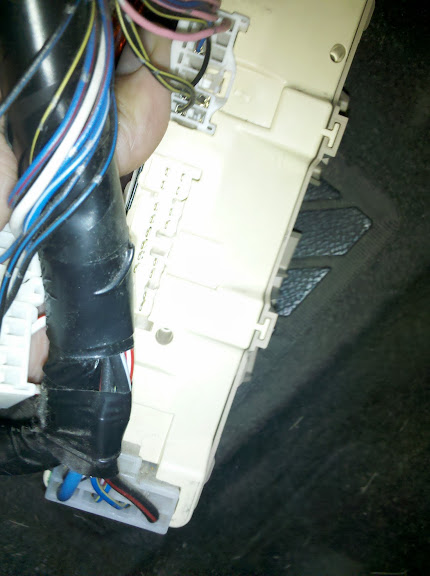
The top left 4 pins are connected to the protected side of the ROOM fuse
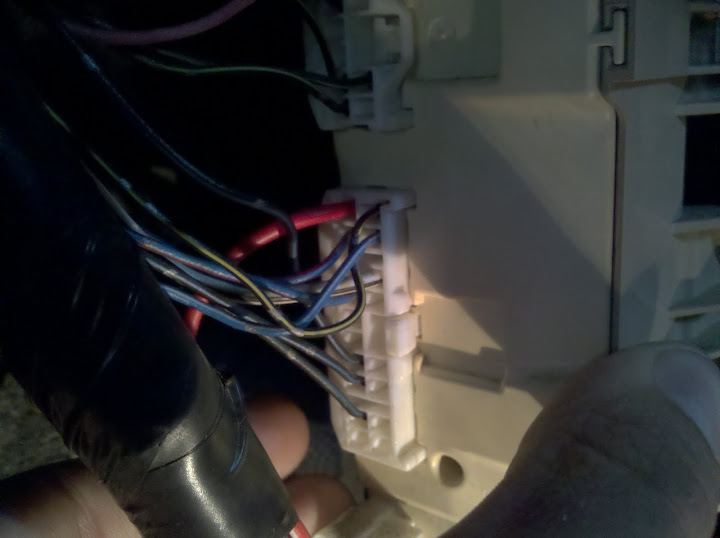
I went ahead and attached a wire (I used some 16 gauge I had lying around, that is likely overkill but like I said, I already had it) to the top left spot on the connector as you can see below.
I then ran this wire up through the dashboard and up my A-Pillar. Then I ran it under the headliner over to the front middle of the car in preparation for the mirror's wires. After this I ran a ground wire (some more 16 gauge I had just black this time) over to one of the bolts holding metal brace under the A-Pillar on and bolted down a stripped end to make a nice grounding point.
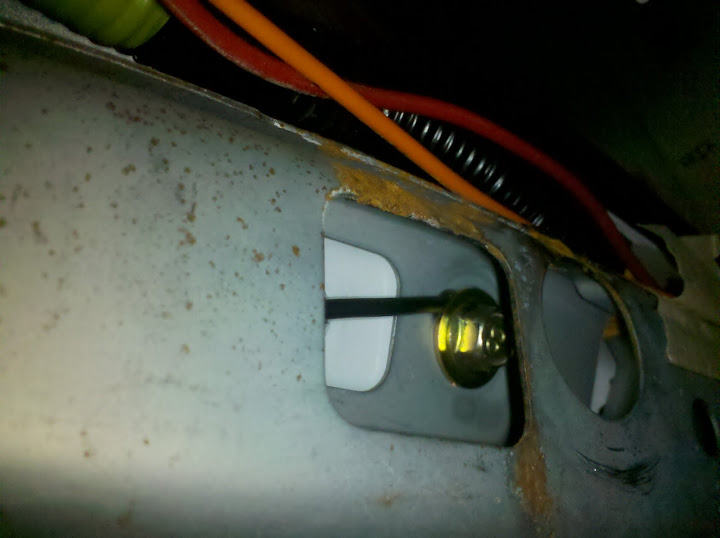
I ran that wire up under the headliner and over to my mirror location as well. (safety note: I had the fuse out and SHOULD have had my battery disconnected at this point. be careful if you are going to mess with the electronics in your car, there is enough power there to hurt yourself or mess up the car's electronics in some way)
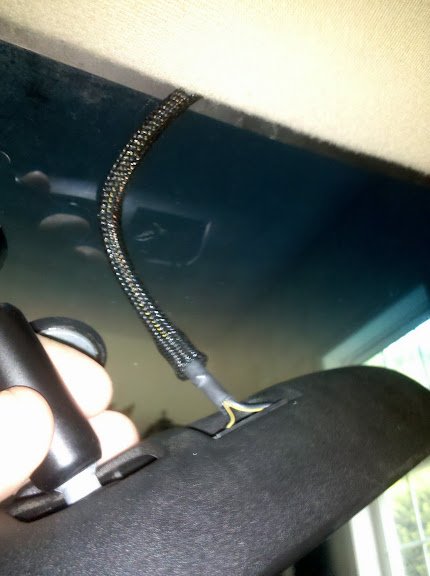
Finally, I just attached the power and ground wires to the wire I got with the dodge mirror (in all reality polarity doesn't matter with simple filament bulbs but usually the lighter color of a pair is hot and the darker color is cold so I called the yellow wire power and the orange wire ground just for sanity's sake) and I taped them up well with electrical tape. hide those wires away in the headliner and made it so only the mesh covered wire that I got with the neon was showing next to the windshield and tried them out.
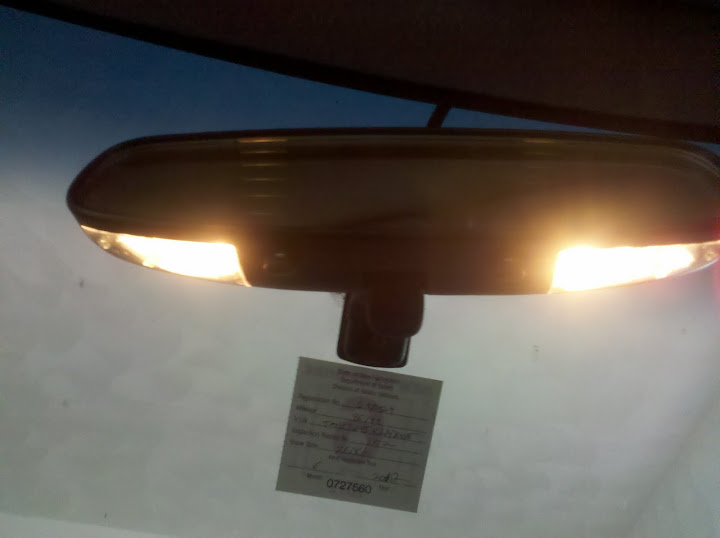
The lights work!
And more importantly, it still works just as well mirror-wise as the oem part!
Finally I made sure the lights turn on when the ROOM fuse is in and that they don't when the ROOM fuse is pulled. It worked great meaning I pinned out the fuse box correctly and they are properly fused. Lastly, I put everything back together and tada now I'll be able to read things in the dark up front if I need to.
I know 99% of you already have map lights up front so this little How-I-Did-It isn't exceptionally useful but maybe this might help out the other 1%? I also saw an old post by ZapWizard where he wanted the maplights to be red or white, maybe this mod with a little more added could give you both? Either way, I hope this helped someone out.
Let me know what you think and don't hesitate to post/PM if you need any help!
So, I went to a pick-and-pull and grabbed a rearview mirror out of a late model dodge neon. The mirror itself is pretty similar in size to our car's and the shape is only a touch different. The reason I picked this mirror was because it has maplights built into the bottom. So I grabbed the mirror and snipped a length of wire enough to get up into the headliner. Total cost: 10 bucks.
I read online that normally the maplights run off the 10amp ROOM fuse in the fuse box by the driver's side kick panel. So I grabbed my trusty multimeter:
mmm, I love my fluke (if you are ever hesitant about buying one, don't be, the thing is a life saver and can measure anything)
and pinned out first, which side of the fuse is the battery side and which side is the protected side.
the ROOM fuse is the 10amp red one in the middle there that is slightly raised up from the rest, the back of the fusebox door will show you where it is.
Then I checked the pins on the back for continuity to the protected side and found out that there are 4 pins connected to it, only two of which actually have wires going to them (there's lots of things that run off the ROOM fuse: dome light, power locks, some of the dash lights, etc)
The top left 4 pins are connected to the protected side of the ROOM fuse
I went ahead and attached a wire (I used some 16 gauge I had lying around, that is likely overkill but like I said, I already had it) to the top left spot on the connector as you can see below.
I then ran this wire up through the dashboard and up my A-Pillar. Then I ran it under the headliner over to the front middle of the car in preparation for the mirror's wires. After this I ran a ground wire (some more 16 gauge I had just black this time) over to one of the bolts holding metal brace under the A-Pillar on and bolted down a stripped end to make a nice grounding point.
I ran that wire up under the headliner and over to my mirror location as well. (safety note: I had the fuse out and SHOULD have had my battery disconnected at this point. be careful if you are going to mess with the electronics in your car, there is enough power there to hurt yourself or mess up the car's electronics in some way)
Finally, I just attached the power and ground wires to the wire I got with the dodge mirror (in all reality polarity doesn't matter with simple filament bulbs but usually the lighter color of a pair is hot and the darker color is cold so I called the yellow wire power and the orange wire ground just for sanity's sake) and I taped them up well with electrical tape. hide those wires away in the headliner and made it so only the mesh covered wire that I got with the neon was showing next to the windshield and tried them out.
The lights work!
And more importantly, it still works just as well mirror-wise as the oem part!
Finally I made sure the lights turn on when the ROOM fuse is in and that they don't when the ROOM fuse is pulled. It worked great meaning I pinned out the fuse box correctly and they are properly fused. Lastly, I put everything back together and tada now I'll be able to read things in the dark up front if I need to.
I know 99% of you already have map lights up front so this little How-I-Did-It isn't exceptionally useful but maybe this might help out the other 1%? I also saw an old post by ZapWizard where he wanted the maplights to be red or white, maybe this mod with a little more added could give you both? Either way, I hope this helped someone out.
Let me know what you think and don't hesitate to post/PM if you need any help!


