My CX-5 Dash Kit

sylva143

Member
:
2014 Mazda CX 5 GT
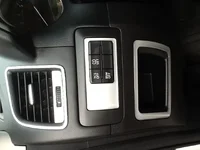
So, although our CX-5s have a nice interior, many of us agree that there could be a bit more contrast to the black interior. After rejecting a raw aluminum kit and then a vinyl sticker kit, I finally found something that has a great quality and look. This kit is in gloss silver from Sherwood purchased through CarId.com. I didn't use all of the parts, only those that provided some tasteful accents. Let me know if you have any questions.
 

Attachments

  • image.webp
    image.webp
    76.1 KB · Views: 4,099
  • image.webp
    image.webp
    43.4 KB · Views: 1,852
  • image.webp
    image.webp
    59.6 KB · Views: 1,853
  • image.webp
    image.webp
    63.2 KB · Views: 2,151
  • image.webp
    image.webp
    58.5 KB · Views: 1,565
Here is one more to display the high quality cut, finish and fit. Thlighting doesn't do this justice. I was really afraid to thy this product, but as a perfectionist, I am happy.
 

Attachments

  • image.webp
    image.webp
    65.4 KB · Views: 1,671
One more of the shift area. Notice how the center piece comes in chrome.
 

Attachments

  • image.webp
    image.webp
    47.4 KB · Views: 1,433
Sure, you can check out this site: http://www.carid.com/2013-mazda-cx-5-wood-grain-dash-kits/

They have several manufacturers represented at different price points. I didn't like the quality of the B&I kit I first purchased, but I did get my money back. The sales rep suggested a Remin kit, but I actually liked the pieces that were included with the Sherwood kit. You also have the option of ordering samples.

This kit looks really good. My photos don't give it full justice.
 
Thanks for the photos. Looks really nice. How hard were they to install? Did you need any special tools?
 
Thanks for the photos. Looks really nice. How hard were they to install? Did you need any special tools?

Yes, I am even happier and impressed with this kit after living with it for one week. It is very easy to install and you will have great results if you work carefully. The first step is to clean the area with alcohol 3-4 times to remove any silicone protectants or other contaminants. Next, apply the provided adhesive promoter. You then remove the adhesive backing and put it all in place.

One caution, this stuff sticks like crazy, so there is no readjustment after it has made contact. Be sure to dry fit first. I also recommend removing only a portion of the adhesive backing at a time and work from one end to the other.
 
Vastly different looking interior. I like the contrasting black and silver accents.
 
15 years ago I had one of these wood kits and they tend to look stuck on when looking from anything other than head on. Yours looks nice so maybe they updated the technique, but I really can't think of what color/design I would want to complement the pearl white exterior when I look into the car from the outside. Maybe a honey oak or burl wood, I dunno but I am sure it can wait until after I get some HD Xmas gifts. Maybe next year...
 
15 years ago I had one of these wood kits and they tend to look stuck on when looking from anything other than head on. Yours looks nice so maybe they updated the technique, but I really can't think of what color/design I would want to complement the pearl white exterior when I look into the car from the outside. Maybe a honey oak or burl wood, I dunno but I am sure it can wait until after I get some HD Xmas gifts. Maybe next year...

This kit fits in areas that are slightly recessed, so with a beveled edge, it really looks like original equipment. The one exception is the pieces that fit on the steering wheel (these areas are not recessed). I feel that most occupants will not realize that there is a custom kit applied to the interior.

As for complimenting the pearl white exterior, I feel that my glossy silver kit fits nicely with this color. I'm not much of a fan of wood in this vehicle, so I decided to stay with the metallic option.
 
In various kits I have seen there is usually a piece that goes above the heater controls and below the air vents in the center of the dash. Does the Sherwood kit you used have this piece? I noticed in you pictures you did not use it.
 
I have purchased some individual pieces like the ones in your kit through AliExpress. I will install them when the weather warms up and when I learn how to post photos here.
 
I have some of these as well.
I would recommend skipping the defroster vent one(on top of the dash). The reflection in the windscreen, is really bad.
After putting these on, it feels kind of overdone(to much bling).
The shifter surround piece, is chrome looking and not silver as the rest.
I like the new 2016 vents, switches better.
 

Similar Threads and Articles

New Threads and Articles

Back