Intercooler Routing Pics...Please Evaluate

dave45090

Member
Contributor
:
Mazda Protege 5
Edit: See post #24 for new routing scheme. The pictures below are not current set-up.....due to stupidity and lack of forsight.

I am working on getting my intercooler piping routed today. It will be welded on Wednesday and powdercoated Friday.

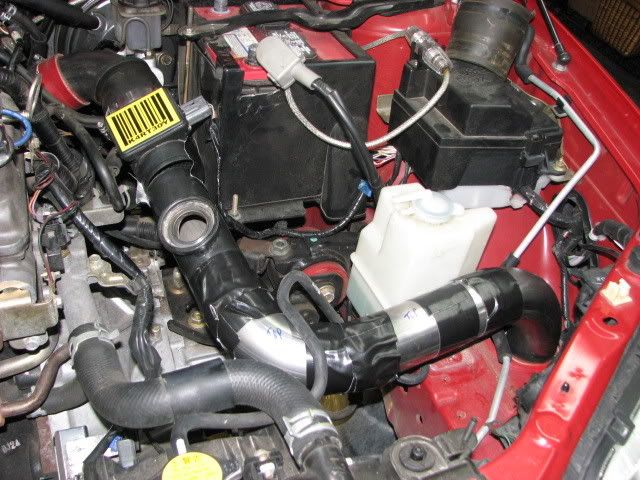
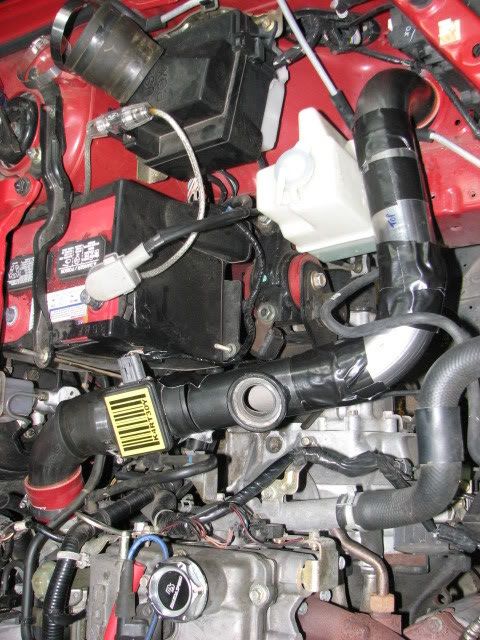
I am using the least amount of couplers as possible. Take a look at what I have done so far. Note: The BOV is located 6" from the MAF.

Does it make too sharp of a turn after the BOV into the "hole"? Is there anything wrong with my routing so far?

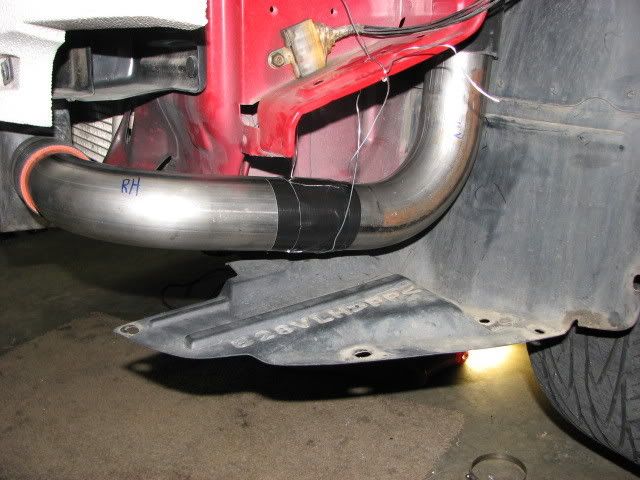
Excuse the tape. It is match marked underneath so we will know exactly how to weld it up. I wanted to tape it to mock up the entire system and the tape works great.

Any help will be appreciated - Dave.

IMG_3356.jpg


IMG_3355.jpg


IMG_3357.jpg


IMG_3358.jpg
 
Last edited:
Looks good but you need a coupler once you drop below the frame there. Last pic, top right "taped" section needs to be a coupler or you wont be able to put the pipe in.
 
You also need to Ax the 90* out of the fender for a pair of 45*'s...It wil cut your length down a bit and look much better.
 
You also need to Ax the 90* out of the fender for a pair of 45*'s...It wil cut your length down a bit and look much better.

I completely agree with you. After I posted this thread I went out and looked at it more and decided to do that. This is good confrimation.
 
Looks good but you need a coupler once you drop below the frame there. Last pic, top right "taped" section needs to be a coupler or you wont be able to put the pipe in.

If you look real close it's a coupler not taped. Didn't plan on welding there.Thanks for looking out though.
 
don't know how much work it would be, but I think you should have more of a "straight away" and relocate the overfill container. It would move the air better than the sharp turn.
 

Attachments

  • IMG_3355a.jpg
    IMG_3355a.jpg
    71.7 KB · Views: 141
looks good , i cant add anything other than what was said (removing the 90 for 45's).

what did you do for the other side?
 
looks good , i cant add anything other than what was said (removing the 90 for 45's).

what did you do for the other side?

I'll post more pics tomorrow after I finish the cold side and make more progress on the hot side.

This is the exact feedback I was looking for. I appreciate your help and comments. This is actually a fun job and would be extremely easy....if it were not for the wife and kids. They command my attention when I'm not at work.

Thanks guys.
Dave.
 
Take your overflow and stick it down below the piping. Thats how I did mine, there's a TON of unused space down there...
 
I'll post more pics tomorrow after I finish the cold side and make more progress on the hot side.

This is the exact feedback I was looking for. I appreciate your help and comments. This is actually a fun job and would be extremely easy....if it were not for the wife and kids. They command my attention when I'm not at work.

Thanks guys.
Dave.

damn family always trumping the modding. ;)

cant wait to see pics. I know the excitement you have, i did the same thing when i was fabbing up my liquid to air IC.
 
damn family always trumping the modding. ;)

cant wait to see pics. I know the excitement you have, i did the same thing when i was fabbing up my liquid to air IC.

LOL....I meant to make the point that family always comes willingly and lovingly first. I am excited as I've been building parts fot this turbo build for almost 2 years. Persitence is the key in my case.
 
LOL....I meant to make the point that family always comes willingly and lovingly first. I am excited as I've been building parts fot this turbo build for almost 2 years. Persitence is the key in my case.

I know what you meant. My wife comes first.

Damn 2 years? you got a build thread? i wanna see some pictors.
 
I know what you meant. My wife comes first.

Damn 2 years? you got a build thread? i wanna see some pictors.

(rei) Pictures and build thread to follow soon.

Not quite two years but close. I bought my first turbo part(s) and started studying Corky Bell's Maximum Boost July of 06. The long delay is mostly because of my profession and obviously the family. I also didn't want to jump into anything I didn't understand.

I've probably studied every (or close enough) thread available pertaining to my build. You should see my bookmarks and links to this forum....it's rediculous.
 
Now Maxx....That looks pretty good down there...Got anymore shots of how you did that?
 
Sorry, no. Just take the bracket, bent the one side up so it's perpindicular (sp?) to the ground, and there's already a hole there I think to mount it. Jsut grab a bolt and screw it in.
 
Sorry, no. Just take the bracket, bent the one side up so it's perpindicular (sp?) to the ground, and there's already a hole there I think to mount it. Jsut grab a bolt and screw it in.

I did the same exact thing till i got the shiny bling canister.

were geniousususoususes'
 
Back