
So my shift boot broke at the top a few days ago. I decided to google up how to make a shift boot....its pretty easy. Things you will need
1) 1 1/2ftX 1 1/2 Ft Material of your choice
2) Sewing kit (I used staples to help me out)
3) Superglue
When taking apart the shifter boot you must retain the ring that holds the s*** boot on the top side.
First take apart your lower panel. (the one with the drink holders) Firmly pull on the piece so that it comes off.
Take off the shift knob.
Now there are two screws that hold down the front part of the base of the shift boot. Take them off and store them in a safe place.
Now take off the shifter boot its held by 6 slots
Here is the part where you go into the sewing kit and take out the seam puller. (or a knife) Anyways separate the seams holding the boot together.
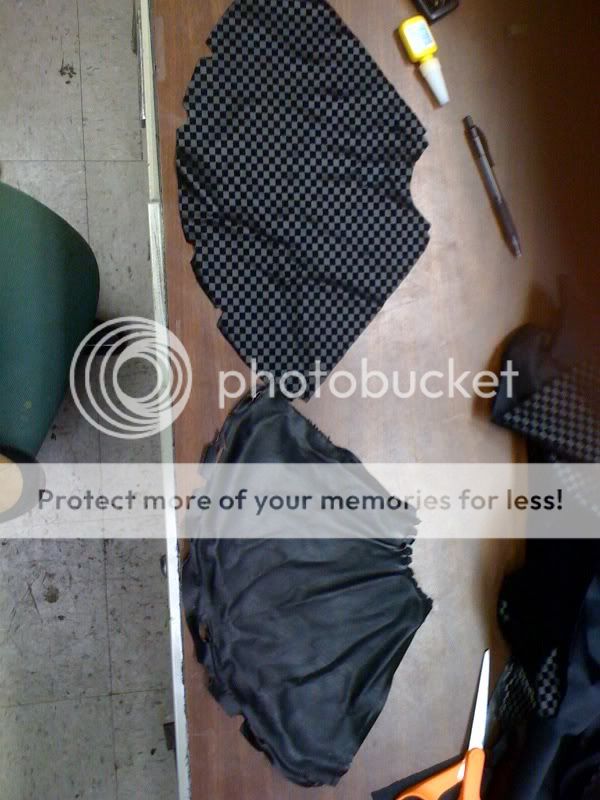
Now lay the shift boot on the opposite side of the material. Trace the shiftboot onto the material. Make sure that you copy the openings where the boot was held down. This will make it easier for the installation.
 ]
]
Now cut what you just traced out. Double check everything making sure that you copied the old shift boot.
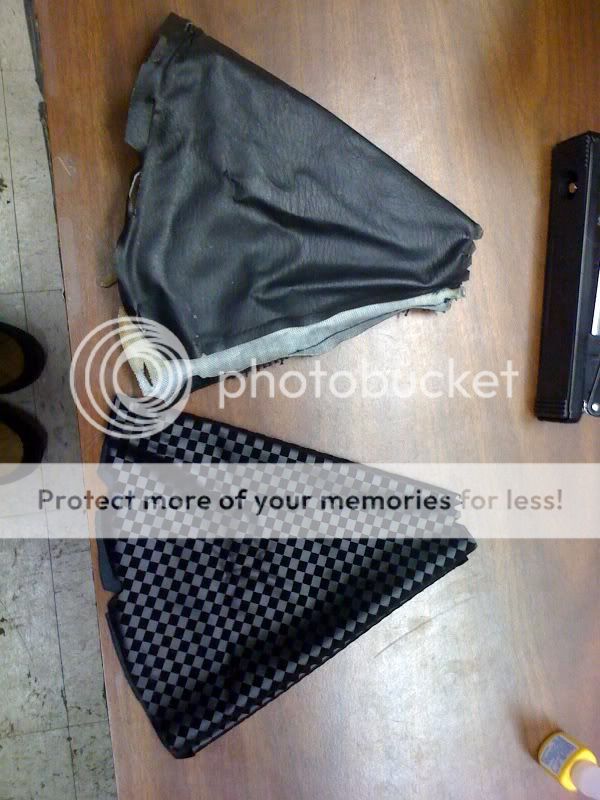
Flip the material inside out and fold it so that the ends are touching eachother. What I did here was staple the ends to gether so that when I sew it was easy. Sew the ends together. (go about 1/8th of an inch from the end.
Now flip it inside out and this is what his shift boot will more or less look like.
For the hard part. Where the little notches at the top were is where you are going to glue the ring that holds the shift boot at the top. Start by putting one side on at a time going counter clock wise. Let the glue dry.
Test fit the boot.
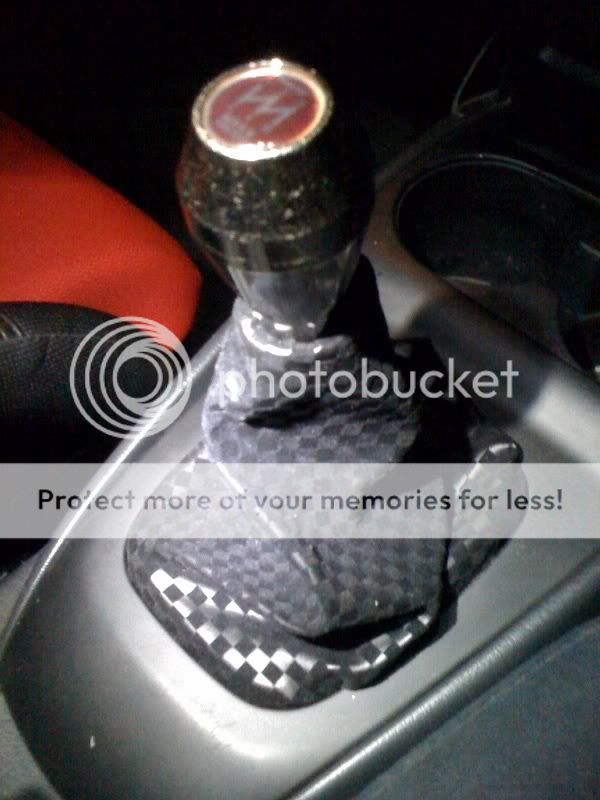
And you should be done!
1) 1 1/2ftX 1 1/2 Ft Material of your choice
2) Sewing kit (I used staples to help me out)
3) Superglue
When taking apart the shifter boot you must retain the ring that holds the s*** boot on the top side.
First take apart your lower panel. (the one with the drink holders) Firmly pull on the piece so that it comes off.
Take off the shift knob.
Now there are two screws that hold down the front part of the base of the shift boot. Take them off and store them in a safe place.
Now take off the shifter boot its held by 6 slots
Here is the part where you go into the sewing kit and take out the seam puller. (or a knife) Anyways separate the seams holding the boot together.
Now lay the shift boot on the opposite side of the material. Trace the shiftboot onto the material. Make sure that you copy the openings where the boot was held down. This will make it easier for the installation.
Now cut what you just traced out. Double check everything making sure that you copied the old shift boot.
Flip the material inside out and fold it so that the ends are touching eachother. What I did here was staple the ends to gether so that when I sew it was easy. Sew the ends together. (go about 1/8th of an inch from the end.
Now flip it inside out and this is what his shift boot will more or less look like.
For the hard part. Where the little notches at the top were is where you are going to glue the ring that holds the shift boot at the top. Start by putting one side on at a time going counter clock wise. Let the glue dry.
Test fit the boot.
And you should be done!
") instead of regular glue, if thats what you used? ^^^^
instead of regular glue, if thats what you used? ^^^^


