How To (MSP): Painting the pillars and headliner Black

no current pics, blew my motor so i dont have the car at my apt.

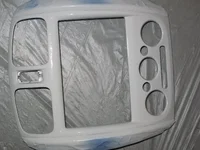
I did get the pillar pod and painted the ring of my stewart warner gauge silver, turned out pretty nice. ill get a pic of that once i see my car again.

But bump for this to get put into the how-to section.
 
I just did this mod a couple days ago. It looks 100 times better than stock. I highly recommend this!!!!
 
This is really nice mod. Pumps up interior feeling nicely. I have painted my ex cars pillars with normal black spray, and it didn't chip off. If I may say how those would look even better IMO, use matt black paint.

Now I have done my P5 pillars little bit different. I used black canvas (not sure about the word?) and I think it looks even better than paint.

Pic of C-D pillar with fabrik vs. original:
CDpil1.jpg


Close-up:
CDpil2.jpg


Even closer:
Apil2.jpg


The fabric/cloth/canvas (what the hell is it??) is same what home speakers have front.
 
Damn fatti that is one haggard ass steering wheel!

ya im working on getting an aftermarket one, have the hub, just need to buy a wheel.

This is really nice mod. Pumps up interior feeling nicely. I have painted my ex cars pillars with normal black spray, and it didn't chip off. If I may say how those would look even better IMO, use matt black paint.

Now I have done my P5 pillars little bit different. I used black canvas (not sure about the word?) and I think it looks even better than paint.

Pic of C-D pillar with fabrik vs. original:


The fabric/cloth/canvas (what the hell is it??) is same what home speakers have front.

nice man the fabric turned out nice. Where did you pick up the fabric at?
 
nice man the fabric turned out nice. Where did you pick up the fabric at?

Thanks!

I got the fabric from local universal autoparts store, I could imagine it's same like yours wallmart, cos' it has lots of different stuff, from cheapass tuning parts to sailing and homestuff.

I think the fabric is great for redoing pillars cos' it's thick enough, so light gray doesn't show trough the fabric, and you can expand it to allmost anykind shapes.
 
paint is holding really good. A few scrathces on the a pillar from my helmet bumping it coming in and out of the car, but other then its all good.

to get the headliner you put both passenger and driver seats all the way down and lower the steering wheel, and you will be able to wiggle it out without damaging it
 
i recently painted my interior. started with just the front stereo surround and cup holder. it looked great. gave it a day to dry and slapped it back together. In a week it bubbled everywhere!!! I used a plastic specific paint but not the krylon stuff. But I'm also in Las Vegas where the inside of cars can hit 180 degrees.

Has anyone had this problem? did i do something wrong? Should i use Heat paint?
 
um maybe u should use engine paint
and take a wire brush and just go over the pillars a few times with some degreaser or something to give them a good base so the paint can stick
i used regular dupli color and its still holding up fine even with the hot sun
 
i didnt have any of those problems with mine, but i dont experience those temps, but i did use a paint for my gauge pod that went under the cd player and it started bubbling.

It was in my car for about a year and when i went to sand the paint off its still was soft and goopy lol so i guess i just didnt let it cure long enough, but i didnt paint with engine paint and its holding up good.
 
if they dont have it at a local parts store check out summit racing, they have everything.
 
took out my shifter/cupholder surround. sanded it down to bare plastic. did four coats of 500 degree high-heat dupli-color white. went on better than any spray paint i've ever used. let it dry for about 12 hours. its back in the car sitting in the sun to see if it bubbles.
pictures soon!
 
this is how f'd up it was. And sanded
 

Attachments

  • 089.webp
    089.webp
    629.1 KB · Views: 173
  • 090.webp
    090.webp
    844.4 KB · Views: 197
  • 094.webp
    094.webp
    515.9 KB · Views: 163
  • 095.webp
    095.webp
    973.5 KB · Views: 191
this is about the 6th coat and as soon as its dry ill install it and take some finished pics.
 

Attachments

  • IMG_8759.webp
    IMG_8759.webp
    338 KB · Views: 166
  • IMG_8760.webp
    IMG_8760.webp
    804.7 KB · Views: 171
Back