Hello guys just another DIY write up , I would like to share of what I did over the weekend .
Job : Flush Brake fluid system
Method : One man method
Vehicle : Mazda CX 5
Year : 2013
Odometer : 20000kms
Fluid : Castrol DOT 4
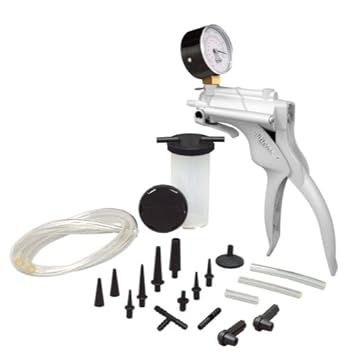
Tools & Equipment that i have used to perform this job are Standard Jack & ( Jack stand i did not have these laying around ) But if you do have it please use it for safety, Breaker bar with 21mm socket , 10mm ratchet spanner (I did not bring my spanner this time so i replaced it with 3/4 ratchet with 10mm socket & Adjustable spanner), Suction tool / equivalent , fluid catcher bottle and old clean rag.

Warning : Do this at your own risk and i will not be responsible for any damage caused by following this steps. I have done this job numerous times before hand to get somewhat a perfect result , so if you are not competent please leave it to the professional. Failure to do this DIY may cause injuries & fatal accidents on the road.
So the sequence i have used of doing the proper Flushing brake fluid system are starting the job at the furthest side from the brake master cylinder & then work your way up to complete.
My case i started at passenger rear side , following by driver side rear , passenger side front and lastly driver side front .
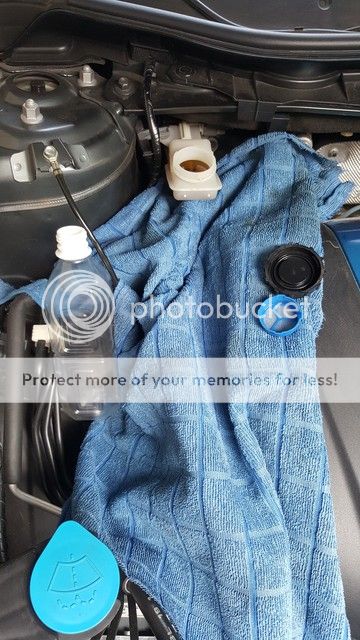
Prior doing the job , please make sure the vehicle is Cooled down , Put the car in P mode with hand brake down , Open the vehicle bonnet , Place the rag below the Brake fluid reservoir, Locate and open brake fluid reservoir cap and using suction tool / equivalent to extract some old brake fluid out from the reservoir and placed it in the brake fluid catcher bottle like shown below. Remember to fill the brake fluid back in the reservoir with fresh brake fluid till at the full mark .


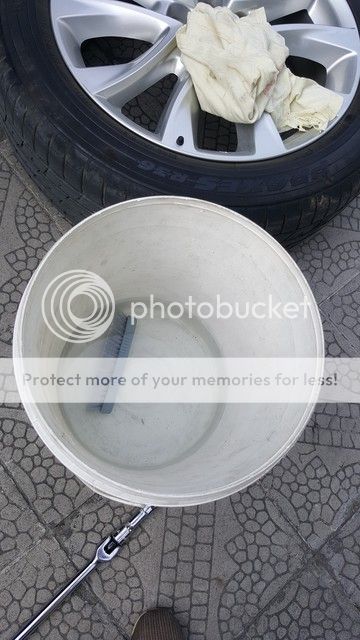
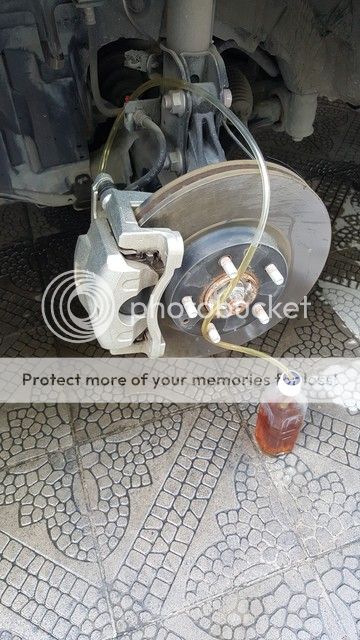
Step 1 : Start from Passenger side rear . Remove wheel. Using the breaker bar with 21mm socket, Jack up the vehicle , Put jack stand. While at it i decide to give a clean scrub on the calipers.


Step 2 : Using 10mm spanner to crack loose the nipple of the brake caliper, attach the fluid catcher bottle tool to the nipple , in the car push the brake pedal 5 times or more . Refill up the brake fluid in the bottle reservoir. Repeat this step until you can see Clean brake fluid from the fluid catcher tubing and make sure there are no more air bubbles before tightening back the nipple. Re install the Passenger side rear wheel assembly.


Check the brake fluid reservoir & refill . Mine was like this . See the particle and dirt that needed to be flushed out .

Step 3 : Working on Driver side rear . Remove wheel . Using 10mm spanner to crack loose the nipple of the brake caliper, attach the fluid catcher bottle tool to the nipple , in the car push the brake pedal 5 times or more . Refill up the brake fluid in the bottle reservoir. Repeat this step until you can see fresh brake fluid from the brake fluid catcher tubing and make sure there are no more air bubbles before tightening back the nipple. Re install Driver side rear wheel.


Example below are the bubbles you have to get out off the brake system.


Step 4 : Working on Passenger side front . Remove wheel . Using 10mm spanner to crack loose the nipple of the brake caliper, attach the fluid catcher bottle tool to the nipple , in the car push the brake pedal 5 times or more . Refill up the brake fluid in the bottle reservoir. Repeat this step until you can see fresh brake fluid from the brake fluid catcher tubing and make sure there are no more air bubbles before tightening back the nipple. Re install Passenger side front wheel.


Step 5 : Working on Driver side front . Remove wheel . Using 10mm spanner to crack loose the nipple of the brake caliper, attach the fluid catcher bottle tool to the nipple , in the car push the brake pedal 5 times or more . Refill up the brake fluid in the bottle reservoir. Repeat this step until you can see fresh brake fluid from the brake fluid catcher tubing and make sure there are no more air bubbles before tightening back the nipple. Re install Driver side front wheel.


Step 6 : In the engine bay clean the brake fluid reservoir and fill it up till the full mark and close the filler cap. Press pedal couple more times . Start the vehicle make sure no ABS warning light are on in the dash .


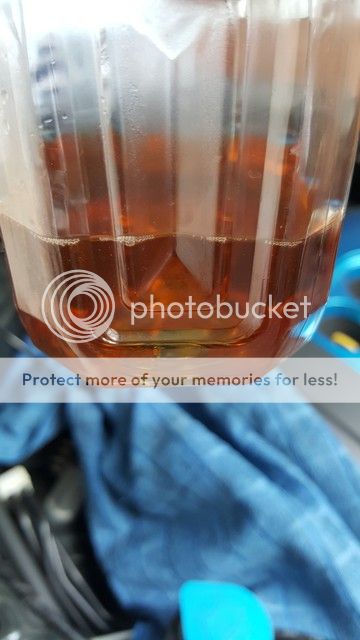
Conclusion If the job were performed right and in the correct manner the brake pedal and braking power should feel more responsive. Here are the result from 20000kms of 3 years ownership under normal driving condition. The old brake fluid were so bad in color , there's a lot of dirt particle in it as shown below .


Please correct me if i am missing steps or whatsoever. Peace out.
Job : Flush Brake fluid system
Method : One man method
Vehicle : Mazda CX 5
Year : 2013
Odometer : 20000kms
Fluid : Castrol DOT 4
Tools & Equipment that i have used to perform this job are Standard Jack & ( Jack stand i did not have these laying around ) But if you do have it please use it for safety, Breaker bar with 21mm socket , 10mm ratchet spanner (I did not bring my spanner this time so i replaced it with 3/4 ratchet with 10mm socket & Adjustable spanner), Suction tool / equivalent , fluid catcher bottle and old clean rag.

Warning : Do this at your own risk and i will not be responsible for any damage caused by following this steps. I have done this job numerous times before hand to get somewhat a perfect result , so if you are not competent please leave it to the professional. Failure to do this DIY may cause injuries & fatal accidents on the road.
So the sequence i have used of doing the proper Flushing brake fluid system are starting the job at the furthest side from the brake master cylinder & then work your way up to complete.
My case i started at passenger rear side , following by driver side rear , passenger side front and lastly driver side front .
Prior doing the job , please make sure the vehicle is Cooled down , Put the car in P mode with hand brake down , Open the vehicle bonnet , Place the rag below the Brake fluid reservoir, Locate and open brake fluid reservoir cap and using suction tool / equivalent to extract some old brake fluid out from the reservoir and placed it in the brake fluid catcher bottle like shown below. Remember to fill the brake fluid back in the reservoir with fresh brake fluid till at the full mark .


Step 1 : Start from Passenger side rear . Remove wheel. Using the breaker bar with 21mm socket, Jack up the vehicle , Put jack stand. While at it i decide to give a clean scrub on the calipers.


Step 2 : Using 10mm spanner to crack loose the nipple of the brake caliper, attach the fluid catcher bottle tool to the nipple , in the car push the brake pedal 5 times or more . Refill up the brake fluid in the bottle reservoir. Repeat this step until you can see Clean brake fluid from the fluid catcher tubing and make sure there are no more air bubbles before tightening back the nipple. Re install the Passenger side rear wheel assembly.


Check the brake fluid reservoir & refill . Mine was like this . See the particle and dirt that needed to be flushed out .

Step 3 : Working on Driver side rear . Remove wheel . Using 10mm spanner to crack loose the nipple of the brake caliper, attach the fluid catcher bottle tool to the nipple , in the car push the brake pedal 5 times or more . Refill up the brake fluid in the bottle reservoir. Repeat this step until you can see fresh brake fluid from the brake fluid catcher tubing and make sure there are no more air bubbles before tightening back the nipple. Re install Driver side rear wheel.


Example below are the bubbles you have to get out off the brake system.


Step 4 : Working on Passenger side front . Remove wheel . Using 10mm spanner to crack loose the nipple of the brake caliper, attach the fluid catcher bottle tool to the nipple , in the car push the brake pedal 5 times or more . Refill up the brake fluid in the bottle reservoir. Repeat this step until you can see fresh brake fluid from the brake fluid catcher tubing and make sure there are no more air bubbles before tightening back the nipple. Re install Passenger side front wheel.


Step 5 : Working on Driver side front . Remove wheel . Using 10mm spanner to crack loose the nipple of the brake caliper, attach the fluid catcher bottle tool to the nipple , in the car push the brake pedal 5 times or more . Refill up the brake fluid in the bottle reservoir. Repeat this step until you can see fresh brake fluid from the brake fluid catcher tubing and make sure there are no more air bubbles before tightening back the nipple. Re install Driver side front wheel.


Step 6 : In the engine bay clean the brake fluid reservoir and fill it up till the full mark and close the filler cap. Press pedal couple more times . Start the vehicle make sure no ABS warning light are on in the dash .


Conclusion If the job were performed right and in the correct manner the brake pedal and braking power should feel more responsive. Here are the result from 20000kms of 3 years ownership under normal driving condition. The old brake fluid were so bad in color , there's a lot of dirt particle in it as shown below .


Please correct me if i am missing steps or whatsoever. Peace out.
Last edited: