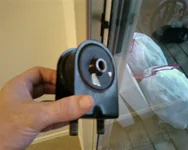
How To: DIY filled motor mounts

at first i tried to put a plate on one side, then fill from the other. That didn't work. The way I ended up doing it was use the caulk gun from one side, and just push as much in as I could. I might have used electrical tape on the other side, but right after i got one side completely filled, I turned it over and filled the other side. Then I used my finger to smooth it out, flat with the edge of the mount. That way all the air was out, and it filled up the whole mount.

It was really messy, and I used thinner to remove the tar from my hands. It got everywhere.
 
I did it this weekend using epoxy. I thought that having the hard epoxy combined with the existing rubber would be a good compromise because damping and vibration, but it turned out to vibrate way too much for me. It barely vibrates at all at 1000 rpm and above, but at idle it feels like sitting in a massage chair.

Driving dynamics are much improved, and great overall, though. The throttle response is SO good. Car feels so much snappier, and even feels like there's more power, though I doubt that could be the case. Just a feeling.

I don't think I can deal with the vibration, though, so I think I'll have to get the SLS mount instead.
 
this is great! i might try this on the weekend

just a few double checking questions...the best material to hold up the longest and reduces hop and vibrations the most is windo weld? and should i do my front first and then the rear and so on, or the rear first?

thanks alot, this may be the answer to some of my issues with the car :)
 
Karna said:
this is great! i might try this on the weekend

just a few double checking questions...the best material to hold up the longest and reduces hop and vibrations the most is windo weld? and should i do my front first and then the rear and so on, or the rear first?

thanks alot, this may be the answer to some of my issues with the car :)
Windo weld seems to be the most popular. But it seems that there aren't that many people completely satisfied by this solution. I don't think the order matters. Most people do the front first, probably because it's the easiest.
 
joined the club. stoped all the motor movement. Ill chime in if it gives me any problems.
 

Attachments

  • Photo-0108.webp
    Photo-0108.webp
    82.7 KB · Views: 929
I can't remember when I last chimed in, but it's been at least a year and I have 0 regrets for this mod.

I wonder how stiff the AWR mounts are, but I don't know if I'd like the mounts any stiffer.
 
iracemine said:
joined the club. stoped all the motor movement. Ill chime in if it gives me any problems.

that looks really good!! what did you use to fill it in?
 
two tubes of 1 min epoxy. I read through all the selections at the store and they said that this bonds to metal and ruber and stets flexable and resists cracking! almost like they made it just for this aplication LOL. having probs getting the rear mount off though.
 
Guys,

Question from a complete newbie:

How can I remove front mount? Any pics ? How difficult it is ?
 
P5? Its 3 bolts and takes 5-10 mins. 2 bolts on the bottom and one through the middle of the mount.
 
open your hood, and look directly down, to the left of the radiator hose on the right

its way at the bottom and if u get under your car theres a little dome shape directly underneath where it should be
 
OK so i just took off the two bottom bolts and now ive been trying to take the middle bolt out for about a good hour

how did it take u guys 5-10 minutes? theres no possible way for me to get the bolt out because i cant get a good angle on it

HOW DID U GUYS DO iT?

need an answer pretty fast please
 
LOL, I'm in the same boat as you, man. I broke 1 extension, and busted the gears in a ratchet trying to get that thing off. I think I'm gonna see if I can find someone with an airgun. I was using a 1/2drive 2 ft breaker bar with 6" extension.
you may want to remove your intake for more room.
It's possible to get the bolt from underneath the car, through the little cut in the slpash shield. I did that and used my leg power. that's what busted my rachet and extension, though..
 
nope i tried that too, didnt use my legs tho
i didnt have time to remove my intake cuz i had to go to work
i thought it was gonna be like a 10 minute thing and it turned out to be a real pain in the ass

I think its too tight cuz i had my clutch replaced at a dealership and they prob took that out and put it back in with an airgun, so im tryin to find someone with an airgun too so i can get this dam thing off lol
 
I filled mine with 3M WinoWeld. They have cartridges that you can put into a caulk gun for application, which is really handy. I covered one of of my mount with foil duct taped into place. I left the mount overnight for curing and it went in the next morning. Piece of cake.

The vibration levels are the same as the softest AWR mount (I know because I had that mount before the WindoWeld stock mount). Wheel hop was eliminated. I am back to stock motor mount now and it's nice to not have the in-cabin vibrations.
 
OK, mine broke free just fine, after giving it a 3 hour break. I guess the PB just needed some extra time to really soak in there!
 
Hey just a couple quick questions here since I don't want to start a new thread for no reason.

First off is a very noob question. Which is the front, rear, and side mount?

Second is how easy is it to remove and fill the side mount?

Thanks guys
 
Back