Home Made CAI (lots of pics)

BremertonMSP

Member
:
95 F-150 4x4, 89 Mustang Turbo Coupe, 87 Thunderbird Turbocoupe
first pic, this is the original setup that was for a p5, the straight part need to be about 2" longer for the MSP.
 

Attachments

  • dsc00110.webp
    dsc00110.webp
    288 KB · Views: 500
The hole is for the air temp sensor. I think the k&n p/n was 0920. The part between the k&n and the straight part is an adjustable piece for bends.
 

Attachments

  • dsc00111.webp
    dsc00111.webp
    286.2 KB · Views: 401
Nice...

My Dad installs A/C's and water heaters and we have all of those parts just laying around in the garage, althought I would buy a CAI for the looks more than the minor preformance gains on a P5.
 
arg dial ups!!

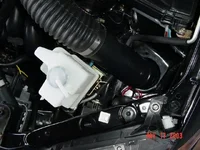
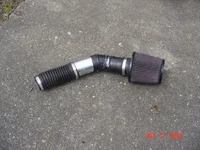
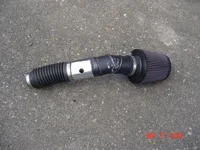
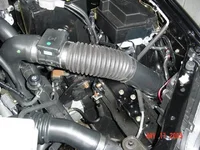
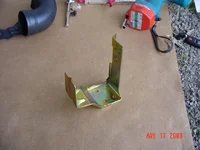
You need to connect the straight piece and the angled piece to the filter and feed it from the underside of the car. Like I said, the ribbed piece is from an 87 TC, fit perfect! I covered the piping with electrical tape to prevent air leaks. Some will say it looks ghetto, but oh well, I'm a cheep basterd!!
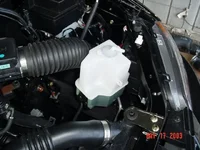
You do need to cut back the tape fore the MAF and ACT sensors, because you are moving the ACT farther from the original location.
 

Attachments

  • dsc00120.webp
    dsc00120.webp
    54.7 KB · Views: 485
BremertonMSP, Did you forget to put back on your coolant tank?. Don't forget it!

that will work fine. You'll deinately get the cooler air down there, but you still have to go through an extra loop compared with Injen's hard pipe replacement. I know you saved a bunch of $$ though. Well done.
 
This is the bracket that holds the radiator overflow bottle. Bend it to this configuration. It will still hold the bottle the say way, but you will screw in the screws in the bottom in a slightly differnet place.
Note: no drilling is required! There are many tapped holes in the area where you take off the bracket and remount it, and on the bracket itself. Just find the one that best relocates the bracket. Don't tighten it down immeadiatley. Just snug it down and put the bottle in. Then move the bottle around until you find the spot where nothing interfears with the hood or the CAI. Then tighten it down. You will have to move the ac line slightly, just be gentle with it.
 

Attachments

  • dsc00122.webp
    dsc00122.webp
    30.3 KB · Views: 282
Let Me Finish!! Still have pics to post!!

This is what it looks like finished.
 

Attachments

  • dsc00125.webp
    dsc00125.webp
    34.5 KB · Views: 345
Another shot of the finished process. Sounds great too! Makes a whooshing noise when the turbo spools up, and a nice pa-pa-pa when the bypass valve opens.
 

Attachments

  • dsc00126.webp
    dsc00126.webp
    37 KB · Views: 324
No Problem

Limited Edition said:
:D.
i thought you were done posting...
15.3 at the track isn't bad at all....i just read your other thread.

That's okay. Yea the time was okay, but I was hoping for at least a 15.1, but I'll settle. At least I have a base line for future modes. I'm not going to say the CAI was worth much hp, but I know it doesn't hurt when you in the staging line, and things are warming up in the engine compartment, and I'm drawing air from the fenderwell vice the engine compartment.
 
Back