
You are using an out of date browser. It may not display this or other websites correctly.
You should upgrade or use an alternative browser.
You should upgrade or use an alternative browser.
NB MX-5 Hey, it's Minnie!
- Thread starter chiefmg
- Start date
Regular readers of this thread might want to sit down, lots of pictures (for me) coming up.
I had noticed that the clutch master I replaced a while back was showing dark fluid.
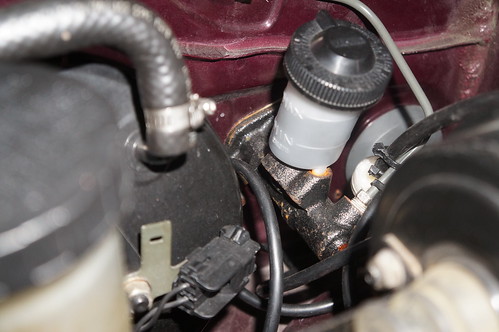
I flushed it once and it came back, suggesting to me that it was leaking by internally. The past few times I drove it I felt like there was some difficulty changing gears so I decided to finally overhaul the original master and swap them out.
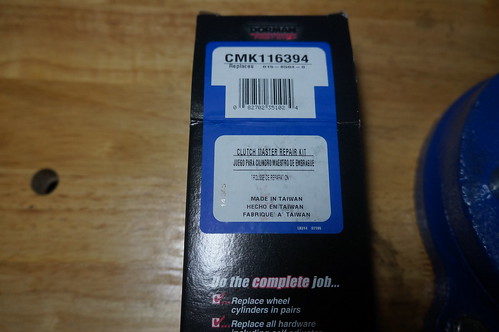
I bought an overhaul kit that last time I was gone from RockAuto:
Tools you need:
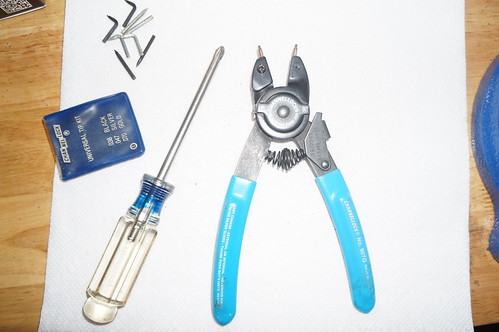
It helps to have a vise to use, as there is a circlip holding the master internals in place. I used a Phillip's head screwdriver to put tension on the spring (pushing down) and then removed the circlip using my pliers.
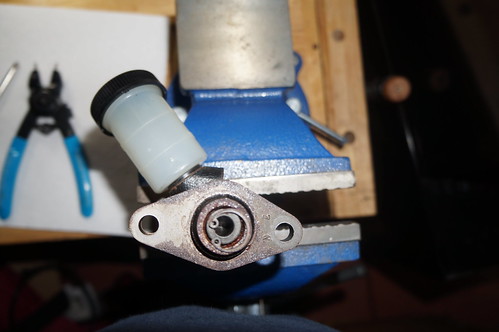
Releasing the tension on the spring should allow you to remove the piston. Mine was a little stuck so I used some needle nose pliers to grab inside the clutch rod recess and pull it out. To get the other pieces out I turned the master upside down and tapped on the side until they came out.
I cleaned out the bore with brake cleaner and then inspected it to make sure there were no grooves etc inside.
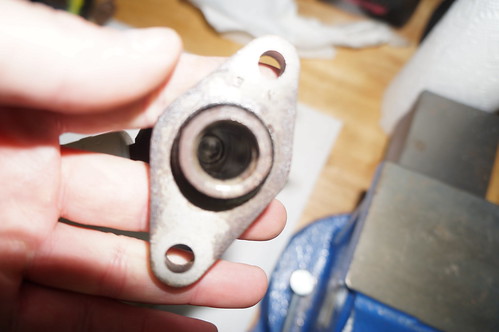
Mine was clean so I proceeded. Here's a look at both the old and new internals:
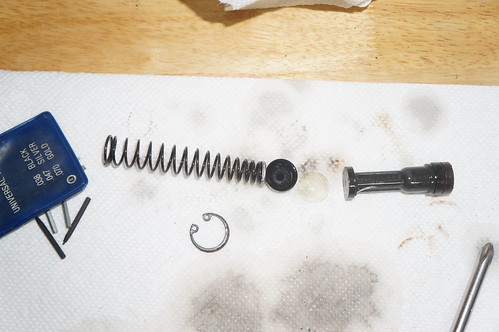
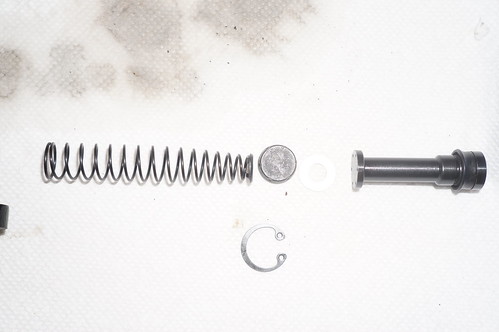
Here's the old and new pistons side by side, you can see how the seal on the old one was flattened:

Assembly is the reverse of disassembly. Use brake fluid to lubricate the seals before putting the internals into the bore. You can't see it in the pictures but there is a brass/copper washer in the new kit, that is to be used as the spacer (I put that into the bore first so the spring wouldn't dig into the bottom which as it turned out was wrong. The washer wouldn't come out when I figured out my mistake so it's still in there. I reused the old nylon washer). You can bench bleed the master if you want (this puts brake fluid inside the bore), I didthe second time around after correcting my mistake. If you don't this will just mean a little longer time to bleed.
Once it's all back together remove the old master. Note if you have cruise then first remove the cruise vacuum actuator, it makes life much easier. You need a flare nut wrench (10mm) to safely remove the hydraulic hard line going to the slave cylinder. I loosened the two 12mm nuts first, then the flare nut. Remember that brake fluid will remove paint so put some protection underneath the hard line (I use a couple of paper towels wadded up). I then removed the nuts completely and finally the hard line. Take care removing the master as there is a gasket underneath its mounting flange. It seems to be thin paper but I didn't have a replacement so I didn't want to bung it up.
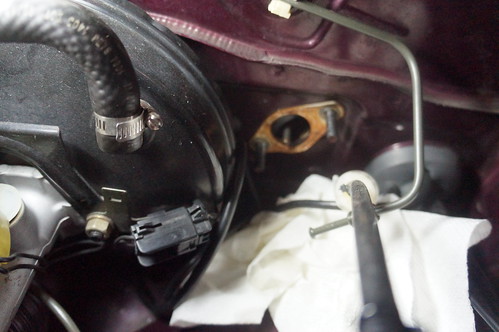
Once that is off check inside the hole in the firewall. There is a double wall in that area and a rubber grommet should be in place in the innermost wall. Mine wasn't for some reason, so I pulled it out and sprayed around it with silicone to lubricate it, then put it in place. A little bit of fiddling and you should be able to get it in place.
After that install the overhauled master the reverse of the removal of the old one. Add some brake fluid, bleed the system and you will be good to go. My designated leg was on a school trip so I had to wait for him to get back in order to bleed the system. My wife doesn't buy it when I tell her it's a free workout.
I had noticed that the clutch master I replaced a while back was showing dark fluid.
I flushed it once and it came back, suggesting to me that it was leaking by internally. The past few times I drove it I felt like there was some difficulty changing gears so I decided to finally overhaul the original master and swap them out.
I bought an overhaul kit that last time I was gone from RockAuto:
Tools you need:
It helps to have a vise to use, as there is a circlip holding the master internals in place. I used a Phillip's head screwdriver to put tension on the spring (pushing down) and then removed the circlip using my pliers.
Releasing the tension on the spring should allow you to remove the piston. Mine was a little stuck so I used some needle nose pliers to grab inside the clutch rod recess and pull it out. To get the other pieces out I turned the master upside down and tapped on the side until they came out.
I cleaned out the bore with brake cleaner and then inspected it to make sure there were no grooves etc inside.
Mine was clean so I proceeded. Here's a look at both the old and new internals:
Here's the old and new pistons side by side, you can see how the seal on the old one was flattened:
Assembly is the reverse of disassembly. Use brake fluid to lubricate the seals before putting the internals into the bore. You can't see it in the pictures but there is a brass/copper washer in the new kit, that is to be used as the spacer (I put that into the bore first so the spring wouldn't dig into the bottom which as it turned out was wrong. The washer wouldn't come out when I figured out my mistake so it's still in there. I reused the old nylon washer). You can bench bleed the master if you want (this puts brake fluid inside the bore), I didthe second time around after correcting my mistake. If you don't this will just mean a little longer time to bleed.
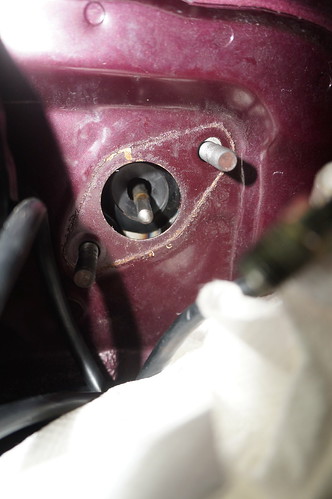
Once it's all back together remove the old master. Note if you have cruise then first remove the cruise vacuum actuator, it makes life much easier. You need a flare nut wrench (10mm) to safely remove the hydraulic hard line going to the slave cylinder. I loosened the two 12mm nuts first, then the flare nut. Remember that brake fluid will remove paint so put some protection underneath the hard line (I use a couple of paper towels wadded up). I then removed the nuts completely and finally the hard line. Take care removing the master as there is a gasket underneath its mounting flange. It seems to be thin paper but I didn't have a replacement so I didn't want to bung it up.
Once that is off check inside the hole in the firewall. There is a double wall in that area and a rubber grommet should be in place in the innermost wall. Mine wasn't for some reason, so I pulled it out and sprayed around it with silicone to lubricate it, then put it in place. A little bit of fiddling and you should be able to get it in place.
After that install the overhauled master the reverse of the removal of the old one. Add some brake fluid, bleed the system and you will be good to go. My designated leg was on a school trip so I had to wait for him to get back in order to bleed the system. My wife doesn't buy it when I tell her it's a free workout.
Well it seemed to have taken Fiveo longer to get to my injectors than I was told, but they are en route back to me and scheduled for delivery once that happened.
I was thinking about my oversteer problem, it was mostly caused by power but the rear does sometimes feel light in steady-state cornering. I decided to swap back to the larger (27mm) JR tubular front bar I still have to see how that changes things. Got that all done, hoped the rain cleared off so I could test it out the next day.
I was thinking about my oversteer problem, it was mostly caused by power but the rear does sometimes feel light in steady-state cornering. I decided to swap back to the larger (27mm) JR tubular front bar I still have to see how that changes things. Got that all done, hoped the rain cleared off so I could test it out the next day.
The injectors didn't show that Saturday which was really annoying. I ran autocross with Corvette Troy on Sunday at Kil Kare Raceway up in Dayton OH, it was a blast. The course was fast (naturally), I had understeer during my first set of runs so I dropped front tire pressure by 2 psi. Second set was better, my times were a second (or less) behind some Mustangs which were pushing more horsepower (and wider tires!) than me so that was fun.
I received notification my injectors were delivered to my local PO this morning, too late for delivery today. I armed myself with the tracking number and went up to see if I could liberate them. I was able to do that, when I asked if I had any recourse since they were sent Priority (two day delivery) I was told they only guarantee Express shipments. That little bit of info is now tucked away in my head.
Had some other stuff to do so didn't get around to installing them until that night. Fiveo did me right, I had asked for O-rings to fit the top of the spacers. Not only did they send me those (two different sizes) they also sent me four new spacers.
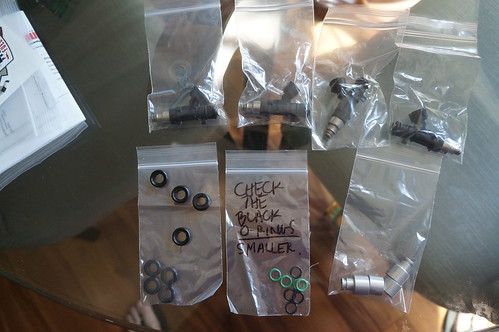
I had to dig through my wiring diagram to remember the fuel pump relay location to disconnect that before starting the job (to relieve pressure off the system). For an NB1, you want to remove the plate beneath the steering column, get on your back and look up. Inboard of the steering column you will see a block with five connectors. The one for the fuel pump relay is the one closest to the firewall and closest to the steering column. I have seen it said to start the car, then disconnect the relay and let it run until it dies. I decided to go ahead and disconnect it, then cranked the car 4-5 times. This was enough to relieve the pressure, I did still have a little fuel in the lines to the rail when I removed them. Then it was just a matter of removing the upper half of the intake manifold, removing the fuel rail and injectors, then installing the new ones and assembling everything the reverse of disassembly. Note to be sure to lubricate the O-rings with engine oil and push things together with a twisting motion to keep from tearing the O-rings. Got that all done in about two hours, and she fired right up. No fuel gushers, I'll test things tomorrow.
I received notification my injectors were delivered to my local PO this morning, too late for delivery today. I armed myself with the tracking number and went up to see if I could liberate them. I was able to do that, when I asked if I had any recourse since they were sent Priority (two day delivery) I was told they only guarantee Express shipments. That little bit of info is now tucked away in my head.
Had some other stuff to do so didn't get around to installing them until that night. Fiveo did me right, I had asked for O-rings to fit the top of the spacers. Not only did they send me those (two different sizes) they also sent me four new spacers.
I had to dig through my wiring diagram to remember the fuel pump relay location to disconnect that before starting the job (to relieve pressure off the system). For an NB1, you want to remove the plate beneath the steering column, get on your back and look up. Inboard of the steering column you will see a block with five connectors. The one for the fuel pump relay is the one closest to the firewall and closest to the steering column. I have seen it said to start the car, then disconnect the relay and let it run until it dies. I decided to go ahead and disconnect it, then cranked the car 4-5 times. This was enough to relieve the pressure, I did still have a little fuel in the lines to the rail when I removed them. Then it was just a matter of removing the upper half of the intake manifold, removing the fuel rail and injectors, then installing the new ones and assembling everything the reverse of disassembly. Note to be sure to lubricate the O-rings with engine oil and push things together with a twisting motion to keep from tearing the O-rings. Got that all done in about two hours, and she fired right up. No fuel gushers, I'll test things tomorrow.
Test drive went well. I had little of the gas smell remaining under boost and throttle response seemed better as well. I went out and did some autotuning that evening, I went back to a previous save point when I last had the injectors installed (so I would lose some but better to run it with the injectors now installed). Now I just had to drive it as much as possible over the next few days and get some more tuning done.
Swapped back to the MSM front sway the next morning. Ride was a little better, I can't push it hard enough on the street to see how it has changed handling at the limit. I just wanted it to be non-threatening for my wife to drive. Had to make a run to the local pick-n-pull and finally thought to get a couple of floor mat holders out of third gen Proteges. It is a direct fit for the left side of the driver's mat (I may have to enlarge the mounting hole so I can put it under the seat bolt) but I will have to extend the right one somehow. I just don't like the screws Mazda wants you to put into the carpet, and don't understand why they use those when so many of their other cars have metal brackets for the mats.
Unfortunately I wasn't be able to get to the mat bracket before heading back to work Saturday, I had several other things to get done that are priority.
Unfortunately I wasn't be able to get to the mat bracket before heading back to work Saturday, I had several other things to get done that are priority.
That Friday I washed her and swapped back to the Lightspeeds. This reduced my stress level as if the wife curbs one while I'm gone, I knew I can get it replaced. That was it for a while as I was headed back to work.
My next post was when I was due to head home in about three weeks. I made a couple of small purchases while gone that I'll be installing when I get home (and documenting as well). Then I'm basically just going to drive it as much as possible. Might be making a trip to FL at some point, I'll see if I can connect with some folks down there.
One of my purchases was one of MS Labs' (reverant) CAN wideband interfaces. For those of you who don't know what that is, it's a box that allows you to use the digital output of your wideband unit to input directly into the MS. This avoids noise problems and signal loss that can happen if you use the analog input (which you then have to correct for). I was a little worried about being able to get one with the issues with Greece going on now, but I discovered that Trackspeed Engineering was carrying them so that's where I ordered from. Should be waiting for me when I get home.
One of my purchases was one of MS Labs' (reverant) CAN wideband interfaces. For those of you who don't know what that is, it's a box that allows you to use the digital output of your wideband unit to input directly into the MS. This avoids noise problems and signal loss that can happen if you use the analog input (which you then have to correct for). I was a little worried about being able to get one with the issues with Greece going on now, but I discovered that Trackspeed Engineering was carrying them so that's where I ordered from. Should be waiting for me when I get home.
When I got to the house I said hello to the grandkids and animals, then went on my treasure hunt. Found everything I had bought without too much searching. After some relaxing I dove into things. First I installed the Garage Star door blocks, there's already been enough pictures of those. Mine went on without any trouble, although the passenger door doesn't want to close without a big heave (driver's door is fine). I will see how it is after some use and then adjust if necessary.
I opened the CAN bus wideband interface and did some research on installing it. I removed the wiring harness between the MS and the factory harness where I'm going to install it but the wine kicked in and I decided to wait on that bit until tomorrow.
Finally, I removed these:
And installed these:
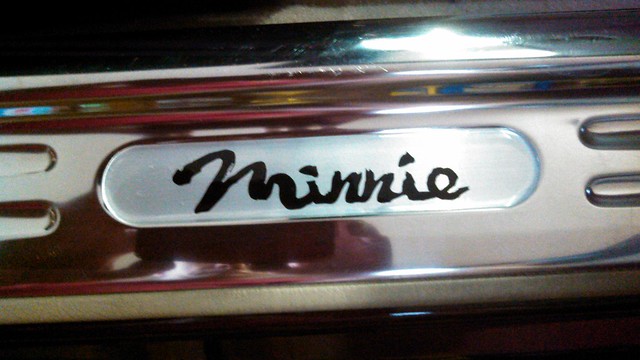
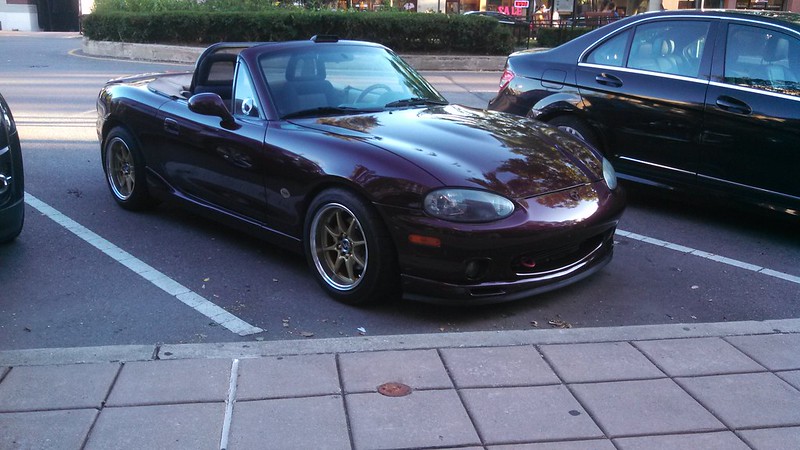
Those were what I got from revlimiter. Adam does great work. And now she officially had her name.
I opened the CAN bus wideband interface and did some research on installing it. I removed the wiring harness between the MS and the factory harness where I'm going to install it but the wine kicked in and I decided to wait on that bit until tomorrow.
Finally, I removed these:
And installed these:
Those were what I got from revlimiter. Adam does great work. And now she officially had her name.
Up early the next morning (as per usual when I first get home), I decided to go ahead and install my CAN wideband interface. Unfortunately it wasn't going to be simple. The instructions specify which wires to connect to without telling which pins they are. I found that information elsewhere, but only references to one DB37 connector. My MS2 has two connectors, and neither one has wires on all the pins that are mentioned. I sent a message to MS Labs asking for guidance.
Heard back from Reverant. Apparently my MS is one of his earlier builds and it does not have the CAN setup like his more recent ones. Not a huge deal, I just have to remove it from the car, open it up and add some wires to the board.
Met up with a small group of people to drive to Columbus for a swap meet. The guy in front of me told me the front end of mine looks intimidating in the rear view mirror. Maybe that's why people seem to drive like idiots when I'm passing them. Or maybe they are just idiots.
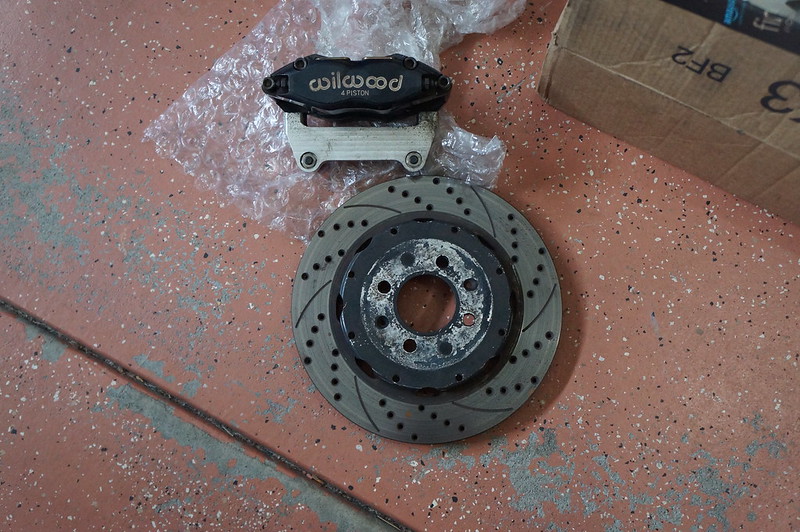
Sold some things at the swap meet, and bought this:
Was going to try to get them installed the next day. That's if I don't have any aftereffects from the wicked sunburn I have.
Sold some things at the swap meet, and bought this:
Was going to try to get them installed the next day. That's if I don't have any aftereffects from the wicked sunburn I have.
AANNNNDDDDDDD the brakes won't work with my Flatouts. Just not quite enough clearance. I will have to try and find out what wheels will work, and if I like any of them enough to buy a set.
I was surprised though to find the bigger rotors were lighter than the stock sized ones. I was told the calipers are also lighter than the stockers but I didn't remove mine to find out (just tucked it out of the way while I checked fitment).
I was surprised though to find the bigger rotors were lighter than the stock sized ones. I was told the calipers are also lighter than the stockers but I didn't remove mine to find out (just tucked it out of the way while I checked fitment).
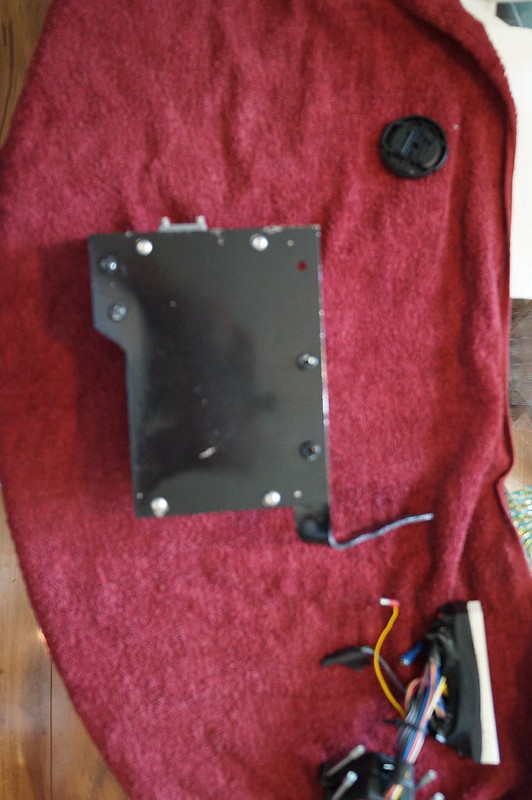
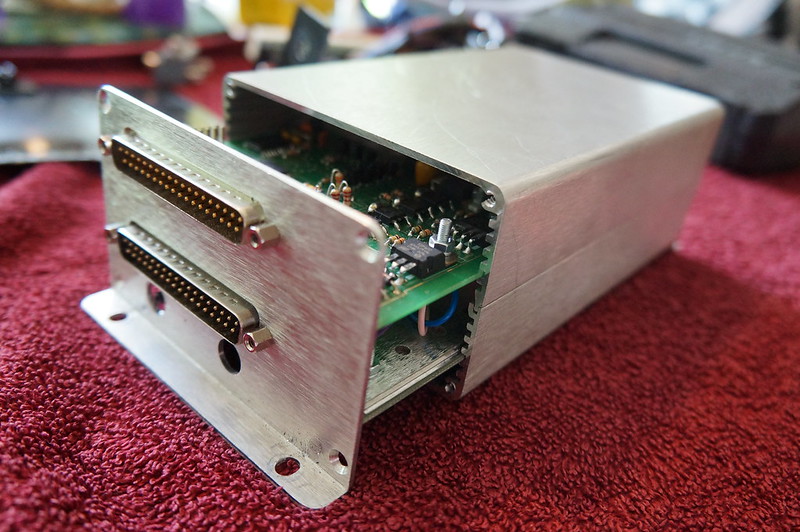
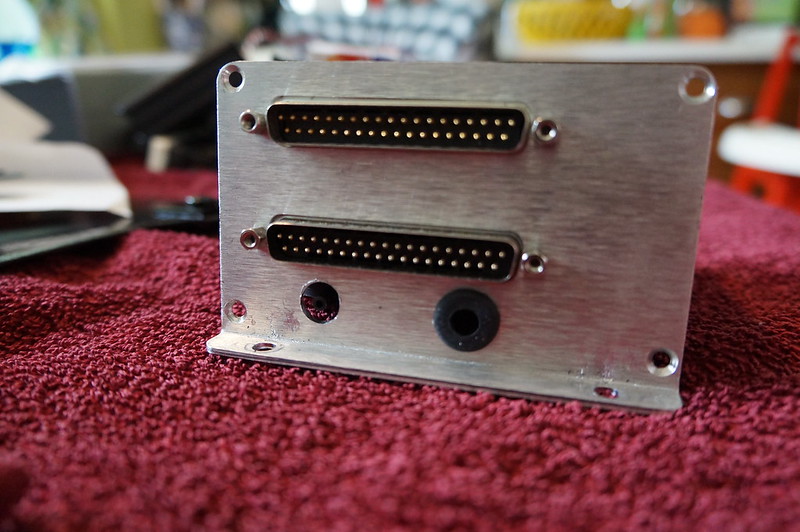
I decided another day was the day to do my contortionist act and work on the MS. I pulled the unit out from under the dash (you may recall I have it installed in the same location as the factory ECU) and brought it inside to work. Here are a couple of pictures showing the top and bottom with it mounted to the plate I fabricated, you can see the area I removed on the bottom edge to give my foot clearance (as mentioned when I talked about this initially). Apologies for the blurred pictures, I'm not sure what was happening as some were fine.

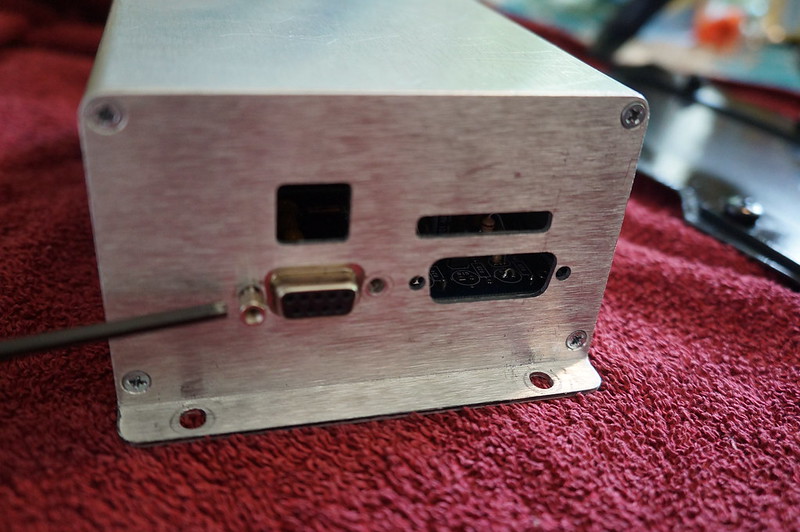
In order to open the box, you have to remove the two nut screws (I'm not sure of the actual nomenclature for these, you computer guys will) holding the serial port in place.
You then go to the opposite end and remove the four corner screws:

After that you can slowly pull the boards out of the box:
In order to open the box, you have to remove the two nut screws (I'm not sure of the actual nomenclature for these, you computer guys will) holding the serial port in place.
You then go to the opposite end and remove the four corner screws:
After that you can slowly pull the boards out of the box:
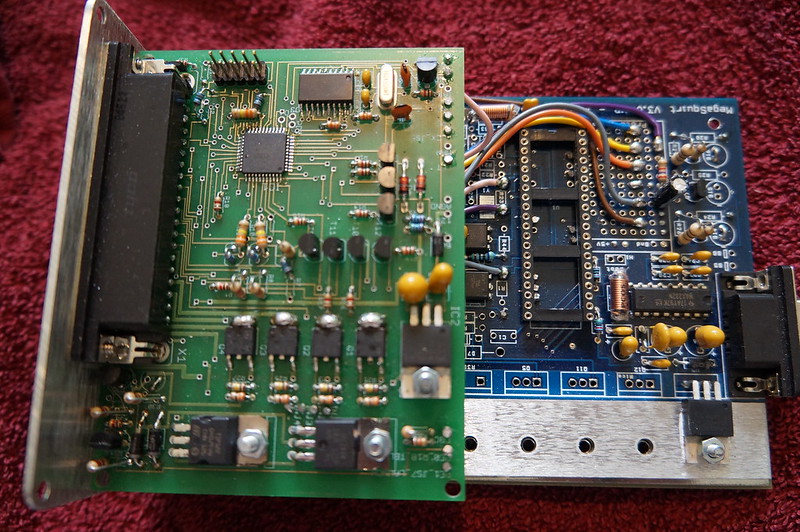
I have an early MS2e, so the guts of mine might be different from someone who is looking at this. Here are the boards installed in mine (don’t ask me what does what as I have no clue):
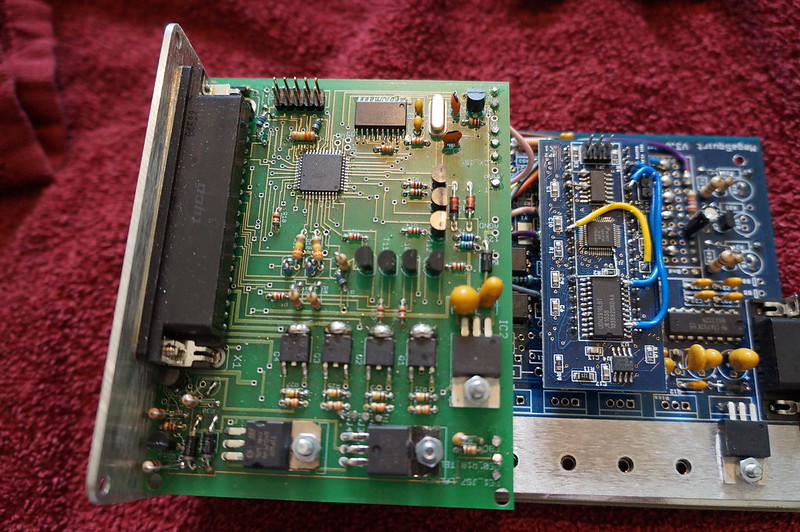
Flipping this assembly over I found the two holes that I needed to add wires to for the CAN input from my wideband. JS6 is the CANH (white wire) while JS8 is CANL (black wire). The holes were in the middle of the small raised board on the main board, but I found that was removable.
I went to Ace to get some white wire as I didn’t have any. All that was available was 18 gauge. Once I got home I found that wouldn’t fit into the hole, so I ended up using some red 22 gauge wire I had for the CANH connection. It’s a little hard to see but the wires are in place in this picture:
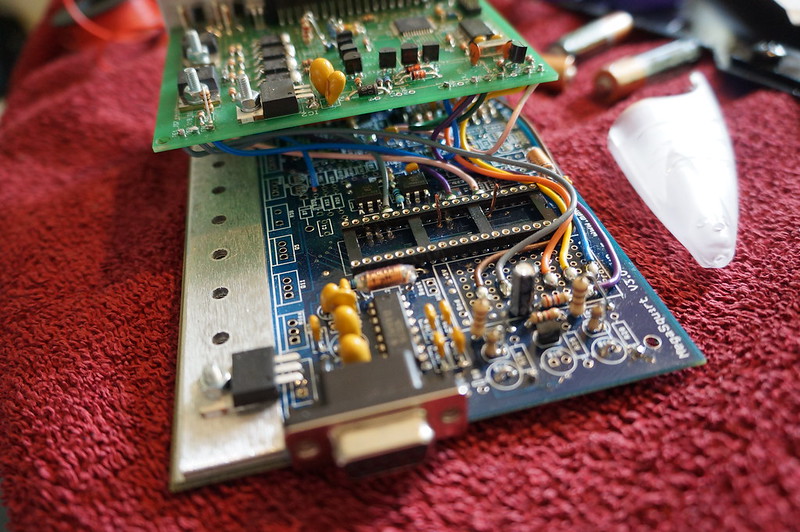
I also bought a battery driven soldering iron as my old one doesn’t have a very small tip. Unfortunately it didn’t work too well, might just need new batteries but I didn’t feel like messing with it further. As can be seen from the pictures it was very tight in there so what I did was place the soldering iron on the wire a little way up from the board, let it get hot and then flowed the solder down the wire. Once it was all cool I cut off the extra wire. Forget about a picture for that, the camera was going nuts trying to focus. You’ll just have to take my word for it that I got them soldered correctly.
There is an extra hole on the one end cap of my housing that I was going to use for running the CAN wires out from. Didn’t want any chafing so I put a grommet in that bad boy.
After I got the heavy lifting done, all I had to do was put some connectors on the various wires to make it easy to remove things when needed. I put my ground wire to the bolt holding the ground block under the dash and tapped off the wire I previously took power from the radio fuse for one of my gauges. Ran all the wires out of the way and used some zip-ties to keep them there. No pictures of this, because not only can the camera not focus on this stuff very well, neither can I to see what I want to shoot. If anyone wants to see it you can pay me a visit and stick your head up under my dash.
Then it was time to update my settings in the MS so it would know to use the digital input from the wideband. This is where it fell apart. I connected my laptop to the MS with no trouble via Tuner Studio, but I found that the configuration of my version of TS did not have the same menu options as what are in the instructions. While I was trying to figure that one out, TS lost communication with the MS. It would try to connect three times but then it goes into offline mode. I am now trying to update TS to see if that will correct anything. In the meantime I removed the CAN wideband interface and reconnected the analog wire for the wideband input so I can safely drive the car.
Flipping this assembly over I found the two holes that I needed to add wires to for the CAN input from my wideband. JS6 is the CANH (white wire) while JS8 is CANL (black wire). The holes were in the middle of the small raised board on the main board, but I found that was removable.
I went to Ace to get some white wire as I didn’t have any. All that was available was 18 gauge. Once I got home I found that wouldn’t fit into the hole, so I ended up using some red 22 gauge wire I had for the CANH connection. It’s a little hard to see but the wires are in place in this picture:
I also bought a battery driven soldering iron as my old one doesn’t have a very small tip. Unfortunately it didn’t work too well, might just need new batteries but I didn’t feel like messing with it further. As can be seen from the pictures it was very tight in there so what I did was place the soldering iron on the wire a little way up from the board, let it get hot and then flowed the solder down the wire. Once it was all cool I cut off the extra wire. Forget about a picture for that, the camera was going nuts trying to focus. You’ll just have to take my word for it that I got them soldered correctly.
There is an extra hole on the one end cap of my housing that I was going to use for running the CAN wires out from. Didn’t want any chafing so I put a grommet in that bad boy.
After I got the heavy lifting done, all I had to do was put some connectors on the various wires to make it easy to remove things when needed. I put my ground wire to the bolt holding the ground block under the dash and tapped off the wire I previously took power from the radio fuse for one of my gauges. Ran all the wires out of the way and used some zip-ties to keep them there. No pictures of this, because not only can the camera not focus on this stuff very well, neither can I to see what I want to shoot. If anyone wants to see it you can pay me a visit and stick your head up under my dash.
Then it was time to update my settings in the MS so it would know to use the digital input from the wideband. This is where it fell apart. I connected my laptop to the MS with no trouble via Tuner Studio, but I found that the configuration of my version of TS did not have the same menu options as what are in the instructions. While I was trying to figure that one out, TS lost communication with the MS. It would try to connect three times but then it goes into offline mode. I am now trying to update TS to see if that will correct anything. In the meantime I removed the CAN wideband interface and reconnected the analog wire for the wideband input so I can safely drive the car.
New Posts and Comments


- Replies
- 3K
- Views
- 2M
- Replies
- 1
- Views
- 1K
New Threads and Articles
-

-
14 CX-5 power drivers seat won't go forward, all other directions work
- By rickprins
- Replies: 2