Bumper Step plate self-install

ladygrey

Member
:
2006 Mazda5 Touring MT, Carbon Grey
So I have the bumper protector in my car waiting to be installed. I've already scratched the top of the bumper up pretty good with all the baseball gear (scratched the side of the car with a bat too - arghhh) so I thought it was a good investment.

Anybody done this already that wants to give me any tips or any advice on weird little things to watch out for? The service guys told me it was easy when I ordered and told me they would give me advice (basically told me not to pay the $25 to have them do it), but I was in a hurry when I picked it up and forgot to ask.
 
Last edited:
It comes with spacers and good instructions. I did my own and it was easy. Spends lots of time test fitting it and you will be fine.
 
I looked at it today and it lookes easy enough. I think it's a job for me and not my A.D.D. doesn't know how to use a ruler husband.

ZoomZoom, I have the carbon grey so it blends in almost perfectly ;) - I laid it on the bumper and it even completely covers the big scratch I've already put on there.
 
I also have one installed and did so myself...I agree with the above statements completely...Use those spacers they'll save your life!!! Oh, and whatever you do, DON'T remove the 3M adhesive covers before you test fit and mark the area on each side of the bumper step plate...Once you do, you'll never get the plate cover off of your bumper without removing some paint in the process ;)

Here's how I did mine :)

1. Make sure car is washed and clean (or the rear bumper at least)

2. Use the provided alcohol clean wipe that comes with the step cover to remove any excess oils or dust that the wash might leave behind.

3. Attach the provided spacers onto the step plate...If I remember correctly, the measurements should be about 3 & 1/4 inches in from the ends

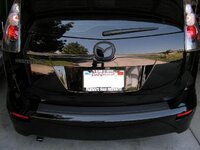
4. Test fit the step plate on the bumper by laying it gently on the bumper to find the correct fitting position.

5. Make sure the bumper is centered by using a tape measure to leave the same amount of space on each side

6. Once centered, use a soft chalk pen or childrens washable marker to mark your bumper on the bottom top and each side of the step plate so you can easily re-apply it in the exact same position after you remove the 3M adhesive film covers

7. Remove the 3M adhesive film from the sticky surface and re-fit the bumper in the already marked area (DO NOT PRESS DOWN FIRMLY YET)...Gently make sure it is in place where it should be and then apply pressure starting in the middle and working your way out to each end slowly in a smoothing.sanding motion...

8. Once fitted securly, use warm water (dish/car wash treatment soap optional) to remove the chalk marks or washable water marker lines from your bumper

9. Use Stoner Brand Trim Shine (available at http://www.trimshine.com/ or any Kragen auto parts) to shine that bad boy up!!! It's water based, goes on wet and dries to a gloss look that is completely dry to the touch...It lasts for days at a time, naturally comes off with washing your car, rain, etc...Is UV protectant, and will not harm your car's paint at all...I've been using their products for years and haven't gone back since :D

Best of luck with the install!!! :D

DAN
 
Last edited:
7red7 said:
6. Once centered, use a soft chalk pen or childrens washable marker to mark your bumper on the bottom top and each side of the step plate so you can easily re-apply it in the exact same position after you remove the 3M adhesive film covers

Dan, those instructions were great, especially #6 - the children's marker tip was truly inspired. Yellow shows up the best on grey if anyone else want's to avoid trial and error.

I installed it in about 10 minutes (including searching for supplies) today.
 

Attachments

  • car_back.jpg
    car_back.jpg
    48.4 KB · Views: 513
  • car_bumper_cu.jpg
    car_bumper_cu.jpg
    42.6 KB · Views: 516
Zoom5Zoom said:
ok lady great job now we have to work on that tint for your baby(enguard)

Soon, very soon. I was just making sure that they could actually get the ABS thing fixed first. We've been driving it hard to make sure that it is truly fixed then I can finally put the tint on.
 
i installed one as well... i think they look nice... simple upgrade but i'm sure it will serve it's purpose well...

and check out my blacked out emblems...
 

Attachments

  • PICT0001.JPG
    PICT0001.JPG
    45.1 KB · Views: 410
  • PICT0002_0001.JPG
    PICT0002_0001.JPG
    44.1 KB · Views: 408
there are times where i want one. like when the handle on my jack came off and the jack put 3, 1 inch long scratches on my bumper.....
 
DE31 said:
there are times where i want one. like when the handle on my jack came off and the jack put 3, 1 inch long scratches on my bumper.....

Yep - that's why I put it on. I put a 2 inch scratch on my bumper loading baseball gear about 3 weeks after I got it :( - the step plate covered the entire scratch.

geezerz99 your's looks good. I like the blacked out emblems.
 
I haven't done the front yet... that will be this weekend...

as for the bumber guard... i golf, and it's nice to be able to sit on the bumper while i put on em tiger wood shoes without scratching em...
 
Last edited:
Zoom5Zoom said:
Geez

Nice black out effect.... how did you do it?

just took em off.. sanded em, then put a new mounting tape on the back, then primered it, then painted em flat black.. viola... i'm doing the front this weekend...
 
This is an easy install. Here is the step guard with the spacers before installation. The spacers are held in place with the blue tape as stated in the instructions.
Bumper%20step%20plate-1.jpg


Pulling off the tape.
Bumper%20step%20plate-2.jpg


Bumper step guard in place.
Bumper%20step%20plate-3.jpg


Very easy to do. It takes about 15-20 minutes if you haven't read the instructions yet; only about 10 minutes if you have.

Sorry these pictures are so large; I thought the software would re-size them.
 
Last edited:
I don't think they have white. I bought this one on the internet and I didn't see a white one offered.
 
Back