08SPEED3Veteran
Member
- :
- 08 Mazdaspeed 3 GT
For anyone who is skeptical about pulling apart their dash to install the center gauge pod or even just wanting to remove the factory BOSE hu here is a basic step by step process that will save you a headache and a hassle...
Your first step is to open your glove box.
Next, take your fingers and feel the notches underneath the decorative MAZDASPEED piece that runs along your dash. They should be about an inch and a half long.
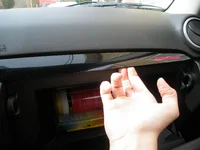
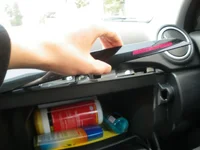
Once you have found the notches, use your fingers and pull towards you. dont just yank on it or you run the risk of breaking one of the clips. instead, pull firmly and slowly and the piece should release. One important thing to keep in mind is that where the decorative piece ends directly below the MAZDASPEED logo it is hooked into the dash. simply pull it out by pulling outwards and to the left at the same time. This should make it so the right side of the piece is out of the dash like the picture below.
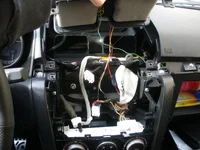
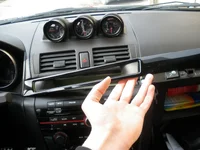
Starting from the right moving left remove the MAZDASPEED piece from the dash using the same technique of firmly pulling it by the notches. Once removed the dash should look like the picture below. Be sure to put the piece somewhere safe so that it doesnt get damaged!
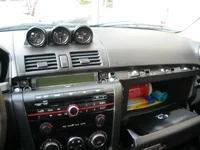
Directly above the factory hu there are several screws holding in the center dash panel and hu. Remove the two dark colored ones on each side that are shown in the picture below. There is no need to separate the four screws because they all are identical. Do NOT remove the silver screw.

I will continue these steps on the next post.
Your first step is to open your glove box.
Next, take your fingers and feel the notches underneath the decorative MAZDASPEED piece that runs along your dash. They should be about an inch and a half long.

Once you have found the notches, use your fingers and pull towards you. dont just yank on it or you run the risk of breaking one of the clips. instead, pull firmly and slowly and the piece should release. One important thing to keep in mind is that where the decorative piece ends directly below the MAZDASPEED logo it is hooked into the dash. simply pull it out by pulling outwards and to the left at the same time. This should make it so the right side of the piece is out of the dash like the picture below.

Starting from the right moving left remove the MAZDASPEED piece from the dash using the same technique of firmly pulling it by the notches. Once removed the dash should look like the picture below. Be sure to put the piece somewhere safe so that it doesnt get damaged!


Directly above the factory hu there are several screws holding in the center dash panel and hu. Remove the two dark colored ones on each side that are shown in the picture below. There is no need to separate the four screws because they all are identical. Do NOT remove the silver screw.

I will continue these steps on the next post.
Last edited by a moderator:

