Lost some weight today, and will lose a couple more pounds next week.
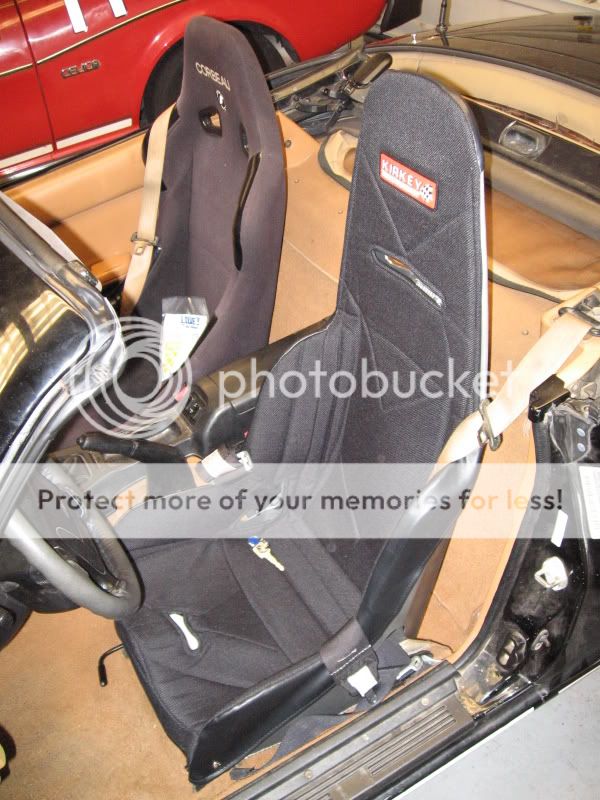
Installation was pretty simple once we had a plan. Problem with the 1st time you do it is that the plan goes through a few iterations before you finally settle on one that works. Part of the problem is that the seat isn't perfectly flat on the bottom. It's hard to describe the mounting, but long story short, these seats are about as low as you're ever going to get in a miata with sliders. I love it! Seating position is lower, so the line of sight is no longer through the top of the windshield lol. THe layback angle is the same as the corbeaus, and as these aren't tube framed, they fit a ton better in the car. Unfortunately, I didn't think to take any pictures of the install, but we basically used 2 lengths of steel angle iron, and the seat is bolted down in 6 places along the bottom. VERY sturdy, and way sturdier than my corbeau sliders that kept falling the F apart lol. The middle 2 holes we drilled directly into the top bracket of the slider and threaded those, and the 2 other pairs of holes (front and rear) are in the angle iron and use bolts, nuts and lock washers. Grade 8 hardware was used for everything.
Before:

After:
Look how much room there is in there now LOL

This is what they look like with no covers:
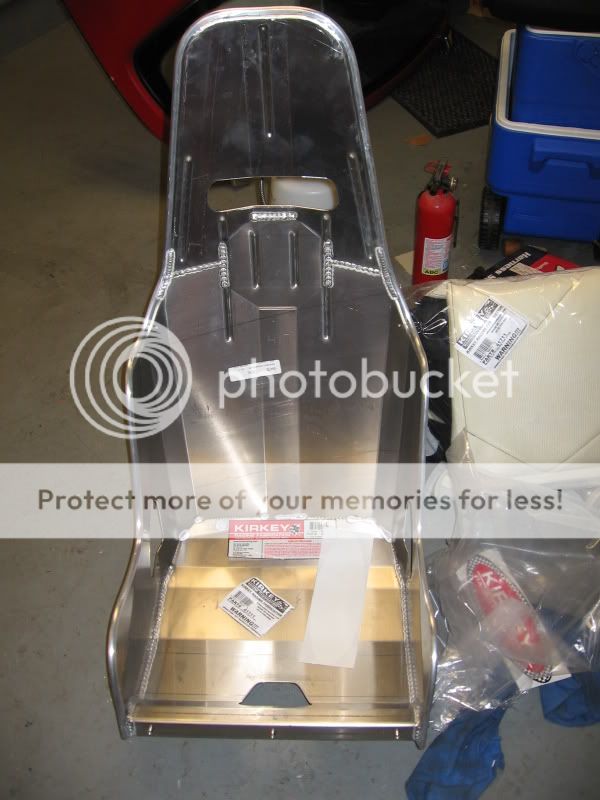
I'm kind of sad to see it go, but it was a lot of weight up high in the car. It's a beautiful piece that will likely be for sale soon. It was right around 60 lbs, so my car should be less than 2100 lbs now!!!! It's probably closer to 2070 or so based on what it weighed at the tour. Extra bonus is that the kirkeys + mounting hardware come out to be about 5 lbs less (at 26 lbs once ballasted) than the Corbeaus. I'm very happy with the results. I won't have time to work on the car this week (my folks will be in town), however I'll take s'more pics when we do the 2nd seat. Now that we know how to do it, installing the 2nd seat shouldn't take more than a couple hours.
Installation was pretty simple once we had a plan. Problem with the 1st time you do it is that the plan goes through a few iterations before you finally settle on one that works. Part of the problem is that the seat isn't perfectly flat on the bottom. It's hard to describe the mounting, but long story short, these seats are about as low as you're ever going to get in a miata with sliders. I love it! Seating position is lower, so the line of sight is no longer through the top of the windshield lol. THe layback angle is the same as the corbeaus, and as these aren't tube framed, they fit a ton better in the car. Unfortunately, I didn't think to take any pictures of the install, but we basically used 2 lengths of steel angle iron, and the seat is bolted down in 6 places along the bottom. VERY sturdy, and way sturdier than my corbeau sliders that kept falling the F apart lol. The middle 2 holes we drilled directly into the top bracket of the slider and threaded those, and the 2 other pairs of holes (front and rear) are in the angle iron and use bolts, nuts and lock washers. Grade 8 hardware was used for everything.
Before:
After:
Look how much room there is in there now LOL
This is what they look like with no covers:
I'm kind of sad to see it go, but it was a lot of weight up high in the car. It's a beautiful piece that will likely be for sale soon. It was right around 60 lbs, so my car should be less than 2100 lbs now!!!! It's probably closer to 2070 or so based on what it weighed at the tour. Extra bonus is that the kirkeys + mounting hardware come out to be about 5 lbs less (at 26 lbs once ballasted) than the Corbeaus. I'm very happy with the results. I won't have time to work on the car this week (my folks will be in town), however I'll take s'more pics when we do the 2nd seat. Now that we know how to do it, installing the 2nd seat shouldn't take more than a couple hours.